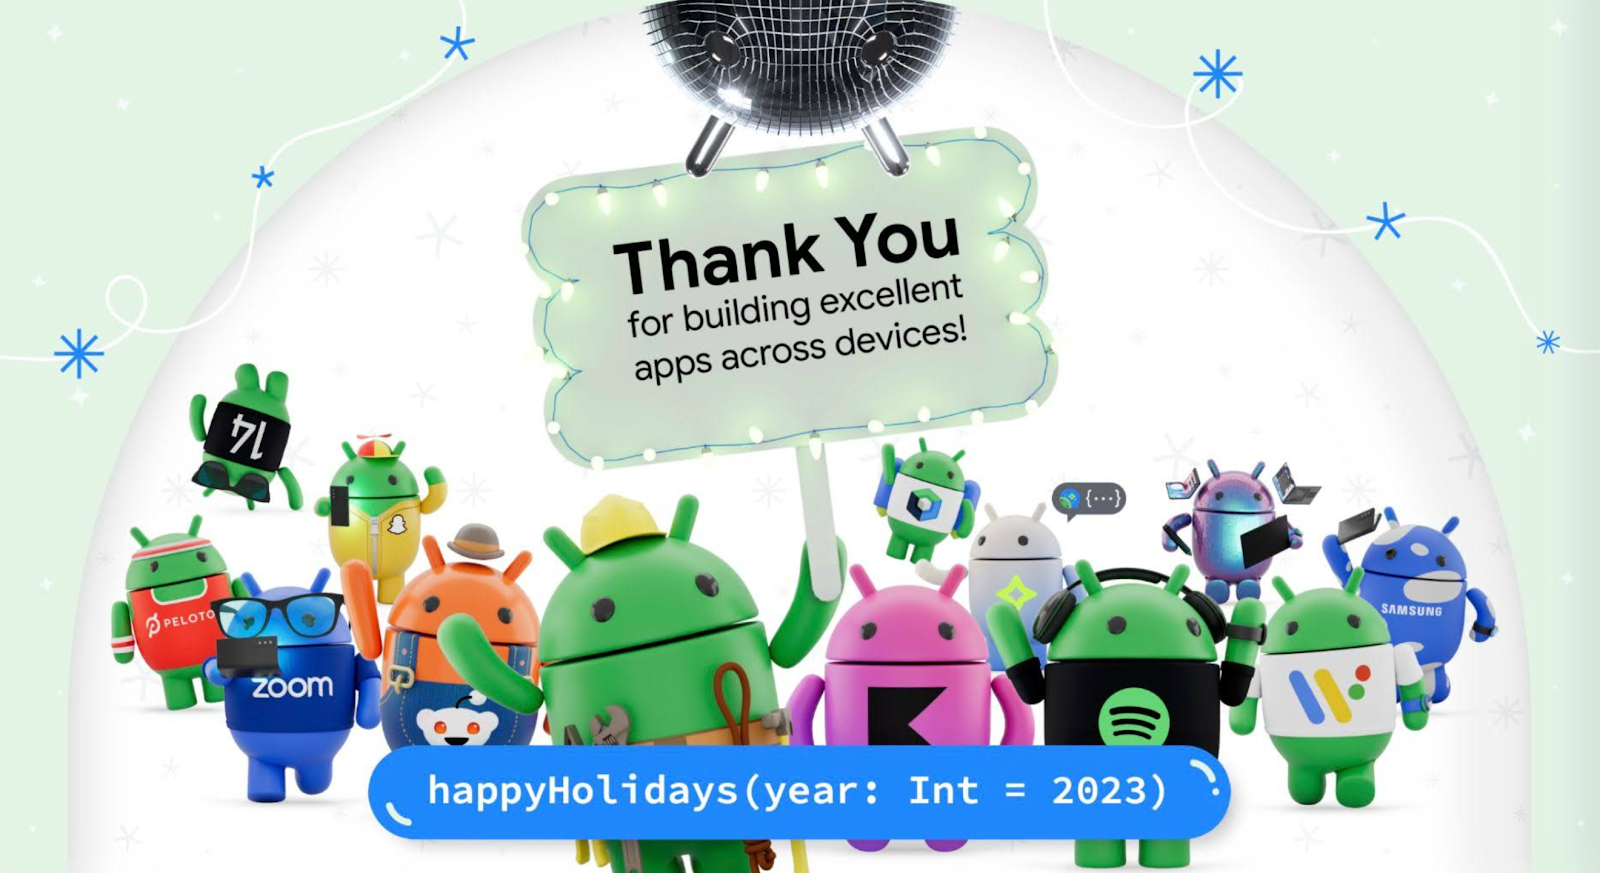
 A look back at 2023 at Google, from AI announcements to hardware launches and more.
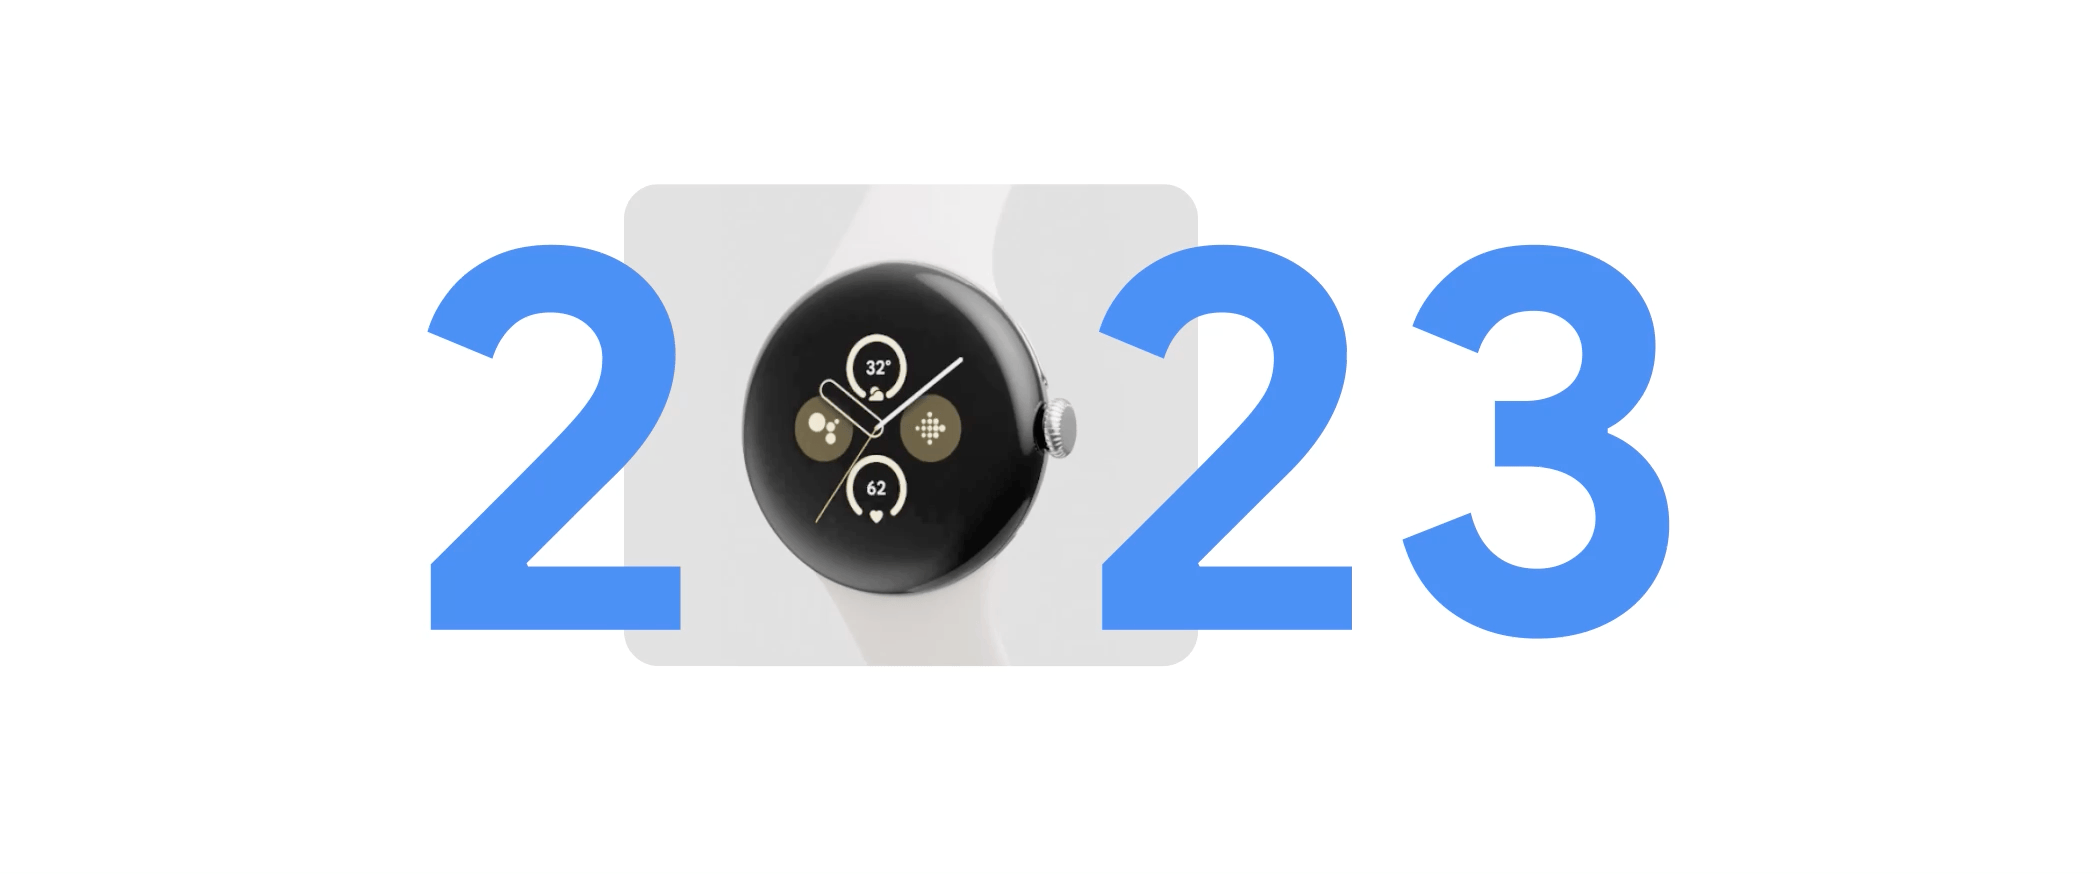
23 of our biggest moments in 2023
A look back at 2023 at Google, from AI announcements to hardware launches and more.
A look back at 2023 at Google, from AI announcements to hardware launches and more.
A look back at 2023 at Google, from AI announcements to hardware launches and more.
Earlier this year, we announced the general availability of third-party smart chips in Google Docs. This new feature lets you add, view, and engage with critical information from third party apps directly in Google Docs. Several partners, including Asana, Atlassian, Figma, Loom, Miro, Tableau, and Whimsical, have already created smart chips so users can start embedding content from their apps directly into Docs. Sourabh Choraria, a Google Developer Expert for Google Workspace and hobby developer, published a third-party smart chip solution called “Link Previews” to the Google Workspace Marketplace. This app adds information to Google Docs from multiple commonly used SaaS tools.
In this blog post you will find out how you too can create your own smart chips for Google Docs.
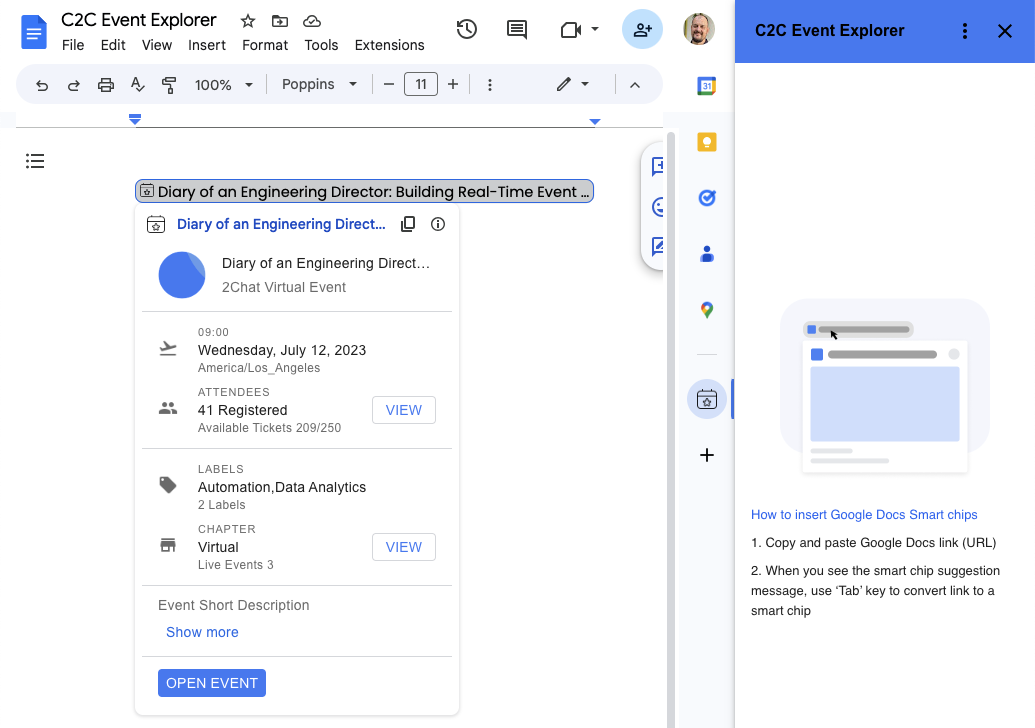
Third-party smart chips are powered by Google Workspace Add-ons and can be published to the Google Workspace Marketplace. From there, an admin or user can install the add-on and it will appear in the sidebar on the right hand side of Google Docs.
The Google Workspace Add-on detects a service's links and prompts Google Docs users to preview them. This means that you can create smart chips for any service that has a publicly accessible URL. You can configure an add-on to preview multiple URL patterns, such as links to support cases, sales leads, employee profiles, and more. This configuration is done in the add-on’s manifest file.
{
  "timeZone": "America/Los_Angeles",
  "exceptionLogging": "STACKDRIVER",
  "runtimeVersion": "V8",
  "oauthScopes": [
    "https://www.googleapis.com/auth/workspace.linkpreview",
    "https://www.googleapis.com/auth/script.external_request"
  ],
  "addOns": {
    "common": {
      "name": "Preview Books Add-on",
      "logoUrl": "https://developers.google.com/workspace/add-ons/images/library-icon.png",
      "layoutProperties": {
        "primaryColor": "#dd4b39"
      }
    },
    "docs": {
      "linkPreviewTriggers": [
        {
          "runFunction": "bookLinkPreview",
          "patterns": [
            {
              "hostPattern": "*.google.*",
              "pathPrefix": "books"
            },
            {
              "hostPattern": "*.google.*",
              "pathPrefix": "books/edition"
            }
          ],
          "labelText": "Book",
          "logoUrl": "https://developers.google.com/workspace/add-ons/images/book-icon.png",
          "localizedLabelText": {
            "es": "Libros"
          }
        }
      ]
    }
  }
}
The smart chip displays an icon and short title or description of the link's content. When the user hovers over the chip, they see a card interface that previews more information about the file or link. You can customize the card interface that appears when the user hovers over a smart chip. To create the card interface, you use widgets to display information about the link. You can also build actions that let users open the link or modify its contents. For a list of all the supported components for preview cards check the developer documentation.
function getBook(id) {
// Code to fetch the data from the Google Books API
}

function bookLinkPreview(event) {
 if (event.docs.matchedUrl.url) {
// Through getBook(id) the relevant data is fetched and used to build the smart chip and card

    const previewHeader = CardService.newCardHeader()
      .setSubtitle('By ' + bookAuthors)
      .setTitle(bookTitle);

    const previewPages = CardService.newDecoratedText()
      .setTopLabel('Page count')
      .setText(bookPageCount);

    const previewDescription = CardService.newDecoratedText()
      .setTopLabel('About this book')
      .setText(bookDescription).setWrapText(true);

    const previewImage = CardService.newImage()
      .setAltText('Image of book cover')
      .setImageUrl(bookImage);

    const buttonBook = CardService.newTextButton()
      .setText('View book')
      .setOpenLink(CardService.newOpenLink()
        .setUrl(event.docs.matchedUrl.url));

    const cardSectionBook = CardService.newCardSection()
      .addWidget(previewImage)
      .addWidget(previewPages)
      .addWidget(CardService.newDivider())
      .addWidget(previewDescription)
      .addWidget(buttonBook);

    return CardService.newCardBuilder()
    .setHeader(previewHeader)
    .addSection(cardSectionBook)
    .build();
  }
}

For a detailed walkthrough of the code used in this post, please checkout the Preview links from Google Books with smart chips sample tutorial.
When creating smart chips for link previewing, you can choose from two different technologies to create your add-on: Google Apps Script or alternate runtime.
Apps script is a rapid application development platform that is built into Google Workspace. This fact makes Apps Script a good choice for prototyping and validating your smart chip solution as it requires no pre-existing development environment. But Apps Script isn’t only for prototyping as some developers choose to create their Google Workspace Add-on with it and even publish it to the Google Workspace Marketplace for users to install.
If you want to create your smart chip with Apps Script you can check out the video below in which you learn how to build a smart chip for link previewing in Google Docs from A - Z. Want the code used in the video tutorial? Then have a look at the Preview links from Google Books with smart chips sample page.
If you prefer to create your Google Workspace Add-on using your own development environment, programming language, hosting, packages, etc., then alternate runtime is the right choice. You can choose from different programming languages like Node.js, Java, Python, and more. The hosting of the add-on runtime code can be on any cloud or on premise infrastructure as long as runtime code can be exposed as a public HTTP(S) endpoint. You can learn more about how to create smart chips using alternate runtimes from the developer documentation.
You can share your add-on with others through the Google Workspace Marketplace. Let’s say you want to make your smart chip solution available to your team. In that case you can publish the add-on to your Google Workspace organization, also known as a private app. On the other hand, if you want to share your add-on with anyone who has a Google Account, you can publish it as a public app.
To find out more about publishing to the Google Workspace Marketplace, you can watch this video that will walk you through the process.
Learn more about creating smart chips for link previewing in the developer documentation. There you will find further information and code samples you can base your solution of. We can’t wait to see what smart chip solutions you will build.
Earlier this year, we announced the general availability of third-party smart chips in Google Docs. This new feature lets you add, view, and engage with critical information from third party apps directly in Google Docs. Several partners, including Asana, Atlassian, Figma, Loom, Miro, Tableau, and Whimsical, have already created smart chips so users can start embedding content from their apps directly into Docs. Sourabh Choraria, a Google Developer Expert for Google Workspace and hobby developer, published a third-party smart chip solution called “Link Previews” to the Google Workspace Marketplace. This app adds information to Google Docs from multiple commonly used SaaS tools.
In this blog post you will find out how you too can create your own smart chips for Google Docs.
Third-party smart chips are powered by Google Workspace Add-ons and can be published to the Google Workspace Marketplace. From there, an admin or user can install the add-on and it will appear in the sidebar on the right hand side of Google Docs.
The Google Workspace Add-on detects a service's links and prompts Google Docs users to preview them. This means that you can create smart chips for any service that has a publicly accessible URL. You can configure an add-on to preview multiple URL patterns, such as links to support cases, sales leads, employee profiles, and more. This configuration is done in the add-on’s manifest file.
{
  "timeZone": "America/Los_Angeles",
  "exceptionLogging": "STACKDRIVER",
  "runtimeVersion": "V8",
  "oauthScopes": [
    "https://www.googleapis.com/auth/workspace.linkpreview",
    "https://www.googleapis.com/auth/script.external_request"
  ],
  "addOns": {
    "common": {
      "name": "Preview Books Add-on",
      "logoUrl": "https://developers.google.com/workspace/add-ons/images/library-icon.png",
      "layoutProperties": {
        "primaryColor": "#dd4b39"
      }
    },
    "docs": {
      "linkPreviewTriggers": [
        {
          "runFunction": "bookLinkPreview",
          "patterns": [
            {
              "hostPattern": "*.google.*",
              "pathPrefix": "books"
            },
            {
              "hostPattern": "*.google.*",
              "pathPrefix": "books/edition"
            }
          ],
          "labelText": "Book",
          "logoUrl": "https://developers.google.com/workspace/add-ons/images/book-icon.png",
          "localizedLabelText": {
            "es": "Libros"
          }
        }
      ]
    }
  }
}
The smart chip displays an icon and short title or description of the link's content. When the user hovers over the chip, they see a card interface that previews more information about the file or link. You can customize the card interface that appears when the user hovers over a smart chip. To create the card interface, you use widgets to display information about the link. You can also build actions that let users open the link or modify its contents. For a list of all the supported components for preview cards check the developer documentation.
function getBook(id) {
// Code to fetch the data from the Google Books API
}

function bookLinkPreview(event) {
 if (event.docs.matchedUrl.url) {
// Through getBook(id) the relevant data is fetched and used to build the smart chip and card

    const previewHeader = CardService.newCardHeader()
      .setSubtitle('By ' + bookAuthors)
      .setTitle(bookTitle);

    const previewPages = CardService.newDecoratedText()
      .setTopLabel('Page count')
      .setText(bookPageCount);

    const previewDescription = CardService.newDecoratedText()
      .setTopLabel('About this book')
      .setText(bookDescription).setWrapText(true);

    const previewImage = CardService.newImage()
      .setAltText('Image of book cover')
      .setImageUrl(bookImage);

    const buttonBook = CardService.newTextButton()
      .setText('View book')
      .setOpenLink(CardService.newOpenLink()
        .setUrl(event.docs.matchedUrl.url));

    const cardSectionBook = CardService.newCardSection()
      .addWidget(previewImage)
      .addWidget(previewPages)
      .addWidget(CardService.newDivider())
      .addWidget(previewDescription)
      .addWidget(buttonBook);

    return CardService.newCardBuilder()
    .setHeader(previewHeader)
    .addSection(cardSectionBook)
    .build();
  }
}
For a detailed walkthrough of the code used in this post, please checkout the Preview links from Google Books with smart chips sample tutorial.
When creating smart chips for link previewing, you can choose from two different technologies to create your add-on: Google Apps Script or alternate runtime.
Apps script is a rapid application development platform that is built into Google Workspace. This fact makes Apps Script a good choice for prototyping and validating your smart chip solution as it requires no pre-existing development environment. But Apps Script isn’t only for prototyping as some developers choose to create their Google Workspace Add-on with it and even publish it to the Google Workspace Marketplace for users to install.
If you want to create your smart chip with Apps Script you can check out the video below in which you learn how to build a smart chip for link previewing in Google Docs from A - Z. Want the code used in the video tutorial? Then have a look at the Preview links from Google Books with smart chips sample page.
If you prefer to create your Google Workspace Add-on using your own development environment, programming language, hosting, packages, etc., then alternate runtime is the right choice. You can choose from different programming languages like Node.js, Java, Python, and more. The hosting of the add-on runtime code can be on any cloud or on premise infrastructure as long as runtime code can be exposed as a public HTTP(S) endpoint. You can learn more about how to create smart chips using alternate runtimes from the developer documentation.
You can share your add-on with others through the Google Workspace Marketplace. Let’s say you want to make your smart chip solution available to your team. In that case you can publish the add-on to your Google Workspace organization, also known as a private app. On the other hand, if you want to share your add-on with anyone who has a Google Account, you can publish it as a public app.
To find out more about publishing to the Google Workspace Marketplace, you can watch this video that will walk you through the process.
Learn more about creating smart chips for link previewing in the developer documentation. There you will find further information and code samples you can base your solution of. We can’t wait to see what smart chip solutions you will build.
A recent wave of video generation models has burst onto the scene, in many cases showcasing stunning picturesque quality. One of the current bottlenecks in video generation is in the ability to produce coherent large motions. In many cases, even the current leading models either generate small motion or, when producing larger motions, exhibit noticeable artifacts.
To explore the application of language models in video generation, we introduce VideoPoet, a large language model (LLM) that is capable of a wide variety of video generation tasks, including text-to-video, image-to-video, video stylization, video inpainting and outpainting, and video-to-audio. One notable observation is that the leading video generation models are almost exclusively diffusion-based (for one example, see Imagen Video). On the other hand, LLMs are widely recognized as the de facto standard due to their exceptional learning capabilities across various modalities, including language, code, and audio (e.g., AudioPaLM). In contrast to alternative models in this space, our approach seamlessly integrates many video generation capabilities within a single LLM, rather than relying on separately trained components that specialize on each task.
The diagram below illustrates VideoPoet’s capabilities. Input images can be animated to produce motion, and (optionally cropped or masked) video can be edited for inpainting or outpainting. For stylization, the model takes in a video representing the depth and optical flow, which represent the motion, and paints contents on top to produce the text-guided style.
 |
| An overview of VideoPoet, capable of multitasking on a variety of video-centric inputs and outputs. The LLM can optionally take text as input to guide generation for text-to-video, image-to-video, video-to-audio, stylization, and outpainting tasks. Resources used: Wikimedia Commons and DAVIS. |
One key advantage of using LLMs for training is that one can reuse many of the scalable efficiency improvements that have been introduced in existing LLM training infrastructure. However, LLMs operate on discrete tokens, which can make video generation challenging. Fortunately, there exist video and audio tokenizers, which serve to encode video and audio clips as sequences of discrete tokens (i.e., integer indices), and which can also be converted back into the original representation.
VideoPoet trains an autoregressive language model to learn across video, image, audio, and text modalities through the use of multiple tokenizers (MAGVIT V2 for video and image and SoundStream for audio). Once the model generates tokens conditioned on some context, these can be converted back into a viewable representation with the tokenizer decoders.
 |
| A detailed look at the VideoPoet task design, showing the training and inference inputs and outputs of various tasks. Modalities are converted to and from tokens using tokenizer encoder and decoders. Each modality is surrounded by boundary tokens, and a task token indicates the type of task to perform. |
Some examples generated by our model are shown below.
 |
| Videos generated by VideoPoet from various text prompts. For specific text prompts refer to the website. |
For text-to-video, video outputs are variable length and can apply a range of motions and styles depending on the text content. To ensure responsible practices, we reference artworks and styles in the public domain e.g., Van Gogh’s “Starry Night”.
| Text Input | “A Raccoon dancing in Times Square” | “A horse galloping through Van-Gogh’s ‘Starry Night’” | “Two pandas playing cards” | “A large blob of exploding splashing rainbow paint, with an apple emerging, 8k” | ||||
| Video Output |  |
 |
 |
 |
For image-to-video, VideoPoet can take the input image and animate it with a prompt.
 |
| An example of image-to-video with text prompts to guide the motion. Each video is paired with an image to its left. Left: “A ship navigating the rough seas, thunderstorm and lightning, animated oil on canvas”. Middle: “Flying through a nebula with many twinkling stars”. Right: “A wanderer on a cliff with a cane looking down at the swirling sea fog below on a windy day”. Reference: Wikimedia Commons, public domain**. |
For video stylization, we predict the optical flow and depth information before feeding into VideoPoet with some additional input text.
 |
| Examples of video stylization on top of VideoPoet text-to-video generated videos with text prompts, depth, and optical flow used as conditioning. The left video in each pair is the input video, the right is the stylized output. Left: “Wombat wearing sunglasses holding a beach ball on a sunny beach.” Middle: “Teddy bears ice skating on a crystal clear frozen lake.” Right: “A metal lion roaring in the light of a forge.” |
VideoPoet is also capable of generating audio. Here we first generate 2-second clips from the model and then try to predict the audio without any text guidance. This enables generation of video and audio from a single model.
| An example of video-to-audio, generating audio from a video example without any text input. |
By default, the VideoPoet model generates videos in portrait orientation to tailor its output towards short-form content. To showcase its capabilities, we have produced a brief movie composed of many short clips generated by VideoPoet. For the script, we asked Bard to write a short story about a traveling raccoon with a scene-by-scene breakdown and a list of accompanying prompts. We then generated video clips for each prompt, and stitched together all resulting clips to produce the final video below.
When we developed VideoPoet, we noticed some nice properties of the model’s capabilities, which we highlight below.
We are able to generate longer videos simply by conditioning on the last 1 second of video and predicting the next 1 second. By chaining this repeatedly, we show that the model can not only extend the video well but also faithfully preserve the appearance of all objects even over several iterations.
Here are two examples of VideoPoet generating long video from text input:
| Text Input | “An astronaut starts dancing on Mars. Colorful fireworks then explode in the background.” | “FPV footage of a very sharp elven city of stone in the jungle with a brilliant blue river, waterfall, and large steep vertical cliff faces.” | |||
| Video Output |  |
 |
It is also possible to interactively edit existing video clips generated by VideoPoet. If we supply an input video, we can change the motion of objects to perform different actions. The object manipulation can be centered at the first frame or the middle frames, which allow for a high degree of editing control.
For example, we can randomly generate some clips from the input video and select the desired next clip.
 |
| An input video on the left is used as conditioning to generate four choices given the initial prompt: “Closeup of an adorable rusty broken-down steampunk robot covered in moss moist and budding vegetation, surrounded by tall grass”. For the first three outputs we show what would happen for unprompted motions. For the last video in the list below, we add to the prompt, “powering up with smoke in the background” to guide the action. |
Similarly, we can apply motion to an input image to edit its contents towards the desired state, conditioned on a text prompt.
 |
| Animating a painting with different prompts. Left: “A woman turning to look at the camera.” Right: “A woman yawning.” ** |
We can also accurately control camera movements by appending the type of desired camera motion to the text prompt. As an example, we generated an image by our model with the prompt, “Adventure game concept art of a sunrise over a snowy mountain by a crystal clear river”. The examples below append the given text suffix to apply the desired motion.
 |
| Prompts from left to right: “Zoom out”, “Dolly zoom”, “Pan left”, “Arc shot”, “Crane shot”, “FPV drone shot”. |
We evaluate VideoPoet on text-to-video generation with a variety of benchmarks to compare the results to other approaches. To ensure a neutral evaluation, we ran all models on a wide variation of prompts without cherry-picking examples and asked people to rate their preferences. The figure below highlights the percentage of the time VideoPoet was chosen as the preferred option in green for the following questions.
 |
| User preference ratings for text fidelity, i.e., what percentage of videos are preferred in terms of accurately following a prompt. |
 |
| User preference ratings for motion interestingness, i.e., what percentage of videos are preferred in terms of producing interesting motion. |
Based on the above, on average people selected 24–35% of examples from VideoPoet as following prompts better than a competing model vs. 8–11% for competing models. Raters also preferred 41–54% of examples from VideoPoet for more interesting motion than 11–21% for other models.
Through VideoPoet, we have demonstrated LLMs’ highly-competitive video generation quality across a wide variety of tasks, especially in producing interesting and high quality motions within videos. Our results suggest the promising potential of LLMs in the field of video generation. For future directions, our framework should be able to support “any-to-any” generation, e.g., extending to text-to-audio, audio-to-video, and video captioning should be possible, among many others.
To view more examples in original quality, see the website demo.
This research has been supported by a large body of contributors, including Dan Kondratyuk, Lijun Yu, Xiuye Gu, José Lezama, Jonathan Huang, Rachel Hornung, Hartwig Adam, Hassan Akbari, Yair Alon, Vighnesh Birodkar, Yong Cheng, Ming-Chang Chiu, Josh Dillon, Irfan Essa, Agrim Gupta, Meera Hahn, Anja Hauth, David Hendon, Alonso Martinez, David Minnen, David Ross, Grant Schindler, Mikhail Sirotenko, Kihyuk Sohn, Krishna Somandepalli, Huisheng Wang, Jimmy Yan, Ming-Hsuan Yang, Xuan Yang, Bryan Seybold, and Lu Jiang.
We give special thanks to Alex Siegman and Victor Gomes for managing computing resources. We also give thanks to Aren Jansen, Marco Tagliasacchi, Neil Zeghidour, John Hershey for audio tokenization and processing, Angad Singh for storyboarding in “Rookie the Raccoon”, Cordelia Schmid for research discussions, Alonso Martinez for graphic design, David Salesin, Tomas Izo, and Rahul Sukthankar for their support, and Jay Yagnik as architect of the initial concept.
**
(a) The Storm on the Sea of Galilee, by Rembrandt 1633, public domain.
(b) Pillars of Creation, by NASA 2014, public domain.
(c) Wanderer above the Sea of Fog, by Caspar David Friedrich, 1818, public domain
(d) Mona Lisa, by Leonardo Da Vinci, 1503, public domain.
 As we mark 15 years of Google Greece, we look back at some of our key milestones.
 An overview of how we're expanding code assistance features to all Colab users.
Hello Android Developers,
As we approach the end of 2023, I wanted to take a moment to reflect on all that we've accomplished together as a community, and send a huge *thank you* for all of your work!
It's been an incredible year for Android, with many new features and improvements released as part of the platform as well as many new delightful app experiences crafted and delivered by you, all for the benefit of our users across the world. Here are just a few of the highlights:
I'm so proud of everything we've achieved together this year!
Your hard work and dedication continue to make Android the best mobile platform in the world, and I want to thank you for being a part of this community. Your contributions are invaluable, and I'm grateful for your continued support.
Thanks again for all that you do, and we can’t wait to see what you build next year!


Developer Journey is a monthly series highlighting diverse and global developers sharing relatable challenges, opportunities, and wins in their journey. Every month, we will spotlight developers around the world, the Google tools they leverage, and the kinds of products they are building.
This month we speak with global developers across Google Developer Experts, and Women Techmakers, to learn more about their favorite Google tools, the applications they’ve built to serve diverse communities and the role of inclusive design in their process.
 |
I've been using Firebase, Google Cloud Platform, CrUX Dashboard, and Chrome DevTools for years. As a web developer, I'm always excited about the new features that DevTools brings to us to improve our productivity and the performance of our applications.
Lately, I've been trying Project IDX, an entirely web-based workspace for full-stack application development, and I'm really excited about the future of this project. I love the idea of being able to develop and deploy applications from the browser, without having to install anything on my computer.
Most recently, I've deployed AdventJS, a holiday calendar for developers. For optimizing the images, I've used Squoosh from the GoogleChromeLabs team. To ensure the website was accessible and to tweak performance, I've used Lighthouse from Chrome DevTools. Also, I used Google Bard to translate the content of the website into English and Portuguese.
I'm planning to expand a website I've created for the Spanish-speaking community to teach JavaScript from scratch. With Google Bard, I can check the content, create some code, and make it help me create challenges for the students.
I would tell them to be patient and to enjoy the process. It's a long journey, but it's worth it. Also, I would tell them to be curious and avoid sticking to only a few technologies. And finally, I would tell them to share their knowledge with the community, because it's the best way to learn and meet new people. You don't need to be an expert to share your knowledge; you just need to be one step ahead of the people you're teaching.
 |
Development and Creativity:
- Google Chrome DevTools
- Bard
- TensorflowJS
Productivity and Communication:
- Gmail
- Google Calendar
- Google Drive
- Google Docs
- Google Sheets
- Google Slides
- Google Meet
Marketing and Business:
- Google Ads
- Google Analytics
- Google My Business
- Google Workspace
- Google Cloud Platform
- Google Marketing Platform
Education and Learning:
- Google Classroom
- Google Forms
- Google Sites
- YouTube
Choosing a favorite tool is quite a task given the unique strengths of Bard, TensorflowJS and Google Chrome DevTools, but I'd have to say that Google Chrome DevTools stands out for me. Its versatility in inspecting and debugging web pages, testing code variations, and providing insights into JavaScript behavior has been crucial in my web development endeavors. That being said, both Bard and TensorFlow.js have incredible capabilities. Bard plays a vital role in generating creative content, answering queries, and even composing code. TensorFlow.js, on the other hand, is a game-changer, enabling machine learning in JavaScript, and making it accessible for a wide range of applications. Each tool has its unique appeal, and the choice will depend on the context and specific requirements of the task at hand.
On our latest website, we use all the Google technologies at hand to enhance our image as an NGO. Find it here.
We are once again resuming a winning mentorship project to advance our career as developers, so Bard and Duet AI are great allies to inspect our code and once again create an MVP of this product for our community.
First, think about the problem you want to solve, or what you want to contribute to the world, then create and make it come true. This is easier if you rely on communities, and people who help you as mentors, sponsors and guides.
 |
I’ve been using the full stack of Google Products. I use Google Workspace daily in my life, my personal website is made on Google Sites, and Google Cloud; I started with Compute Engine and Jupyter Notebooks, customized to my needs.
As I acquired more knowledge through practical experience, Coursera and Google Cloud Skills Boost, I started building end to-end solutions using BigQuery, SQL, lots of Vertex AI (Generative AI Studio, Matching Engine, Speech-to-text, Pipelines, AutoML, Model Fine-Tuning), Cloud Run (and a little GKE - Kubernetes), Cloud Functions, Dialogflow and Document AI.
As the requirements of clients change according to the industry, like recruiting (Virtual Career Center) and contact center (Contact Center AI), I was able to test and deploy in production different Google products to solve the clients’ needs.
Vertex AI is my favorite, as it is pure ML and Deep Learning optimized. Using AutoML with NAS (Neural Architecture Search) was a very interesting experience with awesome results. Developing Machine Learning pipelines with Kubeflow is a special pleasure, as this is going into production and the whole MLOps is involved.
I’ve built a recruiting solution that was implemented in six countries of Latin America, benefiting more than 365,000 people. This solution automatically analyzes resumes using OCR via Document AI.
I delivered a revenue prediction for a hotel chain using Tensorflow, where we increased the accuracy of the client’s model by 0.95%. I also built a Contact Center solution which uses Google Speech-to-Text and analytics to make management easier and also to generate strategic insights.
Lately, I was part of the team that delivered an end-to-end Virtual Career Center solution that matches job candidates to job vacancies using Vertex AI Matching Engine via text embeddings and SCANN. Both the recruiting solution and the contact center solution generated patents in Brazil, in the field of NLP (Natural Language Processing).
Google Bard is part of my daily routine. It helps me while coding, it helps me to plan trips, get to the right public transportation, visit interesting places around the world and it also helps by retrieving the Google search in an organized way, with updated content. My idea is to use Bard along with LangChain to perform optimizations in the finance industry.
Learn the basics first.
The temptation of learning this magnificent field as Machine Learning is gigantic, but coding is a great part of the solution. Learn to code properly, in whatever language you want. This brings efficiency and security if your solution needs to scale, decreasing infrastructure costs and improving user experience.
The same applies to Machine Learning: learn basic disciplines such as Calculus, Computer Science fundamentals and you will understand most of the content is shared today online. Only after learning ML you should dive into Deep Learning and the disciplines associated. Don’t fake it. Make it.
 Posted by
 Posted by Anirudh Dewani, Director of Android Developer Relations
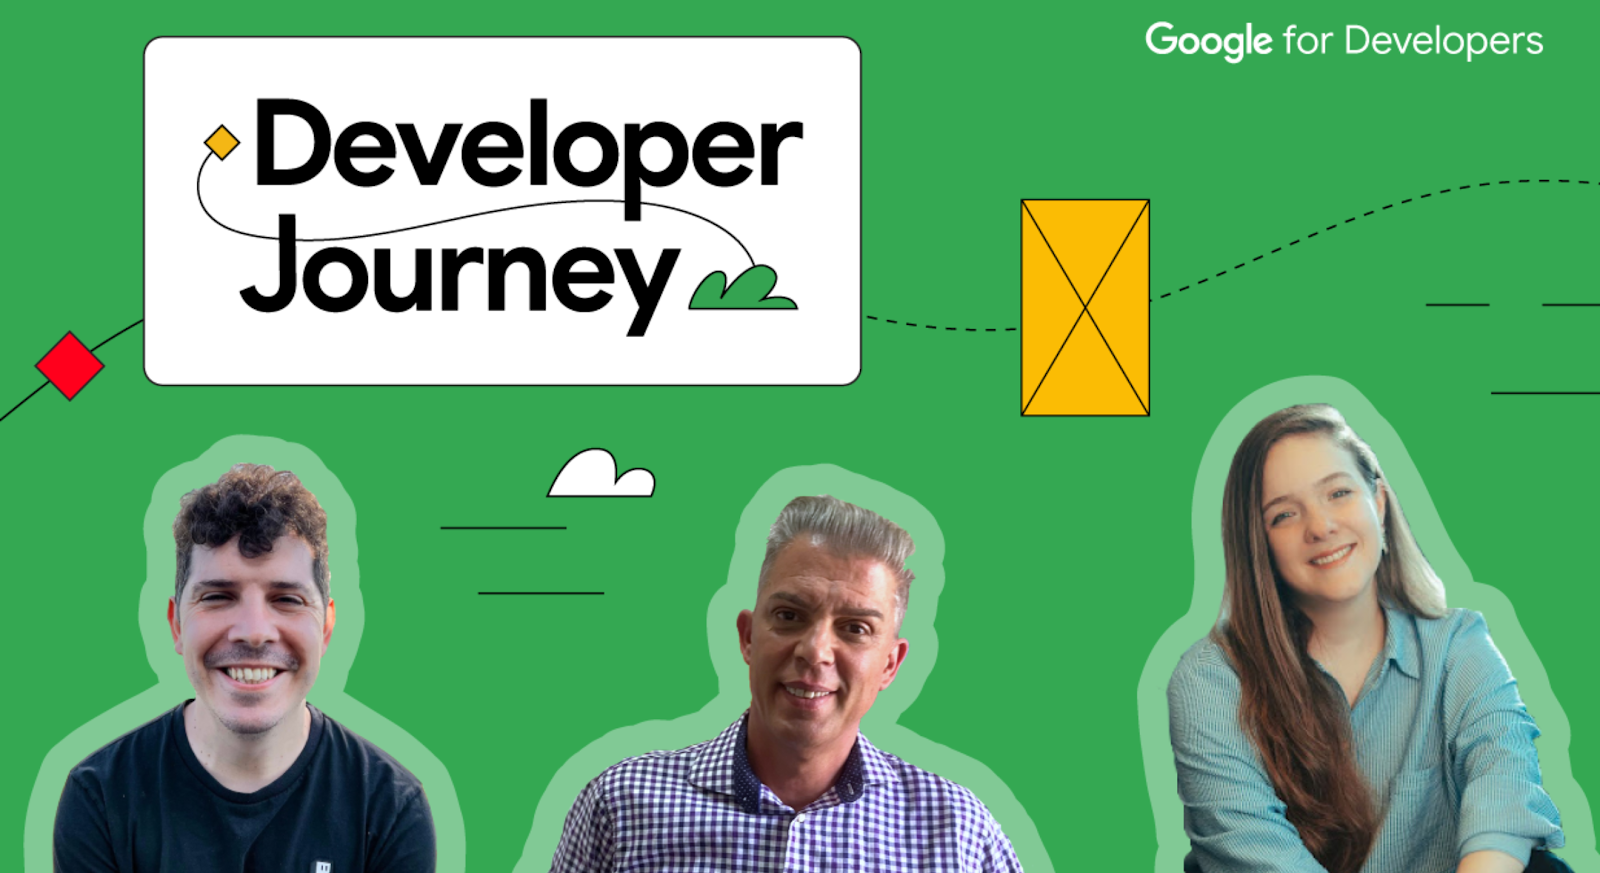 Posted by