Tag Archives: Android

Google Workspace Updates Weekly Recap – April 19, 2024

1 New update

Unless otherwise indicated, the features below are available to all Google Workspace customers, and are fully launched or in the process of rolling out. Rollouts should take no more than 15 business days to complete if launching to both Rapid and Scheduled Release at the same time. If not, each stage of rollout should take no more than 15 business days to complete.


Enhancing search within the Google Drive app on Android devices
Last month, we introduced numerous improvements to the Google Drive search experience on iOS devices. Today, we’re excited to announce that these enhancements will be available on Android devices as well. | This feature is available for Rapid Release domains and is rolling out now to Scheduled Release domains. | Available to Google Workspace customers, Google Workspace Individual subscribers, and users with personal Google accounts. | Learn more about finding files in Google Drive


Previous announcements

The announcements below were published on the Workspace Updates blog earlier this week. Please refer to the original blog posts for complete details.


Build a Dialogflow CX Google Chat app that understands and responds with natural language 
The enhanced Dialogflow CX, now generally available, provides a new way of designing virtual agents by taking a state machine approach to agent design. Now, developers have clear and explicit control over a conversation, enjoy a better end-user experience, and gain access to an improved development workflow. | Learn more about Dialogflow CX Google Chat apps.


Dark mode now available in Google Drive web 
We’ve introduced a highly requested feature: Dark mode in Drive on web. This new setting aims to provide you with a more comfortable, customizable viewing experience for Drive. | Learn more about dark mode.


Launch the FigJam whiteboard app directly from Google Meet Series One Board 65 and Desk 27 devices 
You can now launch FigJam both in and out of an active Meet call from the Series One Board 65 and Desk 27 devices. | Learn more about the FigJam whiteboard app.


Use annotations to enhance your presentations in Google Meet 
We’ve introduced annotation tools in Google Meet. Presenters and their appointed co-annotators can use these tools to highlight content or make other notations over presented content. Annotations will be on by default when you begin presenting — you can open the annotations menu to access various tools such as a pen, disappearing ink, sticker, text box, and more. | Learn more about annotations. 


Promote space members to space managers using the Google Chat API 
You can now use the Chat API to promote space members to space managers. | Learn more about managing members using the Chat API. 


Available in beta: automatically log Google Voice calls made to Salesforce contacts 
We’re introducing a beta integration between Google Voice and Salesforce that makes it easier to track details of calls made in Voice. | Learn more about logging Google Voice calls made to Salesforce contacts. 


Google Chat apps can now subscribe to event notifications 
Google Workspace developers registered in our Developer Preview Program have been able to build Chat apps that can subscribe to Chat events using the Google Workspace Events API. We’re pleased to announce that as of today, this functionality is now available to all Workspace developers. | Learn more about Chat apps subscribing to event notifications. 


Now generally available: Chat interoperability between Google Chat and other messaging platforms 
At Google Cloud Next 2023, we announced interoperability between Google Chat, Microsoft Teams and Slack— powered by Mio and previously available to Workspace customers through a Beta program. We’re pleased to announce that as of today, this solution is generally available for Google Workspace customers. | Learn more about the interoperability of Google Chat.


Completed rollouts

The features below completed their rollouts to Rapid Release domains, Scheduled Release domains, or both. Please refer to the original blog posts for additional details.


Rapid Release Domains: 
Scheduled Release Domains: 
Rapid and Scheduled Release Domains: 

For a recap of announcements in the past six months, check out What’s new in Google Workspace (recent releases).   


How to effectively A/B test power consumption for your Android app’s features

Posted by Mayank Jain - Product Manager, and Yasser Dbeis - Software Engineer; Android Studio

Android developers have been telling us they're looking for tools to help optimize power consumption for different devices on Android.

The new Power Profiler in Android Studio helps Android developers by showing power consumption happening on devices as the app is being used. Understanding power consumption across Android devices can help Android developers identify and fix power consumption issues in their apps. They can run A/B tests to compare the power consumption of different algorithms, features or even different versions of their app.

The new Power Profiler in Android Studio

Apps which are optimized for lower power consumption lead to an improved battery and thermal performance of the device, which means an improved user experience on Android.

This power consumption data is made available through the On Device Power Monitor (ODPM) on Pixel 6+ devices, segmented by each sub-system called “Power Rails”. See Profileable power rails for a list of supported sub-systems.

The Power Profiler can help app developers detect problems in several areas:

    • Detecting unoptimized code that is using more power than necessary.
    • Finding background tasks that are causing unnecessary CPU usage.
    • Identifying wakelocks that are keeping the device awake when they are not needed.

Once a power consumption issue has been identified, the Power Profiler can be used when testing different hypotheses to understand why the app could be consuming excessive power. For example, if the issue is caused by background tasks, the developer can try to stop the tasks from running unnecessarily or for longer periods. And if the issue is caused by wakelocks, the developer can try to release the wakelocks when the resource is not in use or use them more judiciously. Then compare the power consumption before/after the change using the Power Profiler.

In this blog post, we showcase a technique which uses A/B testing to understand how your app’s power consumption characteristics might change with different versions of the same feature - and how you can effectively measure them.

A real-life example of how the Power Profiler can be used to improve the battery life of an app.

Let’s assume you have an app through which users can purchase their favorite movies.

Sample app to demonstrate A/B testing for measure power consumption
Sample app to demonstrate A/B testing for measure power consumption 
Video (c) copyright Blender Foundation | www.bigbuckbunny.org

As your app becomes popular and is used by more users, you realize that a high quality 4K video takes very long to load every time the app is started. Because of its large size, you want to understand its impact on power consumption on the device.

Originally, this video was in 4K quality in the best of intentions, so as to showcase the best possible movie highlights to your customers.

This makes you think…

    • Do you really need a 4K video banner on the home screen?
    • Does it make sense to load a 4K video over the network every time your app is run?
    • How will the power consumption characteristics of your app change if you replace the 4K video with something of lower quality (while still preserving the vivid look & feel of the video)?

This is a perfect scenario to perform an A/B test for power consumption

With an A/B test, you can test two slightly different variations of the video banner feature and choose the one with the better power consumption characteristics.

Scenario A : Run the app with 4K video banner on screen & measure power consumption

Scenario B : Run the app with lower resolution video banner on screen & measure power consumption

A/B Test setup

Let's take a moment and set up our Android Studio profiler to run this A/B test. We need to start the app and attach the CPU profiler to it and trigger a system trace (where the Power Profiler will be shown).

Step 1

Create a custom “Run configuration” by clicking the 3 dot menu > Edit

Custom run configuration

Step 2

Then select the “Profiling” tab and ensure that “Start this recording on startup” and CPU Activity > System Trace is selected. Then click “Apply”.

Edit configuration settings

Now simply run the “Profile app startup profiling with low overhead” whenever you want to run this app from start and attach the CPU profiler to it.

Note on precision

The following example scenarios use the entire app startup for estimating the power consumption for this blog’s purpose. However you can use more advanced techniques to have even higher precision in getting power readings. Some techniques to try are:

    • Isolate and measure power consumption for video playback only after a tap event on the video player
    • Use the trace markers API to mark the start and stop time for power measurement timeline - and then only measure power consumption within that marked window

Scenario A

In this scenario, we run the app with 4K video playing and measure power consumption for the first 30 seconds. We can optionally also run the scenario A multiple times and average out the readings. Once the System trace is shown in Android Studio, select the 0-30 second time range from the timeline selection panel and record as a screenshot for comparing against scenario B

Power consumption in scenario A - playing a 4k video

As you can see, the average power consumed by WLAN, CPU cores & Memory combined is about 1,352 mW (milliwatts)

Now let's compare and contrast how this power consumption changes in Scenario B

Scenario B

In this scenario, we run the app with low quality video playing and measure power consumption for the first 30 seconds. As before, we can also optionally run scenario B multiple times and average out the power consumption readings. Again, once the System trace is shown in Android Studio, select the 0-30 second time range from the timeline selection panel.

Power consumption in scenario B - playing a lower quality video

The total power consumed by WLAN, CPU Little, CPU Big and CPU Mid & Memory is about 741 mW (milliwatts)

Conclusion

All else being equal, Scenario B (with lower quality video) consumed 741 mW power as compared to Scenario A (with 4K video) which required 1,352 mW power.

Scenario B (lower quality video) took 45% less power than Scenario A (4K) - while the lower quality video provides little to no visual difference in perceived quality of the app’s screen.

As a result of this A/B test for power consumption, you conclude that replacing the 4K video with a lower quality video on our app’s home screen not only reduces power consumption by 45%, also reduces the required network bandwidth and can potentially also improve the thermal performance of the devices.

If your app’s business logic still requires the 4K video to be shown on the app’s screen, you can explore strategies like:

    • Caching the 4K video across subsequent runs of the app.
    • Loading video on a user tap.
    • Loading an image initially and only load the video after the screen has fully rendered (delayed loading).

The overall power consumption numbers presented in the above A/B test scenario might seem small, but it shows the techniques that app developers can use to effectively A/B test power consumption for their app’s features using the Power Profiler in Android Studio.

Next Steps

The new Power Profiler is available in Android Studio Hedgehog onwards. To know more, please head over to the official documentation.

The First Beta of Android 15

Posted by Dave Burke, VP of Engineering

Android 14 logo


Today we're releasing the first beta of Android 15. With the progress we've made refining the features and stability of Android 15, it's time to open the experience up to both developers and early adopters, so you can now enroll any supported Pixel device here to get this and future Android 15 Beta and feature drop Beta updates over-the-air.

Android 15 continues our work to build a platform that helps improve your productivity, give users a premium app experience, protect user privacy and security, and make your app accessible to as many people as possible — all in a vibrant and diverse ecosystem of devices, silicon partners, and carriers.

Android delivers enhancements and new features year-round, and your feedback on the Android beta program plays a key role in helping Android continuously improve. The Android 15 developer site has lots more information about the beta, including downloads for Pixel and the release timeline. We’re looking forward to hearing what you think, and thank you in advance for your continued help in making Android a platform that works for everyone.

We’ll have lots more to share as we move through the release cycle, and be sure to tune into Google I/O where you can dive deeper into topics that interest you with over 100 sessions, workshops, codelabs, and demos.

Edge-to-edge

Apps targeting Android 15 are displayed edge-to-edge by default on Android 15 devices. This means that apps no longer need to explicitly call Window.setDecorFitsSystemWindows(false) or enableEdgeToEdge() to show their content behind the system bars, although we recommend continuing to call enableEdgeToEdge() to get the edge-to-edge experience on earlier Android releases.

To assist your app with going edge-to-edge, many of the Material 3 composables handle insets for you, based on how the composables are placed in your app according to the Material specifications.

a side-by-side comparison of App targets SDK 34 (left) and App targets SDK 35 (right) demonstrating edge-to-edge on an Android 15 device
On the left: App targets SDK 34 (Android 14) and is not edge-to-edge on an Android 15 device. On the right: App targets SDK 35 (Android 15) and is edge-to-edge on an Android 15 device. Note the Material 3 TopAppBar is automatically protecting the status bar, which would otherwise be transparent by default.

The system bars are transparent or translucent and content will draw behind by default. Refer to "Handle overlaps using insets" (Views) or Window insets in Compose to see how to prevent important touch targets from being hidden by the system bars.

Smoother NFC experiences - part 2

Android 15 is working to make the tap to pay experience more seamless and reliable while continuing to support Android's robust NFC app ecosystem. In addition to the observe mode changes from Android 15 developer preview 2, apps can now register a fingerprint on supported devices so they can be notified of polling loop activity, which allows for smooth operation with multiple NFC-aware applications.

Inter-character justification

Starting with Android 15, text can be justified utilizing letter spacing by using JUSTIFICATION_MODE_INTER_CHARACTER. Inter-word justification was first introduced in Android O, but inter-character solves for languages that use the white space for segmentation, e.g. Chinese, Japanese, etc.

JUSTIFICATION_MODE_NONE
image shows how japanese kanji (top) and english alphabet characters (bottom) appear with JUSTIFICATION_MODE_NONE
JUSTIFICATION_MODE_INTER_WORD
image shows how japanese kanji (top) and english alphabet characters (bottom) appear with JUSTIFICATION_MODE_INTER_WORD
JUSTIFICATION_MODE_INTER_CHARACTER
image shows how japanese kanji (top) and english alphabet characters (bottom) appear with JUSTIFICATION_MODE_INTER_WORD

App archiving

Android and Google Play announced support for app archiving last year, allowing users to free up space by partially removing infrequently used apps from the device that were published using Android App Bundle on Google Play. Android 15 now includes OS level support for app archiving and unarchiving, making it easier for all app stores to implement it.

Apps with the REQUEST_DELETE_PACKAGES permission can call the PackageInstaller requestArchive method to request archiving a currently installed app package, which removes the APK and any cached files, but persists user data. Archived apps are returned as displayable apps through the LauncherApps APIs; users will see a UI treatment to highlight that those apps are archived. If a user taps on an archived app, the responsible installer will get a request to unarchive it, and the restoration process can be monitored by the ACTION_PACKAGE_ADDED broadcast.

App-managed profiling

Android 15 includes the all new ProfilingManager class, which allows you to collect profiling information from within your app. We're planning to wrap this with an Android Jetpack API that will simplify construction of profiling requests, but the core API will allow the collection of heap dumps, heap profiles, stack sampling, and more. It provides a callback to your app with a supplied tag to identify the output file, which is delivered to your app's files directory. The API does rate limiting to minimize the performance impact.

Better Braille

In Android 15, we've made it possible for TalkBack to support Braille displays that are using the HID standard over both USB and secure Bluetooth.

This standard, much like the one used by mice and keyboards, will help Android support a wider range of Braille displays over time.

Key management for end-to-end encryption

We are introducing the E2eeContactKeysManager in Android 15, which facilitates end-to-end encryption (E2EE) in your Android apps by providing an OS-level API for the storage of cryptographic public keys.

The E2eeContactKeysManager is designed to integrate with the platform contacts app to give users a centralized way to manage and verify their contacts' public keys.

Secured background activity launches

Android 15 brings additional changes to prevent malicious background apps from bringing other apps to the foreground, elevating their privileges, and abusing user interaction, aiming to protect users from malicious apps and give them more control over their devices. Background activity launches have been restricted since Android 10.

App compatibility

With Android 15 now in beta, we're opening up access to early-adopter users as well as developers, so if you haven't yet tested your app for compatibility with Android 15, now is the time to do it. In the weeks ahead, you can expect more users to try your app on Android 15 and raise issues they find.

To test for compatibility, install your published app on a device or emulator running Android 15 beta and work through all of your app's flows. Review the behavior changes to focus your testing. After you've resolved any issues, publish an update as soon as possible.

To give you more time to plan for app compatibility work, we’re letting you know our Platform Stability milestone well in advance.

Android 15 release timeline

At this milestone, we’ll deliver final SDK/NDK APIs and also final internal APIs and app-facing system behaviors. We’re expecting to reach Platform Stability in June 2024, and from that time you’ll have several months before the official release to do your final testing. The release timeline details are here.

Get started with Android 15

Today's beta release has everything you need to try the Android 15 features, test your apps, and give us feedback. Now that we've entered the beta phase, you can enroll any supported Pixel device here to get this and future Android Beta updates over-the-air. If you don’t have a Pixel device, you can use the 64-bit system images with the Android Emulator in Android Studio. If you're already in the Android 14 QPR beta program on a supported device, or have installed the developer preview, you'll automatically get updated to Android 15 Beta 1.

For the best development experience with Android 15, we recommend that you use the latest version of Android Studio Jellyfish (or more recent Jellyfish+ versions). Once you’re set up, here are some of the things you should do:

    • Try the new features and APIs - your feedback is critical during the early part of the developer preview and beta program. Report issues in our tracker on the feedback page.
    • Test your current app for compatibility - learn whether your app is affected by changes in Android 15; install your app onto a device or emulator running Android 15 and extensively test it.

We’ll update the beta system images and SDK regularly throughout the Android 15 release cycle. Read more here.

For complete information, visit the Android 15 developer site.


Java and OpenJDK are trademarks or registered trademarks of Oracle and/or its affiliates.

Google Drive cut code and development time in half with Jetpack Compose and new architecture

Posted by Nick Butcher – Product Manager for Jetpack Compose, and Florina Muntenescu – Developer Relations Engineer

As one of the world’s most popular cloud-based storage services, Google Drive lets people do more than just store their files online. With Drive, users can synchronize, share, search, edit, and even pin specified files and content for safe and secure offline use.

Recently, Drive’s developers revamped the application’s home screen to provide a more seamless experience across devices, matching updates made to Google Drive’s web version. However, the app’s previous architecture and codebase would’ve prevented the team from completing the updates in a timely manner.

Instead of struggling with the app’s previous tech stack to implement the update, the Drive team rebuilt the home page from the ground up using Android’s recommended architecture and Jetpack Compose, Android’s modern declarative toolkit for creating native UI.

Compose, combined with architecture improvements, cut our development time nearly in half.” — Dale Hawkins, Senior software engineer and tech lead at Google Drive

Experimenting with Kotlin and Compose

The Drive team experimented with Kotlin — which the Compose toolkit is built with — for several months before planning the app’s home screen rebuild. Drive’s developers liked Kotlin’s improved syntax and null enforcement, making it easier to produce code.

“We had been using RxJava, but started looking into replacing that with coroutines,” said Dale Hawkins, the features team lead for Google Drive. “This led to a more natural alignment between coroutines and Jetpack Compose. After a deep dive into Compose, we came away with a clear understanding of how Compose has numerous benefits over the Views-based approach.”

Following the Kotlin exploration, Dale experimented with Jetpack Compose. “I was pleased with how easy it was to build the UI using Compose. So I continued the experiment after that week,” said Dale. “I eventually rewrote the feature using Compose.”

Using Compose

Shortly after experimenting with Jetpack Compose, the Drive team decided to use it to completely rebuild the app’s home screen UI.

“We wanted to make some major changes to match the ones being done for the web version, but that project had a several-month head start. We wanted to release the Android version shortly after the web changes went live to ensure our users have a seamless Google Drive experience across devices,” said Dale.

The Drive team's experimentation and testing with Jetpack Compose showed that the new toolkit was powerful and reliable and that it would enable them to move faster. With this in mind, the Drive team decided to step away from their old codebase and embrace Jetpack Compose for the app’s home screen update. Not only would it be quicker and easier, but it would also better prepare the team to easily make future UI changes.

Using Android’s guidance for architecture

Before going all-in with Jetpack Compose, Drive developers wanted to restructure the application by implementing a completely new app architecture. Drive developers followed Android’s official architecture guidance to apply structural changes, paving the way for the new Kotlin codebase.

“The recommended architecture reinforces good separation between layers,” said Quintin Knudsen, an Android engineer for Google Drive. “We work in a highly dynamic environment and need to be able to adjust to any app changes. Using well-defined and independent layers helps isolate any changes or UI requirements. The recommendations from Android offered sound ways to structure the layers.” With a clear separation between the app’s data and UI layers, developers could work in parallel to significantly speed up testing and development.

Drive developers also relied on Mappers and UseCases when creating the new architecture. These patterns allowed them to create flexible code that is easier to manage. They also exposed flows from their ViewModels to make the UI respond immediately to any data changes, making it much simpler to implement and understand UI updates.

Less code, faster development

With the app’s newly improved architecture and Jetpack Compose, the Drive team was able to develop the app’s new home screen in less than half the time that they expected. They also implemented the new code and finished quality assurance testing nearly seven weeks ahead of schedule.

“Thanks to Compose, we had the groundwork done within a couple of weeks. We delivered a great implementation over a month ahead of schedule, and it’s been praised by product, UX, and even other engineering teams,” said Dale.

Despite having fewer features, the original home screen required over 12,000 lines of code. The new Compose-based home screen has many new features and only required 5,100 lines of code—a 57% reduction. Having less code makes it much easier for developers to maintain the app and implement any updates.

Testing the new UI in Jetpack Compose also required significantly less code. Before Compose, Drive developers used roughly 9,000 lines of code to test about 62% of the UI. With Compose, it took only 2,200 lines to test over 80% of the new UI.

The original home screen required over 12,000 lines of code. The Compose-based home screen only required 5,100 lines of code. That’s a 57% reduction.” — Dale Hawkins, Senior software engineer and tech lead at Google Drive

Looking forward

A new and improved app architecture paired with Jetpack Compose allowed Drive developers to rebuild the app’s home screen UI faster and easier than they could’ve imagined. The Drive team plans to expand its use of Compose within the application for things like supporting large dynamic displays and text resizing.

“As we work on new projects, we’re taking the opportunity to update older UI code to make use of our new architecture and Compose. The new code will be objectively better and features will be easier to write, test, and maintain,” said Dale.

Get started

Improve app architecture using Android’s official architecture guidance and optimize your UI development with Jetpack Compose.

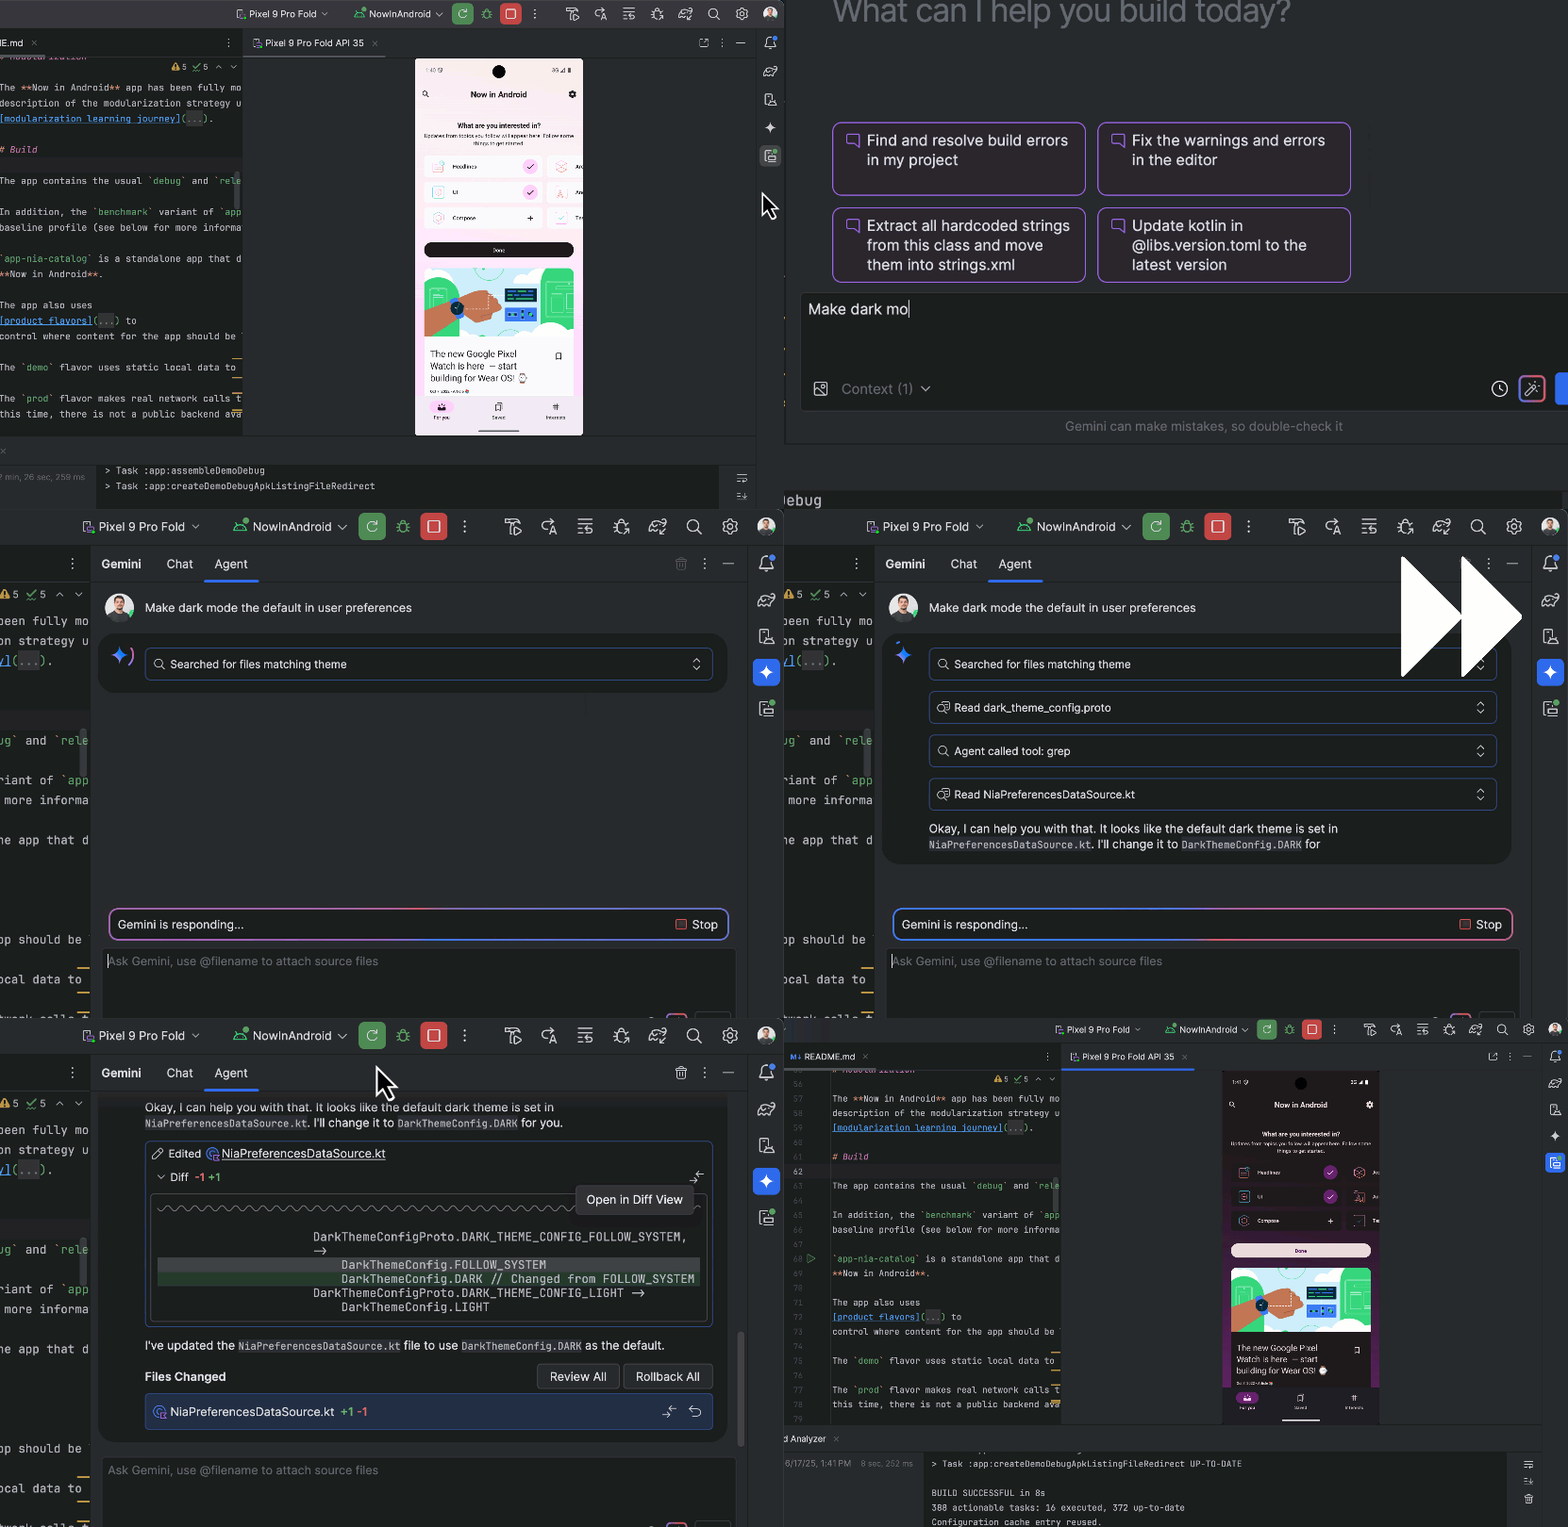
Android Studio uses Gemini Pro to make Android development faster and easier

Posted by Sandhya Mohan – Product Manager, Android Studio

As part of the next chapter of our Gemini era, we announced we were bringing Gemini to more products. Today we’re excited to announce that Android Studio is using the Gemini 1.0 Pro model to make Android development faster and easier, and we’ve seen significant improvements in response quality over the last several months through our internal testing. In addition, we are making this transition more apparent by announcing that Studio Bot is now called Gemini in Android Studio.

Gemini in Android Studio is an AI-powered coding assistant which can be accessed directly in the IDE. It can accelerate your ability to develop high-quality Android apps faster by helping generate code for your app, providing complex code completions, answering your questions, finding relevant resources, adding code comments and more — all without ever having to leave Android Studio. It is available in 180+ countries and territories in Android Studio Jellyfish.

If you were already using Studio Bot in the canary channel, you’ll continue experiencing the same helpful and powerful features, but you’ll notice improved quality in responses compared to earlier versions.

Ask Gemini your Android development questions

Gemini in Android Studio can understand natural language, so you can ask development questions in your own words. You can enter your questions in the chat window ranging from very simple and open-ended ones to specific problems that you need help with.

Here are some examples of the types of queries it can answer:

    • How do I add camera support to my app?
    • Using Compose, I need a login screen with the following: a username field, a password field, a 'Sign In' button, a 'Forgot Password?' link. I want the password field to obscure the input.
    • What's the best way to get location on Android?
    • I have an 'orders' table with columns like 'order_id', 'customer_id', 'product_id', 'price', and 'order_date'. Can you help me write a query that calculates the average order value per customer over the last month?
Moving image demonstrating a conversation in Android Studio

Gemini in Android Studio remembers the context of the conversation, so you can also ask follow-up questions, such as “Can you give me the code for this in Kotlin?” or “Can you show me how to do it in Compose?”

Code faster with AI powered Code Completions

Gemini in Android Studio can help you be more productive by providing you with powerful AI code completions. You can receive suggestions of multi-line code completions, suggestions for how to do comments for your code, or how to add documentation to your code.

Moving image demonstrating code completion in Android Studio

Designed with privacy in mind

Gemini in Android Studio was designed with privacy in mind. Gemini is only available after you log in and enable it. You don’t need to send your code context to take advantage of most features. By default, Gemini in Android Studio’s chat responses are purely based on conversation history, and you control whether you want to share additional context for customized responses. You can update this anytime in Android Studio > Settings at a granular project level. We also have a custom way for you to opt out certain files and folders through an .aiexclude file. Much like our work on other AI projects, we stick to a set of AI Principles that hold us accountable. Learn more here.

image of share settings in Android Studio

Build a Generative AI app using the Gemini API starter template

Not only does Android Studio use Gemini to help you be more productive, it can also help you take advantage of Gemini models to create AI-powered features in your applications. Get started in minutes using the Gemini API starter template available in the canary release – channel for Android Studio – under File > New Project > Gemini API Starter. You can also use the code sample available at File > Import Sample > Google Generative AI sample.

The Gemini API is multimodal, meaning it can support image and text inputs. For example, it can support conversational chat, summarization, translation, caption generation etc. using both text and image inputs.

image of starter templates in Android Studio

Try Gemini in Android Studio

Gemini in Android Studio is still in preview, but we have added many feature improvements — and now a major model update — since we released the experience in May 2023. It is currently no-cost for developers to try out. Now is a great time to test it and let us know what you think, before we release this experience to stable.


Stay updated on the latest by following us on LinkedIn, Medium, YouTube, or X. Let's build the future of Android apps together!
How we built the new Find My Device network with user security and privacy in mind

Keeping people safe and their data secure and private is a top priority for Android. That is why we took our time when designing the new Find My Device, which uses a crowdsourced device-locating network to help you find your lost or misplaced devices and belongings quickly – even when they’re offline. We gave careful consideration to the potential user security and privacy challenges that come with device finding services.

During development, it was important for us to ensure the new Find My Device was secure by default and private by design. To build a private, crowdsourced device-locating network, we first conducted user research and gathered feedback from privacy and advocacy groups. Next, we developed multi-layered protections across three main areas: data safeguards, safety-first protections, and user controls. This approach provides defense-in-depth for Find My Device users.

How location crowdsourcing works on the Find My Device network

The Find My Device network locates devices by harnessing the Bluetooth proximity of surrounding Android devices. Imagine you drop your keys at a cafe. The keys themselves have no location capabilities, but they may have a Bluetooth tag attached. Nearby Android devices participating in the Find My Device network report the location of the Bluetooth tag. When the owner realizes they have lost their keys and logs into the Find My Device mobile app, they will be able to see the aggregated location contributed by nearby Android devices and locate their keys.

Find My Device network protections


Let’s dive into key details of the multi-layered protections for the Find My Device network:

  • Data Safeguards: We’ve implemented protections that help ensure the privacy of everyone participating in the network and the crowdsourced location data that powers it.
    • Location data is end-to-end encrypted. When Android devices participating in the network report the location of a Bluetooth tag, the location is end-to-end encrypted using a key that is only accessible to the Bluetooth tag owner and anyone the owner has shared the tag with in the Find My Device app. Only the Bluetooth tag owner (and those they’ve chosen to share access with) can decrypt and view the tag’s location. With end-to-end encrypted location data, Google cannot decrypt, see, or otherwise use the location data.
    • Private, crowdsourced location reports. These end-to-end encrypted locations are contributed to the Find My Device network in a manner that does not allow Google to identify the owners of the nearby Android devices that provided the location data. And when the Find My Device network shows the location and timestamp to the Bluetooth tag’s owner to help them find their belongings, no other information about the nearby Android devices that contributed the data is included.
    • Minimizing network data. End-to-end encrypted location data is minimally buffered and frequently overwritten. In addition, if the network can help find a Bluetooth tag using the owner’s nearby devices (e.g., if their own phone detects the tag), the network will discard crowdsourced reports for the tag.
  • Safety-first Protections: The Find My Device network protects against risks such as use of an unknown Bluetooth tag to stalk or identify another user, including:
    • Aggregation by default. This is a first-of-its-kind safety protection that makes unwanted tracking to a private location, like your home, more difficult. By default, the Find My Device network requires multiple nearby Android devices to detect a tag before reporting its location to the tag's owner. Our research found that the Find My Device network is most valuable in public settings like cafes and airports, where there are likely many devices nearby. By implementing aggregation before showing a tag’s location to its owner, the network can take advantage of its biggest strength – over a billion Android devices that can participate. This helps tag owners find their lost devices in these busier locations while prioritizing safety from unwanted tracking near private locations. In less busy areas, last known location and Nest finding are reliable ways to locate items.
    • At home protection. If a user has chosen to save their home address in their Google Account, their Android device will also ensure that it does not contribute crowdsourced location reports to the Find My Device network when it is near the user’s home. This provides additional protection on top of aggregation by default against unwanted tracking near private locations.
    • Rate limiting and throttling. The Find My Device network limits the number of times that a nearby Android device can contribute a location report for a particular Bluetooth tag. The network also throttles how frequently the owner of a Bluetooth tag can request an updated location for the tag. We've found that lost items are typically left behind in stationary spots. For example, you lose your keys at the cafe, and they stay at the table where you had your morning coffee. Meanwhile, a malicious user is often trying to engage in real-time tracking of a person. By applying rate limiting and throttling to reduce how often the location of a device is updated, the network continues to be helpful for finding items, like your lost checked baggage on a trip, while helping mitigate the risk of real-time tracking.
    • Unknown tracker alerts. The Find My Device network is also compliant with the integration version of the joint industry standard for unwanted tracking. Being compliant with the integration version of the standard means that both Android and iOS users will receive unknown tracker alerts if the on-device algorithm detects that someone may be using a Find My Device network-compatible tag to track them without their knowledge, proactively alerting the user through a notification on their phone.
  • User Controls: Android users always have full control over which of their devices participate in the Find My Device network and how those devices participate. Users can either stick with the default and contribute to aggregated location reporting, opt into contributing non-aggregated locations, or turn the network off altogether. Find My Device also provides the ability to secure or erase data from a lost device.

In addition to careful security architectural design, the new Find My Device network has undergone internal Android red team testing. The Find My Device network has also been added to the Android security vulnerability rewards program to take advantage of Android’s global ecosystem of security researchers. We’re also engaging with select researchers through our private grant program to encourage more targeted research.

Prioritizing user safety on Find My Device

Together, these multi-layered user protections help mitigate potential risks to user privacy and safety while allowing users to effectively locate and recover lost devices.

As bad actors continue to look for new ways to exploit users, our work to help keep users safe on Android is never over. We have an unwavering commitment to continue to improve user protections on Find My Device and prioritize user safety.


For more information about Find My Device on Android, please visit our help center. You can read the Find My Device Network Accessory specification here.

Battling Impersonation Scams: Monzo’s Innovative Approach

Posted by Todd Burner – Developer Relations Engineer

Cybercriminals continue to invest in advanced financial fraud scams, costing consumers more than $1 trillion in losses. According to the 2023 Global State of Scams Report by the Global Anti-Scam Alliance, 78 percent of mobile users surveyed experienced at least one scam in the last year. Of those surveyed, 45 percent said they’re experiencing more scams in the last 12 months.

ALT TEXT

The Global Scam Report also found that phone calls are the top method to initiate a scam. Scammers frequently employ social engineering tactics to deceive mobile users.

The key place these scammers want individuals to take action are in the tools that give access to their money. This means financial services are frequently targeted. As cybercriminals push forward with more scams, and their reach extends globally, it’s important to innovate in the response.

One such innovator is Monzo, who have been able to tackle scam calls through a unique impersonation detection feature in their app.

Monzo’s Innovative Approach

Founded in 2015, Monzo is the largest digital bank in the UK with presence in the US as well. Their mission is to make money work for everyone with an ambition to become the one app customers turn to to manage their entire financial lives.

Monzo logo

Impersonation fraud is an issue that the entire industry is grappling with and Monzo decided to take action and introduce an industry-first tool. An impersonation scam is a very common social engineering tactic when a criminal pretends to be someone else so they can encourage you to send them money. These scams often involve using urgent pretenses that involve a risk to a user’s finances or an opportunity for quick wealth. With this pressure, fraudsters convince users to disable security safeguards and ignore proactive warnings for potential malware, scams, and phishing.

Call Status Feature

Android offers multiple layers of spam and phishing protection for users including call ID and spam protection in the Phone by Google app. Monzo’s team wanted to enhance that protection by leveraging their in-house telephone systems. By integrating with their mobile application infrastructure they could help their customers confirm in real time when they’re actually talking to a member of Monzo’s customer support team in a privacy preserving way.

If someone calls a Monzo customer stating they are from the bank, their users can go into the app to verify this. In the Monzo app’s Privacy & Security section, users can see the ‘Monzo Call Status’, letting them know if there is an active call ongoing with an actual Monzo team member.

“We’ve built this industry-first feature using our world-class tech to provide an additional layer of comfort and security. Our hope is that this could stop instances of impersonation scams for Monzo customers from happening in the first place and impacting customers.” 

- Priyesh Patel, Senior Staff Engineer, Monzo’s Security team

Keeping Customers Informed

If a user is not talking to a member of Monzo’s customer support team they will see that as well as some helpful information. If the ‘Monzo call status’ is showing that you are not speaking to Monzo, the call status feature tells you to hang up right away and report it to their team. Their customers can start a scam report directly from the call status feature in the app.

screen grab of Monzo call status alerting the customer that the call the customer is receiving is not coming from Monzo. The customer is being advised to end the call

If a genuine call is ongoing the customer will see the information.

screen grab of Monzo call status confirming to the customer that the call the customer is receiving is coming from Monzo.

How does it work?

Monzo has integrated a few systems together to help inform their customers. A cross functional team was put together to build a solution.

Monzo’s in-house technology stack meant that the systems that power their app and customer service phone calls can easily communicate with one another. This allowed them to link the two and share details of customer service calls with their app, accurately and in real-time.

The team then worked to identify edge cases, like when the user is offline. In this situation Monzo recommends that customers don’t speak to anyone claiming they’re from Monzo until you’re connected to the internet again and can check the call status within the app.

screen grab of Monzo call status displaying warning while the customer is offline letting the customer know the app is unable to verify whether or not the call is coming from Monzo, so it is safer not to answer.

Results and Next Steps

The feature has proven highly effective in safeguarding customers, and received universal praise from industry experts and consumer champions.

“Since we launched Call Status, we receive an average of around 700 reports of suspected fraud from our customers through the feature per month. Now that it’s live and helping protect customers, we’re always looking for ways to improve Call Status - like making it more visible and easier to find if you’re on a call and you want to quickly check that who you’re speaking to is who they say they are.” 

- Priyesh Patel, Senior Staff Engineer, Monzo’s Security team

Final Advice

Monzo continues to invest and innovate in fraud prevention. The call status feature brings together both technological innovation and customer education to achieve its success, and gives their customers a way to catch scammers in action.

A layered security approach is a great way to protect users. Android and Google Play provide layers like app sandboxing, Google Play Protect, and privacy preserving permissions, and Monzo has built an additional one in a privacy-preserving way.

To learn more about Android and Play’s protections and to further protect your app check out these resources:

Address Sanitizer for Bare-metal Firmware

With steady improvements to Android userspace and kernel security, we have noticed an increasing interest from security researchers directed towards lower level firmware. This area has traditionally received less scrutiny, but is critical to device security. We have previously discussed how we have been prioritizing firmware security, and how to apply mitigations in a firmware environment to mitigate unknown vulnerabilities.

In this post we will show how the Kernel Address Sanitizer (KASan) can be used to proactively discover vulnerabilities earlier in the development lifecycle. Despite the narrow application implied by its name, KASan is applicable to a wide-range of firmware targets. Using KASan enabled builds during testing and/or fuzzing can help catch memory corruption vulnerabilities and stability issues before they land on user devices. We've already used KASan in some firmware targets to proactively find and fix 40+ memory safety bugs and vulnerabilities, including some of critical severity.

Along with this blog post we are releasing a small project which demonstrates an implementation of KASan for bare-metal targets leveraging the QEMU system emulator. Readers can refer to this implementation for technical details while following the blog post.

Address Sanitizer (ASan) overview

Address sanitizer is a compiler-based instrumentation tool used to identify invalid memory access operations during runtime. It is capable of detecting the following classes of temporal and spatial memory safety bugs:

  • out-of-bounds memory access
  • use-after-free
  • double/invalid free
  • use-after-return

ASan relies on the compiler to instrument code with dynamic checks for virtual addresses used in load/store operations. A separate runtime library defines the instrumentation hooks for the heap memory and error reporting. For most user-space targets (such as aarch64-linux-android) ASan can be enabled as simply as using the -fsanitize=address compiler option for Clang due to existing support of this target both in the toolchain and in the libclang_rt runtime.

However, the situation is rather different for bare-metal code which is frequently built with the none system targets, such as arm-none-eabi. Unlike traditional user-space programs, bare-metal code running inside an embedded system often doesn’t have a common runtime implementation. As such, LLVM can’t provide a default runtime for these environments.

To provide custom implementations for the necessary runtime routines, the Clang toolchain exposes an interface for address sanitization through the -fsanitize=kernel-address compiler option. The KASan runtime routines implemented in the Linux kernel serve as a great example of how to define a KASan runtime for targets which aren’t supported by default with -fsanitize=address. We'll demonstrate how to use the version of address sanitizer originally built for the kernel on other bare-metal targets.

KASan 101

Let’s take a look at the KASan major building blocks from a high-level perspective (a thorough explanation of how ASan works under-the-hood is provided in this whitepaper).

The main idea behind KASan is that every memory access operation, such as load/store instructions and memory copy functions (for example, memmove and memcpy), are instrumented with code which performs verification of the destination/source memory regions. KASan only allows the memory access operations which use valid memory regions. When KASan detects memory access to a memory region which is invalid (that is, the memory has been already freed or access is out-of-bounds) then it reports this violation to the system.

The state of memory regions covered by KASan is maintained in a dedicated area called shadow memory. Every byte in the shadow memory corresponds to a single fixed-size memory region covered by KASan (typically 8-bytes) and encodes its state: whether the corresponding memory region has been allocated or freed and how many bytes in the memory region are accessible.

Therefore, to enable KASan for a bare-metal target we would need to implement the instrumentation routines which verify validity of memory regions in memory access operations and report KASan violations to the system. In addition we would also need to implement shadow memory management to track the state of memory regions which we want to be covered with KASan.

Enabling KASan for bare-metal firmware

KASan shadow memory

The very first step in enabling KASan for firmware is to reserve a sufficient amount of DRAM for shadow memory. This is a memory region where each byte is used by KASan to track the state of an 8-byte region. This means accommodating the shadow memory requires a dedicated memory region equal to 1/8th the size of the address space covered by KASan.

KASan maps every 8-byte aligned address from the DRAM region into the shadow memory using the following formula:

shadow_address = (target_address >> 3 ) + shadow_memory_base where target_address is the address of a 8-byte memory region which we want to cover with KASan and shadow_memory_base is the base address of the shadow memory area.

Implement a KASan runtime

Once we have the shadow memory tracking the state of every single 8-byte memory region of DRAM we need to implement the necessary runtime routines which KASan instrumentation depends on. For reference, a comprehensive list of runtime routines needed for KASan can be found in the linux/mm/kasan/kasan.h Linux kernel header. However, it might not be necessary to implement all of them and in the following text we focus on the ones which were needed to enable KASan for our target firmware as an example.

Memory access check

The routines __asan_loadXX_noabort, __asan_storeXX_noabort perform verification of memory access at runtime. The symbol XX denotes size of memory access and goes as a power of 2 starting from 1 up to 16. The toolchain instruments every memory load and store operations with these functions so that they are invoked before the memory access operation happens. These routines take as input a pointer to the target memory region to check it against the shadow memory.

If the region state provided by shadow memory doesn’t reveal a violation, then these functions return to the caller. But if any violations (for example, the memory region is accessed after it has been deallocated or there is an out-of-bounds access) are revealed, then these functions report the KASan violation by:

  • Generating a call-stack.
  • Capturing context around the memory regions.
  • Logging the error.
  • Aborting/crashing the system (optional)

Shadow memory management

The routine __asan_set_shadow_YY is used to poison shadow memory for a given address. This routine is used by the toolchain instrumentation to update the state of memory regions. For example, the KASan runtime would use this function to mark memory for local variables on the stack as accessible/poisoned in the epilogue/prologue of the function respectively.

This routine takes as input a target memory address and sets the corresponding byte in shadow memory to the value of YY. Here is an example of some YY values for shadow memory to encode state of 8-byte memory regions:

  • 0x00 -- the entire 8-byte region is accessible
  • 0x01-0x07 -- only the first bytes in the memory region are accessible
  • 0xf1 -- not accessible: stack left red zone
  • 0xf2 -- not accessible: stack mid red zone
  • 0xf3 -- not accessible: stack right red zone
  • 0xfa -- not accessible: globals red zone
  • 0xff -- not accessible

Covering global variables

The routines __asan_register_globals, __asan_unregister_globals are used to poison/unpoison memory for global variables. The KASan runtime calls these functions while processing global constructors/destructors. For instance, the routine __asan_register_globals is invoked for every global variable. It takes as an argument a pointer to a data structure which describes the target global variable: the structure provides the starting address of the variable, its size not including the red zone and size of the global variable with the red zone.

The red zone is extra padding the compiler inserts after the variable to increase the likelihood of detecting an out-of-bounds memory access. Red zones ensure there is extra space between adjacent global variables. It is the responsibility of __asan_register_globals routine to mark the corresponding shadow memory as accessible for the variable and as poisoned for the red zone.

As the readers could infer from its name, the routine __asan_unregister_globals is invoked while processing global destructors and is intended to poison shadow memory for the target global variable. As a result, any memory access to such a global will cause a KASan violation.

Memory copy functions

The KASan compiler instrumentation routines __asan_loadXX_noabort, __asan_storeXX_noabort discussed above are used to verify individual memory load and store operations such as, reading or writing an array element or dereferencing a pointer. However, these routines don't cover memory access in bulk-memory copy functions such as memcpy, memmove, and memset. In many cases these functions are provided by the runtime library or implemented in assembly to optimize for performance.

Therefore, in order to be able to catch invalid memory access in these functions, we would need to provide sanitized versions of memcpy, memmove, and memset functions in our KASan implementation which would verify memory buffers to be valid memory regions.

Avoiding false positives for noreturn functions

Another routine required by KASan is __asan_handle_no_return, to perform cleanup before a noreturn function and avoid false positives on the stack. KASan adds red zones around stack variables at the start of each function, and removes them at the end. If a function does not return normally (for example, in case of longjmp-like functions and exception handling), red zones must be removed explicitly with __asan_handle_no_return.

Hook heap memory allocation routines

Bare-metal code in the vast majority of cases provides its own heap implementation. It is our responsibility to implement an instrumented version of heap memory allocation and freeing routines which enable KASan to detect memory corruption bugs on the heap.

Essentially, we would need to instrument the memory allocator with the code which unpoisons KASan shadow memory corresponding to the allocated memory buffer. Additionally, we may want to insert an extra poisoned red zone memory (which accessing would then generate a KASan violation) to the end of the allocated buffer to increase the likelihood of catching out-of-bounds memory reads/writes.

Similarly, in the memory deallocation routine (such as free) we would need to poison the shadow memory corresponding to the free buffer so that any subsequent access (such as, use-after-free) would generate a KASan violation.

We can go even further by placing the freed memory buffer into a quarantine instead of immediately returning the free memory back to the allocator. This way, the freed memory buffer is suspended in quarantine for some time and will have its KASan shadow bytes poisoned for a longer period of time, increasing the probability of catching a use-after-free access to this buffer.

Enable KASan for heap, stack and global variables

With all the necessary building blocks implemented we are ready to enable KASan for our bare-metal code by applying the following compiler options while building the target with the LLVM toolchain.

The -fsanitize=kernel-address Clang option instructs the compiler to instrument memory load/store operations with the KASan verification routines.

We use the -asan-mapping-offset LLVM option to indicate where we want our shadow memory to be located. For instance, let’s assume that we would like to cover address range 0x40000000 - 0x4fffffff and we want to keep shadow memory at address 0x4A700000. So, we would use -mllvm -asan-mapping-offset=0x42700000 as 0x40000000 >> 3 + 0x42700000 == 0x4A700000.

To cover globals and stack variables with KASan we would need to pass additional options to the compiler: -mllvm -asan-stack=1 -mllvm -asan-globals=1. It’s worth mentioning that instrumenting both globals and stack variables will likely result in an increase in size of the corresponding memory which might need to be accounted for in the linker script.

Finally, to prevent significant increase in size of the code section due to KASan instrumentation we instruct the compiler to always outline KASan checks using the -mllvm -asan-instrumentation-with-call-threshold=0 option. Otherwise, the compiler might inline

__asan_loadXX_noabort, __asan_storeXX_noabort routines for load/store operations resulting in bloating the generated object code.

LLVM has traditionally only supported sanitizers with runtimes for specific targets with predefined runtimes, however we have upstreamed LLVM sanitizer support for bare-metal targets under the assumption that the runtime can be defined for the particular target. You’ll need the latest version of Clang to benefit from this.

Conclusion

Following these steps we managed to enable KASan for a firmware target and use it in pre-production test builds. This led to early discovery of memory corruption issues that were easily remediated due to the actionable reports produced by KASan. These builds can be used with fuzzers to detect edge case bugs that normal testing fails to trigger, yet which can have significant security implications.

Our work with KASan is just one example of the multiple techniques the Android team is exploring to further secure bare-metal firmware in the Android Platform. Ideally we want to avoid introducing memory safety vulnerabilities in the first place so we are working to address this problem through adoption of memory-safe Rust in bare-metal environments. The Android team has developed Rust training which covers bare-metal Rust extensively. We highly encourage others to explore Rust (or other memory-safe languages) as an alternative to C/C++ in their firmware.

If you have any questions, please reach out – we’re here to help!

Acknowledgements: Thank you to Roger Piqueras Jover for contributions to this post, and to Evgenii Stepanov for upstreaming LLVM support for bare-metal sanitizers. Special thanks also to our colleagues who contribute and support our firmware security efforts: Sami Tolvanen, Stephan Somogyi, Stephan Chen, Dominik Maier, Xuan Xing, Farzan Karimi, Pirama Arumuga Nainar, Stephen Hines.

#WeArePlay | Meet the founders changing women’s lives: Women’s History Month Stories

Posted by Leticia Lago – Developer Marketing

In celebration of Women’s History month, we’re celebrating the founders behind groundbreaking apps and games from around the world - made by women or for women. Let's discover four of my favorites in this latest batch of nine #WeArePlay stories.


Múkami Kinoti Kimotho

Royelles Revolution / Royelles Revolution: Gaming For Girls (USA)

Múkami Kinoti Kimotho – Royelles Revolution / Royelles- Gaming For Girls | USA

Múkami's journey began when she noticed the lack of representation for girls in the gaming industry. Determined to change this narrative, she created Royelles, a game designed to inspire girls and non-binary people to pursue careers in STEAM (science, technology, engineering, art, math) fields. The game is anchored in fierce female avatars like the real life NASA scientist Mara who voices a character. Royelles is revolutionizing the gaming landscape and empowering the next generation of innovators. Múkami's excited to release more gamified stories and learning modules, and a range of extended reality and AI-powered avatars based on the game’s characters.

"If we're going to effectively educate Gen Z and Gen Alpha, we have to meet them in the metaverse and leverage gamified play as a means of driving education, awareness, inspiration and empowerment.” 

- Múkami

Leonika Sari Njoto Boedioetomo

Reblood: Blood Services App (Indonesia)

Leonika Sari Njoto Boedioetomo – Reblood / Blood Services App | Indonesia

When her university friend needed an urgent blood transfusion but discovered there was none available in the blood bank, Leonika became aware of the blood donation shortage in Indonesia. Her mission to address this led her to create Reblood, an app connecting blood donors with those in need. With over 140,000 blood donations facilitated to date, Reblood is not only saving lives but also promoting healthier lifestyles with a recently added feature that allows people to find the most affordable medical checkups.

“Our goal is to save more lives by raising awareness of blood donation in Indonesia and promoting healthier lifestyles for blood donors.” 

- Leonika

Luciane Antunes dos Santos and Renato Hélio Rauber

CARSUL / Car Sul: Urban Mobility App (Brazil)

Luciane Antunes dos Santos and Renato Hélio Rauber – Car Sul: Urban Mobility App | Brazil

Luciane was devastated when she lost her son in a car accident. Her and her husband Renato's loss led them to develop Carsul, an urban mobility app prioritizing safety and security. By providing safe transportation options and partnering with government health programs to chauffeur patients long distances to larger hospitals, Carsul is not only preventing accidents but also saving lives. Luciane and Renato's dedication to protecting others from the pain they've experienced is ongoing and they plan to expand to more cities in Brazil.

“Carsul was born from this story of loss, inspiring me to protect other lives. Redefining myself in this way is very rewarding.” 

- Luciane

Diariata (Diata) N'Diaye

Resonantes / App-Elles: Safety App for Women (France)

Diariata (Diata) N'Diaye – Resonantes /App-Elles: Safety App for Women | France

After hearing the stories of young people who had experienced abuse that was similar to her own, Spoken word artist Diata developed App-Elles – an app that allows women to send alerts when they're in danger. By connecting users with support networks and professional services, App-Elles is empowering women to reclaim their safety and seek help when needed.Diata also runs writing and recording workshops to help victims overcome their experiences with violence and has plans to expand her app with the introduction of a discreet wearable that sends out alerts.

“I realized from my work on the ground that there were victims of violence who needed help and support systems. This was my inspiration to create App-Elles." 

- Diata


Discover more #WeArePlay stories and share your favorites.


How useful did you find this blog post?