Category Archives: YouTube Engineering and Developers Blog

What’s happening with engineering and developers at YouTube

Visit our new blog destination

Our YouTube Blog has been on Blogger for the past 15 years, so this past August, we figured it was time to completely change things up. We created an entirely new site and redesign. 


In 30 days, we’re going to redirect the Engineering Blog over to our new YouTube Official Blog as the final piece of the redesign strategy. We hope you enjoy the blog’s new home!

Abbreviated public-facing subscriber counts

Following our announcement in May, we'll be abbreviating subscriber counts across YouTube, starting the week of September 2; and the public YouTube Data API Service, starting the week of September 9. Read more about what this means for the public YouTube Data API Service in this updated Help Community post.

Launching a YouTube dataset of user-generated content

We are excited to launch a large-scale dataset of public user-generated content (UGC) videos uploaded to YouTube under a Creative Commons license. This dataset is intended to aid the advancement of research on video compression and quality evaluation.

We created this dataset to help baseline research efforts, as well as foster algorithmic development. We hope that this dataset will help the industry better comprehend UGC quality and tackle UGC challenges at scale.

What is UGC?


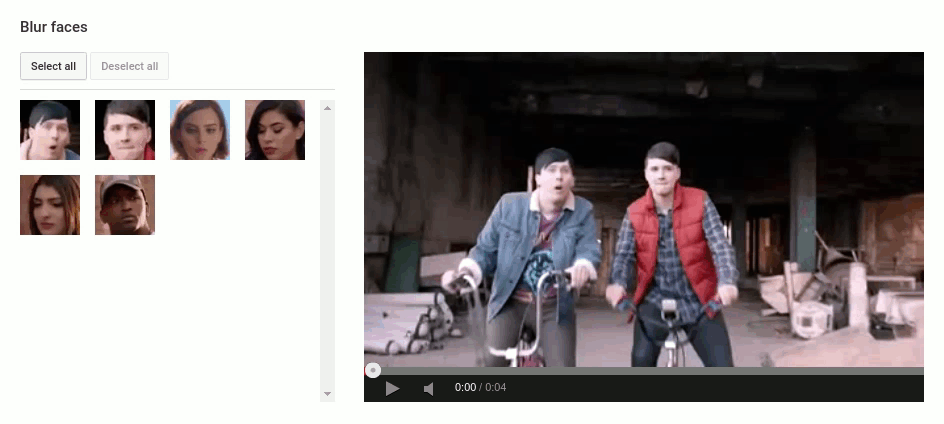
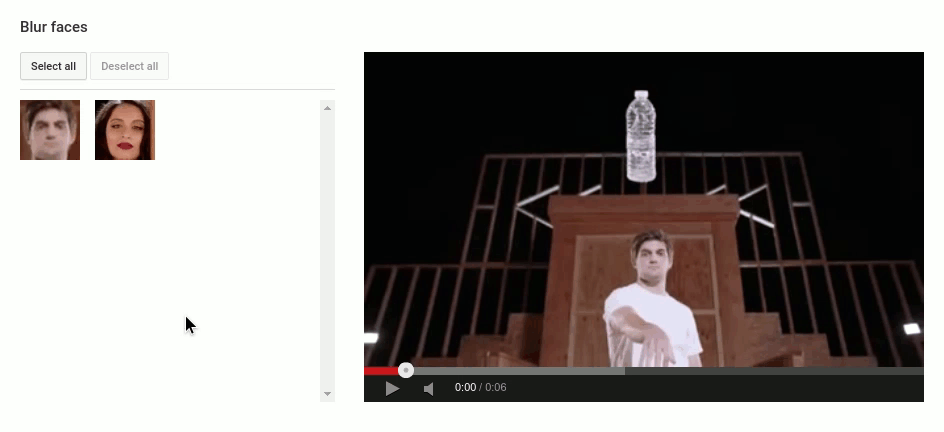
User-generated content (UGC) videos are uploaded by users and creators. These videos are not always professionally curated and could exhibit perceptual artifacts. For the purpose of this dataset, we've selected original videos with specific and perceptual quality issues, like blockiness, blur, banding, noise, jerkiness, and so on.


These videos have a wide array of categories, such as “how to” videos, technology reviews, gaming, pets, etc.

Since these videos are often captured in environments without controlled lighting, with ambient noise, or on low-end capture devices, they may end up exhibiting various video quality issues, such as camera shaking, low visibility, or jarring audio.

Before sharing these videos, creators may edit the video for aesthetics and generally compress the captured video for a faster upload (e.g. depending on the network conditions). Creators also may annotate the video or add additional overlays. The editing, annotating, and overlaying processes change the underlying video data at the pixel and/or frame levels. Additionally, any associated compression may introduce visible compression artifacts within the video such as blockiness, banding, or ringing.

For these reasons, in our experience, UGC should be evaluated and treated differently from traditional, professional video.

The challenges with UGC


Processing and encoding UGC video presents a variety of challenges that are less prevalent in traditional video.

For instance, look at these clips shown below that are heavily ridden with blockiness and noise. Many modern video codecs would target their encoding algorithms based on reference-based metrics, such as PSNR or SSIM. These metrics measure the fidelity of accurately reproducing the original content roughly pixel for pixel, including artifacts. The assumption here is that the video that acts as the reference is “pristine,” but for UGC, this assumption often breaks down.


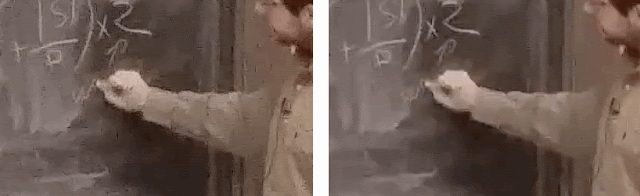
In this case, the videos on the left ends up having 5 Mbps bitrate to faithfully represent the originally uploaded user video content. However, the heavily compressed video on the right has a bitrate of only 1 Mbps, but looks similar when compared to the 5 Mbps counterpart.

Another unconventional challenge can come from a lack of understanding of the provided quality of the uploaded video. With traditional video, quite often a lower quality is a result of heavy editing or processing and an un-optimized encoding. However, this is not always true for UGC, where the uploaded video itself could be sufficiently low quality that any number of optimizations on the encoding operation would not increase the quality of the encoded video.

How is the dataset put together?


This dataset is sampled from millions of YouTube uploaded videos licensed under a Creative Commons license. Only publicly shared videos from uploaders are sampled.

The sample space the videos were chosen from can be divided into four discrete dimensions: Spatial, Motion, Color, and Chunk-level variations. We believe that this dataset reasonably represents the variety of content that we observe as uploads within these dimensions.

For technical details on how this dataset was composed, the coverage correlations scores and more, please refer to our paper on dataset generation in arxiv (also submitted to ICIP 2019).

Where can I see and download it?


This UGC dataset can be explored over various content categories and resolutions in the explore tab of media.withyoutube.com. The video preview will be shown when you mouse-over the video, along with an overlay of the attribution.

Various content categories are separated out for simplicity of selection. HDR and VR formats are available in addition for each resolution. Though some high frame rate content is present as part of the offering, it is not currently separated out as a category. Frame rate information is embedded in the video metadata and can be obtained when the corresponding video is downloaded.

Videos can be downloaded from the download tab of media.withyoutube.com page. Here you will also notice the CC BY creative commons attribution file for the whole set of videos. Details about the video download format along with the link to the Google Cloud Platform location are available on this page.

Additionally, three no-reference metrics that have been computed on the UGC video dataset by the YouTube Media Algorithms team are available to download from this page. These three metrics are Noise, Banding, and SLEEQ. Explanations of each were published in ICIPs and ACM Multimedia Conferences.

Posted by Balu Adsumilli, Sasi Inguva, Yilin Wang, Jani Huoponen, Ross Wolf.https://00e9e64bace9f5e25eea751bfc166a8b1fbaa1ba7953e385ec-apidata.googleusercontent.com/download/storage/v1/b/ugc-dataset/o/ugc_dataset.pdf?qk=AD5uMEubH8dw1x99vqYiYYT-xf8d2C6SaB68mY_STRb02_DIfFsYUNL5oaYz5nLDe-wSUHpvz91A0qWfScMWs19Vru89BLon5YrNy0ed0x50Weo-jrTNPzOP14BpJgA7bu-H0t4zTidJITRw8u9FP0AKPuDhDsXJXI5NpffFF_ilsR93DbbVK_6t-iIF772CYxGFE9aYvgSrLHJDy6Q81H4uMhJKgE5jcEwLGhpEdYy1Hsa31rBMxy03cAmEBkqjKXHxAn5Ap0qAGpfAKeJ6aEQaKat14OlfOiAhCH9Bw2bN5BD5LE3b1X-tcTyrmb6zdGzIOJo2qDltBsD9ug3Hy-H7BRDYCOSszG_m88xqiiQ0Rx6ElsnkK5jG17atPf7o3Iefb7CLD2DsPZfKKXdDbOdR-q5THFYl9M15Jg2lfBaYjztT7Kv4aX2rTzl0-C1t5pAcEiIlCO0eMmCv7Vx7BV-s-YsEMk_vwfgd3X58lbezgoIgg651cEN4EGqx2_X2vZP0JJjV5sRDvr3_KZnnpRyhM8xUL_-f2OMKEHGYe0Gw4FqcdU4n1Lu70ezWvQ3E4yx3FGXjIs8w6jxBhP3H5Of4EsbWUScXoNflzTI65R1JR1KGojSvf_oZ0jgXya2KzwW4sBD2bb9w_BTqH3K_CpdGXQ7a-XCc8Jns7dQVQDyB4uxzDSb4HGfry1y3LzFMpCDBwsjKwLbea3BL7Keq6DdIntEsQOJZE0VUgrQ7DdGUklj3rF-D2mtVP7IZ5n9oUvAYVL4wqbRVuOS4lP6w-MHEeGYVoOYgnA

Add stereo music or narration to VR videos

We introduced a new feature which allows YouTube creators to mix together spatial audio with stereo audio content, like music and/or narration, when they work on VR experiences. Viewers can already enjoy this feature on YouTube mobile apps as well as desktop web browsers.

Why we need spatial audio in VR


Sound has been part of making movies great almost from the start. Live music performance went along with silent movies even before 1927, when "The Jazz Singer" brought talkies to the big screen. In the early days, movie sound reproduction was very primitive and typically played over a single loudspeaker. Little consideration was given to the relationship between recorded sounds and the objects or actors on the screen. As technology progressed, people realized that making sound stereo — putting some sounds to the left, some to the right, and some moving from side-to-side across the screen  added another dimension to the experience. It's easier to get immersed in a movie when the sound and the picture fit together!

We like when the sound of an engine follows the car we are seeing. We get excited if our attention is suddenly drawn to another part of the screen by a door squeak, or a gunshot or an explosion. Although stereo sound creates an immersive experience, a typical loudspeaker set-up places the speakers on either side of the screen, which largely confines the movement of sound to within the screen itself. One of the limitations of this is that it doesn't match what we're used to in real life. We're used to hearing sounds from all around us, even when we don't see where they're coming from.

The need for more accurate real-life sound reproduction was recognized even before stereo was perfected for film in the production of "Fantasia" and its groundbreaking multi-speaker: Fantasound system. Through the use of multiple speakers, "Fantasia" pushed sound reproduction off the screen and into three-dimensions, putting the audience at the center of a 3-D sound experience. Since this early work, sound technology has advanced to more complex multi-speaker surround sound systems, but also 3-D headphone sound.

More recently, we've seen the emergence of VR, which aims to improve immersive experiences further by giving the audience not just a 3-D audio experience, but an entire 3-D video experience too. That's why the VR teams at Google and YouTube have been working to provide YouTube users with VR experiences with immersive spatial audio.

Spatial audio in VR


One of the challenges in VR production is sound design and spatial audio production. A major task for sound designers is to accurately associate sounds in 3-D space with visible objects within the 3-D video scene. Like the engine sound we mentioned before, a sound designer needs to correctly position the audio to accurately follow the visible position of the car in the scene. The car in this example is what is known as a diegetic sound source, because its position is visible or implied within the video scene. In a typical cinematic production, though, there will also be sounds that don't directly correspond to positions within the video scene, like voice-overs or narration, for example. Voiced narration (i.e. 'Red' in "The Shawshank Redemption") is typically not associated with any object within the video scene. This type of sound is known as a non-diegetic sound source. Another example would be background music, which has been present in cinematic experiences since the very beginning.

How does it work?


When you watch a VR video on a Head Mounted Display (HMD) like the Daydream View, the spatial audio rendering needs to accurately reproduce the intentions of the sound designer. How does it achieve this? Firstly, a spatial audio rendering engine needs to treat non-diegetic and diegetic sounds differently.

The audio processing for diegetic sounds is conceptually quite simple: The device knows how your head moves, and hence, how all the sounds need to be filtered, so that what you hear over headphones precisely reflects what is happening around you at that very moment. It is like creating a unique headphone mix especially for you every time you watch a movie. This way you can experience all the sounds with their true depth and spatial location, coming from all around you!

When it comes to non-diegetic sounds, the situation is quite different. These should be rendered as a standard stereophonic track, alongside immersive spatial audio content and preserve the original fidelity of music or narrator's voice. The viewer should experience them the same way that we are used to: in left/right stereo. (This is why you may hear the phrase "head-locked stereo.") Create spatial audio with head-locked stereo and upload to YouTube

YouTube now allows creators to join these two concepts together and augment immersive spatial audio with more traditional stereo content. When creators add two extra channels to their uploaded spatial audio soundtrack, they will now be interpreted as a head-locked stereo and won't go through the same processing algorithms that YouTube uses for spatial audio. In other words, it will sound exactly the same as more traditional audio uploaded to YouTube. See this YouTube Spatial Audio help page for a more detailed guide on how to prepare and upload spatial audio and head-locked stereo to YouTube. Also, make sure to check out the example video here:


YouTube viewers can already enjoy this new feature on YouTube Android/iOS apps, as well as Chrome, Opera and now also Mozilla Firefox web browsers. For the best experience, we recommend using YouTube VR with the Daydream View.

Marcin Gorzel and Damien Kelly, Software Engineers, recently watched "Ecuadorian Cloud Forest in 360 VR!! (2018)."

Control your 360 videos with the YouTube IFrame Player API

Ever since we launched 360° videos in 2015, we've been exploring ways to unleash the full potential of this new video format, including Cardboard mode, 360° live streams, and improved video quality. We are excited to share with you some new APIs for controlling 360° videos in embedded videos.

The Spherical Video Control API gives developers full control over the user’s perspective when using the YouTube IFrame Player SDK. Developers can get and set the view’s current yaw, pitch, roll, and field-of-view. This opens the door to many different scenarios such as narration-driven tours, custom controllers, multi-display installations all via JavaScript.


Here is a simple example of using the API. Google Spotlight Stories, collaborating with Justin Lin, brought us this wonderful story centered around a mysterious alien. We loved the experience, but it is easy to lose track of the alien while exploring the surroundings, so we added an “Alien” button to the video. Try wandering through the story, using your mouse to look around, and using the button to bring the alien back to the center of the scene.

We hope this helps you to incorporate 360° videos as an integral part of your applications and to create new and novel 360° experiences. To get you started, this short script will create an embed that pans in the horizontal direction while oscillating vertically.

<div id="player"></div>
<script src="https://www.youtube.com/iframe_api"></script>

<script>
let player;
let panStarted = false;

function onYouTubeIframeAPIReady() {
player = new YT.Player('player', {
videoId: 'FAtdv94yzp4',
events: {
'onStateChange': onPlayerStateChange
}
});
}

// Start animation when video starts playing.
function onPlayerStateChange(event) {
if (event.data == 1 && !panStarted) {
requestAnimationFrame(panVideo);
panStarted = true;
}
}

function panVideo() {
// 20 seconds per rotation.
const yaw = (performance.now() / 1000 / 20 * 360) % 360;
// 2 up-down cycle per rotation.
const pitch = 20 * Math.sin(2 * yaw / 360 * 2 * Math.PI);
player.setSphericalProperties({
yaw: yaw,
pitch: pitch
});
requestAnimationFrame(panVideo);
}
</script>

Yingyu Yao, Software Engineer, recently watched "The Earth's Internet: How Fungi Help Plants Communicate".

Making high quality video efficient

YouTube works hard to provide the best looking video at the lowest bandwidth. One way we're doing that is by optimizing videos with bandwidth in mind. We recently made videos stream better -- giving you higher-quality video by improving our videos so they are more likely to fit into your available bandwidth.

When you watch a video the YouTube player measures the bandwidth on the client and adaptively chooses chunks of video that can be downloaded fast enough, up to the limits of the device’s viewport, decoding, and processing capability. YouTube makes multiple versions of each video at different resolutions, with bigger resolutions having higher encoding bitrates.

01.png
Figure 1: HTTP-based Adaptive Video Streaming.

YouTube chooses how many bits are used to encode a particular resolution (within the limits that the codecs provide). A higher bitrate generally leads to better video quality for a given resolution but only up to a point. After that, a higher bitrate just makes the chunk bigger even though it doesn’t look better. When we choose the encoding bitrate for a resolution, we select the sweet spot on the corresponding bitrate-quality curve (see Figure 2) at the point where adding more data rate stops making the picture look meaningfully better.

02.png
Figure 2: Rate-quality curves of a video chunk for a given video codec at different encoding resolutions.

We found these sweet spots, but observing how people watch videos made us realize we could deliver great looking video even more efficiently.

These sweet spots assume that viewers are not bandwidth limited but if we set our encoding bitrates based only on those sweet spots for best looking video, we see that in practice video quality is often constrained by viewers’ bandwidth limitations. However, if we consider an operating point (other than the sweet spot) given our users’ bandwidth distribution (what we call streaming bandwidth), we end up providing better looking video (what we call delivered video quality).

A way to think about this is to imagine the bandwidth available to a user, as a pipe shown in Figure 3. Given the pipe’s capacity fits a 360p chunk but not a 480p chunk, we could tweak the 480p chunk size to be more likely to fit within that pipe by estimating the streaming bandwidth, thereby increasing the resolution users see. We solved the resulting constrained optimization problem to make sure there was no perceivable impact to video quality. In short, by analyzing aggregated playback statistics, and correspondingly altering the bitrates for various resolutions, we worked out how to stream higher quality video to more users.1

Figure 3: Efficient streaming scenario before and after our proposal

To understand how streaming bandwidth is different from an individual viewer’s bandwidth, consider the example in Figure 4 below. Given the measured distribution of viewers’ available bandwidth, the playback distribution can be estimated using the areas between the encoding bitrates of neighboring resolutions.

Using playback statistics, we are able to model the behavior of the player as it switches between resolutions. This allows us in effect to predict when an increased bitrate would be more likely to cause a player to switch to a lower resolution and thereby cancel the effect of bitrate increase in any one resolution. With this model, we are able to find better operating points for each video in the real world.1

04-new.png
Figure 4: For a given resolution 720p for example, the playback distribution across resolutions can be estimated from the probability density function of bandwidth. Partitioning the bandwidth using encoding bitrates of the different representations, the probability of watching a representation can then be estimated with the corresponding area under the bandwidth curve.

Another complication here is that the operating points provide an estimate of delivered quality, which is different from encoded quality. If the available bandwidth of a viewer decreases, then the viewer is more likely to switch down to a lower resolution, and therefore land on a different operating point. This doesn’t influence the encoded quality per resolution, but changes the delivered quality.

05.png
Fig.5 Our system for encoder optimization

In Figure 5, the Rate-quality analyzer takes the video to be encoded and generates rate-quality curves for each resolution. The Performance Estimator takes these curves and the distributions of viewer resolutions and streaming bandwidth to estimate possible operation points, so the Non-linear optimizer can choose the best possible set.

The output is a set of optimized operation points, one for each resolution. The optimization algorithm can be configured to minimize average streaming bandwidth subject to a constraint of delivered video quality or to maximize delivered video quality subject to a streaming bandwidth budget.

When we used this system to process HD videos, we delivered a reduction of 14 percent in the streaming bandwidth in YouTube playbacks. This reduction in bandwidth is expected to help the viewers to lower their data consumption when watching YouTube videos, which is especially helpful for those on limited data plans. We also saw watch time for the HD resolution increase by more than 6 percent as more people were able to stream higher-resolution videos on both fixed and mobile networks.

Another big benefit of this method is improved viewer experience. In addition to very low impact on delivered quality, these videos loaded up to 5 percent faster with 12 percent fewer rebuffering events.

We have made progress towards better video streaming efficiency. But we still want to do more.

Our optimization approach is currently based on global distribution of viewers’ bandwidth and player resolutions. But videos sometimes are viewed regionally. For example, a popular Indian music video may be less likely to be as popular in Brazil or a Spanish sporting event may not be played many times in Vietnam. Bandwidth and player resolution distributions vary from country to country. If we can accurately predict the geographic regions in which a video will become popular, then we could integrate the local bandwidth statistics to do a better job with those videos. We're looking into this now to try to make your video playback experience even better!

-- Balu Adsumilli, Steve Benting, Chao Chen, Anil Kokaram, and Yao-Chung Lin

1Chao Chen, Yao-Chung Lin, Anil Kokaram and Steve Benting, "Encoding Bitrate Optimization Using Playback Statistics for HTTP-based Adaptive Video Streaming," Arxiv, 2017

Resonance Audio: Multi-platform spatial audio at scale

Cross-posted from the VR Blog

Posted by Eric Mauskopf, Product Manager
As humans, we rely on sound to guide us through our environment, help us communicate with others and connect us with what's happening around us. Whether walking along a busy city street or attending a packed music concert, we're able to hear hundreds of sounds coming from different directions. So when it comes to AR, VR, games and even 360 video, you need rich sound to create an engaging immersive experience that makes you feel like you're really there. Today, we're releasing a new spatial audio software development kit (SDK) called Resonance Audio. It's based on technology from Google's VR Audio SDK, and it works at scale across mobile and desktop platforms.

Experience spatial audio in our Audio Factory VR app for Daydreamand SteamVR

Performance that scales on mobile and desktop

Bringing rich, dynamic audio environments into your VR, AR, gaming, or video experiences without affecting performance can be challenging. There are often few CPU resources allocated for audio, especially on mobile, which can limit the number of simultaneous high-fidelity 3D sound sources for complex environments. The SDK uses highly optimized digital signal processing algorithms based on higher order Ambisonics to spatialize hundreds of simultaneous 3D sound sources, without compromising audio quality, even on mobile. We're also introducing a new feature in Unity for precomputing highly realistic reverb effects that accurately match the acoustic properties of the environment, reducing CPU usage significantly during playback.

Using geometry-based reverb by assigning acoustic materials to a cathedral in Unity

Multi-platform support for developers and sound designers


We know how important it is that audio solutions integrate seamlessly with your preferred audio middleware and sound design tools. With Resonance Audio, we've released cross-platform SDKs for the most popular game engines, audio engines, and digital audio workstations (DAW) to streamline workflows, so you can focus on creating more immersive audio. The SDKs run on Android, iOS, Windows, MacOS and Linux platforms and provide integrations for Unity, Unreal Engine, FMOD, Wwise and DAWs. We also provide native APIs for C/C++, Java, Objective-C and the web. This multi-platform support enables developers to implement sound designs once, and easily deploy their project with consistent sounding results across the top mobile and desktop platforms. Sound designers can save time by using our new DAW plugin for accurately monitoring spatial audio that's destined for YouTube videos or apps developed with Resonance Audio SDKs. Web developers get the open source Resonance Audio Web SDK that works in the top web browsers by using the Web Audio API.
DAW plugin for sound designers to monitor audio destined for YouTube 360 videos or apps developed with the SDK

Model complex Sound Environments Cutting edge features

By providing powerful tools for accurately modeling complex sound environments, Resonance Audio goes beyond basic 3D spatialization. The SDK enables developers to control the direction acoustic waves propagate from sound sources. For example, when standing behind a guitar player, it can sound quieter than when standing in front. And when facing the direction of the guitar, it can sound louder than when your back is turned.

Controlling sound wave directivity for an acoustic guitar using the SDK

Another SDK feature is automatically rendering near-field effects when sound sources get close to a listener's head, providing an accurate perception of distance, even when sources are close to the ear. The SDK also enables sound source spread, by specifying the width of the source, allowing sound to be simulated from a tiny point in space up to a wall of sound. We've also released an Ambisonic recording tool to spatially capture your sound design directly within Unity, save it to a file, and use it anywhere Ambisonic soundfield playback is supported, from game engines to YouTube videos.
If you're interested in creating rich, immersive soundscapes using cutting-edge spatial audio technology, check out the Resonance Audio documentation on our developer site, let us know what you think through GitHub, and show us what you build with #ResonanceAudio on social media; we'll be resharing our favorites.

Variable speed playback on mobile

Variable speed playback was launched on the web several years ago and is one of our most highly requested features on mobile. Now, it’s here! You can speed up or slow down videos in the YouTube app on iOS and on Android devices running Android 5.0+. Playback speed can be adjusted from 0.25x (quarter speed) to 2x (double speed) in the overflow menu of the player controls.

The most commonly used speed setting on the web is 1.25x, closely followed by 1.5x. Speed watching is the new speed listening which was the new speed reading, especially when consuming long lectures or interviews. But variable speed isn’t just useful for skimming through content to save time, it can also be an important tool for investigating finer details. For example, you might want to slow down a tutorial to learn some new choreography or figure out a guitar strumming pattern.

To speed up or slow down audio while retaining its comprehensibility, our main challenge was to efficiently change the duration of the audio signal without affecting the pitch or introducing distortion. This process is called time stretching. Without time stretching, an audio signal that was originally at 100 Hz becomes 200 Hz at double speed causing that chipmunk effect. Similarly, slowing down the speed will lower the pitch. Time stretching can be achieved using a phase vocoder, which transforms the signal into its frequency domain representation to make phase adjustments before producing a lengthened or shortened version. Time stretching can also be done in the time domain by carefully selecting windows from the original signal to be assembled into the new one. On Android, we used the Sonic library for our audio manipulation in ExoPlayer. Sonic uses PICOLA, a time domain based algorithm. On iOS, AVplayer has a built in playback rate feature with configurable time stretching. Here, we have chosen to use the spectral (frequency domain) algorithm.

To speed up or slow down video, we render the video frames in alignment with the modified audio timestamps. Video frames are not necessarily encoded chronologically, so for the video to stay in sync with the audio playback, the video decoder needs to work faster than the rate at which the video frames need to be rendered. This is especially pertinent at higher playback speeds. On mobile, there are also often more network and hardware constraints than on desktop that limit our ability to decode video as fast as necessary. For example, less reliable wireless links will affect how quickly and accurately we can download video data, and then battery, CPU speed, and memory size will limit the processing power we can spend on decoding it. To address these issues, we adapt the video quality to be only as high as we can download dependably. The video decoder can also skip forward to the next key frame if it has fallen behind the renderer, or the renderer can drop already decoded frames to catch up to the audio track.

If you want to check out the feature, try this: turn up your volume and play the classic dramatic chipmunk at 0.5x to see an EVEN MORE dramatic chipmunk. Enjoy!


Posted by Pallavi Powale, Software Engineer, recently watched “Dramatic Chipmunk” at 0.5x speed.

Blur select faces with the updated Blur Faces tool

In 2012 we launched face blurring as a visual anonymity feature, allowing creators to obscure all faces in their video. Last February we followed up with custom blurring to let creators blur any objects in their video, even as they move. Since then we’ve been hard at work improving our face blurring tool.

Today we’re launching a new and improved version of Blur Faces, allowing creators to easily and accurately blur specific faces in their videos. The tool now displays images of the faces in the video, and creators simply click an image to blur that individual throughout their video.

english_us_short (3).gif

To introduce this feature, we had to improve the accuracy of our face detection tools, allowing for recognition of the same person across an entire video. The tool is designed for a wide array of situations that we see in YouTube videos, including users wearing glasses, occlusion (the face being blocked, for example, by a hand), and people leaving the video and coming back later.

Instead of having to use video editing software to manually create feathered masks and motion tracks, our Blur Faces tool automatically handles motion and presents creators with a thumbnail that encapsulates all instances of that individual recognized by our technology. Creators can apply these blurring edits to already uploaded videos without losing views, likes, and comments by choosing to “Save” the edits in-place. Applying the effect using “Save As New” and deleting the original video will remove the original unblurred video from YouTube for an extra level of privacy. The blur applied to the published video cannot be practically reversed, but keep in mind that blurring does not guarantee absolute anonymity.

To get to Blur Faces, go to the Enhance tool for a video you own. This can be done from the Video Manager or watch page. The Blur Faces tool can be found under the “Blurring Effects” tab of Enhancements. The following image shows how to get there.

english_us_gettofeature.gif

When you open the Blur Faces tool on your video for the first time, we start processing your video for faces. During processing, we break your video up into chunks of frames, and start detecting faces on each frame individually. We use a high-quality face detection model to increase our accuracy, and at the same time, we look for scene changes and compute motion vectors throughout the video which we will use later.

english_us_short2.gif

Once we’ve detected the faces in each frame of your video, we start matching face detections within a single scene of the video, relying on both the visual characteristics of the face as well as the face’s motion. To compute motion, we use the same technology that powers our Custom Blurring feature. Face detections aren’t perfect, so we use a few techniques to help us hone in on edge cases such as tracking motion through occlusions (see the water bottle in the above GIF) and near the edge of the video frame. Finally, we compute visual similarity across what we found in each scene, pick the best face to show as a thumbnail, and present it to you.

Before publishing your changes, we encourage you to preview the video. As we cannot guarantee 100 percent accuracy in every video, you can use our Custom Blurring tool to further enhance the automated face blurring edits in the same interface.

Ryan Stevens, Software Engineer, recently watched 158,962,555,217,826,360,000 (Enigma Machine), and Ian Pudney, Software Engineer, recently watched Wood burning With Lightning. Lichtenberg Figures!

Visualizing Sound Effects

At YouTube, we understand the power of video to tell stories, move people, and leave a lasting impression. One part of storytelling that many people take for granted is sound, yet sound adds color to the world around us. Just imagine not being able to hear music, the joy of a baby laughing, or the roar of a crowd. But this is often a reality for the 360 million people around the world who are deaf and hard of hearing. Over the last decade, we have been working to change that.

The first step came over ten years ago with the launch of captions. And in an effort to scale this technology, automated captions came a few years later. The success of that effort has been astounding, and a few weeks ago we announced that the number of videos with automatic captions now exceeds 1 billion. Moreover, people watch videos with automatic captions more than 15 million times per day. And we have made meaningful improvements to quality, resulting in a 50 percent leap in accuracy for automatic captions in English, which is getting us closer and closer to human transcription error rates.

But there is more to sound and the enjoyment of a video than words. In a joint effort between YouTube, Sound Understanding, and Accessibility teams, we embarked on the task of developing the first ever automatic sound effect captioning system for YouTube. This means finding a way to identify and label all those other sounds in the video without manual input.

We started this project by taking on a wide variety of challenges, such as how to best design the sound effect recognition system and what sounds to prioritize. At the heart of the work was utilizing thousands of hours of videos to train a deep neural network model to achieve high quality recognition results. There are more details in a companion post here.

As a result, we can now automatically detect the existence of these sound effects in a video and transcribe it to appropriate classes or sound labels. With so many sounds to choose from, we started with [APPLAUSE], [MUSIC] and [LAUGHTER], since these were among the most frequent manually captioned sounds, and they can add meaningful context for viewers who are deaf and hard of hearing.

So what does this actually look like when you are watching a YouTube video? The sound effect is merged with the automatic speech recognition track and shown as part of standard automatic captions.


Click the CC button to see the sound effect captioning system in action

We are still in the early stages of this work, and we are aware that these captions are fairly simplistic. However, the infrastructural backend to this system will allow us to expand and easily apply this framework to other sound classes. Future challenges might include adding other common sound classes like ringing, barking and knocking, which present particular problems -- for example, with ringing we need to be able to decipher if this is an alarm clock, a door or a phone as described here.

Since the addition of sound effect captions presented a number of unique challenges on both the machine learning end as well as the user experience, we continue to work to better understand the effect of the captioning system on the viewing experience, how viewers use sound effect information, and how useful it is to them. From our initial user studies, two-thirds of participants said these sound effect captions really enhance the overall experience, especially when they added crucial “invisible” sound information that people cannot tell from the visual cues. Overall, users reported that their experience wouldn't be impacted by the system making occasional mistakes as long as it was able to provide good information more often than not.

We are excited to support automatic sound effect captioning on YouTube, and we hope this system helps us make information useful and accessible for everyone.

Noah Wang, software engineer, recently watched "The Expert (Short Comedy Sketch)."