Posted by Peiyong Lin, Software Engineer
Android is now at the point where sRGB color gamut with 8 bits per color channel is not enough to take advantage of the display and camera technology. At Android we have been working to make wide color photography happen end-to-end, e.g. more bits and bigger gamuts. This means, eventually users will be able to capture the richness of the scenes, share a wide color pictures with friends and view wide color pictures on their phones. And now with Android Q, it's starting to get really close to reality: wide color photography is coming to Android. So, it's very important to applications to be wide color gamut ready. This article will show how you can test your application to see whether it's wide color gamut ready and wide color gamut capable, and the steps you need to take to be ready for wide color gamut photography.
But before we dive in, why wide color photography? Display panels and camera sensors on mobile are getting better and better every year. More and more newly released phones will be shipped with calibrated display panels, some are wide color gamut capable. Modern camera sensors are capable of capturing scenes with a wider range of color outside of sRGB and thus produce wide color gamut pictures. And when these two come together, it creates an end-to-end photography experience with more vibrant colors of the real world.
At a technical level, this means there will be pictures coming to your application with an ICC profile that is not sRGB but some other wider color gamut: Display P3, Adobe RGB, etc. For consumers, this means their photos will look more realistic.

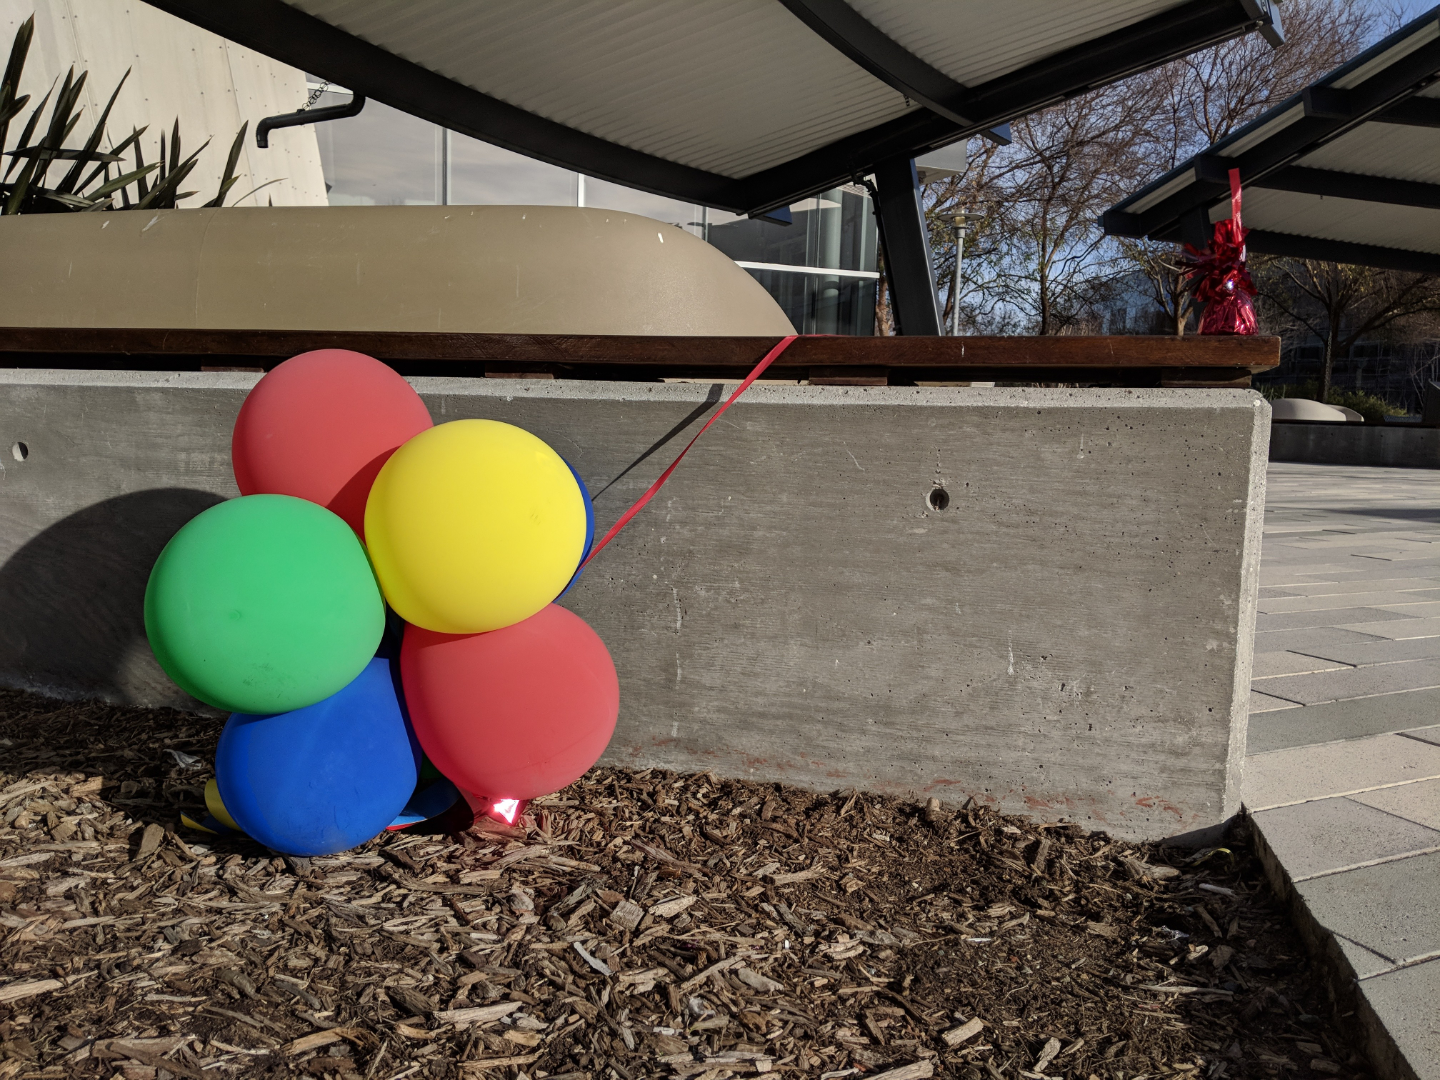
Display P3

SRGB

Display P3
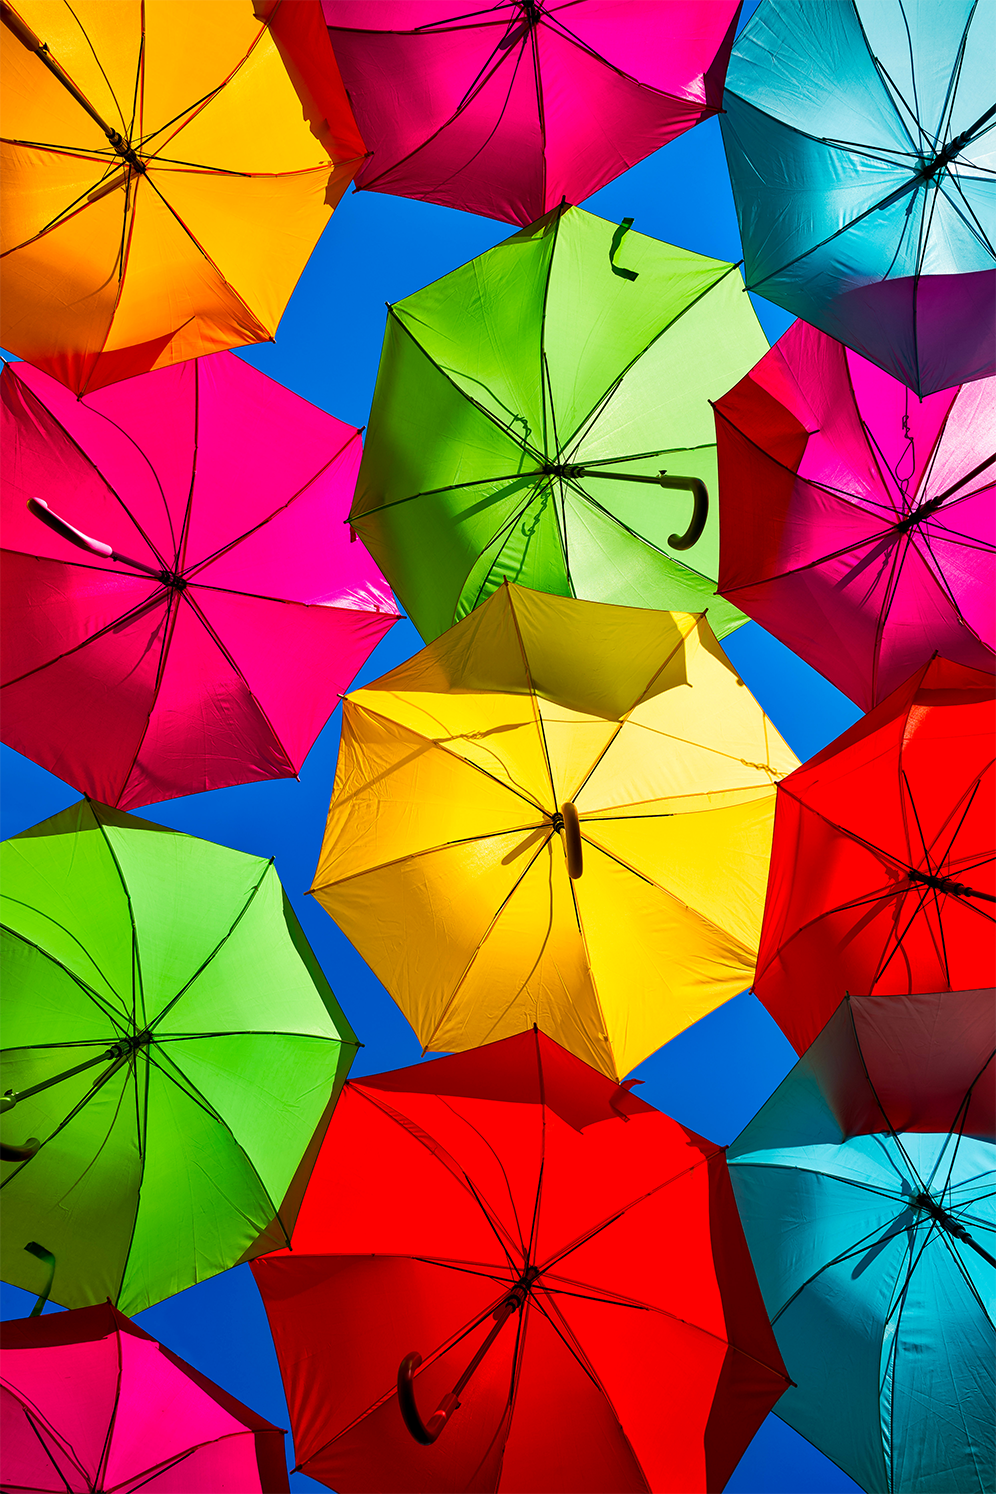
SRGB
Above are images of the Display P3 version and the SRGB version respectively of the same scene. If you are reading this article on a calibrated and wide color gamut capable display, you can notice the significant difference between these them.
Color Tests
There are two kinds of tests you can perform to know whether your application is prepared or not. One is what we call color correctness tests, the other is wide color tests.
Color Correctness test: Is your application wide color gamut ready?
A wide color gamut ready application implies the application manages color proactively. This means when given images, the application always checks the color space and does conversion based on its capability of showing wide color gamut, and thus even if the application can't handle wide color gamut it can still show the sRGB color gamut of the image correctly without color distortion.
Below is a color correct example of an image with Display P3 ICC profile.

However, if your application is not color correct, then typically your application will end up manipulating/displaying the image without converting the color space correctly, resulting in color distortion. For example you may get the below image, where the color is washed-out and everything looks distorted.
Wide Color test: Is your application wide color gamut capable?
A wide color gamut capable application implies when given wide color gamut images, it can show the colors outside of sRGB color space. Here's an image you can use to test whether your application is wide color gamut capable or not, if it is, then a red Android logo will show up. Note that you must run this test on a wide color gamut capable device, for example a Pixel 3 or Samsung Galaxy S10.

What you should do to prepare
To prepare for wide color gamut photography, your application must at least pass the wide color gamut ready test, we call it color correctness test. If your application passes the wide color gamut ready tests, that's awesome! But if it doesn't, here are the steps to make it wide color gamut ready.
The key thing to be prepared and future proof is that your application should never assume sRGB color space of the external images it gets. This means application must check the color space of the decoded images, and do the conversion when necessary. Failure to do so will result in color distortion and color profile being discarded somewhere in your pipeline.
Mandatory: Be Color Correct
You must be at least color correct. If your application doesn't adopt wide color gamut, you are very likely to just want to decode every image to sRGB color space. You can do that by either using BitmapFactory or ImageDecoder.
Using BitmapFactory
In API 26, we added inPreferredColorSpace in BitmapFactory.Option, which allows you to specify the target color space you want the decoded bitmap to have. Let's say you want to decode a file, then below is the snippet you are very likely to use in order to manage the color:
final BitmapFactory.Options options = new BitmapFactory.Options();
// Decode this file to sRGB color space.
options.inPreferredColorSpace = ColorSpace.get(Named.SRGB);
Bitmap bitmap = BitmapFactory.decodeFile(FILE_PATH, options);
Using ImageDecoder
In Android P (API level 28), we introduced ImageDecoder, a modernized approach for decoding images. If you upgrade your apk to API level 28 or beyond, we recommend you to use it instead of the BitmapFactory and BitmapFactory.Option APIs.
Below is a snippet to decode the image to an sRGB bitmap using ImageDecoder#decodeBitmap API.
ImageDecoder.Source source =
        ImageDecoder.createSource(FILE_PATH);
try {
    bitmap = ImageDecoder.decodeBitmap(source,
            new ImageDecoder.OnHeaderDecodedListener() {
                @Override
                public void onHeaderDecoded(ImageDecoder decoder,
                        ImageDecoder.ImageInfo info,
                        ImageDecoder.Source source) {
                    decoder.setTargetColorSpace(ColorSpace.get(Named.SRGB));
                }
            });
} catch (IOException e) {
    // handle exception.
}
ImageDecoder also has the advantage to let you know the encoded color space of the bitmap before you get the final bitmap by passing an ImageDecoder.OnHeaderDecodedListener and checking ImageDecoder.ImageInfo#getColorSpace(). And thus, depending on how your applications handle color spaces, you can check the encoded color space of the contents and set the target color space differently.
ImageDecoder.Source source =
        ImageDecoder.createSource(FILE_PATH);
try {
    bitmap = ImageDecoder.decodeBitmap(source,
            new ImageDecoder.OnHeaderDecodedListener() {
                @Override
                public void onHeaderDecoded(ImageDecoder decoder,
                        ImageDecoder.ImageInfo info,
                        ImageDecoder.Source source) {
                    ColorSpace cs = info.getColorSpace();
                    // Do something...
                }
            });
} catch (IOException e) {
    // handle exception.
}
For more detailed usage you can check out the ImageDecoder APIs here.
Known bad practices
Some typical bad practices include but are not limited to:
- Always assume sRGB color space
- Upload image as texture without necessary conversion
- Ignore the ICC profile during compression
All these cause a severe users perceived results: Color distortion. For example, below is a code snippet that results in the application not color correct:
// This is bad, don't do it!
final BitmapFactory.Options options = new BitmapFactory.Options();
final Bitmap bitmap = BitmapFactory.decodeFile(FILE_PATH, options);
glTexImage2D(GLES20.GL_TEXTURE_2D, 0, GLES31.GL_RGBA, bitmap.getWidth(),
        bitmap.getHeight(), 0, GLES20.GL_RGBA, GLES20.GL_UNSIGNED_BYTE, null);
GLUtils.texSubImage2D(GLES20.GL_TEXTURE_2D, 0, 0, 0, bitmap,
        GLES20.GL_RGBA, GLES20.GL_UNSIGNED_BYTE);
There's no color space checking before uploading the bitmap as the texture, and thus the application will end up with the below distorted image from the color correctness test.

Optional: Be wide color capable
Besides the above changes you must make in order to handle images correctly, if your applications are heavily image based, you will want to take additional steps to display these images in the full vibrant range by enabling the wide gamut mode in your manifest or creating a Display P3 surfaces.
To enable the wide color gamut in your activity, set the colorMode attribute to wideColorGamut in your AndroidManifest.xml file. You need to do this for each activity for which you want to enable wide color mode.
android:colorMode="wideColorGamut"
You can also set the color mode programmatically in your activity by calling the setColorMode(int) method and passing in COLOR_MODE_WIDE_COLOR_GAMUT.
To render wide color gamut contents, besides the wide color contents, you will also need to create a wide color gamut surfaces to render to. In OpenGL for example, your application must first check the following extensions:
And then, request the Display P3 as the color space when creating your surfaces, as shown in the following code snippet:
private static final int EGL_GL_COLORSPACE_DISPLAY_P3_PASSTHROUGH_EXT = 0x3490;

public EGLSurface createWindowSurface(EGL10 egl, EGLDisplay display,
                                      EGLConfig config, Object nativeWindow) {
  EGLSurface surface = null;
  try {
    int attribs[] = {
      EGL_GL_COLORSPACE_KHR, EGL_GL_COLORSPACE_DISPLAY_P3_PASSTHROUGH_EXT,
      egl.EGL_NONE
    };
    surface = egl.eglCreateWindowSurface(display, config, nativeWindow, attribs);
  } catch (IllegalArgumentException e) {}
  return surface;
}
Also check out our post about more details on how you can adopt wide color gamut in native code.
APIs design guideline for image library
Finally, if you own or maintain an image decoding/encoding library, you will need to at least pass the color correctness tests as well. To modernize your library, there are two things we strongly recommend you to do when you extend APIs to manage color:
- Strongly recommend to explicitly accept ColorSpace as a parameter when you design new APIs or extend existing APIs. Instead of hardcoding a color space, an explicit ColorSpace parameter is a more future-proof way moving forward.
- Strongly recommend all legacy APIs to explicitly decode the bitmap to sRGB color space. Historically there's no color management, and thus Android has been treating everything as sRGB implicitly until Android 8.0 (API level 26). This allows you to help your users maintain backward compatibility.
After you finish, go back to the above section and perform the two color tests.