Category Archives: Android Developers Blog

An Open Handset Alliance Project

A New Approach to Real-Money Games on Google Play

Posted by Karan Gambhir – Director, Global Trust and Safety Partnerships

As a platform, we strive to help developers responsibly build new businesses and reach wider audiences across a variety of content types and genres. In response to strong demand, in 2021 we began onboarding a wider range of real-money gaming (RMG) apps in markets with pre-existing licensing frameworks. Since then, this app category has continued to flourish with developers creating new RMG experiences for mobile.

To ensure Google Play keeps up with the pace of developer innovation, while promoting user safety, we’ve since conducted several pilot programs to determine how to support more RMG operators and game types. For example, many developers in India were eager to bring RMG apps to more Android users, so we launched a pilot program, starting with Rummy and Daily Fantasy Sports (DFS), to understand the best way to support their businesses.

Based on the learnings from the pilots and positive feedback from users and developers, Google Play will begin supporting more RMG apps this year, including game types and operators not covered by an existing licensing framework. We’ll launch this expanded RMG support in June to developers for their users in India, Mexico, and Brazil, and plan to expand to users in more countries in the future.

We’re pleased that this new approach will provide new business opportunities to developers globally while continuing to prioritize user safety. It also enables developers currently participating in RMG pilots in India and Mexico to continue offering their apps on Play.

    • India pilot: For developers in the Google Play Pilot Program for distributing DFS and Rummy apps to users in India, we are extending the grace period for pilot apps to remain on Google Play until June 30, 2024 when the new policy will take effect. After that time, developers can distribute RMG apps on Google Play to users in India, beyond DFS and Rummy, in compliance with local laws and our updated policy.
    • Mexico pilot: For developers in the Google Play Pilot Program for DFS in Mexico, the pilot will end as scheduled on June 30, 2024, at which point developers can distribute RMG apps on Google Play to users in Mexico, beyond DFS, in compliance with local laws and our updated policy.

Google Play’s existing developer policies supporting user safety, such as requiring age-gating to limit RMG experiences to adults and requiring developers use geo-gating to offer RMG apps only where legal, remain unchanged and we’ll continue to strengthen them. In addition, Google Play will continue other key user safety and transparency efforts such as our expanded developer verification mechanisms.

With this policy update, we will also be evolving our service fee model for RMG to reflect the value Google Play provides and to help sustain the Android and Play ecosystems. We are working closely with developers to ensure our new approach reflects the unique economics and various developer earning models of this industry. We will have more to share in the coming months on our new policy and future expansion plans.

For developers already involved in the real-money gaming space, or those looking to expand their involvement, we hope this helps you prepare for the upcoming policy change. As Google Play evolves our support of RMG around the world, we look forward to helping you continue to delight users, grow your businesses, and launch new game types in a safe way.

What’s new with Google Cast?

Posted by Meher Vurimi, Product Manager

Since we launched Google Cast in 2013, we've been working to bring casting capabilities to more apps and devices. We have come a long way. Now, users can cast to many new devices, like TVs, speakers, smart displays, and even the latest Pixel Tablet. We are very excited to launch new features that make it more seamless to cast on Android.

Output Switcher

Moving image of output switcher showing various device categories
Figure 1: Output Switcher showing various device categories

Android makes moving media between various devices– including phones to TVs, tablets, speakers, and smart displays–easy with Output Switcher. Output Switcher is easily accessible from the Android System UI and aims to allow cross-device transfer and control in one place for different technical protocols. With Output Switcher 2.0 on Android U, you can also see improved volume control, device categories, and support for devices with custom protocols.

More information can be found in the Google Cast developer guide and Media router.

    • Enable Output Switcher in AndroidManifest.xml
<application>
    ...
    <receiver
         android:name="androidx.mediarouter.media.MediaTransferReceiver"
         android:exported="true">
    </receiver>
    ...
</application>

    • Update SessionManagerListener for background casting
class MyService : Service() {
    private var castContext: CastContext? = null
    protected fun onCreate() {
        castContext = CastContext.getSharedInstance(this)
        castContext
            .getSessionManager()
            .addSessionManagerListener(sessionManagerListener, 
CastSession::class.java)
    }

    protected fun onDestroy() {
        if (castContext != null) {
            castContext
                .getSessionManager()
                .removeSessionManagerListener(sessionManagerListener, 
CastSession::class.java)
        }
    }
}

    • Support Remote-to-Local playback
class MySessionTransferCallback : SessionTransferCallback() {
        fun onTransferring(@SessionTransferCallback.TransferType transferType: 
Int) {
            // Perform necessary steps prior to onTransferred
        }

        fun onTransferred(@SessionTransferCallback.TransferType transferType: 
Int,
                          sessionState: SessionState?) {
            if (transferType == SessionTransferCallback.TRANSFER_TYPE_FROM_REMOTE_TO_LOCAL) {
                // Remote stream is transferred to the local device.
                // Retrieve information from the SessionState to continue playback on the local player.
            }
        }

        fun onTransferFailed(@SessionTransferCallback.TransferType transferType: 
Int,
                             @SessionTransferCallback.TransferFailedReason 
transferFailedReason: Int) {
            // Handle transfer failure.
        }
    }

Cast to devices nearby

Moving image showing bringing an Android phone close to the docked Pixel Tablet to transfer media
Figure 2: Bring your Android phone close to the docked Pixel Tablet to transfer media

It will soon be possible to cast to devices nearby in a whole new way when you have a Pixel Pro phone and a docked Pixel Tablet. Users can transfer ongoing music from their Pixel Pro phone to a docked Pixel Tablet just by bringing the phone closer to the docked tablet. Similarly, they can transfer the music to their phone from a docked Pixel Tablet just by holding the phone closer to the tablet. This feature needs Output Switcher integration as a prerequisite.

Cast from short-form video apps

Moving image showing enabling and disabling autoplay for short-form content
Figure 3: Enabling and disabling autoplay for short-form content (autoplay is enabled by default)

Short-form content is extremely popular and growing in use. Google Cast can make it easy for users to watch their favorite short-form content on TVs or other cast-enabled devices. Now, you can easily extend Google Cast support into your apps. These are the guidelines we put together to provide a great user experience to your users.

cast from your phone

Ensure that the Google Cast icon is prominently displayed on every screen with playable content on the top right corner. Users automatically understand they can cast media to a TV just by seeing the Cast icon.

cast with autoplay

Users will also have an option to disable autoplay to cast a specific video. When autoplay is enabled, playback automatically transitions to the next video without any user intervention.

Persistent Cast icon

Moving image showing cast icon and error message for users to troubleshoot if no devices  are found
Figure 4: Cast icon is shown even if the sender device is not connected to Wi-Fi, showcasing an error message for users to troubleshoot if no devices are found.

We've heard feedback that when users don't see the cast icon, they assume their Chromecast built-in devices haven't been discovered. To improve user experience and discovery, we have introduced the “Persistent cast icon”. With this support, users will see the cast icon whenever they need and can receive better help and guidance on why they don’t see a specific device. In addition, we've updated when device discovery starts. More information can be found in the Google Cast Developer Guide.

Shaka Player

For any Web Receiver applications streaming HLS content, we recommend looking into migrating to Shaka Player for playback. The current player (MPL) will no longer adopt feature updates. As a result, the Web Receiver SDK has increased support for HLS playback using Shaka Player on the device targets and has introduced an opt-in flag to enable it. Refer to the Shaka Player migration guide hosted on the DevSite for more information and implementation details.

To opt-in to use Shaka Player for HLS content use the following snippet in your Google Cast Receiver application:

const context = cast.framework.CastReceiverContext.getInstance();

const castReceiverOptions = new cast.framework.CastReceiverOptions();
castReceiverOptions.useShakaForHls = true;

context.start(castReceiverOptions);

Cast to new devices

Moving image showing the experience of casting to an LG TV as a first time user
Figure 5: Casting to LG TVs for a first time user

We have been continuously working with various OEMs to bring Chromecast built-in to new devices. Last year, we launched Chromecast built-in to new speakers, while also introducing the receiver support on docked Pixel Tablets.

As always, Google TVs come with Chromecast built-in, including the new Hisense ULED and ULED X Series, latest TCL Q Class models, and new TCL QM7 line. In fact, there are now over 220 million monthly active Google TV and other Android TV OS devices, and we’re just getting started. More devices are launching with Chromecast built-in, like the 2024 LG TV series.

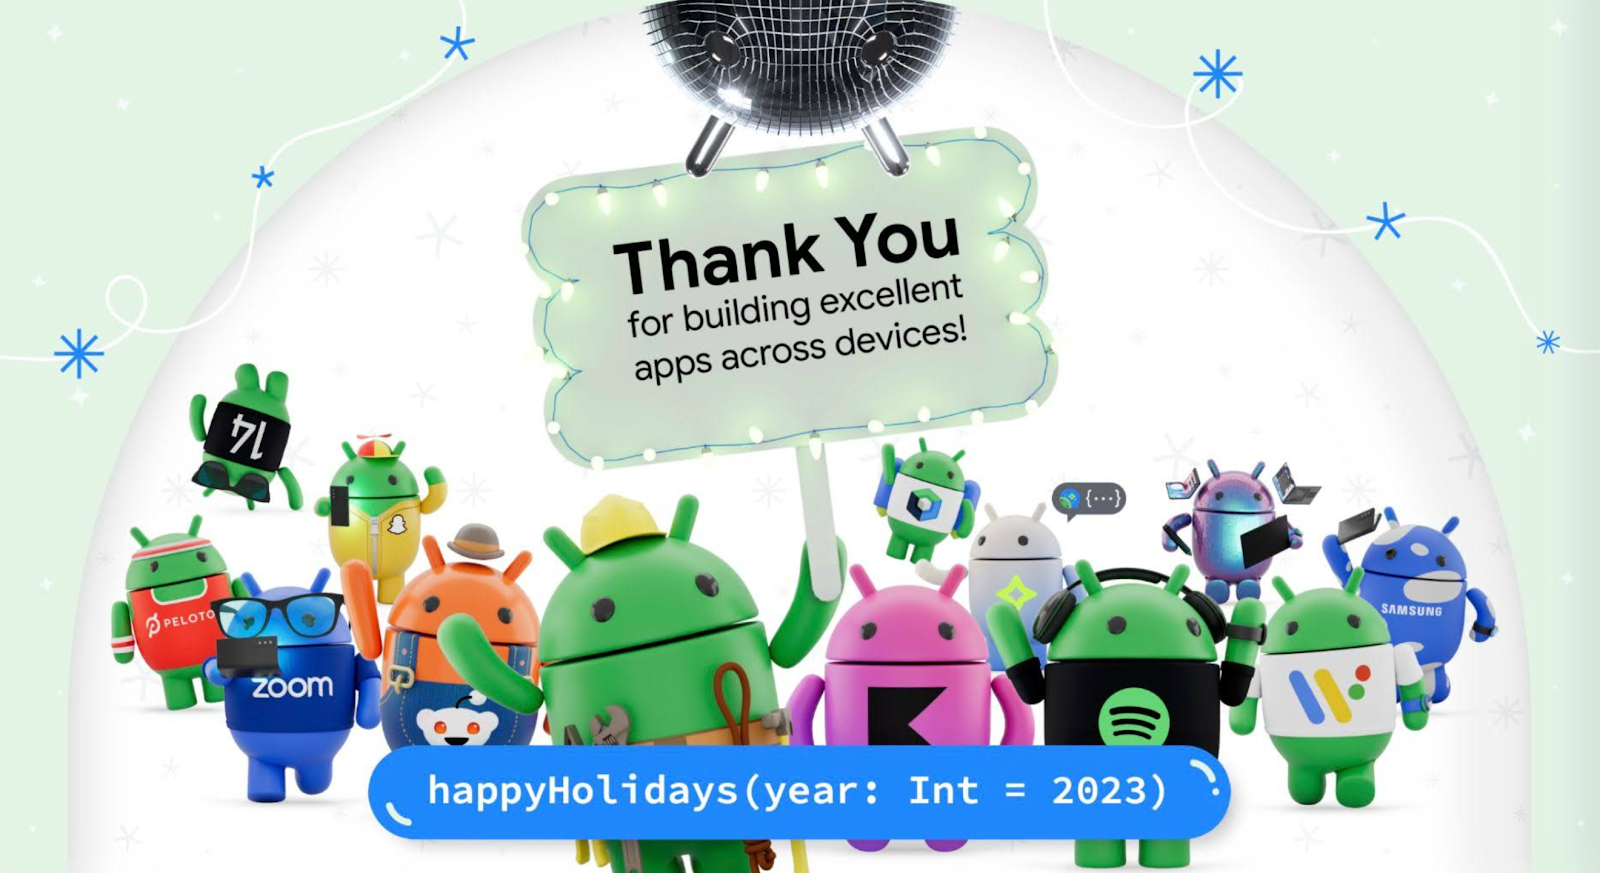
Thank you for creating excellent apps, across devices in 2023!

Posted by Anirudh Dewani, Director of Android Developer Relations

Hello Android Developers,

As we approach the end of 2023, I wanted to take a moment to reflect on all that we've accomplished together as a community, and send a huge *thank you* for all of your work!

It's been an incredible year for Android, with many new features and improvements released as part of the platform as well as many new delightful app experiences crafted and delivered by you, all for the benefit of our users across the world. Here are just a few of the highlights:

    • The release of feature packed and highly performant Android 14, our most ambitious release to date.
    • The incredible momentum on large screens and Wear OS, fueled by hardware innovations of device makers and by the great app experiences you build for users
    • The growth of Compose, from being a mobile developer toolkit to Compose Everywhere, helping you build excellent apps for mobile, tablets, wear and TV,
    • And the growth of the entire Android Developer community around the world, and the millions of amazing apps you build for users!

I'm so proud of everything we've achieved together this year!

Your hard work and dedication continue to make Android the best mobile platform in the world, and I want to thank you for being a part of this community. Your contributions are invaluable, and I'm grateful for your continued support.

Thanks again for all that you do, and we can’t wait to see what you build next year!

Best,
Anirudh Dewani
Director, Android Developer Relations

Thank You for building excellent apps across devices! 0 PELOTO zoom SAMSUNG happyHolidays (year: Int = 2023)

Increase your app’s availability across device types

Posted by Alex Vanyo – Developer Relations Engineer

TL;DR: Remove unnecessary feature requirements that prevent users from downloading your app on devices that don’t support the features. Automate tracking feature requirements and maximize app availability with badging!

Required features reduce app availability

<uses-feature> is an app manifest element that specifies whether your app depends on a hardware or software feature. By default, <uses-feature> specifies that a feature is required. To indicate that the feature is optional, you must add the android:required="false" attribute.

Google Play filters which apps are available to download based on required features. If the user’s device doesn’t support some hardware or software feature, then an app that requires that feature won’t be available for the user to download.

<uses-permission>, another app manifest element, complicates things by implicitly requiring features for permissions such as CAMERA or BLUETOOTH (see Permissions that imply feature requirements). The initial declared orientations for your activities can also implicitly require hardware features.

The system determines implicitly required features after merging all modules and dependencies, so it may not be clear to you which features your app ultimately requires. You might not even be aware when the list of required features has changed. For example, integrating a new dependency into your app might introduce a new required feature. Or the integration might request additional permissions, and the permissions could introduce new, implicitly required features.

This behavior has been around for a while, but Android has changed a lot over the years. Android apps now run on phones, foldables, tablets, laptops, cars, TVs and watches, and these devices are more varied than ever. Some devices don’t have telephony services, some don’t have touchscreens, some don’t have cameras.

Expectations based on permissions have also changed. With runtime permissions, a <uses-permission> declaration in the manifest no longer guarantees that your app will be granted that permission. Users can choose to deny access to hardware in favor of other ways to interact with the app. For example, instead of giving an app permission to access the device’s location, a user may prefer to always search for a particular location instead.

Banking apps shouldn’t require the device to have an autofocusing camera for check scanning. They shouldn’t specify that the camera must be a front or rear camera or that the device has a camera at all! It should be enough to allow the user to upload a picture of a check from another source.

Apps should support keyboard navigation and mouse input for accessibility and usability reasons, so strictly requiring a hardware touchscreen should not be necessary.

Apps should support both landscape and portrait orientations, so they shouldn’t require that the screen could be landscape-oriented or could be portrait-oriented. For example, screens built in to cars may be in a fixed landscape orientation. Even if the app supports both landscape and portrait, the app could be unnecessarily requiring that the device supports being used in portrait, which would exclude those cars.

Determine your app’s required features

You can use aapt2 to output information about your APK, including the explicitly and implicitly required features. The logic matches how the Play Store filters app availability.

aapt2 dump badging <path_to_.apk>

In the Play Console, you can also check which devices are being excluded from accessing your app.

Increase app availability by making features optional

Most apps should not strictly require hardware and software features. There are few guarantees that the user will allow using that feature in the first place, and users expect to be able to use all parts of your app in the way they see fit. To increase your app’s availability across form factors:

    • Provide alternatives in case the feature is not available, ensuring your app doesn’t need the feature to function.
    • Add android:required="false" to existing <uses-feature> tags to mark the feature as not required (or remove the tag entirely if the app no longer uses a feature).
    • Add the <uses-feature> tag with android:required="false" for implicitly required feature due to declaring permissions that imply feature requirements.

Prevent regressions with CI and badging

To guard against regressions caused by inadvertently adding a new feature requirement that reduces device availability, automate the task of determining your app’s features as part of your build system. By storing the badging output of the aapt2 tool in a text file and checking the file into version control, you can track all declared permissions and explicitly and implicitly required features from your final universal apk. This includes all features and permissions included by transitive dependencies, in addition to your own.

You can automate badging as part of your continuous integration setup by setting up three Gradle tasks for each variant of your app you want to validate. Using release as an example, create these three tasks:

    • generateReleaseBadging – Generates the badging file from the universal APK using the aapt2 executable. The output of this task (the badging information) is used for the following two tasks.
    • updateReleaseBadging – Copies the generated badging file into the main project directory. The file is checked into source control as a golden badging file.
    • checkReleaseBadging – Validates the generated badging file against the golden badging file.

CI should run checkReleaseBadging to verify that the checked-in golden badging file still matches the generated badging file for the current code. If code changes or dependency updates have caused the badging file to change in any way, CI fails.

Screen grab of failing CI due to adding a new permission and required feature without updating the badging file.
Failing CI due to adding a new permission and required feature without updating the badging file.

When changes are intentional, run updateReleaseBadging to update the golden badging file and recheck it into source control. Then, this change will surface in code review to be validated by reviewers that the badging changes are expected.

Screen grab showing updated golden badging file for review with additional permission and implied required feature.
Updated golden badging file for review with additional permission and implied required feature.

CI-automated badging guards against changes inadvertently causing a new feature to be required, which would reduce availability of the app.

For a complete working example of a CI system verifying the badging file, check out the setup in the Now in Android app.

Keep features optional

Android devices are continually becoming more varied, with users expecting a great experience from your Android app regardless of the type of device they’re using. While some software or hardware features might be essential to your app’s function, in many cases they should not be strictly required, needlessly preventing some users from downloading your app.

Use the badging output from aapt2 to check which features your app requires, and use the Play Console to verify which devices the requirements are preventing from downloading your app. You can automatically check your app’s badging in CI and catch regressions.

Bottom line: If you don’t absolutely need a feature for your entire app to function, make the feature optional to ensure your app’s availability to the greatest number of devices and users.

Learn more by checking out our developer guide.

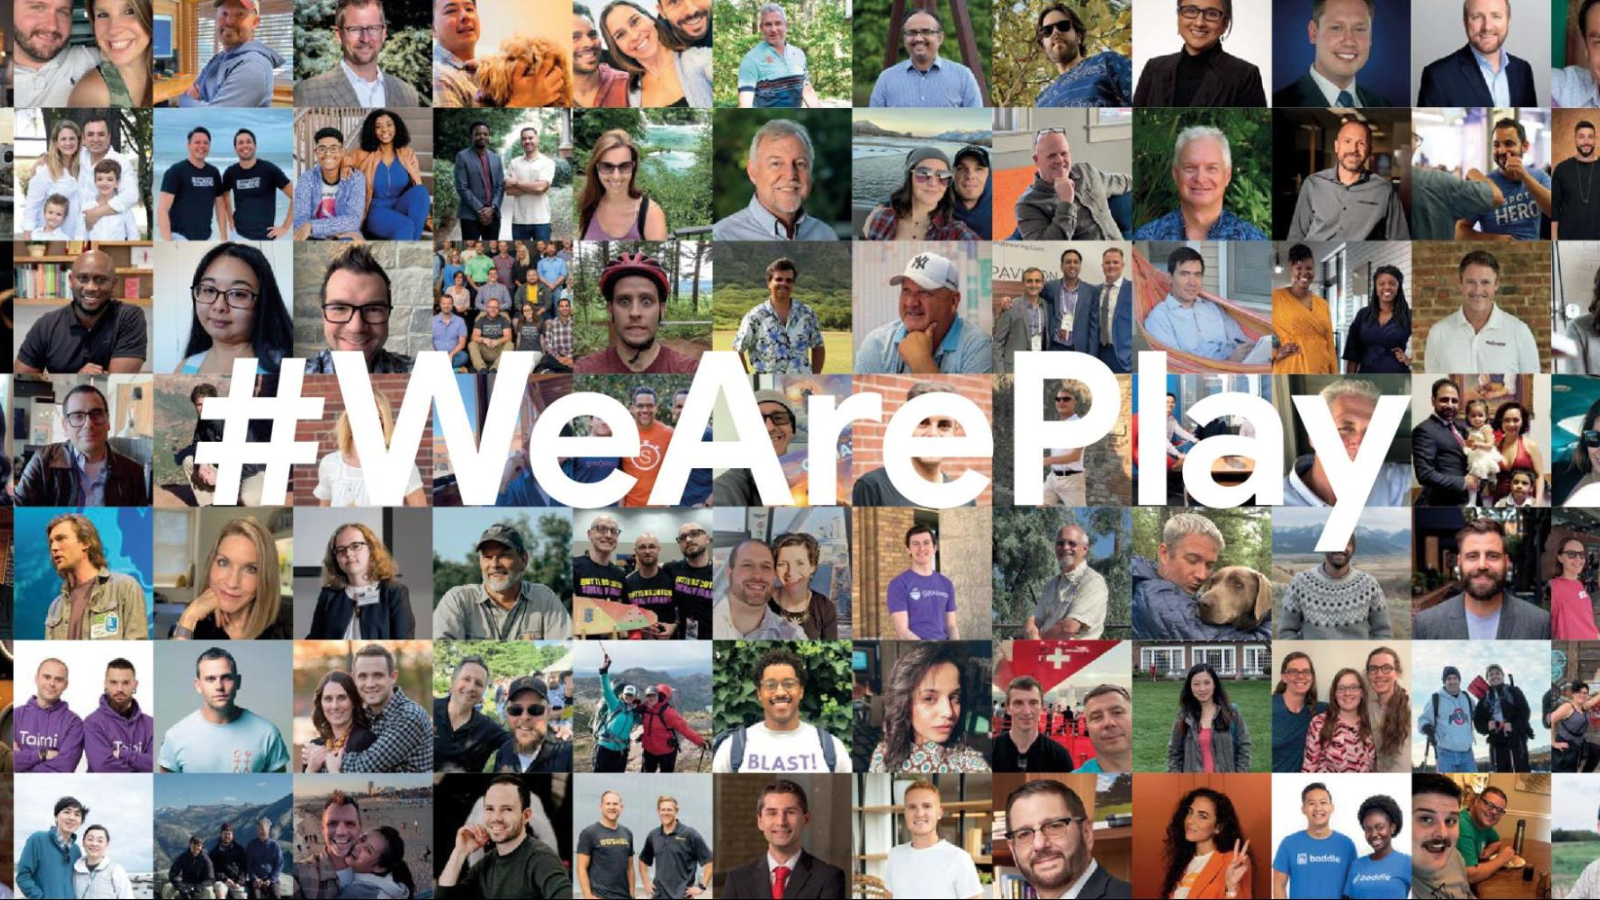
#WeArePlay | Meet Steven from Indonesia. More stories from around the world.

Posted by Leticia Lago, Developer Marketing

As we bid farewell to 2023, we're excited to unveil our last #WeArePlay blog post of the year. From Lisbon to Dubai, let’s meet the creators behind the game-changing apps supporting communities, bringing innovation and joy to people.


We’re starting off in Indonesia, where Steven remembers his pocket money quickly running out while traveling around rural areas of Indonesia with his parents. Struck by how much more expensive food items were in the villages compared to Jakarta, he was inspired to create Super, providing more affordable goods outside the capital. The app allows shop owners to buy items stored locally and supply them to their communities at lower prices. It's helped boost the hyperlocal supply chain and raise living standards for rural populations. Steven is keen to point out that “it’s not just about entrepreneurship”, but “social impact”. He hopes to take Super even further and improve economic distribution across the whole of rural Indonesia.


ALT TEXT

Next, we’re crossing the Java Sea to Singapore, where twin brothers – and marathon runners – Jeromy and Kenny decided to turn their passion for self-care into a journaling app. On Journey, people can log their daily thoughts and work towards their mental health and self-improvement goals using prompts. With the guidance of coaches, they can practice gratitude, record their ambitions, and learn about mindfulness and building self-confidence. “People tell us it helps them find time to invest in themselves and dedicate space to self-care”, says Jeromy. In the future, the pair want to bring in additional coaches to support even more people to achieve their wellness goals.


ALT TEXT

Now we’re landing in the Middle East where former kindergarten friends Chris and Rene decided to use their experience being expats in Dubai to create a platform for connecting disparate communities across the city. On Hayi حي, locals can share information with their neighbors, find help within the community and connect with those living nearby. “Community is at the heart of everything we do and our goal is to have a positive effect”, says Chris. They’re currently working on creating groups for art and sport enthusiasts to encourage residents to bond over their interests. The pair are also dedicated to sustainability and plan on launching environmental projects, such as wide-scale city clean-ups.


ALT TEXT

And finally, we’re off to Europe where Lisbon-based university chums Rita, João and Martim saw unexpected success. Initially, the trio created a recipe-sharing platform, SaveCook. When they launched its accompaniment, Super Save, however, which compared prices of recipe ingredients across different supermarkets, it exploded in popularity. With rising inflation, people were hugely thankful to the founders “for providing a major service” at such a crucial time. Next, they’re working on a barcode scanner that tells shoppers where they can buy cheaper versions of products “to help people save as much as they can.”

Discover more founder stories from across the globe in the #WeArePlay collection.


How useful did you find this blog post?

Leverage Gemini in your Android apps

Posted by Dave Burke, VP of Engineering

Last week we unveiled our most capable foundation model, Gemini. Gemini is multimodal – it can accept both text and image inputs. We introduced a way for Android developers to leverage our smallest model Gemini Nano, on-device. This is available on select devices through AICore, a system service that handles model management, runtimes, safety features and more, simplifying the work for developers. And today, we're introducing new ways for Android developers to access the Gemini Pro model – which runs off-device, in Google's data centers.

App development with Gemini Pro

Gemini Pro is accessible via the Gemini API, and it’s our best model for scaling across a wide range of text and image reasoning tasks. To simplify integrating Gemini Pro, you can use the Google AI SDK, a client SDK for Android. This SDK enables direct integration from Android apps and removes the need for developers to build and manage their own backend infrastructure, reducing development costs and improving velocity.

Google AI Studio provides a streamlined way for developers to integrate the Gemini Pro model, craft prompts, create API keys, and effortlessly transform ideas into AI apps. Once you have developed your prompt in Google AI Studio, you can simply click on the “Get code” action to generate a Kotlin code snippet, and start integrating Gemini today using the Google AI SDK for Android.

ALT TEXT
Generate Kotlin code for the Gemini API in Google AI Studio

We are also making it easier for developers to use the Gemini API directly in the latest preview version of Android Studio. We’re introducing a new project template for developers to get started with the Google AI SDK for Android right away. You’ll benefit from Android Studio’s enhanced code completion and lint checkers, helping with API keys and security.

ALT TEXT
New Project template for AI in Android Studio

To leverage the new template in Android Studio, start a new project through File > New > New Project and pick the Gemini API starter template. This template provides a pre-configured project with the necessary code to use the Gemini API. After choosing a project name and location, you will be prompted to generate an API key in Google AI Studio, and asked to enter it in Android Studio. Android Studio will automatically set up the project for you with the Gemini API connection, simplifying your workflow.

Alternatively, you can import the generative AI code sample and set it up in Android Studio through File > New > Import Sample, and searching for "Generative AI Sample".

Get started building AI-powered features and Android apps using Gemini Pro.

Faster Rust Toolchains for Android

Posted by Chris Wailes - Senior Software Engineer

The performance, safety, and developer productivity provided by Rust has led to rapid adoption in the Android Platform. Since slower build times are a concern when using Rust, particularly within a massive project like Android, we've worked to ship the fastest version of the Rust toolchain that we can. To do this we leverage multiple forms of profiling and optimization, as well as tuning C/C++, linker, and Rust flags. Much of what I’m about to describe is similar to the build process for the official releases of the Rust toolchain, but tailored for the specific needs of the Android codebase. I hope that this post will be generally informative and, if you are a maintainer of a Rust toolchain, may make your life easier.

Android’s Compilers

While Android is certainly not unique in its need for a performant cross-compiling toolchain this fact, combined with the large number of daily Android build invocations, means that we must carefully balance tradeoffs between the time it takes to build a toolchain, the toolchain’s size, and the produced compiler’s performance.

Our Build Process

To be clear, the optimizations listed below are also present in the versions of rustc that are obtained using rustup. What differentiates the Android toolchain from the official releases, besides the provenance, are the cross-compilation targets available and the codebase used for profiling. All performance numbers listed below are the time it takes to build the Rust components of an Android image and may not be reflective of the speedup when compiling other codebases with our toolchain.

Codegen Units (CGU1)

When Rust compiles a crate it will break it into some number of code generation units. Each independent chunk of code is generated and optimized concurrently and then later re-combined. This approach allows LLVM to process each code generation unit separately and improves compile time but can reduce the performance of the generated code. Some of this performance can be recovered via the use of Link Time Optimization (LTO), but this isn’t guaranteed to achieve the same performance as if the crate were compiled in a single codegen unit.

To expose as many opportunities for optimization as possible and ensure reproducible builds we add the -C codegen-units=1 option to the RUSTFLAGS environment variable. This reduces the size of the toolchain by ~5.5% while increasing performance by ~1.8%.

Be aware that setting this option will slow down the time it takes to build the toolchain by ~2x (measured on our workstations).

GC Sections

Many projects, including the Rust toolchain, have functions, classes, or even entire namespaces that are not needed in certain contexts. The safest and easiest option is to leave these code objects in the final product. This will increase code size and may decrease performance (due to caching and layout issues), but it should never produce a miscompiled or mislinked binary.

It is possible, however, to ask the linker to remove code objects that aren’t transitively referenced from the main()function using the --gc-sections linker argument. The linker can only operate on a section-basis, so, if any object in a section is referenced, the entire section must be retained. This is why it is also common to pass the -ffunction-sections and -fdata-sections options to the compiler or code generation backend. This will ensure that each code object is given an independent section, thus allowing the linker’s garbage collection pass to collect objects individually.

This is one of the first optimizations we implemented and, at the time, it produced significant size savings (on the order of 100s of MiBs). However, most of these gains have been subsumed by those made from setting -C codegen-units=1 when they are used in combination and there is now no difference between the two produced toolchains in size or performance. However, due to the extra overhead, we do not always use CGU1 when building the toolchain. When testing for correctness the final speed of the compiler is less important and, as such, we allow the toolchain to be built with the default number of codegen units. In these situations we still run section GC during linking as it yields some performance and size benefits at a very low cost.

Link-Time Optimization (LTO)

A compiler can only optimize the functions and data it can see. Building a library or executable from independent object files or libraries can speed up compilation but at the cost of optimizations that depend on information that’s only available when the final binary is assembled. Link-Time Optimization gives the compiler another opportunity to analyze and modify the binary during linking.

For the Android Rust toolchain we perform thin LTO on both the C++ code in LLVM and the Rust code that makes up the Rust compiler and tools. Because the IR emitted by our clang might be a different version than the IR emitted by rustc we can’t perform cross-language LTO or statically link against libLLVM. The performance gains from using an LTO optimized shared library are greater than those from using a non-LTO optimized static library however, so we’ve opted to use shared linking.

Using CGU1, GC sections, and LTO produces a speedup of ~7.7% and size improvement of ~5.4% over the baseline. This works out to a speedup of ~6% over the previous stage in the pipeline due solely to LTO.

Profile-Guided Optimization (PGO)

Command line arguments, environment variables, and the contents of files can all influence how a program executes. Some blocks of code might be used frequently while other branches and functions may only be used when an error occurs. By profiling an application as it executes we can collect data on how often these code blocks are executed. This data can then be used to guide optimizations when recompiling the program.

We use instrumented binaries to collect profiles from both building the Rust toolchain itself and from building the Rust components of Android images for x86_64, aarch64, and riscv64. These four profiles are then combined and the toolchain is recompiled with profile-guided optimizations.

As a result, the toolchain achieves a ~19.8% speedup and 5.3% reduction in size over the baseline compiler. This is a 13.2% speedup over the previous stage in the compiler.

BOLT: Binary Optimization and Layout Tool

Even with LTO enabled the linker is still in control of the layout of the final binary. Because it isn’t being guided by any profiling information the linker might accidentally place a function that is frequently called (hot) next to a function that is rarely called (cold). When the hot function is later called all functions on the same memory page will be loaded. The cold functions are now taking up space that could be allocated to other hot functions, thus forcing the additional pages that do contain these functions to be loaded.

BOLT mitigates this problem by using an additional set of layout-focused profiling information to re-organize functions and data. For the purposes of speeding up rustc we profiled libLLVM, libstd, and librustc_driver, which are the compiler’s main dependencies. These libraries are then BOLT optimized using the following options:

--peepholes=all
--data=<path-to-profile>
--reorder-blocks=ext-tsp
–-reorder-functions=hfsort
--split-functions
--split-all-cold
--split-eh
--dyno-stats

Any additional libraries matching lib/*.so are optimized without profiles using only --peepholes=all.

Applying BOLT to our toolchain produces a speedup over the baseline compiler of ~24.7% at a size increase of ~10.9%. This is a speedup of ~6.1% over the PGOed compiler without BOLT.

If you are interested in using BOLT in your own project/build I offer these two bits of advice: 1) you’ll need to emit additional relocation information into your binaries using the -Wl,--emit-relocs linker argument and 2) use the same input library when invoking BOLT to produce the instrumented and the optimized versions.

Conclusion

Graph of normalized size and duration comparison between Toolchain size and Android Rust build time

Optimizations

Speedup vs Baseline
Monolithic 1.8%
Mono + GC Sections

1.9%
Mono + GC + LTO 7.7%
Mono + GC + LTO + PGO 19.8%

Mono + GC + LTO + PGO + BOLT

24.7%

By compiling as a single code generation unit, garbage collecting our data objects, performing both link-time and profile-guided optimizations, and leveraging the BOLT tool we were able to speed up the time it takes to compile the Rust components of Android by 24.8%. For every 50k Android builds per day run in our CI infrastructure we save ~10K hours of serial execution.

Our industry is not one to stand still and there will surely be another tool and another set of profiles in need of collecting in the near future. Until then we’ll continue making incremental improvements in search of additional performance. Happy coding!

KSP2 Preview: Kotlin K2 and Standalone Source Generator

Posted by Ting-Yuan Huang – Software Engineer, and Jiaxiang Chen – Software Engineer

The Kotlin Symbol Processing (KSP) tool provides a high-level API for doing meta-programming in Kotlin. Many tools have been built on KSP, enabling Kotlin code to be generated at compile time. For example, Jetpack Room uses KSP to generate code for accessing the database, based on an interface provided by the developer, like:

@Dao
interface UserDao {
    @Query("SELECT * FROM user")
    fun getAll(): List<User>
}

KSP provides the API to the Kotlin code so that Room in this case can generate the actual implementation of that interface. While KSP has become a core foundation for meta-programing in Kotlin, its current implementation has some gaps which we are aiming to resolve with a new KSP2 architecture. This blog details those architectural changes and the impact for plugins built on KSP.

In addition, KSP2 has preview support for:

    • The new Kotlin compiler (code-named K2)
    • A new standalone source generator that provides more flexibility and features than the current Kotlin compiler plugin

After getting feedback on the new architecture and continuing to address gaps we will work towards releasing KSP 2.0 where these changes will be the default.

Enabling the KSP2 Preview

The new preview changes can be enabled in KSP 1.0.14 or newer using a flag in gradle.properties:

ksp.useKSP2=true

Note: You might need to enlarge the heap size of the Gradle daemon now that KSP and processors run in the Gradle daemon instead of the Kotlin compiler’s daemon (which has larger default heap size), e.g. org.gradle.jvmargs=-Xmx4096M -XX:MaxMetaspaceSize=1024m

KSP2 and K2

Internally KSP2 uses the Beta Kotlin K2 compiler (which will be the default compiler in Kotlin 2.0). You can use KSP2 before switching your Kotlin compiler to K2 (via the languageVersion setting) but if you want to use K2 for compiling your code, check out: Try the K2 compiler in your Android projects.

Standalone Source Generator

KSP1 is implemented as a Kotlin 1.x compiler plugin. Running KSP requires running the compiler and specifying KSP and its plugin options. In Gradle, KSP’s tasks are customized compilation tasks, which dispatch real work to KotlinCompileDaemon by default. This makes debugging and testing somewhat difficult, because KotlinCompileDaemon runs in its own process, outside of Gradle.

In KSP2, the implementation can be thought of as a library with a main entry point. Build systems and tools can call KSP with this entry point, without setting up the compiler. This makes it very easy to call KSP programmatically and is very useful especially for debugging and testing. With KSP2 you can set breakpoints in KSP processors without having to perform any other / irregular setup tasks to enable debugging.

Everything becomes much easier because KSP2 now controls its lifecycle and can be called as a standalone program or programmatically, like:

val kspConfig = KSPJvmConfig.Builder().apply {
  // All configurations happen here.
}.build()
val exitCode = KotlinSymbolProcessing(kspConfig, listOfProcessors, kspLoggerImpl).execute()

KSP2 API Behavior Changes

With the new implementation, it is also a great opportunity to introduce some refinements in the API behavior so that developers building on KSP will be more productive, have better debuggability and error recovery. For example, when resolving Map<String, NonExistentType>, KSP1 simply returns an error type. In KSP2, Map<String, ErrorType> will be returned instead. Here is a list of the current API behavior changes we plan on making in KSP2:

    1. Resolve implicit type from function call: val error = mutableMapOf<String, NonExistType>()
      KSP1: The whole type will be an error type due to failed type resolution
      KSP2: It will successfully resolve the container type, and for the non-existent type in the type argument, it will correctly report errors on the specific type argument.
    2. Unbounded type parameter
      KSP1: No bounds
      KSP2: An upper bound of Any? is always inserted for consistency
    3. Resolving references to type aliases in function types and annotations
      KSP1: Expanded to the underlying, non-alias type
      KSP2: Not expanded, like uses in other places.
    4. Fully qualified names
      KSP1: Constructors have FQN if the constructor is from source, but not if the constructor is from a library.
      KSP2: Constructors do not have FQN
    5. Type arguments of inner types
      KSP1: Inner types has arguments from outer types
      KSP2: Inner types has no arguments from outer types
    6. Type arguments of star projections
      KSP1: Star projections have type arguments that are expanded to the effective variances according to the declaration sites.
      KSP2: No expansion. Star projections have nulls in their type arguments.
    7. Variance of Java Array
      KSP1: Java Array has a invariant upper bound
      KSP2: Java Array has a covariant upper bound
    8. Enum entries
      KSP1: An enum entry has its own subtype with a supertype of the enum class (incorrect behavior from language point of view)
      KSP2: An enum entry's type is the type of the enclosing enum class
    9. Multi-override scenario

      For example
      interface GrandBaseInterface1 {
          fun foo(): Unit
      }
      
      interface GrandBaseInterface2 {
          fun foo(): Unit
      }
      
      interface BaseInterface1 : GrandBaseInterface1 {
      }
      
      interface BaseInterface2 : GrandBaseInterface2 {
      }
      
      class OverrideOrder1 : BaseInterface1, GrandBaseInterface2 {
          override fun foo() = TODO()
      }
      class OverrideOrder2 : BaseInterface2, GrandBaseInterface1 {
          override fun foo() = TODO()
      }
      

      KSP1:
      Find overridden symbols in BFS order, first super type found on direct super type list that contains overridden symbol is returned For the example, KSP will say OverrideOrder1.foo() overrides GrandBaseInterface2.foo() and OverrideOrder2.foo() overrides GrandBaseInterface1.foo()
      KSP2:
      DFS order, first super type found overridden symbols (with recursive super type look up) in direct super type list is returned.
      For the example, KSP will say OverrideOrder1.foo() overrides GrandBaseInterface1.foo() and OverrideOrder2.foo() overrides GrandBaseInterface2.foo()
    10. Java modifier
      KSP1: Transient/volatile fields are final by default
      KSP2: Transient/volatile fields are open by default
    11. Type annotations
      KSP1: Type annotations on a type argument is only reflected on the type argument symbol
      KSP2: Type annotations on a type argument now present in the resolved type as well
    12. vararg parameters
      KSP1: Considered an Array type
      KSP2: Not considered an Array type
    13. Synthesized members of Enums
      KSP1: values and valueOf are missing if the enum is defined in Kotlin sources
      KSP2: values and valueOf are always present
    14. Synthesized members of data classes
      KSP1: componentN and copy are missing if the data class is defined in Kotlin sources
      KSP2: componentN and copy are always present

New Multiplatform Processing Scheme

When it comes to the processing scheme, i.e. what sources are processed when, the principle of KSP is to be consistent with the build's existing compilation scheme. In other words, what the compiler sees is what processors see, plus the source code that is generated by processors.

What processors see Kotlin compiler see

ClassA.kt, UtilB.kt, InterfaceC.kt ... ClassA.kt, UtilB.kt, InterfaceC.kt ... + GeneratedFromA.kt, ...

In KSP1's current compilation scheme, common / shared source sets are processed and compiled multiple times, with each target. For example, commonMain is processed and compiled 3 times in the following project layout. Being able to process all the sources from dependencies is convenient with one exception: Processors don’t see the sources generated from commonMain when processing jvmMain and jsMain. Everything must be re-processed and that can be inefficient.

Flow diagram illustrating sources generated from jvmMain and jsMain processing to commonMain

tasks

inputs

outputs

kspKotlinCommonMainMetadata

commonMain

generatedCommon

kspKotlinJvm

commonMain, jvmMain

generatedCommonJvm

kspKotlinJs

commonMain, jsMain

generatedCommonJs

compileKotlinCommonMainMetadata

commonaMain, generatedCommon

common.klib

compileKotlinJvm

commonMain, jvmMain, generatedCommonJvm

app.jar

compileKotlinJs

commonMain, jsMain, generatedCommonJs

main.js

In KSP2, we plan to add an experimental mode that tries to align to how source sets are compiled in K2 better. All sources can be processed only once with the available new processing scheme:

tasks

inputs

outputs

Resolvable but not available in 

getAllFiles / 

getSymbolsWithAnnotation

kspKotlinCommonMainMetadata

commonMain

generatedCommon


kspKotlinJvm

jvmMain

generatedJvm

commonMain, generatedCommon

kspKotlinJs

jsMain

generatedJs

commonaMain, generatedCommon

compileKotlinCommonMainMetadata

commonaMain, generatedCommon

common.klib


compileKotlinJvm

commonMain, jvmMain, generatedCommon, generatedJvm

app.jar


compileKotlinJs

commonMain, jsMain, generatedCommon, generatedJs

main.js


Please note that Kotlin 2.0 is still in beta and the compilation model is subject to change. Please let us know how this works for you and give us feedback.

KSP2 Preview Feedback

KSP2 is in preview but there is still more work to be done before a stable release. We hope these new features will ultimately help you be more productive when using KSP! Please provide us with your feedback so we can make these improvements awesome as they progress towards being stable.

A New Foundation for AI on Android

Posted by Dave Burke, VP of Engineering

Foundation Models learn from a diverse range of data sources to produce AI systems capable of adapting to a wide range of tasks, instead of being trained for a single narrow use case. Today, we announced Gemini, our most capable model yet. Gemini was designed for flexibility, so it can run on everything from data centers to mobile devices. It's been optimized for three different sizes: Ultra, Pro and Nano.

Gemini Nano, optimized for mobile

Gemini Nano, our most efficient model built for on-device tasks, runs directly on mobile silicon, opening support for a range of important use cases. Running on-device enables features where the data should not leave the device, such as suggesting replies to messages in an end-to-end encrypted messaging app. It also enables consistent experiences with deterministic latency, so features are always available even when there’s no network.

Gemini Nano is distilled down from the larger Gemini models and specifically optimized to run on mobile silicon accelerators. Gemini Nano enables powerful capabilities such as high quality text summarization, contextual smart replies, and advanced proofreading and grammar correction. For example, the enhanced language understanding of Gemini Nano enables the Pixel 8 Pro to concisely summarize content in the Recorder app, even when the phone’s network connection is offline.

Moving image of Gemini Nano being used in the Recorder app on a Pixel 8 Pro device
Pixel 8 Pro using Gemini Nano in the Recorder app to summarize meeting audio, even without a network connection.

Gemini Nano is starting to power Smart Reply in Gboard on Pixel 8 Pro, ready to be enabled in settings as a developer preview. Available now to try with WhatsApp and coming to more apps next year, the on-device AI model saves you time by suggesting high-quality responses with conversational awareness1.

Moving image of WhatsApp’s use of Smart Reply in Gboard using Gemini Nano on Pixel 8 Pro device
Smart Reply in Gboard within WhatsApp using Gemini Nano on Pixel 8 Pro.

Android AICore, a new system service for on-device foundation models

Android AICore is a new system service in Android 14 that provides easy access to Gemini Nano. AICore handles model management, runtimes, safety features and more, simplifying the work for you to incorporate AI into your apps.

AICore is private by design, following the example of Android’s Private Compute Core with isolation from the network via open-source APIs, providing transparency and auditability. As part of our efforts to build and deploy AI responsibly, we also built dedicated safety features to make it safer and more inclusive for everyone.

AICore architechture
AICore manages model, runtime and safety features.

AICore enables Low Rank Adaptation (LoRA) fine tuning with Gemini Nano. This powerful concept enables app developers to create small LoRA adapters based on their own training data. The LoRA adapter is loaded by AICore, resulting in a powerful large language model fine tuned for the app’s own use-cases.

AICore takes advantage of new ML hardware like the latest Google Tensor TPU and NPUs in flagship Qualcomm Technologies, Samsung S.LSI and MediaTek silicon. AICore and Gemini Nano are rolling out to Pixel 8 Pro, with more devices and silicon partners to be announced in the coming months.

Build with Gemini

We're excited to bring together state-of-the-art AI research with easy-to-use tools and APIs for Android developers to build with Gemini on-device. If you are interested in building apps using Gemini Nano and AICore, please sign up for our Early Access Program.


1 Available globally, only using the United States English keyboard language. Read more for details.

Virtual Machine as a core Android Primitive

Posted by Sandeep Patil – Principal Software Engineer, and Irene Ang – Product Manager

The Android Virtualization Framework (AVF) will be available on upcoming select Android 14 devices. The AVF, first introduced in Android 13 on Pixel devices, provides new capabilities for platform developers working on privileged applications.

With AVF, we are more broadly supporting virtualization to Android. Virtualization is widely used and deployed to isolate workloads and operating systems from each other. It enables efficient scaling of infrastructure, testing environments, legacy software compatibility, creating virtual desktops and much more.

With AVF virtual machines become a core construct of the Android operating system, similar to the way Android utilizes Linux processes. Developers have the flexibility to choose the level of isolation for a virtual machine:

    • One-way isolation: Android (the host) can control and inspect the contents of the VM. These are most commonly used for sandboxing and separation, enabling multiple operating systems to run on the same machine / device, with one operating system host (Android) controlling and watching over all others.
    • Two-way isolation (Isolated VM): Android (the host) and the virtual machine (the guest) are completely isolated from each other. Developers who deal with or store sensitive data may benefit from an isolated virtual machine. An isolated virtual machine has a two-way barrier, where neither the host (Android) nor the VM have access to each other, except via explicitly-agreed-upon communication channels. This has 2 main properties:
  1. The workload and data inside the VM is inaccessible (confidential) from the host (Android).
  2. Even if Android is compromised all the way up to (and including) the host kernel, the isolated VM remains uncompromised.

Benefits of AVF

Isolation

With an isolated VM, developers now have an alternative to Trustzone for use cases that need isolation from Android without escalated privilege.

Portability

Virtual machines and the applications running inside them are far more portable than trusted applets. For example, a Linux-based virtual machine with a Linux-application payload will work on all devices that support AVF. This means that developers can build an application once and deploy it everywhere. VMs also make porting of existing Linux based applications seamless and easy, compared to porting into a Trustzone operating system.

Performance

AVF is designed to be lightweight, efficient and flexible. Virtual machines can:

    • be as small as a single C program and as big as an entire operating system depending on the developer’s need;
    • be persistent or intermittent;
    • grow in memory or shrink depending on the overall system health; and
    • honor Android’s scheduler hints and low-memory warnings.

Extensibility

AVF is designed with developers in mind. Virtual machines can be customized to meet specific use-case needs. Developers can deploy any VM payload as long as it conforms to certain boot and communication protocols specified by AVF.

In addition to bringing the power of virtualization to Android and enabling all the possibilities of virtual desktops, sandboxing, AVF’s use of isolated virtual machines can benefit the following common Android use cases (and many more):

    • Biometrics: By deploying biometric trusted applets in an isolated virtual machine, developers will have the isolation guarantee, access to more compute power for biometric algorithms, easy updatability regardless of the Trustzone operating system, and a more streamlined deployment.
    • DRM: Widevine enables streaming DRM on Android devices. Once deployed in an isolated Virtual Machine, updates to Widevine become much easier across Android devices, regardless of the details of the various Trustzone operating systems being deployed on those devices.

AVF Usage

AVF provides easy APIs to query the device’s ability to create virtual machines and their supported types, and to set up secure communication channels with these virtual machines from applications and services that create them.

For example, to check for the availability of the AVF APIs, and of isolated and regular VM:

VirtualMachineManager manager =
     (VirtualMachineManager)context.
          getSystemService(VirtualMachineManager.class);
if (manager == null) {
    // AVF not supported
} else {
    int capabilities = manager.getCapabilities();
    if ((capabilities & CAPABILITY_PROTECTED_VM) != 0) {
        // protected VM is supported
    }
    if ((capabilities & CAPABILITY_NON_PROTECTED_VM) != 0) {
        // non protected VM is supported
    }
}

Please find additional documentation on AVF and its APIs here.

AVF Components

AVF Component architecture

AVF consists of the framework APIs, the hypervisor, and the Virtual Machine Manager. The hypervisor guarantees virtual machines (including Android) are isolated from each other, much like how the Linux kernel does it for processes. The AVF hypervisor (pKVM), however, does that with a significantly smaller (~50x) code base compared to the Linux kernel.

The Hypervisor (pKVM)

The hypervisor is focused on open source availability, security, device assignment to VMs and security by isolation between virtual machines. It has a small attack surface that meets a higher security assurance level. AVF APIs and features are fully supported by the protected KVM hypervisor (pKVM).

pKVM is built on top of the industry standard Kernel-based Virtual Machine (KVM) in Linux. It means all existing operating systems and workloads that rely on KVM-based virtual machines can work seamlessly on Android devices with pKVM.

Virtual Machine Manager (crosvm)

crosvm, a Rust-based Virtual Machine Manager (VMM), provides the glue between the hypervisor and the AVF framework. It is responsible for creating, managing and destroying virtual machines. In addition, it provides an abstraction layer across multiple hypervisor implementations.

Isolated Virtual Machines

Isolated virtual machines are invisible to Android i.e. any process running in Android cannot inspect, see, tamper with the content of such a virtual machine. This guarantee is provided by the hypervisor.

Virtual Machines

Virtual machines are the same as isolated VMs, except they are accessible to Android processes with the right permissions and privilege.

Microdroid

Microdroid is a trimmed down Android OS package that is created to serve as a template for starting a virtual machine (VM). It provides developers with a familiar environment to build and run their workloads in a VM. Microdroid uses familiar Android tools and libraries, such as Bionic, Binder IPC and keystore support.

Virtualization Service

VirtualizationService manages all guest VMs, isolated or otherwise. It does so, primarily by managing instances of crosvm. It also exposes an AIDL API, which system services or privileged apps can use to start, monitor, and stop VMs.

RpcBinder

RpcBinder is an all-new backend developed for the Android Interface Definition Language (AIDL). RpcBinder enables communication to and from virtual machines using the existing binder wire protocol. This means:

  1. Developers can write interfaces to virtual machines using the language and infrastructure they are already familiar with - AIDL.
  2. Simply continue using existing AIDL interfaces even if the binder endpoint moves into a virtual machine.

What’s new in Android 14?

Android 14, not only makes AVF available on more devices, it also provides a new toolkit to enable building more with AVF and its components:

    • Android System API for AVF 
Privileged applications can now use VMs for executing their critical workload needing isolation; 

    • Hypervisor DevEx toolkit 
Added tracing capability, improved debuggability and monitoring capabilities to provide insights and assist platform developers in developing inside Isolated VMs; 

    • Hypervisor Vendor Modules 
With vendor module extensions, our partners can customize Google’s hypervisor (pKVM) to meet their specific need and differentiate themselves; 

    • System Health Improvements 
With Android 14, a microdroid based VM boots 2 times faster compared to Android 13 while using half the memory.

The rest of the AVF framework makes virtualization easy to use by Android services and apps. For example by abstracting inter-VM communication using AIDL as a transport layer, managing the VM lifecycle or how VMs are created.

Where can you start?

The AVF is only for developers of privileged applications and platform developers. TheAndroid Virtualization Framework overview provides a high level guidance on the detailed components of AVF. If you’re an Android Platform developer, try creating a Virtual Machine today and contact us at android-kvm if you have any questions.