At Google Play, we’re committed to helping app and game businesses of all sizes reach their full potential. That’s why we’re excited to announce we have opened submissions for the Indie Games Accelerator 2024.
If you’re an indie developer who is early in their journey - either close to launching a new game or have recently launched a title - this high-impact program is designed for you.
Selected game studios will be invited to take part in the 10-week accelerator program starting in March 2024. This is a highly-tailored program for small game developers from across 70+ eligible countries. It includes a series of online masterclasses, talks and gaming workshops, hosted by some of the best in the industry.
You’ll also get the chance to meet and connect with other passionate founders from around the world who are looking to take their games to the next level.
Learn how founder of Gambir Studio, Shafiq Hussein, and team grew their revenue by 20% with the advice from mentors at the Indie Games Accelerator.
All submissions must be completed by December 12, 2023 @ 1 pm CET and meet all eligibility requirements. Apply now to supercharge your growth on Google Play.
Posted by Kateryna Semenova, Developer Relations Engineer, Android
Introduction
KAYAK is one of the world's leading travel search engines that helps users find the best deals on flights, hotels, and rental cars. In 2023, KAYAK integrated passkeys - a new type of passwordless authentication - into its Android and web apps. As a result, KAYAK reduced the average time it takes their users to sign-up and sign-in by 50%, and also saw a decrease in support tickets.
This case study explains KAYAK's implementation on Android with Credential Manager API and RxJava. You can use this case study as a model for implementing Credential Manager to improve security and user experience in your own apps.
If you want a quick summary, check out the companion video on YouTube.
Problem
Like most businesses, KAYAK has relied on passwords in the past to authenticate users. Passwords are a liability for both users and businesses alike: they're often weak, reused, guessed, phished, leaked, or hacked.
“Offering password authentication comes with a lot of effort and risk for the business. Attackers are constantly trying to brute force accounts while not all users understand the need for strong passwords. However, even strong passwords are not fully secure and can still be phished.” – Matthias Keller, Chief Scientist and SVP, Technology at KAYAK
To make authentication more secure, KAYAK sent "magic links" via email. While helpful from a security standpoint, this extra step introduced more user friction by requiring users to switch to a different app to complete the login process. Additional measures needed to be introduced to mitigate the risk of phishing attacks.
Solution
KAYAK's Android app now uses passkeys for a more secure, user-friendly, and faster authentication experience. Passkeys are unique, secure tokens that are stored on the user's device and can be synchronized across multiple devices. Users can sign in to KAYAK with a passkey by simply using their existing device's screen lock, making it simpler and more secure than entering a password.
“We've added passkeys support to our Android app so that more users can use passkeys instead of passwords. Within that work, we also replaced our old Smartlock API implementation with the Sign in with Google supported by Credential Manager API. Now, users are able to sign up and sign in to KAYAK with passkeys twice as fast as with an email link, which also improves the completion rate" – Matthias Keller, Chief Scientist and SVP, Technology at KAYAK
Credential Manager API integration
To integrate passkeys on Android, KAYAK used the Credential Manager API. Credential Manager is a Jetpack library that unifies passkey support starting with Android 9 (API level 28) and support for traditional sign-in methods such as passwords and federated authentication into a single user interface and API.
Designing a robust authentication flow for apps is crucial to ensure security and a trustworthy user experience. The following diagram demonstrates how KAYAK integrated passkeys into their registration and authentication flows:
Figure 2:KAYAK's diagram showing their registration and authentication flows.
At registration time, users are given the opportunity to create a passkey. Once registered, users can sign in using their passkey, Sign in with Google, or password. Since Credential Manager launches the UI automatically, be careful not to introduce unexpected wait times, such as network calls. Always fetch a one-time challenge and other passkeys configuration (such as RP ID) at the beginning of any app session.
While the KAYAK team is now heavily invested in coroutines, their initial integration used RxJava to integrate with the Credential Manager API. They wrapped Credential Manager calls into RxJava as follows:
This example defines a Kotlin function called createCredential() that returns a credential from the user as an RxJava Single of type CreateCredentialResponse. The createCredential() function encapsulates the asynchronous process of credential registration in a reactive programming style using the RxJava Single class.
This example demonstrates the approach KAYAK used to register a new credential, here Credential Manager was wrapped in Rx primitives.
webAuthnRetrofitService.getClientParams(username = /** email address **/)
.flatMap { response->
// Produce a passkeys request from client params that include a one-time challengeCreatePublicKeyCredentialOption(/** produce JSON from response **/)
}
.subscribeOn(schedulers.io())
.flatMap { request->
// Call the earlier defined wrapper which calls the Credential Manager UI// to register a new passkey credentialcredentialManagerRepository.createCredential(
request = request,
activity = activity
)
}
.flatMap {
// send credential to the authentication server
}
.observeOn(schedulers.main())
.subscribe(
{ /** process successful login, update UI etc. **/ },
{ /** process error, send to logger **/ }
)
Rx allowed KAYAK to produce more complex pipelines that can involve multiple interactions with Credential Manager.
Existing user sign-in
KAYAK used the following steps to launch the sign-in flow. The process launches a bottom sheet UI element, allowing the user to log in using a Google ID and an existing passkey or saved password.
Figure 3:Bottom sheet for passkey authentication.
Developers should follow these steps when setting up a sign-in flow:
Since the bottom sheet is launched automatically, be careful not to introduce unexpected wait times in the UI, such as network calls. Always fetch a one-time challenge and other passkeys configuration (such as RP ID) at the beginning of any app session.
When offering Google sign-in via Credential Manager API, your code should initially look for Google accounts that have already been used with the app. To handle this, call the API with the setFilterByAuthorizedAccounts parameter set to true.
If the result returns a list of available credentials, the app shows the bottom sheet authentication UI to the user.
If a NoCredentialException appears, no credentials were found: No Google accounts, no passkeys, and no saved passwords. At this point, your app should call the API again and set setFilterByAuthorizedAccounts to false to initiate the Sign up with Google flow.
Process the credential returned from Credential Manager.
Single.fromSupplier<GetPublicKeyCredentialOption> {
GetPublicKeyCredentialOption(/** Insert challenge and RP ID that was fetched earlier **/)
}
.flatMap { response ->// Produce a passkeys requestGetPublicKeyCredentialOption(response.toGetPublicKeyCredentialOptionRequest())
}
.subscribeOn(schedulers.io())
.map { publicKeyCredentialOption ->// Merge passkeys request together with other desired options,// such as Google sign-in and saved passwords.
}
.flatMap { request ->// Trigger Credential Manager system UI
credentialManagerRepository.getCredential(
request = request,
activity = activity
)
}
.onErrorResumeNext { throwable ->// When offering Google sign-in, it is recommended to first only look for Google accounts// that have already been used with our app. If there are no such Google accounts, no passkeys,// and no saved passwords, we try looking for any Google sign-in one more time.if (throwable is NoCredentialException) {
return@onErrorResumeNext credentialManagerRepository.getCredential(
request = GetCredentialRequest(/* Google ID with filterByAuthorizedOnly = false */),
activity = activity
)
}
Single.error(throwable)
}
.flatMapCompletable {
// Step 1: Use Retrofit service to send the credential to the server for validation. Waiting// for the server is handled on a IO thread using subscribeOn(schedulers.io()).// Step 2: Show the result in the UI. This includes changes such as loading the profile// picture, updating to the personalized greeting, making member-only areas active,// hiding the sign-in dialog, etc. The activities of step 2 are executed on the main thread.
}
.observeOn(schedulers.main())
.subscribe(
// Handle errors, e.g. send to log ingestion service. // A subset of exceptions shown to the user can also be helpful,// such as user setup problems. // Check out more info in Troubleshoot common errors at// https://developer.android.com/training/sign-in/passkeys#troubleshoot
)
“Once the Credential Manager API is generally implemented, it is very easy to add other authentication methods. Adding Google One-Tap Sign In was almost zero work after adding passkeys.” – Matthias Keller
Some of the major user experience considerations KAYAK faced when switching to passkeys included whether users should be able to delete passkeys or create more than one passkey.
Our UX guide for passkeys recommends that you have an option to revoke a passkey, and that you ensure that the user does not create duplicate passkeys for the same username in the same password manager.
Figure 4:KAYAK's UI for passkey management.
To prevent registration of multiple credentials for the same account, KAYAK used the excludeCredentials property that lists credentials already registered for the user. The following example demonstrates how to create new credentials on Android without creating duplicates:
fun WebAuthnClientParamsResponse.toCreateCredentialRequest(): String {
val credentialRequest = WebAuthnCreateCredentialRequest(
challenge = this.challenge!!.asSafeBase64,
relayingParty = this.relayingParty!!,
pubKeyCredParams = this.pubKeyCredParams!!,
userEntity = WebAuthnUserEntity(
id = this.userEntity!!.id.asSafeBase64,
name = this.userEntity.name,
displayName = this.userEntity.displayName
),
authenticatorSelection = WebAuthnAuthenticatorSelection(
authenticatorAttachment = "platform",
residentKey = "preferred"
),
// Setting already existing credentials here prevents// creating multiple passkeys on the same keychain/password manager
excludeCredentials = this.allowedCredentials!!.map { it.copy(id = it.id.asSafeBase64) },
)
return GsonBuilder().disableHtmlEscaping().create().toJson(credentialRequest)
}
And this is how KAYAK implemented excludeCredentials functionality for their Web implementation.
The server-side part is an essential component of an authentication solution. KAYAK added passkey capabilities to their existing authentication backend by utilizing WebAuthn4J, an open source Java library.
KAYAK broke down the server-side process into the following steps:
The client requests parameters needed to create or use a passkey from the server. This includes the challenge, the supported encryption algorithm, the relying party ID, and related items. If the client already has a user email address, the parameters will include the user object for registration, and a list of passkeys if any exist.
The client runs browser or app flows to start passkey registration or sign-in.
The client sends retrieved credential information to the server. This includes client ID, authenticator data, client data, and other related items. This information is needed to create an account or verify a sign-in.
When KAYAK worked on this project, no third-party products supported passkeys. However, many resources are now available for creating a passkey server, including documentation and library examples.
Results
Since integrating passkeys, KAYAK has seen a significant increase in user satisfaction. Users have reported that they find passkeys to be much easier to use than passwords, as they do not require users to remember or type in a long, complex string of characters. KAYAK reduced the average time it takes their users to sign-up and sign-in by 50%, have seen a decrease in support tickets related to forgotten passwords, and have made their system more secure by reducing their exposure to password-based attacks. Thanks to these improvements, KAYAK plans to eliminate password-based authentication in their app by the end of 2023.
“Passkeys make creating an account lightning fast by removing the need for password creation or navigating to a separate app to get a link or code. As a bonus, implementing the new Credential Manager library also reduced technical debt in our code base by putting passkeys, passwords and Google sign-in all into one new modern UI. Indeed, users are able to sign up and sign in to KAYAK with passkeys twice as fast as with an email link, which also improves the completion rate." – Matthias Keller
Conclusion
Passkeys are a new and innovative authentication solution that offers significant benefits over traditional passwords. KAYAK is a great example of how an organization can improve the security and usability of its authentication process by integrating passkeys. If you are looking for a more secure and user-friendly authentication experience, we encourage you to consider using passkeys with Android's Credential Manager API.
Dashlane is a password management tool that provides a secure way to manage user credentials, access control, and authentication across multiple systems and applications. Dashlane has over 18 million users and 20,000 businesses in 180 countries. It’s available on Android, iOS, macOS, Windows, and as a web app with an extension for Chrome, Firefox, Edge, and Safari.
The opportunity
Many users choose password managers because of the pain and frustration of dealing with passwords. While password managers help here, the fact remains that one of the biggest issues with passwords are security breaches. Passkeys on the other hand bring passwordless authentication with major advancements in security.
Passkeys are a simple and secure authentication technology that enables signing in to online accounts without entering a password. They cannot be reused, don't leak in server breaches of relying parties, and protect users from phishing attacks. Passkeys are built on open standards and work on all major platforms and browsers.
As an authentication tool, Dashlane’s primary goal is to ensure customers’ credentials are kept safe. They realized how significant the impact of passkeys could be to the security of their users and adapted their applications to support passkeys across devices, browsers, and platforms. With passkey support they provide users a secure and convenient access with a phishing-resistant authentication method.
Implementation
Passkeys as a replacement for passwords is a relatively new concept and to address the challenge of going from a familiar to an unfamiliar way of logging in, the Dashlane team considered various solutions.
On the desktop web they implemented conditional UI support through a browser extension to help users gracefully navigate the choice between using a password and a passkey to log into websites that support both login methods. As soon as the user taps on the username input field, an autofill suggestion dialog pops up with the stored passkeys and password autofill suggestions. The user can then choose an account and use the device screen lock to sign in.
On Android, they used the Credential Manager API which supports multiple sign-in methods, such as username and password, passkeys, and federated sign-in solutions (such as Sign-in with Google) in a single API. The Credential Manager simplifies the development process and it has enabled Dashlane to implement passkeys support on Android in 8 weeks with a team of one engineer.
Data shows that users are more satisfied with the passkey flows than the existing password flows.
The conversion rate is 92% on passkey authentication opportunities on the web (when Dashlane suggests a saved passkey for the user to sign in), compared to a 54% conversion rate on opportunities to automatically sign in with passwords. That’s a 70% increase in conversion rate compared to passwords–a great sign for passkey adoption.
Password sign-in prompt.
Passkey sign-in prompt.
The conversion rate here refers to user actions when they visit websites that support passkeys. If a user attempts to register or use a passkey they will see a Dashlane dialog appear on Chrome on desktop. If they proceed and create new or use an existing passkey it is considered a success. If they dismiss the dialog or cancel passkey creation, it’s considered a failure. The same user experience flow applies to passwords.
Dashlane also saw a 63% conversion rate on passkey registration opportunities (when Dashlane offers to save a newly created passkey to the user’s vault) compared to only around 25% conversion rate on suggestions to save new passwords. This indicates that Dashlane’s suggestions to save passkeys are more relevant and precise than the suggestions to save passwords.
Save passkey prompt.
Save password prompt.
Dashlane observed an acceleration of passkey usage with 6.8% average weekly growth of passkeys saved and used on the web.
Save password prompt.
Takeaways
While passkeys are a new technology that users are just starting to get familiar with, the adoption rate and positive engagement rates show that Dashlane users are more satisfied with passkey flows than the existing password flows.
“Staying up to date on developments in the market landscape and industry, anticipating the potential impact to your customers’ experience, and being ready to meet their needs can pay off. Thanks in part to our rapid implementation of the Credential Manager API, customers can rest assured that they can continue to rely on Dashlane to store and help them access services, no matter how authentication methods evolve.“ –Rew Islam, Director of Product Engineering and Innovation at Dashlane
Dashlane tracks and investigates all passkey errors and says that there haven’t been many. They also receive few questions from customers around how to use or manage their passkeys. This can be a sign of an intuitive user experience, clear help center documentation, a tendency of passkey users today already being knowledgeable about passkeys, or some combination of these factors.
Passkeys are an easier and more secure alternative to passwords. They let users sign-in simply with a fingerprint, face scan, PIN or a pattern. This week we are sharing resources to help you understand passkeys and upgrade authentication on your sites and apps.
Every day from 23-27 October on @ChromiumDev and @AndroidDev we’ll share new materials, including blog posts, case studies, and a Q&A session. Use #PasskeysWeek to participate in the conversation and spread the word about your sites and apps that support passkeys.
Join our live Q&A
On 25 October at 10 AM PDT, we’ll host a live Q&A session on Google for Developers YouTube channel where you’ll be able to ask questions in the live chat and get answers from passkeys engineers from Google. To send us your questions ahead of time through social media channels tag @ChromiumDev and @AndroidDev and use #PasskeysWeek.
Bookmark this link or click "Notify me" to get alerted when the livestream is about to start:
The recording will also be available on the channel after the event. Save the date and learn more about passkeys.
Where are passkeys today
Google Accounts have supported passkeys since May this year and on 10 October, 2023 have made passkeys the default sign in method for all devices that support it. If you haven’t created a passkey for your Google account yet, head over to g.co/passkeys.
Google is also partnering with brands to enable passkeys across Chrome and Android platforms. Partners across the ecommerce, financial tech, and travel industries—along with other software providers—already support passkeys creating easier, secure sign-ins for their users.
When the travel company KAYAK integrated passkeys into its Android and web apps, they reduced the time it takes their users to sign up and sign in by 50%.
Password manager Dashlane can also manage passkeys across its Android, iOS, macOS, and Windows apps, as well as on the web with an extension for Chrome, Firefox, Edge, and Safari. Since introducing passkeys, Dashlane has seen a 70% increase in conversion rate for signing in with passkeys compared to passwords.
To learn more about these success stories keep an eye on #PasskeysWeek on @ChromiumDev and @AndroidDev, where we'll share full case studies in the next couple of days.
Learn how to implement passkeys and earn a badge
Are you a web developer? Are you ready to learn how to implement passkeys in a web app?
FIDO Alliance is an open industry association with a mission to develop and standardize technical specifications that reduce the reliance on passwords to authenticate users.
Passkeys are a safer and simpler alternative to passwords that works on all modern browsers and platforms. They enable signing into online accounts by using a device screen lock–with a fingerprint, facial recognition, PIN or a pattern.
More and more online services are adding passkey support every day. On 10 October, 2023, Google accounts made passkeys the default sign in method for all devices that support it.
To accelerate our way into a passwordless future, from 23-27 October we are hosting Passkeys Week–an online event where you can learn everything you need to know to successfully implement passkeys. Use #PasskeysWeek to participate in the conversation and spread the word about your products that support passkeys.
Keep an eye on @ChromiumDev and @AndroidDev, where we'll share new learning materials, including blog posts, case studies and pathways to earn passkeys badges on your Google Developer Profile.
On 25 October at 10 AM PDT, we’ll host a live Q&A session on Google for Developers YouTube channel where you can get all your questions about passkeys answered by passkeys engineers from Google. Bookmark this link or click "Notify me" to get alerted when the livestream is about to start:
The recording will also be available on the channel after the event — we hope you will tune in.
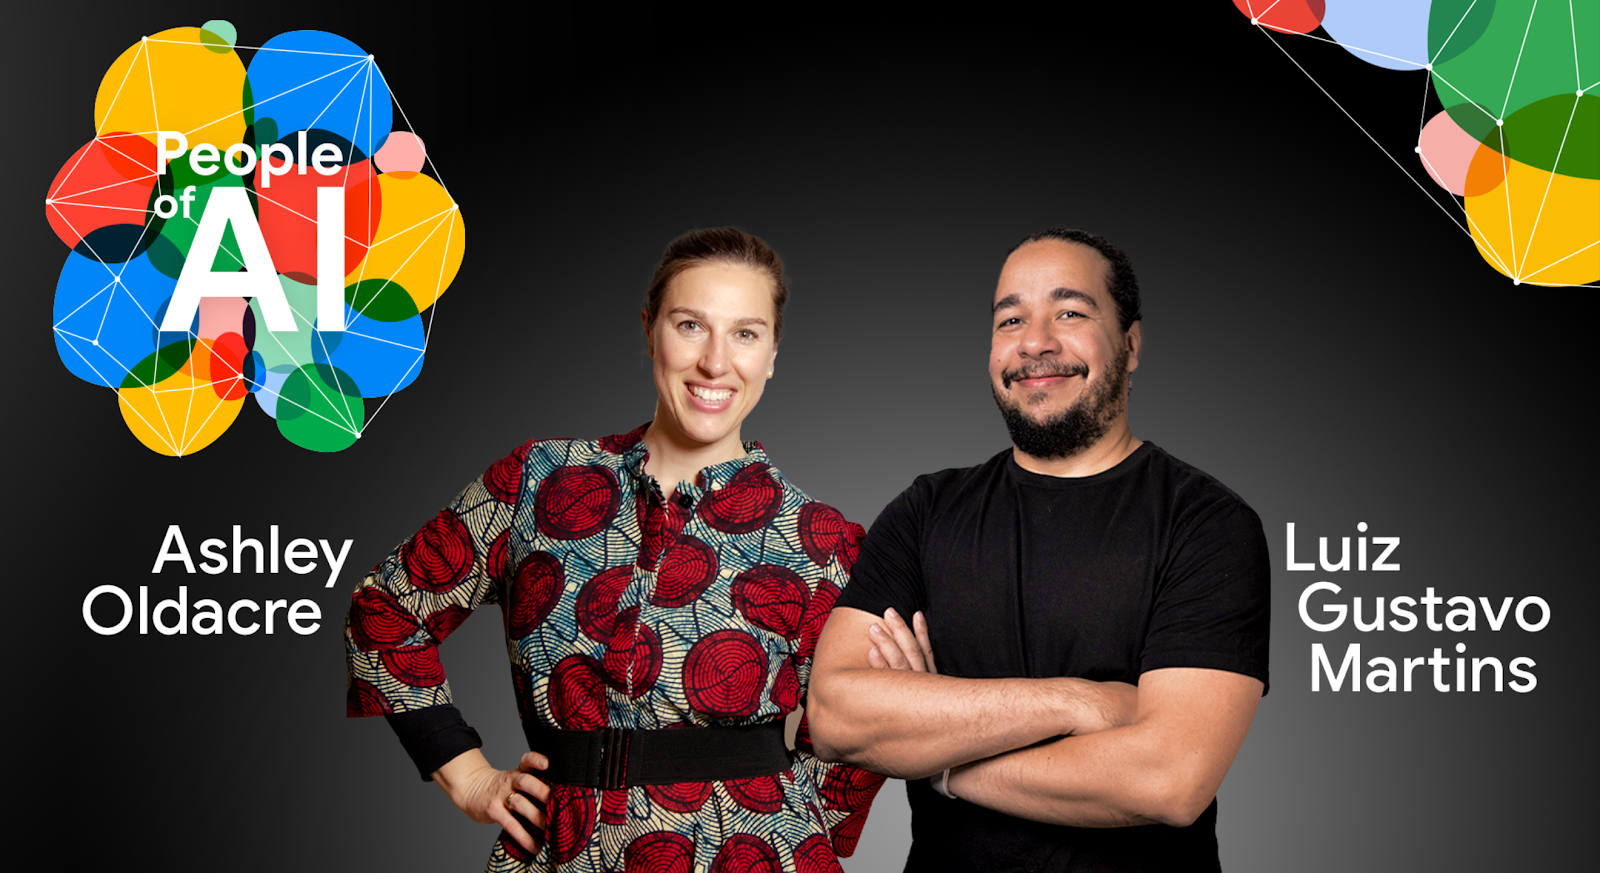
We are back for another season of People of AI with a new lineup of incredible guests! I am so excited to introduce my new co-host Luiz Gustavo Martins as we meet inspiring people with interesting stories in the field of Artificial Intelligence.
Last season we focused on the incredible journeys that our guests took to get into the field of AI. Through our stories, we highlighted that no matter who you are, what your interests are, or what you work on, there is a place for anyone to get into this field. We also explored how much more accessible the technology has become over the years, as well as the importance of building AI-related products responsibly and ethically. It is easier than ever to use tools, platforms and services powered by machine learning to leverage the benefits of AI, and break down the barrier of entry.
For season 2, we will feature amazing conversations, focusing on Generative AI! Specifically, we will be discussing the explosive growth of Generative AI tools and the major technology shift that has happened in recent months. We will dive into various topics to explore areas where Generative AI can contribute tremendous value, as well as boost both productivity and economic growth. We will also continue to explore the personal paths and career development of this season’s guests as they share how their interest in technology was sparked, how they worked hard to get to where they are today, and explore what it is that they are currently working on.
Starting today, we will release one new episode of season 2 per week. Listen to the first episode on the People of AI site or wherever you get your podcasts. And stay tuned for later in the season when we premiere our first video podcasts as well!
Episode 1: meet your hosts, Ashley and Gus and learn about Generative AI, Bard and the big shift that has dramatically changed the industry.
Episode 2: meet Sunita Verma, a long-time Googler, as she shares her personal journey from Engineering to CS, and into Google. As an early pioneer of AI and Google Ads, we will talk about the evolution of AI and how Generative AI will transform the way we work.
Episode 3: meet Sayak Paul, a Google Developer Expert (GDE) as we explore what it means to be a GDE and how to leverage the power of your community through community contributions.
Episode 4: meet Crispin Velez, the lead for Cloud’s Vertex AI as we dig into his experience in Cloud working with customers and partners on how to integrate and deploy AI. We also learn how he grew his AI developer community in LATAM from scratch.
Episode 5: meet Joyce Shen, venture capital/private equity investor. She shares her fascinating career in AI and how she has worked with businesses to spot AI talent, incorporate AI technology into workflows and implement responsible AI into their products.
Episode 6: meet Anne Simonds and Brian Gary, founders of Muse https://www.museml.com. Join us as we talk about their recent journeys into AI and their new company which uses the power of Generative AI to spark creativity.
Episode 7: meet Tulsee Doshi, product lead for Google’s Responsible AI efforts as we discuss the development of Google-wide resources and best practices for developing more inclusive, diverse, and ethical algorithm driven products.
Episode 8: meetJeanine Banks, Vice President and General Manager of Google Developer X and Head of Developer Relations. Join us as we debunk AI and get down to what Generative AI really is, how it has changed over the past few months and will continue to change the developer landscape.
Episode 9: meet Simon Tokumine, Director of Product Management at Google. We will talk about how AI has brought us into the era of task-orientated products and is fueling a new community of makers.
Listen now to the first episode of Season 2. We can’t wait to share the stories of these exceptional People of AI with you!
This podcast is sponsored by Google. Any remarks made by the speakers are their own and are not endorsed by Google.
This article was originally posted on the Firebase blog.
For the past six years, we have shared the latest and greatest updates to Firebase, Google’s app development platform, at our annual Firebase Summit – this year, we wanted to do something a little different for our community of developers. So, in addition to the Flutter Firebase festival that just wrapped up, and meeting you all over the world at DevFests, we’re thrilled to announce our very first Firebase Demo Day, happening on November 8, 2023!
What is Demo Day?
Demo Day will be a virtual experience where we'll unveil short demos (i.e. pre-recorded videos) that showcase what's new, what's possible, and how you can solve your biggest app development challenges with Firebase. You’ll hear directly from our team about what they’ve been working on in a format that will feel both refreshing but also familiar.
What will you learn?
You’ll learn how Firebase can help you build and run fullstack apps faster, harness the power of AI to build smart experiences, and use Google technology and tools together to be more productive. We’ve been working closely with our friends from Flutter, Google Cloud, and Project IDX to ensure the demos cover a variety of topics and feature integrated solutions from your favorite Google products.
How can you participate?
Since Demo Day is not your typical physical or virtual event, you don’t need to worry about registering, securing a ticket, or even traveling. This is one of the easiest ways to peek at the exciting future of Firebase! Simply bookmark the website (and add the event to your calendar), then check back on Wednesday, November 8, 2023 at 1:00 pm EST to watch the videos at your own pace and be inspired to make your app the best it can be for users and your business.
In the meantime, we encourage you to follow us on X (formerly Twitter) and LinkedIn and join the conversation using #FirebaseDemoDay. We’ll be sharing teasers and behind-the-scenes footage throughout October as we count down to Demo Day, so stay tuned!
Posted by Kevin Hernandez, Developer Relations Community Manager
For Hispanic Heritage Month, we are celebrating Henry Ruiz, Machine Learning GDE, and Latin American and Hispanic developer voices.
Henry Ruiz, Machine Learning GDE, originally had aspirations of becoming a soccer player in his home country of Colombia, but when his brother got injured he knew that he had to have a backup plan. With a love for video games, Henry decided to pursue an education in development and eventually discovered the world of computer science.
Today, Henry is a Computer Scientist, working as a Research Specialist (Data Scientist) at Texas A&M AgriLife Research and finishing his Ph.D. in Engineering at Texas A&M University.
Henry, who barely spoke English before immigrating to the United States, has now progressed to the point of preparing to defend his PhD, thanks to the assistance of the Hispanic community.
As a first-generation college student in the United States, Henry was looking for a community where he could feel connected. He received a lot of support from international students and mentions that he always received a warm welcome specifically from the Hispanic community. Joining different clubs on campus, Henry connected with others through food and shared experiences and they served as a support system for one another by creating study groups. Through these connections, he began to notice the impact of developers from Latin America which deeply inspired him. Henry reflects, “We are considered a minority and don’t always have the same opportunities that developed countries have. So we have to be creative and put in an extra effort. So to see these stories of minority developers making an impact on the world is very significant to me.” Henry views Hispanic Heritage Month as a celebration of what Hispanic people have accomplished and it drives him in his work.
"Hispanic Heritage Month is a celebration of the hard work, the resilience, and the work that people in the community have done,”
- Henry Ruiz, Machine Learning GDE
Henry has seen progress being made in recognizing Hispanic contributions in the tech industry. “Big companies have been aware of the challenges that we have as minorities and they started creating different programs to get community members more involved in tech companies,” he explains. Well-known corporations have hosted conferences for the Hispanic community and Google in particular, gives out scholarships such as the Generation Google Scholarship. This makes him feel seen and gives the community visibility in the industry. When he sees Hispanics in leadership positions, it shows him what can be accomplished, which fuels his work.
Today, Henry has worked on generative AI projects and leverages Google technologies (Cloud, TensorFlow, Kubernetes) to tackle challenges in the agricultural industry. Specifically, he’s working on a project to detect diseases and pests in bananas. With the strong foundation of his community, Henry is actively helping communities with his research. On his advice to the Hispanic community, Henry imparts the following words of wisdom, “Although some might not have access to the same tools and technologies as others, we have to remember that we are resilient, creative, and are problem solvers. Just continue moving forward.”
The Google Developer Experts (GDE) program is a global network of highly experienced technology experts, influencers, and thought leaders who actively support developers, companies, and tech communities by speaking at events and publishing content.
There are three primary ways that you can use the new MediaPipe Image Generator task:
Text-to-image generation based on text prompts using standard diffusion models.
Controllable text-to-image generation based on text prompts and conditioning images using diffusion plugins.
Customized text-to-image generation based on text prompts using Low-Rank Adaptation (LoRA) weights that allow you to create images of specific concepts that you pre-define for your unique use-cases.
Models
Before we get into all of the fun and exciting parts of this new MediaPipe task, it’s important to know that our Image Generation API supports any models that exactly match the Stable Diffusion v1.5 architecture. You can use a pretrained model or your fine-tuned models by converting it to a model format supported by MediaPipe Image Generator using our conversion script.
You can also customize a foundation model via MediaPipe Diffusion LoRA fine-tuning on Vertex AI, injecting new concepts into a foundation model without having to fine-tune the whole model. You can find more information about this process in our official documentation.
If you want to try this task out today without any customization, we also provide links to a few verified working models in that same documentation.
Image Generation through Diffusion Models
The most straightforward way to try the Image Generator task is to give it a text prompt, and then receive a result image using a diffusion model.
Like MediaPipe’s other tasks, you will start by creating an options object. In this case you will only need to define the path to your foundation model files on the device. Once you have that options object, you can create the ImageGenerator.
After creating your new ImageGenerator, you can create a new image by passing in the prompt, the number of iterations the generator should go through for generating, and a seed value. This will run a blocking operation to create a new image, so you will want to run it in a background thread before returning your new Bitmap result object.
val result= imageGenerator.generate(prompt_string, iterations, seed)
val bitmap= BitmapExtractor.extract(result?.generatedImage())
In addition to this simple input in/result out format, we also support a way for you to step through each iteration manually through the execute() function, receiving the intermediate result images back at different stages to show the generative progress. While getting intermediate results back isn’t recommended for most apps due to performance and complexity, it is a nice way to demonstrate what’s happening under the hood. This is a little more of an in-depth process, but you can find this demo, as well as the other examples shown in this post, in our official example app on GitHub.
Image Generation with Plugins
While being able to create new images from only a prompt on a device is already a huge step, we’ve taken it a little further by implementing a new plugin system which enables the diffusion model to accept a condition image along with a text prompt as its inputs.
We currently support three different ways that you can provide a foundation for your generations: facial structures, edge detection, and depth awareness. The plugins give you the ability to provide an image, extract specific structures from it, and then create new images using those structures.
LoRA Weights
The third major feature we’re rolling out today is the ability to customize the Image Generator task with LoRA to teach a foundation model about a new concept, such as specific objects, people, or styles presented during training. With the new LoRA weights, the Image Generator becomes a specialized generator that is able to inject specific concepts into generated images.
LoRA weights are useful for cases where you may want every image to be in the style of an oil painting, or a particular teapot to appear in any created setting. You can find more information about LoRA weights on Vertex AI in the MediaPipe Stable Diffusion LoRA model card, and create them using this notebook. Once generated, you can deploy the LoRA weights on-device using the MediaPipe Tasks Image Generator API, or for optimized server inference through Vertex AI’s one-click deployment.
In the example below, we created LoRA weights using several images of a teapot from the Dreambooth teapot training image set. Then we use the weights to generate a new image of the teapot in different settings.
Image generation with the LoRA weights
Next Steps
This is just the beginning of what we plan to support with on-device image generation. We’re looking forward to seeing all of the great things the developer community builds, so be sure to post them on X (formally Twitter) with the hashtag #MediaPipeImageGen and tag @GoogleDevs. You can check out the official sample on GitHub demonstrating everything you’ve just learned about, read through our official documentation for even more details, and keep an eye on the Google for Developers YouTube channel for updates and tutorials as they’re released by the MediaPipe team.
Acknowledgements
We’d like to thank all team members who contributed to this work: Lu Wang, Yi-Chun Kuo, Sebastian Schmidt, Kris Tonthat, Jiuqiang Tang, Khanh LeViet, Paul Ruiz, Qifei Wang, Yang Zhao, Yuqi Li, Lawrence Chan, Tingbo Hou, Joe Zou, Raman Sarokin, Juhyun Lee, Geng Yan, Ekaterina Ignasheva, Shanthal Vasanth, Glenn Cameron, Mark Sherwood, Andrei Kulik, Chuo-Ling Chang, and Matthias Grundmann from the Core ML team, as well as Changyu Zhu, Genquan Duan, Bo Wu, Ting Yu, and Shengyang Dai from Google Cloud.
Posted by Jen Person, Developer Relations Engineer
If you're a web developer looking to bring the power of machine learning (ML) to your web apps, then check out MediaPipe Solutions! With MediaPipe Solutions, you can deploy custom tasks to solve common ML problems in just a few lines of code. View the guides in the docs and try out the web demos on Codepen to see how simple it is to get started. While MediaPipe Solutions handles a lot of the complexity of ML on the web, there are still a few things to keep in mind that go beyond the usual JavaScript best practices. I've compiled them here in this list of seven dos and don'ts. Do read on to get some good tips!
❌ DON'T bundle your model in your app
As a web developer, you're accustomed to making your apps as lightweight as possible to ensure the best user experience. When you have larger items to load, you already know that you want to download them in a thoughtful way that allows the user to interact with the content quickly rather than having to wait for a long download. Strategies like quantization have made ML models smaller and accessible to edge devices, but they're still large enough that you don't want to bundle them in your web app. Store your models in the cloud storage solution of your choice. Then, when you initialize your task, the model and WebAssembly binary will be downloaded and initialized. After the first page load, use local storage or IndexedDB to cache the model and binary so future page loads run even faster. You can see an example of this in this touchless ATM sample app on GitHub.
✅ DO initialize your task early
Task initialization can take a bit of time depending on model size, connection speed, and device type. Therefore, it's a good idea to initialize the solution before user interaction. In the majority of the code samples on Codepen, initialization takes place on page load. Keep in mind that these samples are meant to be as simple as possible so you can understand the code and apply it to your own use case. Initializing your model on page load might not make sense for you. Just focus on finding the right place to spin up the task so that processing is hidden from the user.
After initialization, you should warm up the task by passing a placeholder image through the model. This example shows a function for running a 1x1 pixel canvas through the Pose Landmarker task:
One of my favorite parts of JavaScript is automatic garbage collection. In fact, I can't remember the last time memory management crossed my mind. Hopefully you've cached a little information about memory in your own memory, as you'll need just a bit of it to make the most of your MediaPipe task. MediaPipe Solutions for web uses WebAssembly (WASM) to run C++ code in-browser. You don't need to know C++, but it helps to know that C++ makes you take out your own garbage. If you don't free up unused memory, you will find that your web page uses more and more memory over time. It can have performance issues or even crash.
When you're done with your solution, free up resources using the .close() method.
For example, I can create a gesture recognizer using the following code:
Once I'm done recognizing gestures, I dispose of the gesture recognizer using the close() method:
gestureRecognizer.close();
Each task has a close method, so be sure to use it where relevant! Some tasks have close() methods for the returned results, so refer to the API docs for details.
✅ DO try out tasks in MediaPipe Studio
When deciding on or customizing your solution, it's a good idea to try it out in MediaPipe Studio before writing your own code. MediaPipe Studio is a web-based application for evaluating and customizing on-device ML models and pipelines for your applications. The app lets you quickly test MediaPipe solutions in your browser with your own data, and your own customized ML models. Each solution demo also lets you experiment with model settings for the total number of results, minimum confidence threshold for reporting results, and more. You'll find this especially useful when customizing solutions so you can see how your model performs without needing to create a test web page.
✅ DO test on different devices
It's always important to test your web apps on various devices and browsers to ensure they work as expected, but I think it's worth adding a reminder here to test early and often on a variety of platforms. You can use MediaPipe Studio to test devices as well so you know right away that a solution will work on your users' devices.
❌ DON'T default to the biggest model
Each task lists one or more recommended models. For example, the Object Detection task lists three different models, each with benefits and drawbacks based on speed, size and accuracy. It can be tempting to think that the most important thing is to choose the model with the very highest accuracy, but if you do so, you will be sacrificing speed and increasing the size of your model. Depending on your use case, your users might benefit from a faster result rather than a more accurate one. The best way to compare model options is in MediaPipe Studio. I realize that this is starting to sound like an advertisement for MediaPipe Studio, but it really does come in handy here!
✅ DO reach out!
Do you have any dos or don'ts of ML on the web that you think I missed? Do you have questions about how to get started? Or do you have a cool project you want to share? Reach out to me on LinkedIn and tell me all about it!