Posted by Jose Alcérreca, Developer Programs Engineer and Wojtek Kaliciński, Developer Advocate
During our recent talk at Android Dev Summit, we discuss the state of testing on Android on the example of a simple Notes application that we created as part of our testing codelab. In one section of the talk, we discuss the problem of test flakiness and introduce a simple solution for setting up a hermetic testing environment.
Combatting flaky tests
UI tests with frameworks like Espresso or UI Automator can easily get flaky if the application has external dependencies that can sometimes fail or take long to respond. In short, flaky tests are tests that are not reliable (they can pass or fail randomly) which defeats the whole purpose of having tests in the first place.
A common solution to this problem is hermetic testing or, in other words, making sure that your tests are isolated from dependencies. Using fake implementations or fake servers that just return predefined data is a common way of dealing with this problem. Here are some good examples:
- Network calls can be made via a fake API client or fake server that immediately returns data from files stored on disk instead of hitting the network. This bypasses the network's latency and flakiness as well as any errors originating on the real server.
- Interactions with low-level framework APIs (especially those for accessing hardware, like camera or storage) can be passed through an intermediate interface. A fake implementation of this interface could return immediately, providing a reference to preloaded data, such as an image, without relying on the hardware.
- Any sensors can be replaced with fakes too: GPS, microphone, accelerometer etc., giving you a chance to test on data that would be difficult to provide for the test in real life, like a preset location or a set of inputs simulating a gesture.
Dependency Injection (DI) is a software design pattern that facilitates testing, reusing modules and making them interchangeable. DI frameworks can help you deal with the boilerplate associated with this pattern but it can take a considerable amount of time to set them up and understand how they work. Before you are ready to commit to one of those frameworks for your app, you might want to explore an easier way, especially if your project requirements are simple.
Managing dependencies with product flavors
Product flavors is a powerful feature of Android Studio and our Android Gradle plugin that lets you swap Java classes at compile time and doesn't require additional libraries. Some typical examples of flavor dimensions are:
- free/paid flavors to generate two different APKs that will be released on your distribution channels
- stable/experimental to keep experiments in a different source set and generate beta versions quickly
We can leverage the same mechanism to create two separate versions of our app to help with hermetic testing:
- prod - uses real implementation of services and components, using real data and resources
- mock - for a version that contains fake implementations of dependencies that are hard to test
The procedure is very simple:
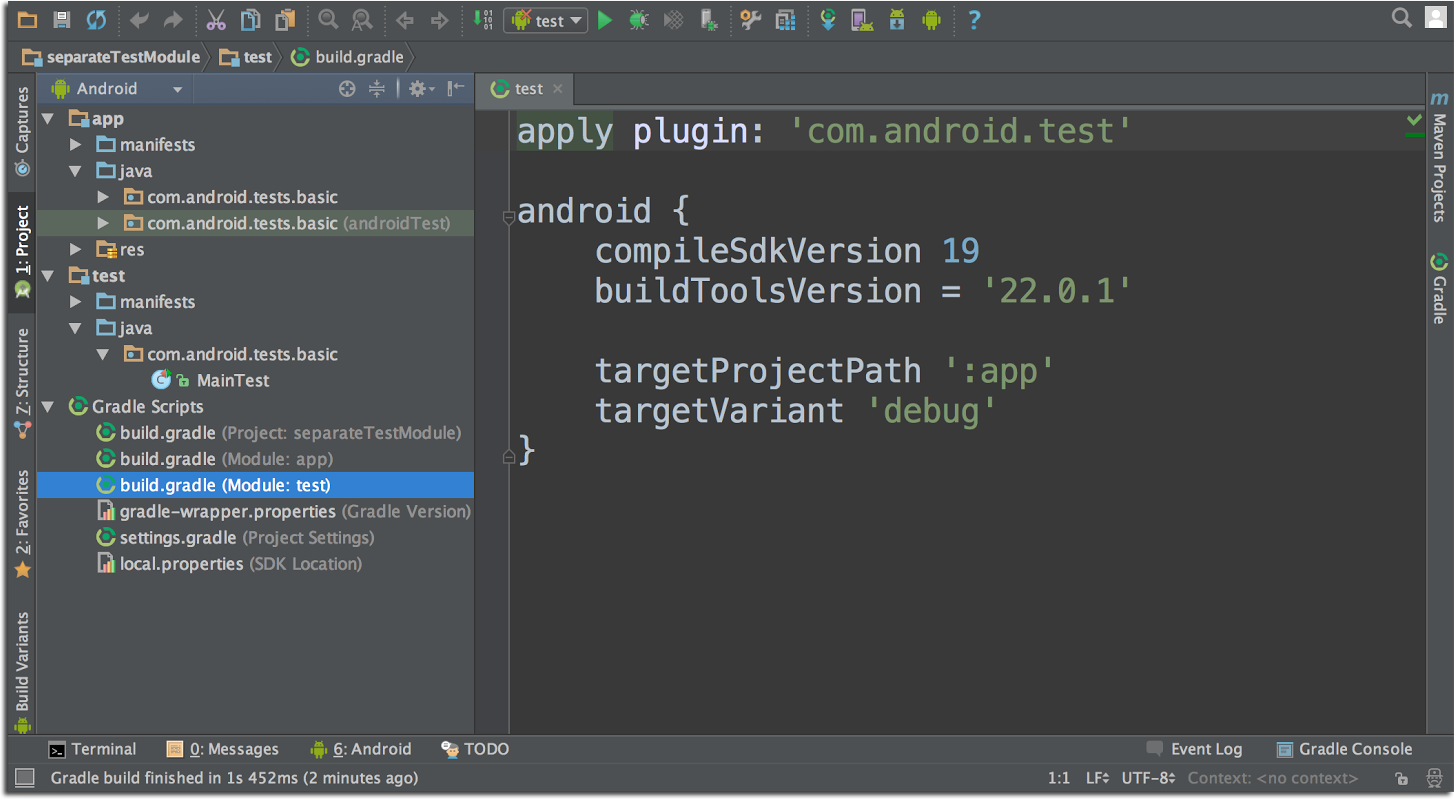
- Create the flavors in your app/build.gradle file.
android { productFlavors { mock { applicationIdSuffix = ".mock" } prod } } - Create two directories: app/src/prod and app/src/mock

- Create the class that you want to use for production code in the
prod/javafolder or move it frommain/java.Make sure themain/javafolder does not contain this class. - Create the same class (with the exact same class and file name) in the mock/java folder, but providing a different (fake) implementation that will be used for tests.
- In the Build Variants window in Android Studio, choose the variant that you want to install or run tests against. A variant is the combination of a flavor and a build type.


Note: In gradle, the task names change when you add flavors. Instead of installDebug, you will now have to choose installProdDebug or installMockDebug.
Running your tests
With the prod and mock flavors configured and your mock implementation in place, you can now use the following gradle tasks to choose how your tests should run:
connectedMockDebugAndroidTestwill merge theandroidTestandandroidTestMockdirectories and run every test found in the resulting source set. As these tests are run in a hermetic way, they will be faster and less flaky. This is ideal for a pre-submit check.connectedProdDebugAndroidTestwill use the real APIs and sensors so they might fail from time to time. If you have a Continuous Integration system, this task could be executed every night or used manually as a acceptance end-to-end test. Note that this task will run the tests inandroidTesteven ifandroidTestProddoesn't exist.
You can refer to our Android Testing Codelab to see how we used this method to provide different Injection class implementations, the one in prod providing real data and the other (mock) serving fake dependencies that use fake data for isolated test execution.
When you’re happy with your hermetic setup, you might want to give more flexibility to your build process and add even more dimensions to be able to interchange different components in your app. While the method discussed above is suitable for simple projects, for more complex situations it would be much better to invest some time to learn about and add a Dependency Injection framework to your project.