 Posted by Kristina Simakova – Engineering Manager

This article is cross-published on Medium
Media3 1.5.0 is now available!
Transformer now supports motion photos and faster image encoding. We’ve also simplified the setup for DefaultPreloadManager and ExoPlayer, making it easier to use. But that’s not all! We’ve included a new IAMF decoder, a Kotlin listener extension, and easier Player optimization through delegation.
To learn more about all new APIs and bug fixes, check out the full release notes.
Transformer improvements
Motion photo support
Transformer now supports exporting motion photos. The motion photo’s image is exported if the corresponding MediaItem’s image duration is set (see MediaItem.Builder().setImageDurationMs()) Otherwise, the motion photo’s video is exported. Note that the EditedMediaItem’s duration should not be set in either case as it will automatically be set to the corresponding MediaItem’s image duration.
Faster image encoding
This release accelerates image-to-video encoding, thanks to optimizations in DefaultVideoFrameProcessor.queueInputBitmap(). DefaultVideoFrameProcessor now treats the Bitmap given to queueInputBitmap() as immutable. The GL pipeline will resample and color-convert the input Bitmap only once. As a result, Transformer operations that take large (e.g. 12 megapixels) images as input execute faster.
AudioEncoderSettings
Similar to VideoEncoderSettings, Transformer now supports AudioEncoderSettings which can be used to set the desired encoding profile and bitrate.
Edit list support
Transformer now shifts the first video frame to start from 0. This fixes A/V sync issues in some files where an edit list is present.
Unsupported track type logging
This release includes improved logging for unsupported track types, providing more detailed information for troubleshooting and debugging.
Media3 muxer
In one of the previous releases we added a new muxer library which can be used to create MP4 container files. The media3 muxer offers support for a wide range of audio and video codecs, enabling seamless handling of diverse media formats. This new library also brings advanced features including:
The muxer library can be included as a gradle dependency:
implementation ("androidx.media3:media3-muxer:1.5.0")
Media3 muxer with Transformer
To use the media3 muxer with Transformer, set an InAppMuxer.Factory (which internally wraps media3 muxer) as the muxer factory when creating a Transformer:
val transformer = Transformer.Builder(context)
    .setMuxerFactory(InAppMuxer.Factory.Builder().build())
    .build()
Simpler setup for DefaultPreloadManager and ExoPlayer
With Media3 1.5.0, we added DefaultPreloadManager.Builder, which makes it much easier to build the preload components and the player. Previously we asked you to instantiate several required components (RenderersFactory, TrackSelectorFactory, LoadControl, BandwidthMeter and preload / playback Looper) first, and be super cautious on correctly sharing those components when injecting them into the DefaultPreloadManager constructor and the ExoPlayer.Builder. With the new DefaultPreloadManager.Builder this becomes a lot simpler:
- Build a DefaultPreloadManager and ExoPlayer instances with all default components.
val preloadManagerBuilder = DefaultPreloadManager.Builder()
val preloadManager = preloadManagerBuilder.build()
val player = preloadManagerBuilder.buildExoPlayer()
- Build a DefaultPreloadManager and ExoPlayer instances with custom sharing components.
val preloadManagerBuilder = DefaultPreloadManager.Builder().setRenderersFactory(customRenderersFactory)
// The resulting preloadManager uses customRenderersFactory
val preloadManager = preloadManagerBuilder.build()
// The resulting player uses customRenderersFactory
val player = preloadManagerBuilder.buildExoPlayer()
- Build a DefaultPreloadManager and ExoPlayer instances, while setting the custom playback-only configurations on the ExoPlayers.
val preloadManagerBuilder = DefaultPreloadManager.Builder()
val preloadManager = preloadManagerBuilder.build()
// Tune the playback-only configurations
val playerBuilder = ExoPlayer.Builder().setFooEnabled()
// The resulting player will have playback feature "Foo" enabled
val player = preloadManagerBuilder.buildExoPlayer(playerBuilder)
Preloading the next playlist item
We’ve added the ability to preload the next item in the playlist of ExoPlayer. By default, playlist preloading is disabled but can be enabled by setting the duration which should be preloaded to memory:
player.preloadConfiguration =
    PreloadConfiguration(/* targetPreloadDurationUs= */ 5_000_000L)
With the PreloadConfiguration above, the player tries to preload five seconds of media for the next item in the playlist. Preloading is only started when no media is being loaded that is required for the ongoing playback. This way preloading doesn’t compete for bandwidth with the primary playback.
When enabled, preloading can help minimize join latency when a user skips to the next item before the playback buffer reaches the next item. The first period of the next window is prepared and video, audio and text samples are preloaded into its sample queues. The preloaded period is later queued into the player with preloaded samples immediately available and ready to be fed to the codec for rendering.
Once opted-in, playlist preloading can be turned off again by using PreloadConfiguration.DEFAULT to disable playlist preloading:
player.preloadConfiguration = PreloadConfiguration.DEFAULT
New IAMF decoder and Kotlin listener extension
The 1.5.0 release includes a new media3-decoder-iamf module, which allows playback of IAMF immersive audio tracks in MP4 files. Apps wanting to try this out will need to build the libiamf decoder locally. See the media3 README for full instructions.
implementation ("androidx.media3:media3-decoder-iamf:1.5.0")
This release also includes a new media3-common-ktx module, a home for Kotlin-specific functionality. The first version of this module contains a suspend function that lets the caller listen to Player.Listener.onEvents. This is a building block that’s used by the upcoming media3-ui-compose module (launching with media3 1.6.0) to power a Jetpack Compose playback UI.
implementation ("androidx.media3:media3-common-ktx:1.5.0")
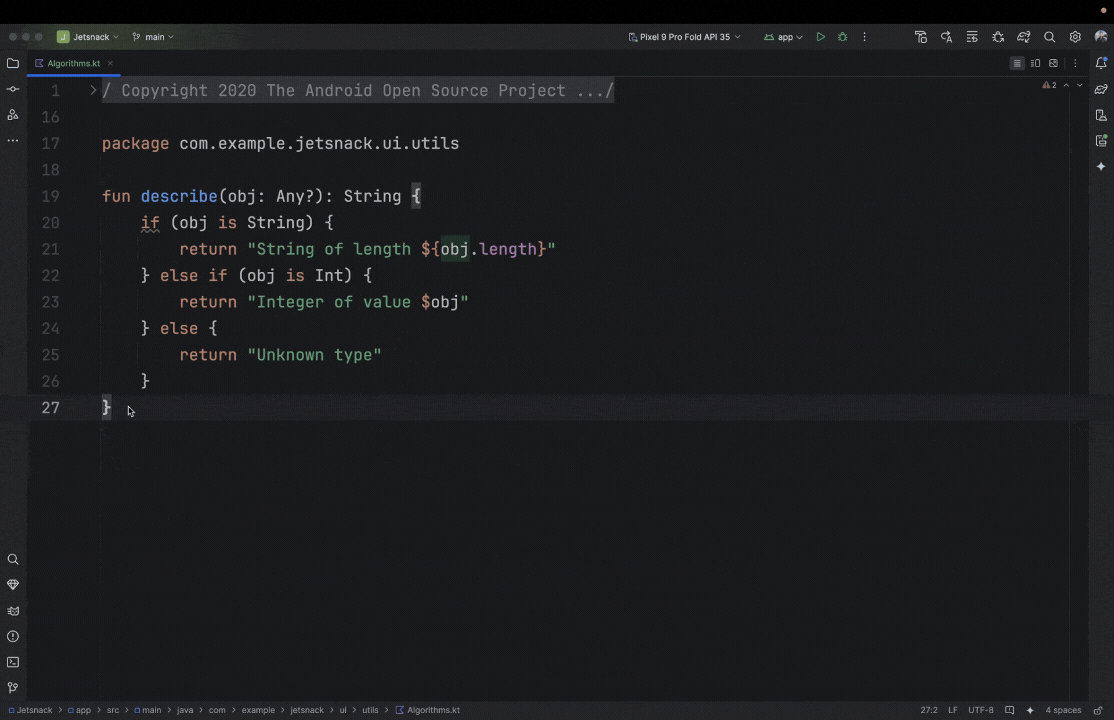
Easier Player customization via delegation
Media3 has provided a ForwardingPlayer implementation since version 1.0.0, and we have previously suggested that apps should use it when they want to customize the way certain Player operations work, by using the decorator pattern. One very common use-case is to allow or disallow certain player commands (in order to show/hide certain buttons in a UI). Unfortunately, doing this correctly with ForwardingPlayer is surprisingly hard and error-prone, because you have to consistently override multiple methods, and handle the listener as well. The example code to demonstrate how fiddly this is too long for this blog, so we’ve put it in a gist instead.
In order to make these sorts of customizations easier, 1.5.0 includes a new ForwardingSimpleBasePlayer, which builds on the consistency guarantees provided by SimpleBasePlayer to make it easier to create consistent Player implementations following the decorator pattern. The same command-modifying Player is now much simpler to implement:
class PlayerWithoutSeekToNext(player: Player) : ForwardingSimpleBasePlayer(player) {
  override fun getState(): State {
    val state = super.getState()
    return state
      .buildUpon()
      .setAvailableCommands(
        state.availableCommands.buildUpon().remove(COMMAND_SEEK_TO_NEXT).build()
      )
      .build()
  }

  // We don't need to override handleSeek, because it is guaranteed not to be called for
  // COMMAND_SEEK_TO_NEXT since we've marked that command unavailable.
}
MediaSession: Command button for media items
Command buttons for media items allow a session app to declare commands supported by certain media items that then can be conveniently displayed and executed by a MediaController or MediaBrowser:
Screenshot: Command buttons for media items in the Media Center of Android Automotive OS.
You'll find the detailed documentation on android.developer.com.
This is the Media3 equivalent of the legacy “custom browse actions” API, with which Media3 is fully interoperable. Unlike the legacy API, command buttons for media items do not require a MediaLibraryService but are a feature of the Media3 MediaSession instead. Hence they are available for MediaController and MediaBrowser in the same way.
If you encounter any issues, have feature requests, or want to share feedback, please let us know using the Media3 issue tracker on GitHub. We look forward to hearing from you!
This blog post is a part of Camera and Media Spotlight Week. We're providing resources – blog posts, videos, sample code, and more – all designed to help you uplevel the media experiences in your app.
To learn more about what Spotlight Week has to offer and how it can benefit you, be sure to read our overview blog post.
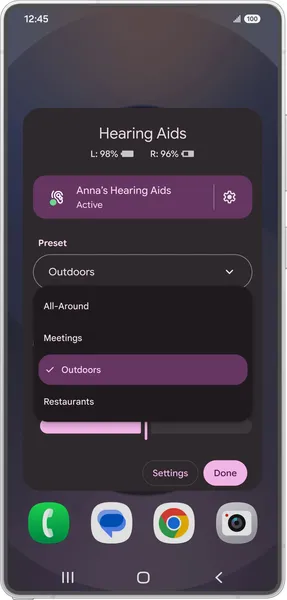 Today we’re rolling out a handful of updates to make Android’s hearing aid and screenreader experiences even more accessible.Starting with the Samsung Galaxy S25, we’re …
 Learn more about the Google and Android updates announced at Galaxy Unpacked.
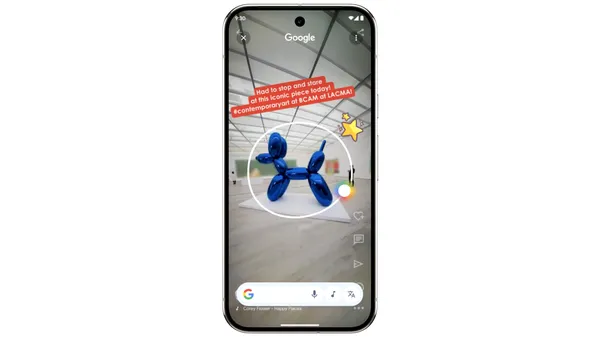 Last year, we introduced Circle to Search to help you easily circle, scribble or tap anything you see on your Android screen, and find information from the web without s…
 Posted by John Zoeller – Developer Relations Engineer, and Caroline Vander Wilt – Group Product Manager


 Posted by Caren Chang – Developer Relations Engineer

 Posted by Steven Jenkins – Product Manager, Android Studio

 Posted by Nevin Mital - Developer Relations Engineer, Android Media

 Posted by Caren Chang- Android Developer Relations Engineer

