Posted by Kenny Sulaimon, Product Manager, ML Kit; Chengji Yan and Areeba Abid, Software Engineers, ML Kit
Two months ago we introduced the standalone version of the ML Kit SDK, making it even easier to integrate on-device machine learning into mobile apps. Since then we’ve launched the Digital Ink Recognition API, and also introduced the ML Kit early access program. Our first two early access APIs were Pose Detection and Entity Extraction. We’ve received an overwhelming amount of interest in these new APIs and today, we are thrilled to officially add Pose Detection to the ML Kit lineup.
A New ML Kit API, Pose Detection


Examples of ML Kit Pose Detection
ML Kit Pose Detection is an on-device, cross platform (Android and iOS), lightweight solution that tracks a subject's physical actions in real time. With this technology, building a one-of-a-kind experience for your users is easier than ever.
The API produces a full body 33 point skeletal match that includes facial landmarks (ears, eyes, mouth, and nose), along with hands and feet tracking. The API was also trained on a variety of complex athletic poses, such as Yoga positions.
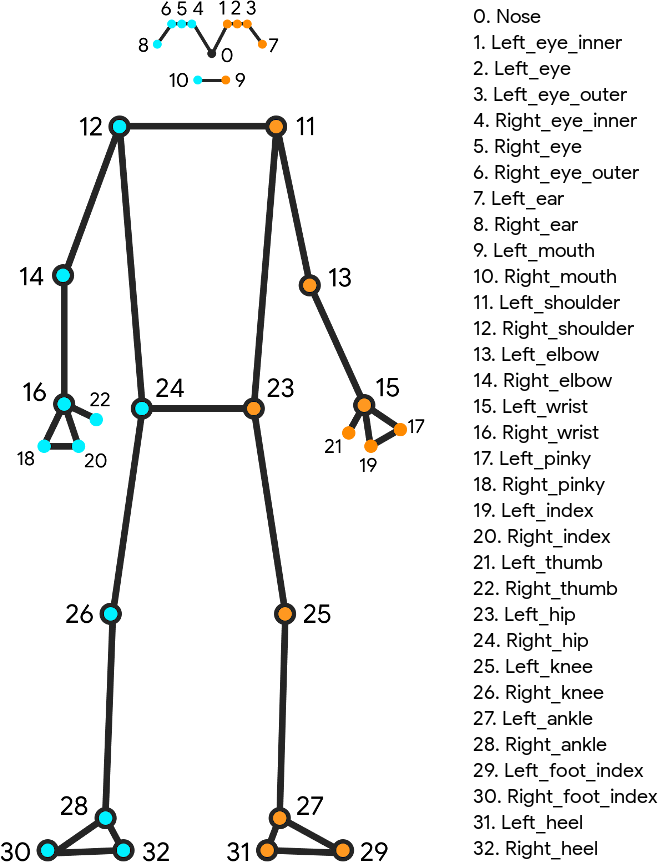
Skeleton image detailing all 33 landmark points
Under The Hood
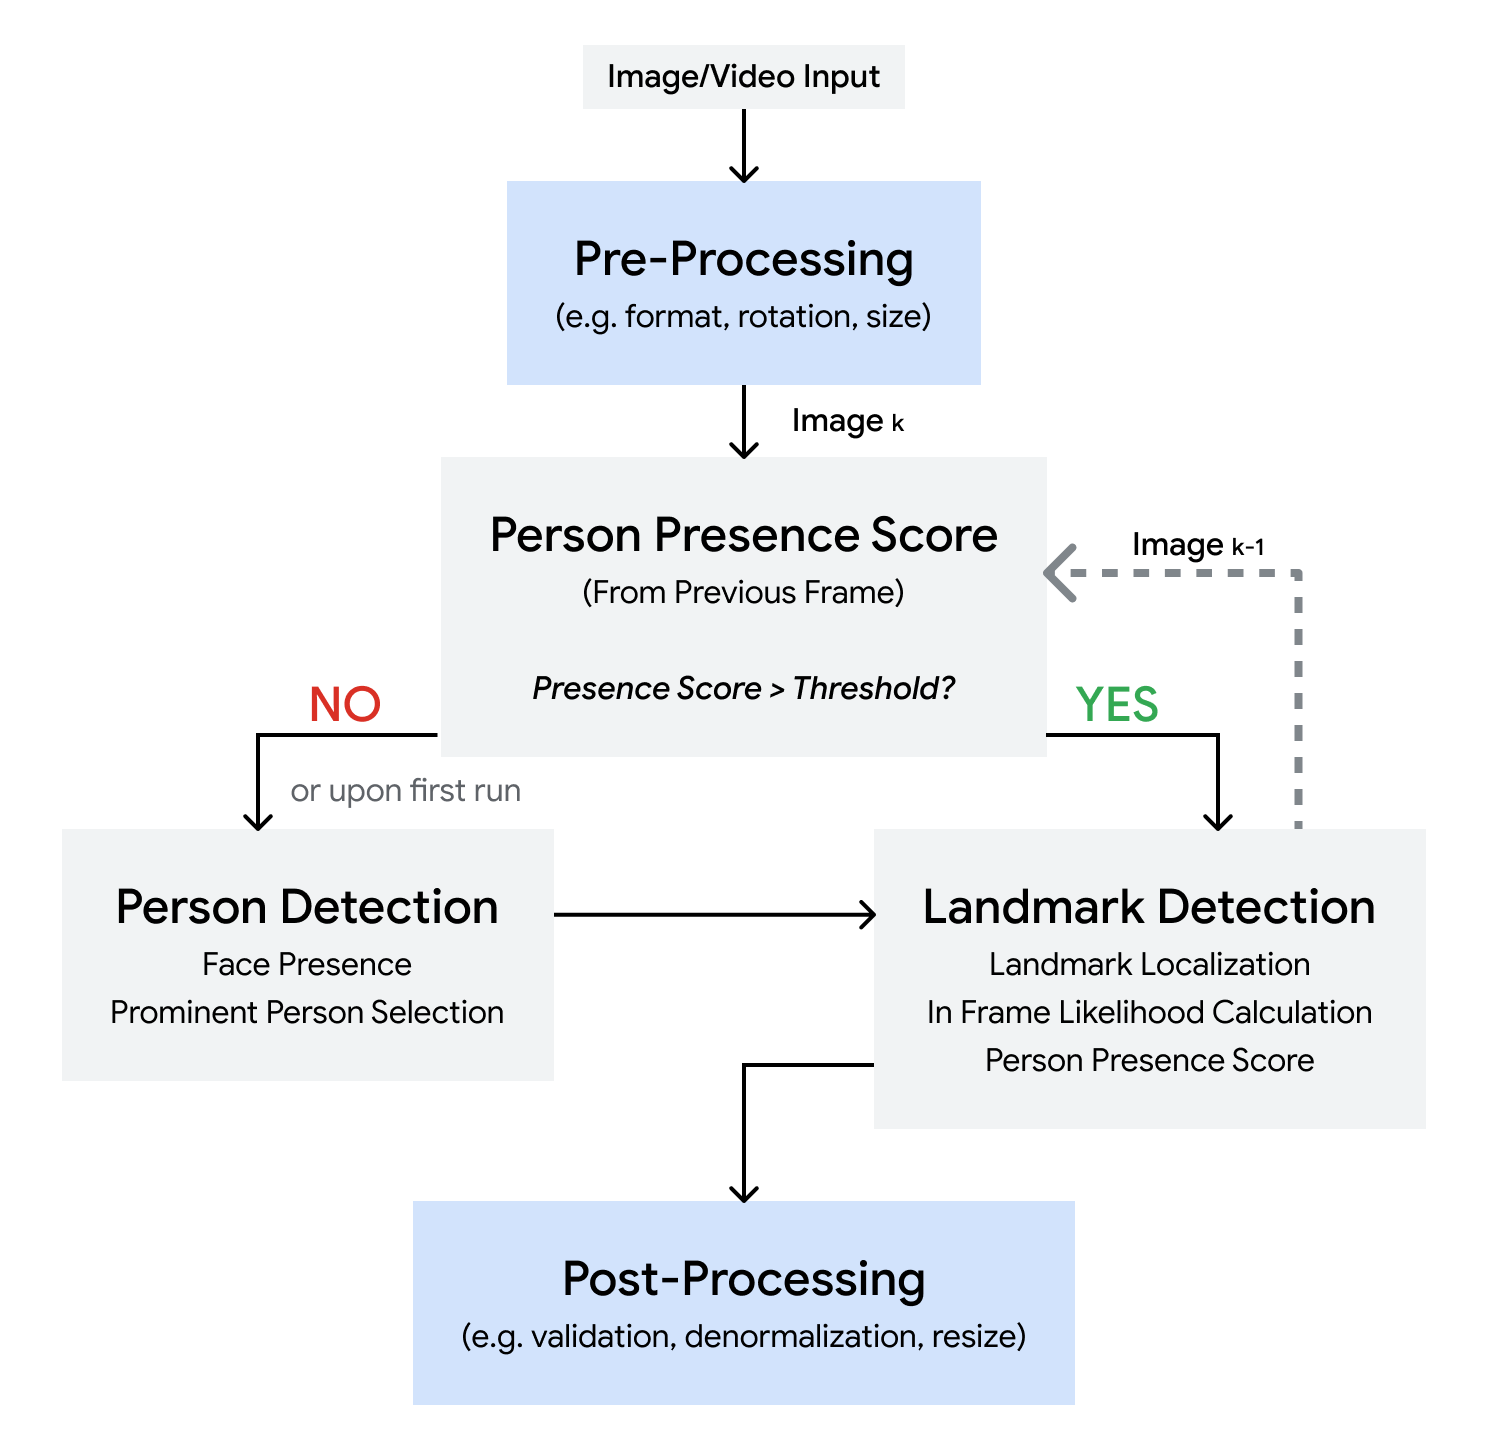
Diagram of the ML Kit Pose Detection Pipeline
The power of the ML Kit Pose Detection API is in its ease of use. The API builds on the cutting edge BlazePose pipeline and allows developers to build great experiences on Android and iOS, with little effort. We offer a full body model, support for both video and static image use cases, and have added multiple pre and post processing improvements to help developers get started with only a few lines of code.
The ML Kit Pose Detection API utilizes a two step process for detecting poses. First, the API combines an ultra-fast face detector with a prominent person detection algorithm, in order to detect when a person has entered the scene. The API is capable of detecting a single (highest confidence) person in the scene and requires the face of the user to be present in order to ensure optimal results.
Next, the API applies a full body, 33 landmark point skeleton to the detected person. These points are rendered in 2D space and do not account for depth. The API also contains a streaming mode option for further performance and latency optimization. When enabled, instead of running person detection on every frame, the API only runs this detector when the previous frame no longer detects a pose.
The ML Kit Pose Detection API also features two operating modes, “Fast” and “Accurate”. With the “Fast” mode enabled, you can expect a frame rate of around 30+ FPS on a modern Android device, such as a Pixel 4 and 45+ FPS on a modern iOS device, such as an iPhone X. With the “Accurate” mode enabled, you can expect more stable x,y coordinates on both types of devices, but a slower frame rate overall.
Lastly, we’ve also added a per point “InFrameLikelihood” score to help app developers ensure their users are in the right position and filter out extraneous points. This score is calculated during the landmark detection phase and a low likelihood score suggests that a landmark is outside the image frame.
Real World Applications
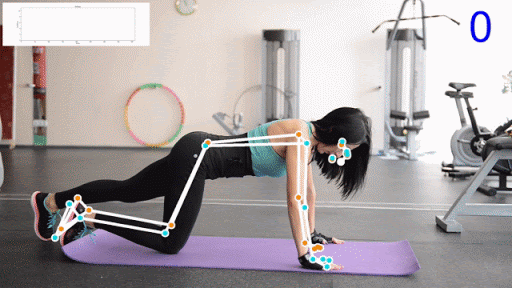
Examples of a pushup and squat counter using ML Kit Pose Detection
Keeping up with regular physical activity is one of the hardest things to do while at home. We often rely on gym buddies or physical trainers to help us with our workouts, but this has become increasingly difficult. Apps and technology can often help with this, but with existing solutions, many app developers are still struggling to understand and provide feedback on a user’s movement in real time. ML Kit Pose Detection aims to make this problem a whole lot easier.
The most common applications for Pose detection are fitness and yoga trackers. It’s possible to use our API to track pushups, squats and a variety of other physical activities in real time. These complex use cases can be achieved by using the output of the API, either with angle heuristics, tracking the distance between joints, or with your own proprietary classifier model.
To get you jump started with classifying poses, we are sharing additional tips on how to use angle heuristics to classify popular yoga poses. Check it out here.
Learning to Dance Without Leaving Home
Learning a new skill is always tough, but learning to dance without the aid of a real time instructor is even tougher. One of our early access partners, Groovetime, has set out to solve this problem.
With the power of ML Kit Pose Detection, Groovetime allows users to learn their favorite dance moves from popular short-form dance videos, while giving users automated real time feedback on their technique. You can join their early access beta here.
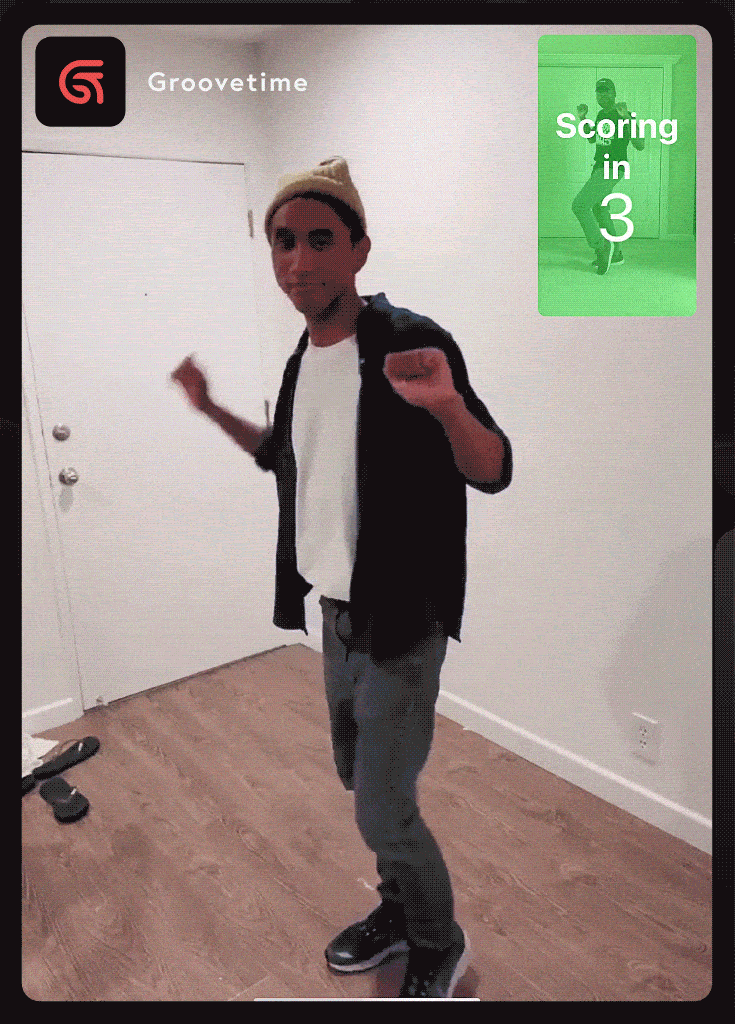
Groovetime App using ML Kit Pose Detection
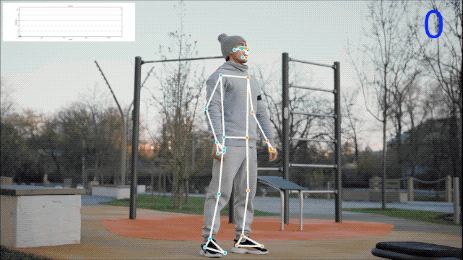
Staying Active Wherever You Are
Our Pose Detection API is also helping adidas Training, another one of our early access partners, build a virtual workout experience that will help you stay active no matter where you are. This one-of-a-kind innovation will help analyze and give feedback on the user’s movements, using nothing more than just your phone. Integration into the adidas Training app is still in the early phases of the development cycle, but stay tuned for more updates in the future.
How to get started?
If you would like to start using the Pose Detection API in your mobile app, head over to the developer documentation or check out the sample apps for Android and iOS to see the API in action. For questions or feedback, please reach out to us through one of our community channels.