Posted by Scott Swarthout, Product Manager
We spoke with the Android developer community and learned that animations are important for making UIs more intuitive and memorable. However, we also heard that adding complex animation to Android apps has been a difficult task.To address this problem, we created a powerful set of APIs with Motion Layout and a corresponding tool – Motion Editor, that when combined make it easier to build pixel-perfect animations. This blog is a quick tour of the new Motion Editor and how to use the latest features during your animation development. Additionally today, you can now watch a new video series specifically created to teach you about the various APIs included with MotionLayout. Watch here.
Motion Editor is a visual design editor for the MotionLayout layout type, making it easier to create and preview animations. We just released the stable version Motion Editor in Android Studio 4.0 and we already see many developers using it to build animations.
Animation running in the Motion Editor
The Motion Editor is an extension of Android Studio’s layout editor, and automatically opens when you select the Design or Split view on an XML file containing a MotionLayout. From there, you can edit your layout and Motion Scene files using the familiar interactive tools of the Layout Editor as well as preview your animations right from the Android Studio preview pane.
Motion Editor
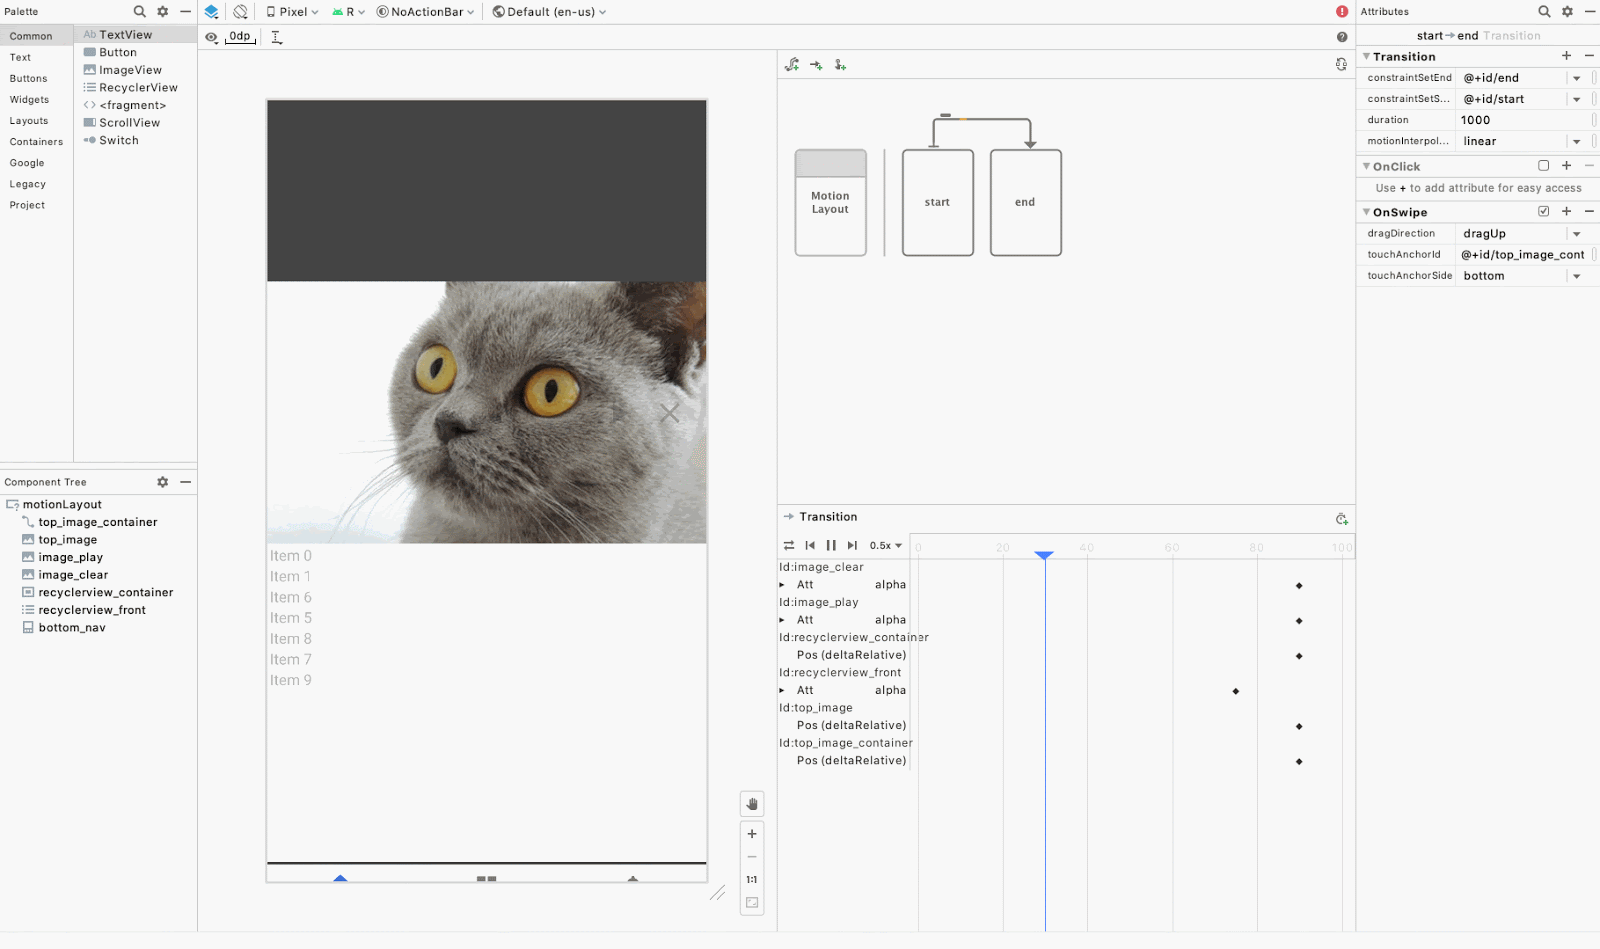
The Motion Editor is broken up into several panels which we will describe in this article. The main panels are: Overview, Selection, Attribute, and Preview.
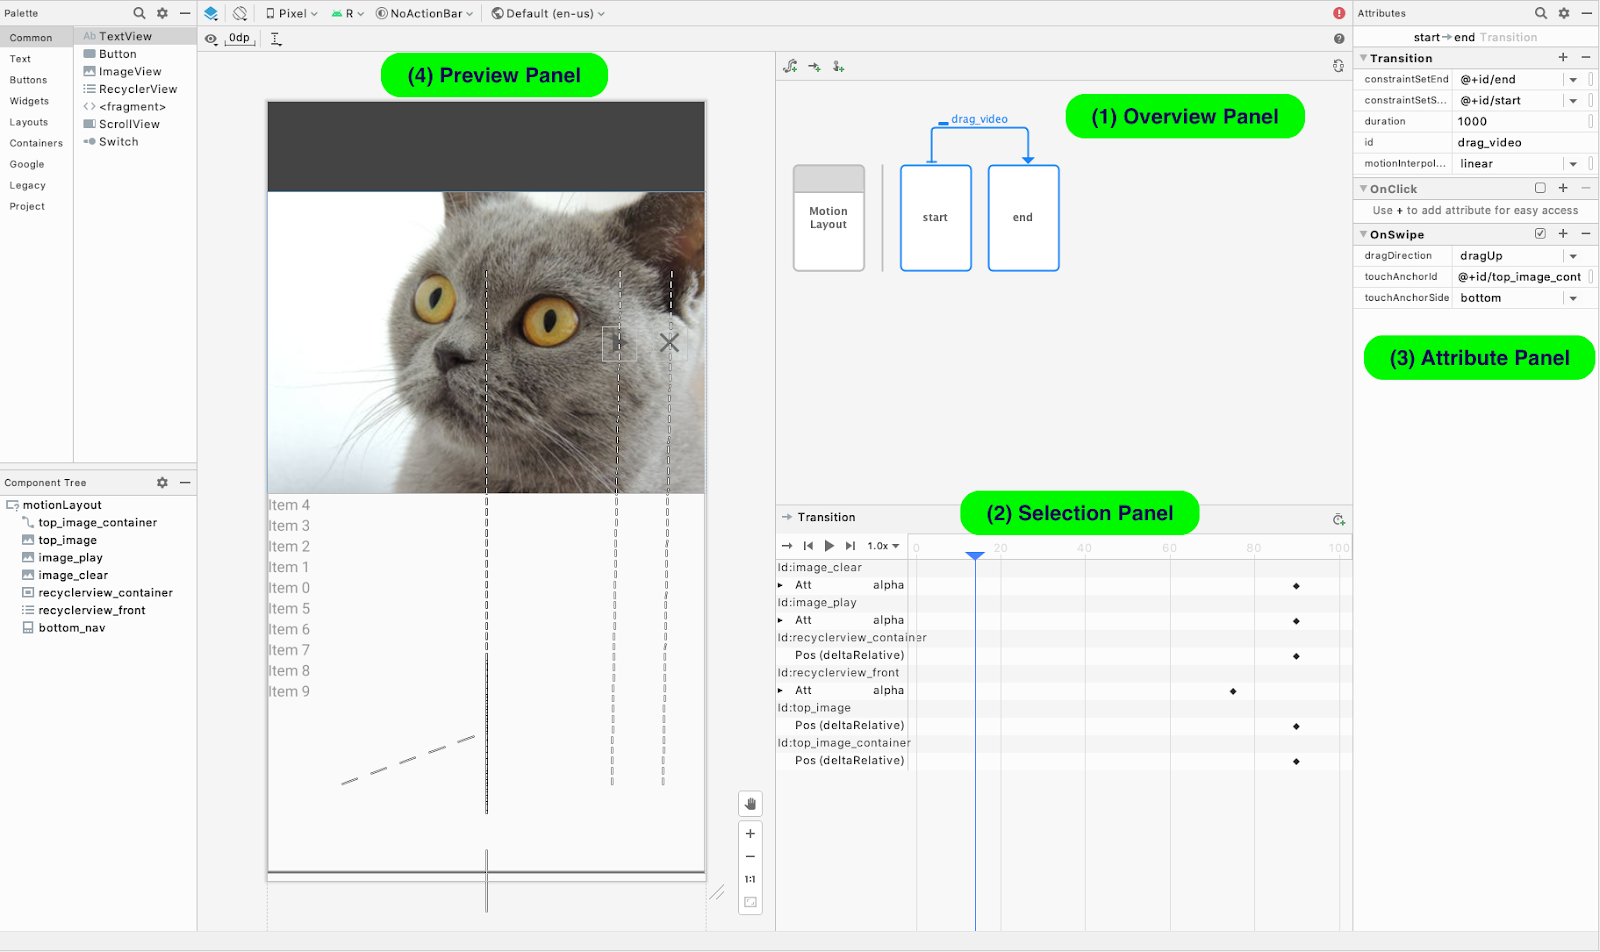
The Motion Editor has four main panels
Overview panel
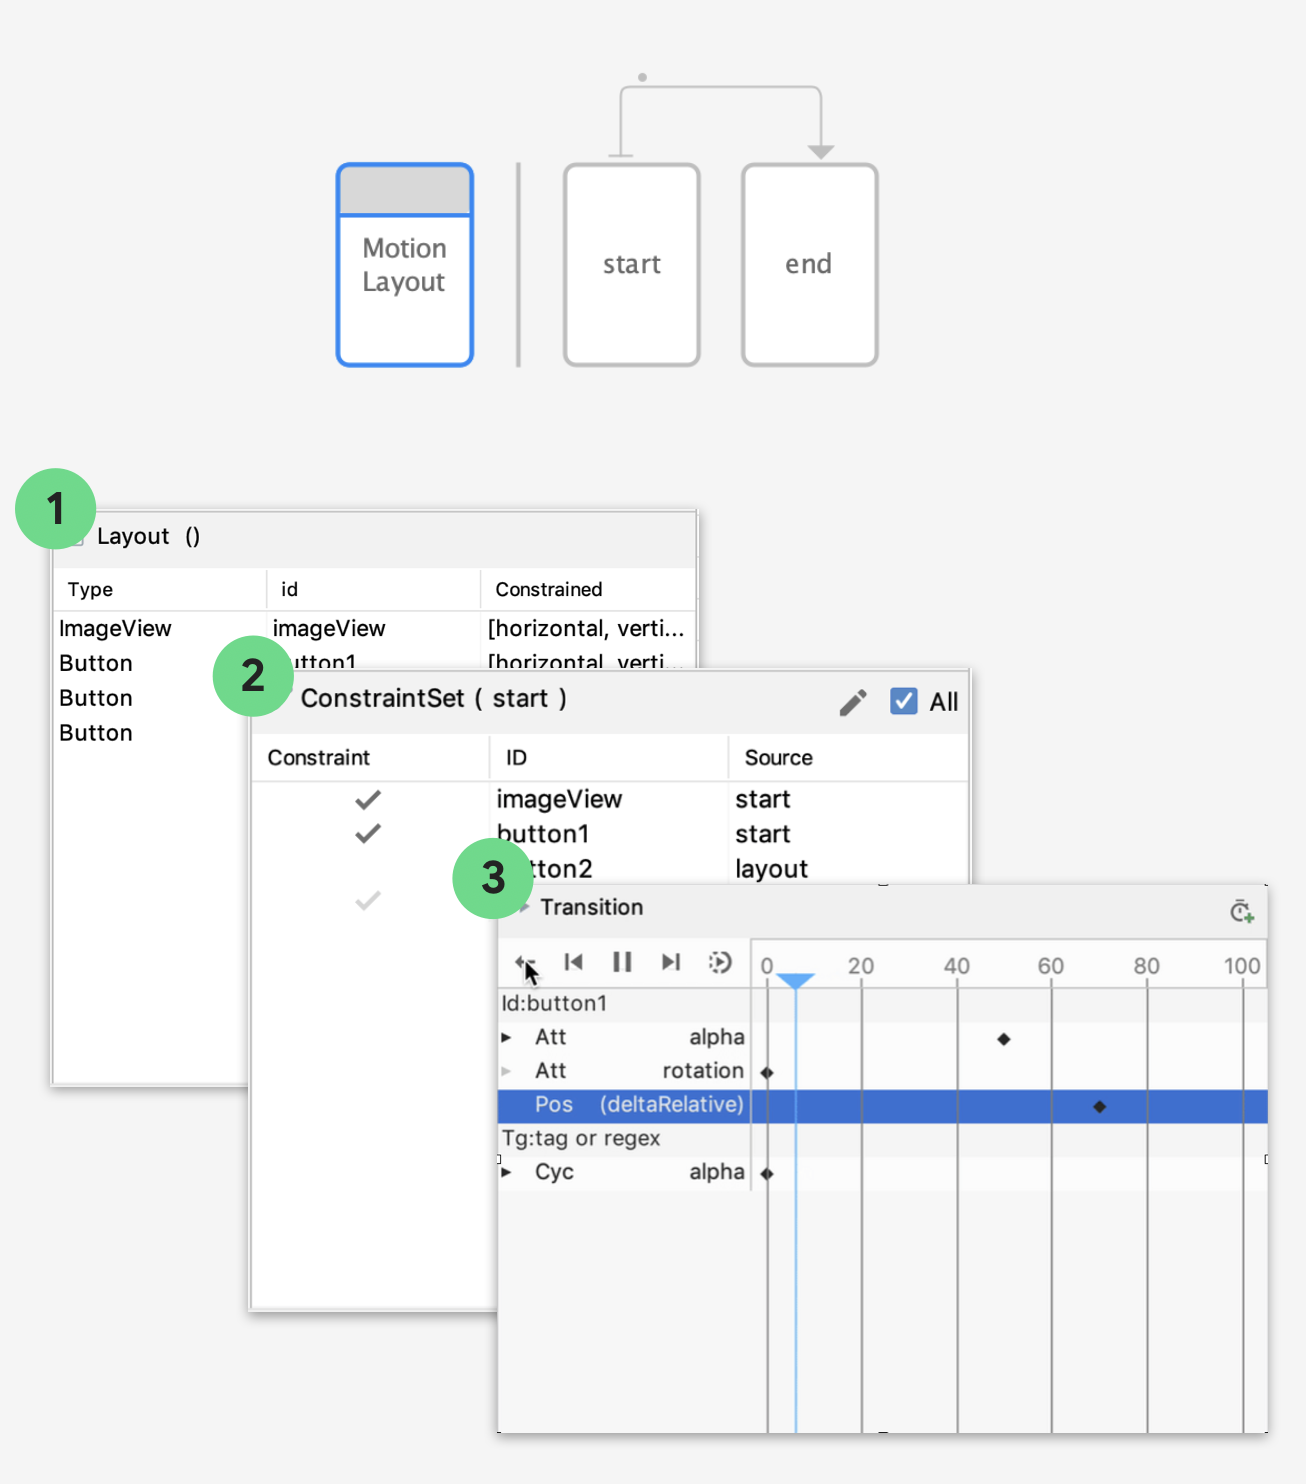
MotionLayout helps you animate layout changes, which you specify as transitions between ConstraintSets. The Motion Editor helps you visualize these states with the Overview panel. To edit constraints in a ConstraintSet, click on the corresponding box in the Overview panel.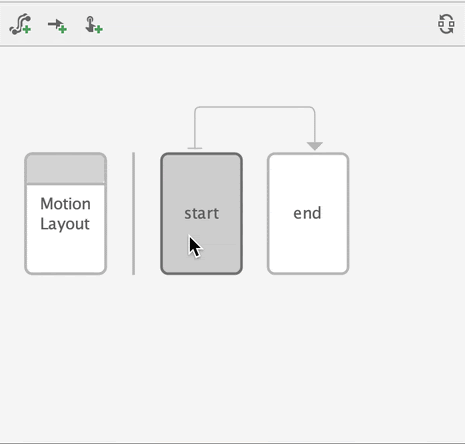
MotionLayout Scene with two ConstraintSets, start and end, and a Transition between them
Selection panel
The Selection panel provides detailed controls based on the state of the Overview panel. It has three modes:
- Motion Layout selected
- ConstraintSet selected
- Transition selected
The selection panel has three modes depending on the state of the Overview panel
MotionLayout selected
The Motion Editor supports editing of the base Motion Layout. When Motion Layout is selected in the Overview panel, you can select components to see if they are properly constrained.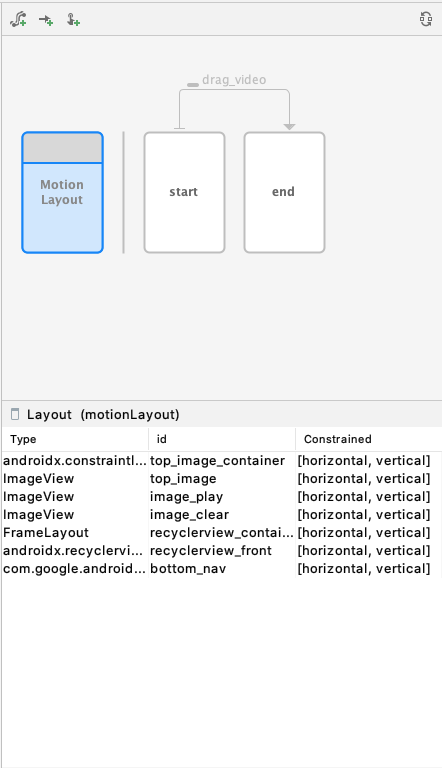
Check if components are properly constrained with the Selection panel
ConstraintSet selected
When a ConstraintSet is selected, the Selection panel displays the list of components and a checkmark to indicate if the component is constrained in this ConstraintSet.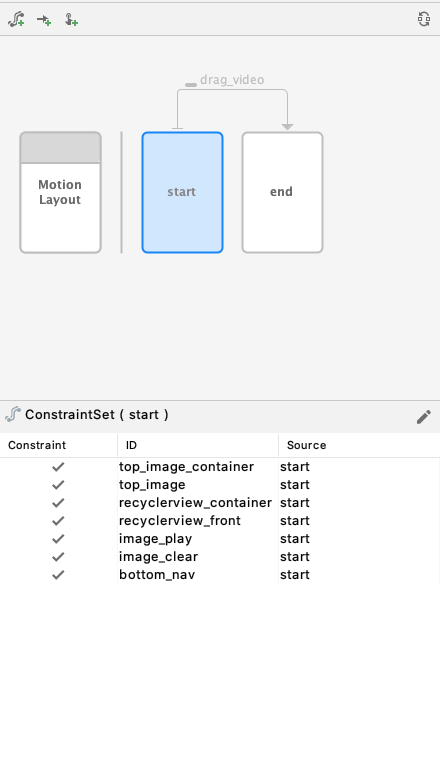
Select components to be included in the ConstraintSet
Transition selected
When a transition is selected, you can control the playback of the animation with the animation toolbar. When an animation is selected, click Play ▶️ above the timeline to preview the animation.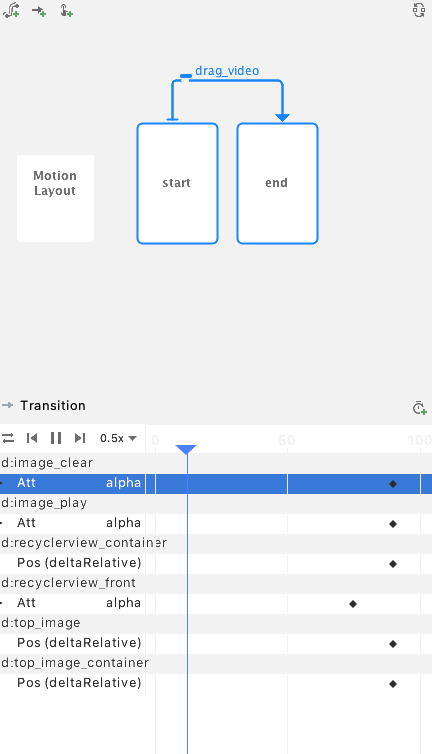
Preview animations on the Motion Editor timeline
Keyframes
Sometimes you want to modify the path a view takes during an animation. To do this, MotionLayout uses keyframes. We build keyframe editing into the editor to make it easy to tweak animations. To create a new keyframe, click on the new keyframe icon in the top right of the selection panel. This action opens a dialog where you can set attributes for the keyframe. To edit a keyframe, click on the diamond ◆ icon to open the KeyFrame attribute panel.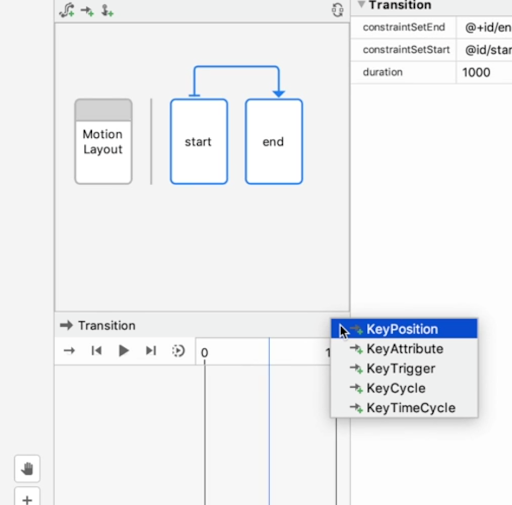
Create keyframes with the selection panel
Attribute panel
Creating animations in MotionLayout involves editing lots of view parameters, so we brought the Attribute panel from the Layout Editor into the Motion Editor. The Attribute panel includes handy visualizations for Constraints as well as all the attributes set on each view in the Motion Scene file.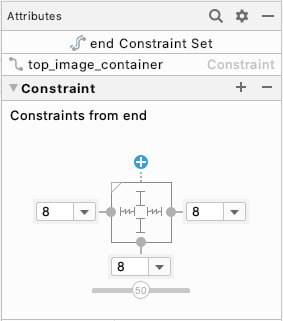
Constraint visualization in the Attribute panel
The Attribute panel is also where you can create custom attributes. You use custom attributes when you want to animate view properties that are not part of the ConstraintLayout or MotionLayout APIs, such as backgroundColor. We made it easy to create custom attributes with autocomplete and input validation for all view properties.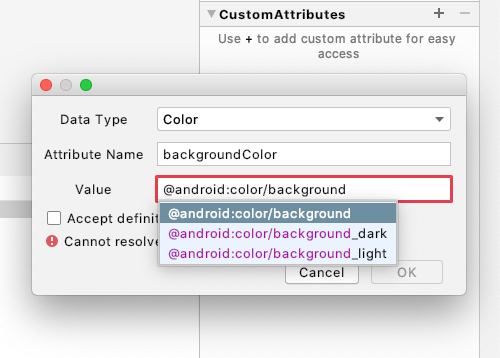
Preview panel
We wanted to make it easy to quickly edit and get immediate feedback when working on animations, so you can view animations right from the Preview panel. Now you don’t have to recompile and redeploy your app every time you want to make a small tweak to your animation.
We also added a number of features to the Preview panel to make it easier to understand how views are animating. You can preview animations with the Design view and Blueprint view to get a clearer idea of how your views are moving with fewer visual distractions.

We also added visualizations for the paths views take across the screen, including markers for keyframes. We hope these features make it easier to parse complex transitions and simplify the creation experience.

The Motion Editor is available in Android Studio 4.0, give it a try and let us know what you think! We are eager to see what the community builds with MotionLayout and the Motion Editor. The Android Studio team is constantly gathering feedback to improve the experience of using our tools, so if you have any ideas for new features or run into any issues using these tools, please file a bug.
The code used in this example, along with several other MotionLayout examples, are available on our GitHub sample page, found here.
For more information on MotionLayout, see the following links:
- Manage motion and widget animation with MotionLayout
- Using MotionLayout to Animate Android Apps (codelab)
- MotionLayout examples
- MotionLayout / ConstraintLayout Samples (GitHub)