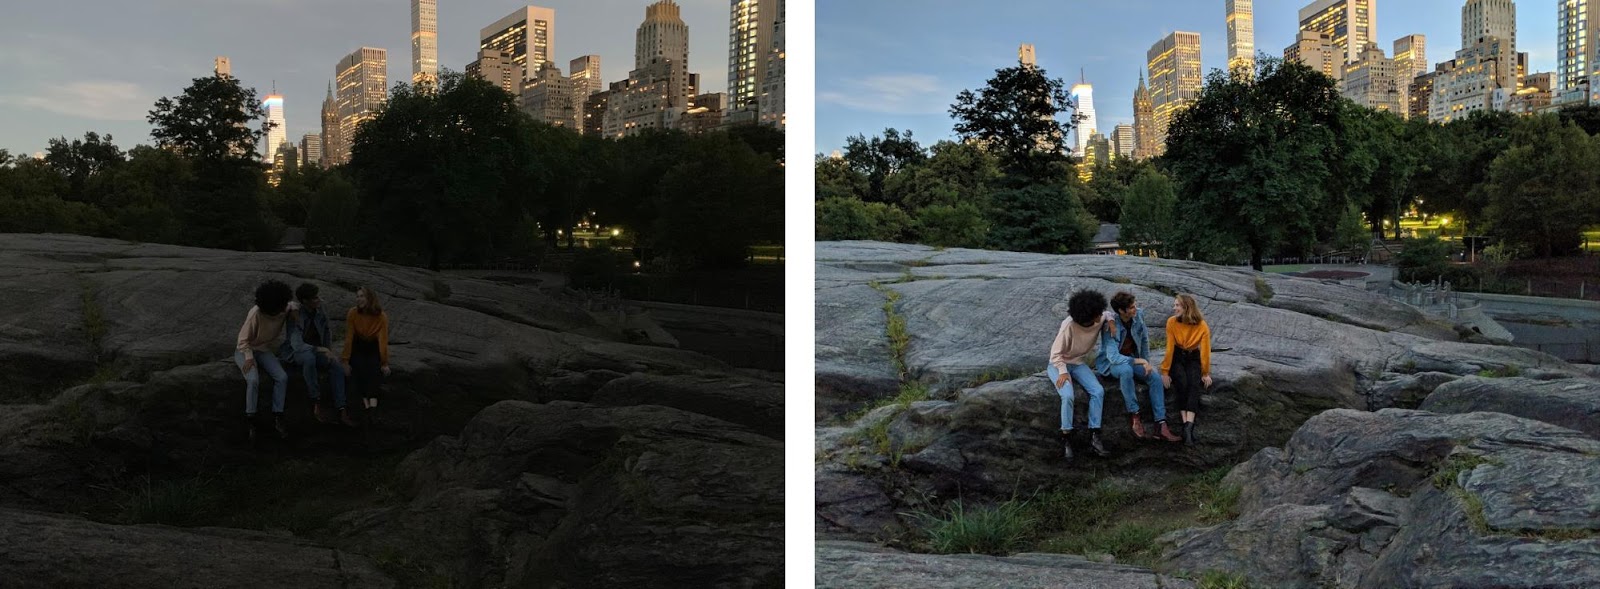
Professional portrait photographers are able to create compelling photographs by using specialized equipment, such as off-camera flashes and reflectors, and expert knowledge to capture just the right illumination of their subjects. In order to allow users to better emulate professional-looking portraits, we recently released Portrait Light, a new post-capture feature for the Pixel Camera and Google Photos apps that adds a simulated directional light source to portraits, with the directionality and intensity set to complement the lighting from the original photograph.
 |
| Example image with and without Portrait Light applied. Note how Portrait Light contours the face, adding dimensionality, volume, and visual interest. |
In the Pixel Camera on Pixel 4, Pixel 4a, Pixel 4a (5G), and Pixel 5, Portrait Light is automatically applied post-capture to images in the default mode and to Night Sight photos that include people — just one person or even a small group. In Portrait Mode photographs, Portrait Light provides more dramatic lighting to accompany the shallow depth-of-field effect already applied, resulting in a studio-quality look. But because lighting can be a personal choice, Pixel users who shoot in Portrait Mode can manually re-position and adjust the brightness of the applied lighting within Google Photos to match their preference. For those running Google Photos on Pixel 2 or newer, this relighting capability is also available for many pre-existing portrait photographs.
 |
| Pixel users can adjust a portrait’s lighting as they like in Google Photos, after capture. |
Today we present the technology behind Portrait Light. Inspired by the off-camera lights used by portrait photographers, Portrait Light models a repositionable light source that can be added into the scene, with the initial lighting direction and intensity automatically selected to complement the existing lighting in the photo. We accomplish this by leveraging novel machine learning models, each trained using a diverse dataset of photographs captured in the Light Stage computational illumination system. These models enabled two new algorithmic capabilities:
- Automatic directional light placement: For a given portrait, the algorithm places a synthetic directional light in the scene consistent with how a photographer would have placed an off-camera light source in the real world.
- Synthetic post-capture relighting: For a given lighting direction and portrait, synthetic light is added in a way that looks realistic and natural.
These innovations enable Portrait Light to help create attractive lighting at any moment for every portrait — all on your mobile device.
Automatic Light Placement
Photographers usually rely on perceptual cues when deciding how to augment environmental illumination with off-camera light sources. They assess the intensity and directionality of the light falling on the face, and also adjust their subject’s head pose to complement it. To inform Portrait Light’s automatic light placement, we developed computational equivalents to these two perceptual signals.
First, we trained a novel machine learning model to estimate a high dynamic range, omnidirectional illumination profile for a scene based on an input portrait. This new lighting estimation model infers the direction, relative intensity, and color of all light sources in the scene coming from all directions, considering the face as a light probe. We also estimate the head pose of the portrait’s subject using MediaPipe Face Mesh.
 |
| Estimating the high dynamic range, omnidirectional illumination profile from an input portrait. The three spheres at the right of each image, diffuse (top), matte silver (middle), and mirror (bottom), are rendered using the estimated illumination, each reflecting the color, intensity, and directionality of the environmental lighting. |
Using these clues, we determine the direction from which the synthetic lighting should originate. In studio portrait photography, the main off-camera light source, or key light, is placed about 30° above the eyeline and between 30° and 60° off the camera axis, when looking overhead at the scene. We follow this guideline for a classic portrait look, enhancing any pre-existing lighting directionality in the scene while targeting a balanced, subtle key-to-fill lighting ratio of about 2:1.
Data-Driven Portrait Relighting
Given a desired lighting direction and portrait, we next trained a new machine learning model to add the illumination from a directional light source to the original photograph. Training the model required millions of pairs of portraits both with and without extra light. Photographing such a dataset in normal settings would have been impossible because it requires near-perfect registration of portraits captured across different lighting conditions.
Instead, we generated training data by photographing seventy different people using the Light Stage computational illumination system. This spherical lighting rig includes 64 cameras with different viewpoints and 331 individually-programmable LED light sources. We photographed each individual illuminated one-light-at-a-time (OLAT) by each light, which generates their reflectance field — or their appearance as illuminated by the discrete sections of the spherical environment. The reflectance field encodes the unique color and light-reflecting properties of the subject’s skin, hair, and clothing — how shiny or dull each material appears. Due to the superposition principle for light, these OLAT images can then be linearly added together to render realistic images of the subject as they would appear in any image-based lighting environment, with complex light transport phenomena like subsurface scattering correctly represented.
Using the Light Stage, we photographed many individuals with different face shapes, genders, skin tones, hairstyles, and clothing/accessories. For each person, we generated synthetic portraits in many different lighting environments, both with and without the added directional light, rendering millions of pairs of images. This dataset encouraged model performance across diverse lighting environments and individuals.
 |
| Photographing an individual as illuminated one-light-at-a-time in the Google Light Stage, a 360° computational illumination rig. |
 |
| Left: Example images from an individual’s photographed reflectance field, their appearance in the Light Stage as illuminated one-light-at-a-time. Right: The images can be added together to form the appearance of the subject in any novel lighting environment. |
Learning Detail-Preserving Relighting Using the Quotient Image
Rather than trying to directly predict the output relit image, we trained the relighting model to output a low-resolution quotient image, i.e., a per-pixel multiplier that when upsampled can be applied to the original input image to produce the desired output image with the contribution of the extra light source added. This technique is computationally efficient and encourages only low-frequency lighting changes, without impacting high-frequency image details, which are directly transferred from the input to maintain image quality.
Supervising Relighting with Geometry Estimation
When photographers add an extra light source into a scene, its orientation relative to the subject’s facial geometry determines how much brighter each part of the face appears. To model the optical behavior of light sources reflecting off relatively matte surfaces, we first trained a machine learning model to estimate surface normals given the input photograph, and then applied Lambert’s law to compute a “light visibility map” for the desired lighting direction. We provided this light visibility map as input to the quotient image predictor, ensuring that the model is trained using physics-based insights.
 |
| The pipeline of our relighting network. Given an input portrait, we estimate per-pixel surface normals, which we then use to compute a light visibility map. The model is trained to produce a low-resolution quotient image that, when upsampled and applied as a multiplier to the original image, produces the original portrait with an extra light source added synthetically into the scene. |
We optimized the full pipeline to run at interactive frame-rates on mobile devices, with total model size under 10 MB. Here are a few examples of Portrait Light in action.
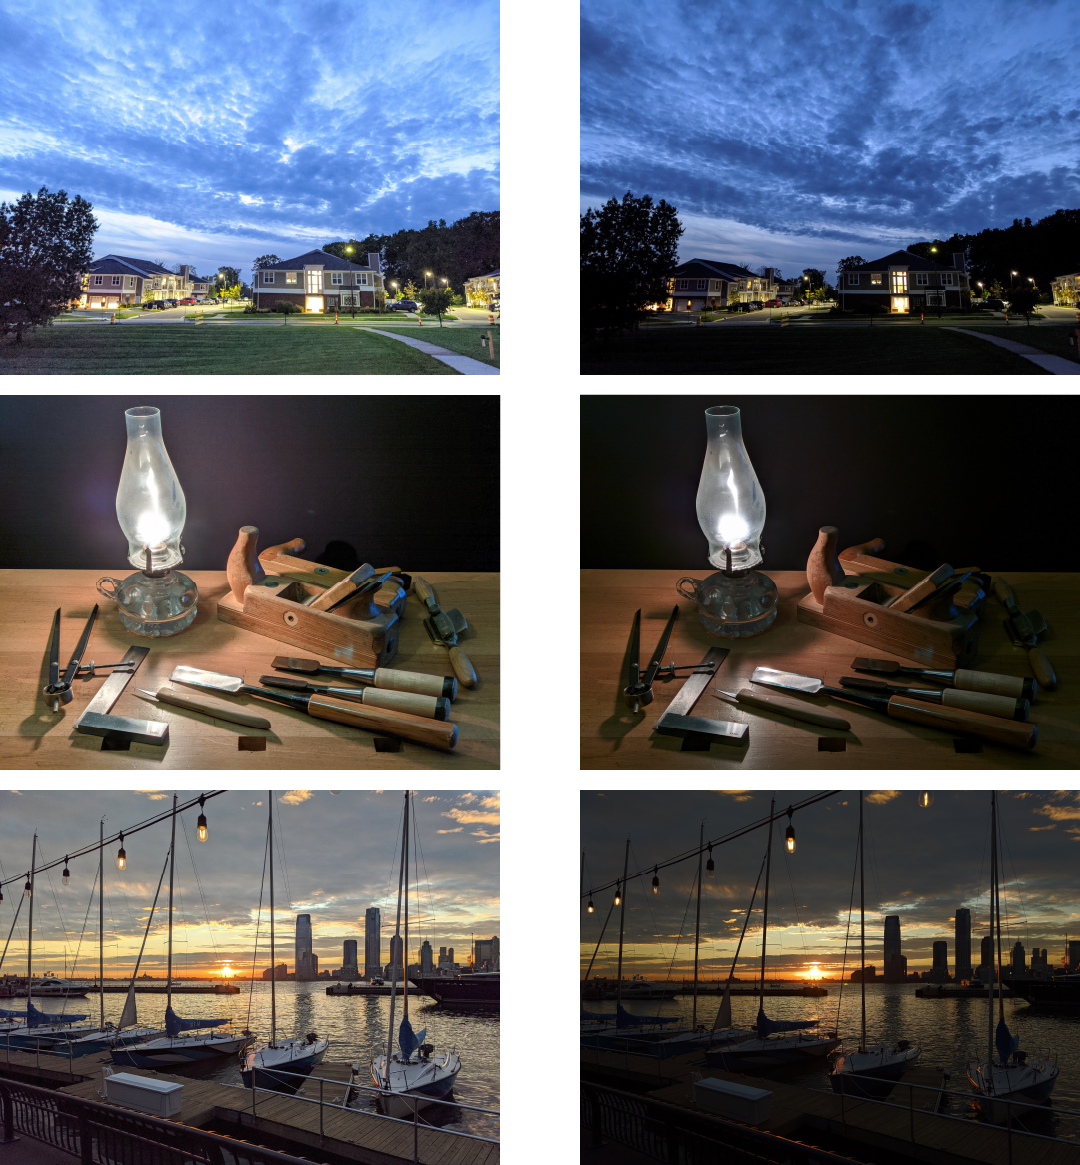
 |
| Portrait Light in action. |
Getting the Most Out of Portrait Light
You can try Portrait Light in the Pixel Camera and change the light position and brightness to your liking in Google Photos. For those who use Dual Exposure Controls, Portrait Light can be applied post-capture for additional creative flexibility to find just the right balance between light and shadow. On existing images from your Google Photos library, try it where faces are slightly underexposed, where Portrait Light can illuminate and highlight your subject. It will especially benefit images with a single individual posed directly at the camera.
We see Portrait Light as the first step on the journey towards creative post-capture lighting controls for mobile cameras, powered by machine learning.
Acknowledgements
Portrait Light is the result of a collaboration between Google Research, Google Daydream, Pixel, and Google Photos teams. Key contributors include: Yun-Ta Tsai, Rohit Pandey, Sean Fanello, Chloe LeGendre, Michael Milne, Ryan Geiss, Sam Hasinoff, Dillon Sharlet, Christoph Rhemann, Peter Denny, Kaiwen Guo, Philip Davidson, Jonathan Taylor, Mingsong Dou, Pavel Pidlypenskyi, Peter Lincoln, Jay Busch, Matt Whalen, Jason Dourgarian, Geoff Harvey, Cynthia Herrera, Sergio Orts Escolano, Paul Debevec, Jonathan Barron, Sofien Bouaziz, Clement Ng, Rachit Gupta, Jesse Evans, Ryan Campbell, Sonya Mollinger, Emily To, Yichang Shih, Jana Ehmann, Wan-Chun Alex Ma, Christina Tong, Tim Smith, Tim Ruddick, Bill Strathearn, Jose Lima, Chia-Kai Liang, David Salesin, Shahram Izadi, Navin Sarma, Nisha Masharani, Zachary Senzer.
1 Work conducted while at Google. ↩


