Tag Archives: Security & Identity

What a year! Google Cloud Platform in 2017


The end of the year is a time for reflection . . . and making lists. As 2017 comes to a close, we thought we’d review some of the most memorable Google Cloud Platform (GCP) product announcements, white papers and how-tos, as judged by popularity with our readership.

As we pulled the data for this post, some definite themes emerged about your interests when it comes to GCP:
  1. You love to hear about advanced infrastructure: CPUs, GPUs, TPUs, better network plumbing and more regions. 
  2.  How we harden our infrastructure is endlessly interesting to you, as are tips about how to use our security services. 
  3.  Open source is always a crowd-pleaser, particularly if it presents a cloud-native solution to an age-old problem. 
  4.  You’re inspired by Google innovation — unique technologies that we developed to address internal, Google-scale problems. So, without further ado, we present to you the most-read stories of 2017.

Cutting-edge infrastructure

If you subscribe to the “bigger is always better” theory of cloud infrastructure, then you were a happy camper this year. Early in 2017, we announced that GCP would be the first cloud provider to offer Intel Skylake architecture, GPUs for Compute Engine and Cloud Machine Learning became generally available and Shazam talked about why cloud GPUs made sense for them. In the spring, you devoured a piece on the performance of TPUs, and another about the then-largest cloud-based compute cluster. We announced yet more new GPU models and topping it all off, Compute Engine began offering machine types with a whopping 96 vCPUs and 624GB of memory.

It wasn’t just our chip offerings that grabbed your attention — you were pretty jazzed about Google Cloud network infrastructure too. You read deep dives about Espresso, our peering-edge architecture, TCP BBR congestion control and improved Compute Engine latency with Andromeda 2.1. You also dug stories about new networking features: Dedicated Interconnect, Network Service Tiers and GCP’s unique take on sneakernet: Transfer Appliance.

What’s the use of great infrastructure without somewhere to put it? 2017 was also a year of major geographic expansion. We started out the year with six regions, and ended it with 13, adding Northern Virginia, Singapore, Sydney, London, Germany, Sao Paolo and Mumbai. This was also the year that we shed our Earthly shackles, and expanded to Mars ;)

Security above all


Google has historically gone to great lengths to secure our infrastructure, and this was the year we discussed some of those advanced techniques in our popular Security in plaintext series. Among them: 7 ways we harden our KVM hypervisor, Fuzzing PCI Express and Titan in depth.

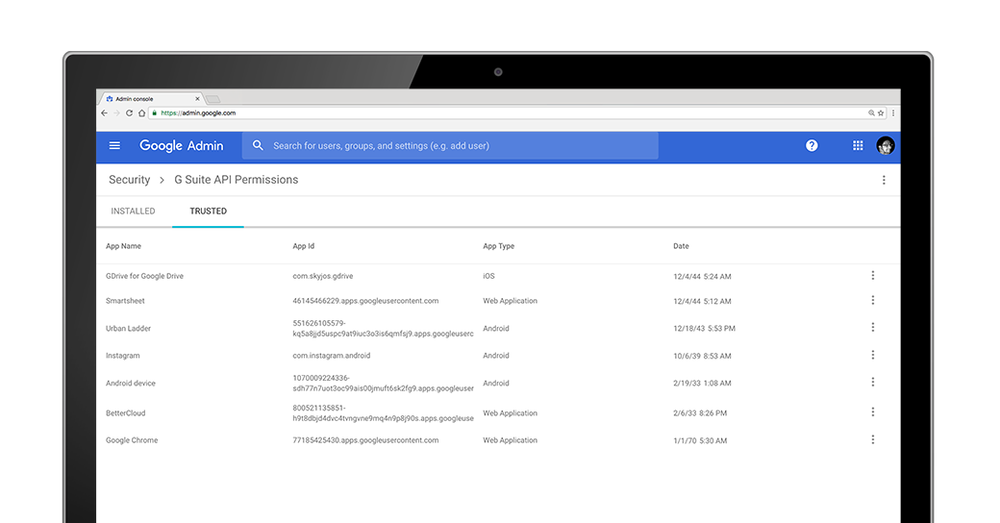
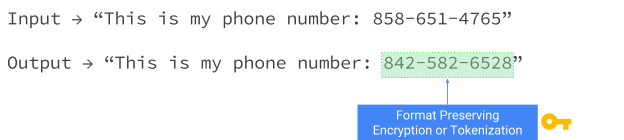
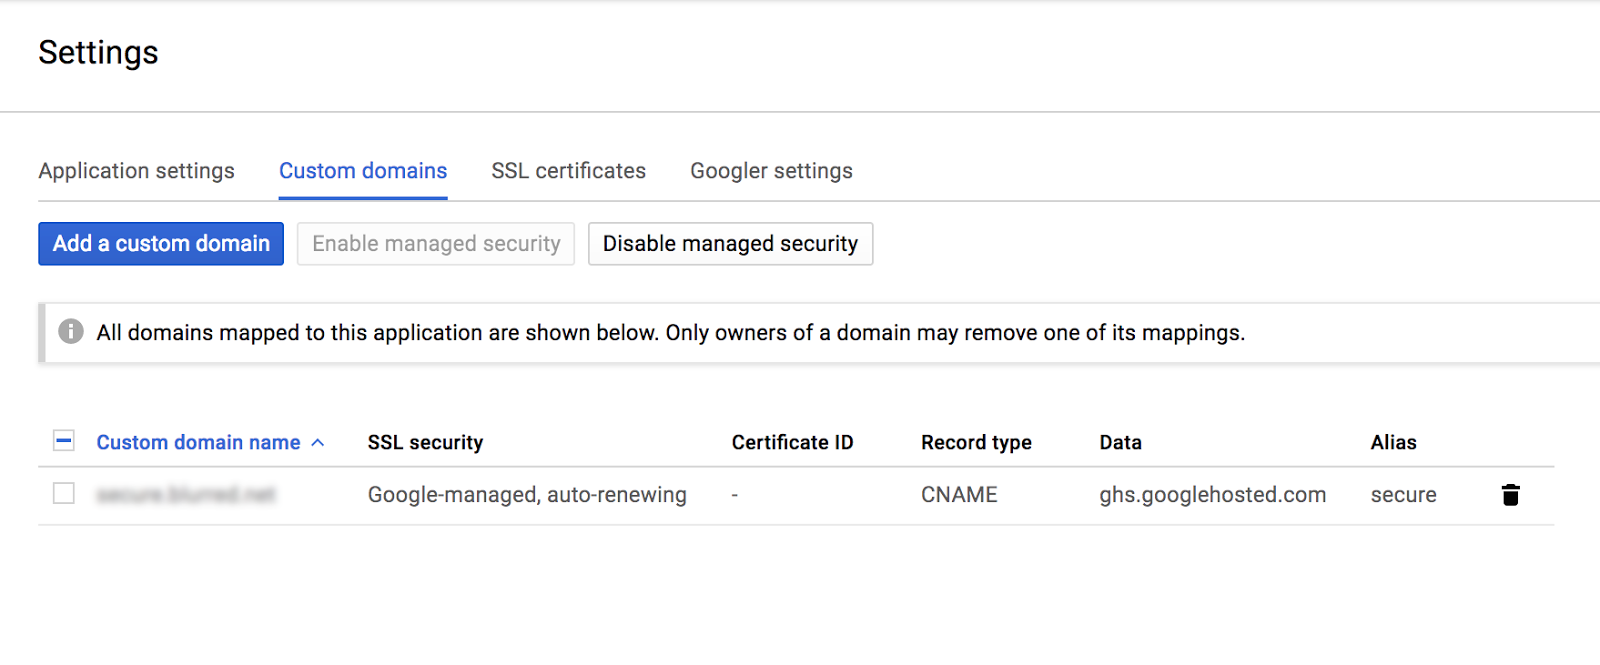
You also grooved on new GCP security services: Cloud Key Management and managed SSL certificates for App Engine applications. Finally, you took heart in a white paper on how to implement BeyondCorp as a more secure alternative to VPN, and support for the European GDPR data protection laws across GCP.

Open, hybrid development


When you think about GCP and open source, Kubernetes springs to mind. We open-sourced the container management platform back in 2014, but this year we showed that GCP is an optimal place to run it. It’s consistently among the first cloud services to run the latest version (most recently, Kubernetes 1.8) and comes with advanced management features out of the box. And as of this fall, it’s certified as a conformant Kubernetes distribution, complete with a new name: Google Kubernetes Engine.

Part of Kubernetes’ draw is as a platform-agnostic stepping stone to the cloud. Accordingly, many of you flocked to stories about Kubernetes and containers in hybrid scenarios. Think Pivotal Container Service and Kubernetes’ role in our new partnership with Cisco. The developers among you were smitten with Cloud Container Builder, a stand-alone tool for building container images, regardless of where you deploy them.

But our open source efforts aren’t limited to Kubernetes — we also made significant contributions to Spinnaker 1.0, and helped launch the Istio and Grafeas projects. You ate up our "Partnering on open source" series, featuring the likes of HashiCorp, Chef, Ansible and Puppet. Availability-minded developers loved our Customer Reliability Engineering (CRE) team’s missive on release canaries, and with API design: Choosing between names and identifiers in URLs, our Apigee team showed them a nifty way to have their proverbial cake and eat it too.

Google innovation


In distributed database circles, Google’s Spanner is legendary, so many of you were delighted when we announced Cloud Spanner and a discussion of how it defies the CAP Theorem. Having a scalable database that offers strong consistency and great performance seemed to really change your conception of what’s possible — as did Cloud IoT Core, our platform for connecting and managing “things” at scale. CREs, meanwhile, showed you the Google way to handle an incident.

2017 was also the year machine learning became accessible. For those of you with large datasets, we showed you how to use Cloud Dataprep, Dataflow, and BigQuery to clean up and organize unstructured data. It turns out you don’t need a PhD to learn to use TensorFlow, and for visual learners, we explained how to visualize a variety of neural net architectures with TensorFlow Playground. One Google Developer Advocate even taught his middle-school son TensorFlow and basic linear algebra, as applied to a game of rock-paper-scissors.

Natural language processing also became a mainstay of machine learning-based applications; here, we highlighted with a lighthearted and relatable example. We launched the Video Intelligence API and showed how Cloud Machine Learning Engine simplifies the process of training a custom object detector. And the makers among you really went for a post that shows you how to add machine learning to your IoT projects with Google AIY Voice Kit. Talk about accessible!

Lastly, we want to thank all our customers, partners and readers for your continued loyalty and support this year, and wish you a peaceful, joyful, holiday season. And be sure to rest up and visit us again Next year. Because if you thought we had a lot to say in 2017, well, hold onto your hats.

How Google protects your data in transit


Protecting your data is of the utmost importance for Google Cloud, and one of the ways we protect customer data is through encryption. We encrypt your data at rest, by default, as well as while it’s in transit over the internet from the user to Google Cloud, and then internally when it’s moving within Google, for example between data centers.

We aim to create trust through transparency, and today, we’re releasing a whitepaper, “Encryption in Transit in Google Cloud,” that describes our approach to protecting data in transit.

Google Cloud employs several security measures to help ensure the authenticity, integrity and privacy of data in transit. Authentication means we know and verify the data source. Integrity means we make sure data you send arrives at its destination unaltered. Encryption means we make your data confidential while in transit to keep it private.


Your data is encrypted in transit by default


By default, when a user connects to Google Cloud, the connection between the user and Google is encrypted. That means that when you connect to Google Cloud, the data you send is encrypted using HTTPS, so that an adversary cannot snoop on your traffic. (You can find out more about HTTPS at Google in our HTTPS transparency report.) Google implements TLS and other encryption in transit protocols by using BoringSSL, an open-source cryptographic library derived from OpenSSL.

By default, Google Cloud encrypts and authenticates all data in transit at one or more network layers when data moves outside physical boundaries not controlled by or on behalf of Google. For comparison, data in transit inside a physical boundary is authenticated but not necessarily encrypted because rigorous security controls are already in place. To ensure we are protecting data against any potential threats, our inherent assumption is that the wide area network is only semi-trusted — that is, that network links between physical boundaries can be compromised by an active adversary who can snoop, inject or alter traffic on the wire. Encrypting data in transit helps protect against this type of activity.

At the network layer, Google Cloud’s virtual network infrastructure automatically encrypts VM to VM traffic if it crosses a physical boundary not controlled by or on behalf of Google. On top of this, at the application layer, Application Layer Transport Security automatically provides authentication, integrity and encryption of remote procedure calls from service to service, when those calls leave a physical boundary controlled by or on behalf of Google. Each service that runs in Google’s infrastructure has a service account identity with associated cryptographic credentials that are used to authenticate these communications.

You have additional options to encrypt your data in transit


In addition to default protections, Google Cloud customers have many options to further encrypt data in transit, including IPsec tunnels, free and automated TLS certificates and Istio.

With Google Cloud VPN, you can send requests from your on-premise machine to a service hosted on Google Cloud through a secure, IPsec VPN tunnel at the network layer. You can also set up multiple, load-balanced tunnels through multiple VPN gateways.

For applications built on Google Cloud, Google provisions free and automated certificates to implement TLS in Firebase Hosting and Google App Engine custom domains.

Istio is an open-source service mesh developed by Google, IBM, Lyft and others, to simplify service discovery and connectivity. Istio authentication aims to automatically encrypt data in transit between services, and manage the associated keys and certificates.

Google helps the internet encrypt data in transit


In addition to how we specifically protect Google Cloud users, we have several open-source projects and other efforts to improve the internet’s security at large and support the use of encryption in transit. These include Certificate Transparency (CT), which is designed to audit and monitor certificates issued by publicly trusted CAs. Certificate Transparency helps detect certificates that may not have been issued according to industry standards, or may not have been requested by the domain owner.

Your data is yours


While we’re on the topic of data protection and privacy, it's useful to reinforce how we think about customer data. In Google Cloud, you choose what data your business stores and what applications your business creates and runs on the service. We process your data only according to our agreement with your business. You can read more about how we keep your business data private on our Privacy website.

To learn more about how we encrypt your data at rest and our overall security design, read our whitepapers “Encryption at Rest in Google Cloud Platform” and “Google Infrastructure Security Design Overview.”

Safe computing!

OAuth whitelisting can now control access to GCP services and data


As a Google Cloud Platform (GCP) customer, having control over who can access your resources is incredibly important. Last summer, we introduced OAuth apps whitelisting, giving you visibility and control into how third-party applications access your users’ G Suite data. And today, we’ve expanded our OAuth API access controls to let you control access to GCP resources as well.

OAuth apps whitelisting helps keep your data safe by letting admins specifically select which third-party apps are allowed to access users’ GCP data and resources. Once an app is part of a whitelist, users can choose to grant authorized access to their GCP apps and data. This prevents malicious apps from tricking users into accidentally granting access to corporate resources.

As a GCP administrator, you can whitelist applications via the Google Admin console (also known as the G Suite Admin console). With OAuth API access controls you have three GCP whitelisting options:
  1. Cloud Platform - a whitelist that covers GCP services like Google Cloud Storage and BigQuery, but excludes Cloud Machine Learning and Cloud Billing
  2. Machine Learning - a dedicated whitelist for machine learning services that includes Cloud Video Intelligence, Cloud Speech API, Cloud Natural Language API, Cloud Translation API, and Cloud Vision API 
  3. Cloud Billing - a dedicated whitelist for the Cloud Billing API 

OAuth API access controls

When you disable API access to any of these categories, you disallow third-party apps from accessing data or services in that category. Third-party applications that you have specifically vetted and deem trustworthy can be whitelisted, and users can choose to grant them authorized access to their GCP and G Suite apps. This helps prevent malicious apps from tricking users into accidentally granting access to their corporate data.
Whitelisting trusted applications (click to enlarge)
Disabling or whitelisting third-party access to GCP resources is easy. Click here for more info on how to get started.

Precious cargo: Securing containers with Kubernetes Engine 1.8


With every new release of Kubernetes and Google Kubernetes Engine, we add new security features, strengthen existing security controls and move to stronger default configurations. We strive to improve Kubernetes security in general, and to make Kubernetes Engine more secure by default so that you don’t have to apply these configurations yourself.

With the speed of development in Kubernetes, there are often new features and security configurations for you to know about. This post will guide you through implementing our current guidance for hardening your Kubernetes Engine cluster. If you’re feeling adventurous, we’ll also discuss new security features that you can test on alpha clusters (which are not recommended for production use).

Security best practices for your Kubernetes cluster

When running a Kubernetes cluster, there are several best practices we recommend you follow:
  •  Use least privilege service accounts on your nodes
  •  Disable the Kubernetes web UI 
  •  Disable legacy authorization (now disabled by default for new clusters in Kubernetes 1.8) But before you can do that, you’ll need to set a few environment variables first:
#Your project ID
PROJECT_ID=
#Your Zone. E.g. us-west1-c
ZONE=
#New service account we will create. Can be any string that isn't an existing service account. E.g. min-priv-sa
SA_NAME=
#Name for your cluster we will create or modify. E.g. example-secure-cluster
CLUSTER_NAME=
#Name for a node-pool we will create. Can be any string that isn't an existing node-pool. E.g. example-node-pool
NODE_POOL=

Use least privilege service accounts on your nodes


The principle of least privilege helps to reduce the "blast radius" of a potential compromise, by granting each component only the minimum permissions required to perform its function. Should one component become compromised, least privilege makes it much more difficult to chain attacks together and escalate permissions.

Each Kubernetes Engine node has a Service Account associated with it. You’ll see the Service Account user listed in the IAM section of the Cloud Console as “Compute Engine default service account.” This account has broad access by default, making it useful to wide variety of applications, but has more permissions than you need to run your Kubernetes Engine cluster.

We recommend you create and use a minimally privileged service account to run your Kubernetes Engine Cluster instead of the Compute Engine default service account.

Kubernetes Engine requires, at a minimum, the service account to have the monitoring.viewer, monitoring.metricWriter, and logging.logWriter roles.

The following commands will create a GCP service account for you with the minimum permissions required to operate Kubernetes Engine:

gcloud iam service-accounts create "${SA_NAME}" \
  --display-name="${SA_NAME}"

gcloud projects add-iam-policy-binding "${PROJECT_ID}" \
  --member "serviceAccount:${SA_NAME}@${PROJECT_ID}.iam.gserviceaccount.com" \
  --role roles/logging.logWriter

gcloud projects add-iam-policy-binding "${PROJECT_ID}" \
  --member "serviceAccount:${SA_NAME}@${PROJECT_ID}.iam.gserviceaccount.com" \
  --role roles/monitoring.metricWriter

gcloud projects add-iam-policy-binding "${PROJECT_ID}" \
  --member "serviceAccount:${SA_NAME}@${PROJECT_ID}.iam.gserviceaccount.com" \
  --role roles/monitoring.viewer

#if your cluster already exists, you can now create a new node pool with this new service account.
gcloud container node-pools create "${NODE_POOL}" \
  --service-account="${SA_NAME}@${PROJECT_ID}.iam.gserviceaccount.com" \
  --cluster="${CLUSTER_NAME}"

If you need your Kubernetes Engine cluster to have access to other Google Cloud services, we recommend that you create an additional role and provision it to workloads via Kubernetes secrets, rather than re-use this one.

Note: We’re currently designing a system to make obtaining GCP credentials in your Kubernetes cluster much easier and will completely replace this workflow. Join the Kubernetes Container Identity Working Group to participate.

Disable the Kubernetes Web UI

We recommend you disable the Kubernetes Web UI when running on Kubernetes Engine. The Kubernetes Web UI (aka KubernetesDashboard) is backed by a highly privileged Kubernetes Service Account. The Cloud Console provides much of the same functionality, so you don't need these permissions if you're running on Kubernetes Engine.

The following command disables the Kubernetes Web UI:
gcloud container clusters update "${CLUSTER_NAME}" \
    --update-addons=KubernetesDashboard=DISABLED

Disable legacy authorization

Starting with Kubernetes 1.8, Attribute-Based Access Control (ABAC) is disabled by default in Kubernetes Engine. Role-Based Access Control (RBAC) was released as beta in Kubernetes 1.6, and ABAC was kept enabled until 1.8 to give users time to migrate. RBAC has significant security advantages and is now stable, so it’s time to disable ABAC. If you're still relying on ABAC, review the Prerequisites for using RBAC before continuing. If you upgraded your cluster from an older version and are using ABAC, you should update your access controls configuration:
gcloud container clusters update "${CLUSTER_NAME}" \
  --no-enable-legacy-authorization

To create a new cluster with all of the above recommendations, run:
gcloud container clusters create "${CLUSTER_NAME}" \
  --service-account="${SA_NAME}@${PROJECT_ID}.iam.gserviceaccount.com" \
  --no-enable-legacy-authorization \
  --disable-addons=KubernetesDashboard


Create a cluster network policy


In addition to the aforementioned best practices, we recommend you create network policies to control the communication between your cluster's Pods and Services. Kubernetes Engine's Network Policy enforcement, currently in beta, makes it much more difficult for attackers to propagate inside your cluster. You can also use the Kubernetes Network Policy API to create Pod-level firewall rules in Kubernetes Engine. These firewall rules determine which Pods and Services can access one another inside your cluster.

To enable network policy enforcement when creating a new cluster, specify the --enable-network-policy flag using gcloud beta:

gcloud beta container clusters create "${CLUSTER_NAME}" \
  --project="${PROJECT_ID}" \
  --zone="${ZONE}" \
  --enable-network-policy

Once Network Policy has been enabled, you'll have to actually define a policy. Since this is specific to your exact topology, we can’t provide a detailed walkthrough. The Kubernetes documentation, however, has an excellent overview and walkthrough for a simple nginx deployment.

Note: Alpha and beta features such as Kubernetes Engine’s Network Policy API represent meaningful security improvements in the GKE APIs. Be aware that alpha and beta features are not covered by any SLA or deprecation policy, and may be subject to breaking changes in future releases. We don't recommend you use these features for production clusters.

Closing thoughts


Many of the same lessons we learned from traditional information security apply to Containers, Kubernetes, and Kubernetes Engine; we just have new ways to apply them. Adhere to least privilege, minimize your attack surface by disabling legacy or unnecessary functionality, and the most traditional of all: write good firewall policies. To learn more, visit the Kubernetes Engine webpage and documentation. If you’re just getting started with containers and Google Cloud Platform (GCP), be sure to sign up for a free trial.

Folders: a powerful tool to manage cloud resources


Today we’re excited to announce general availability of folders in Cloud Resource Manager, a powerful tool to organize and administer cloud resources. This feature gives you the flexibility to map resources to your organizational structure and enable more granular access control and configuration for those resources.

Folders can be used to represent different departments, teams, applications or environments in your organization. With folders, you can give teams and departments the agility to delegate administrative rights and enable them to run independently.

Folders help you scale by enabling you to organize and manage their resources hierarchically. By enforcing Identity and Access Management (IAM) policies on folders, admins can delegate control over parts of the resource hierarchy to the appropriate teams. Using organization-level IAM roles in conjunction with folders, you can maintain full visibility and control over the entire organization without needing to be directly involved in every operation.
“Our engineering team manages several hundred projects within GCP, and the resource hierarchy makes it easy to handle the growing complexity of our environment. We classify projects based on criteria such as department, geography, product, and data sensitivity to ensure the right people have access to the right information. With folders, we have the flexibility we need to organize our resources and manage access control policies based on those criteria.” 
Alex Olivier, Technical Product Manager, Qubit
Folders establish trust boundaries between resources. By assigning Cloud IAM roles to folders, you can help isolate and protect production critical workloads while still allowing your teams to create and work freely. For example, you could grant a Project Creator role to the entire team on the Test folder, but only assign the Log Viewer role on the Production folder, so that users can do necessary debugging without the risk of compromising critical components.

The combination of organization policy and folders lets you define organization-level configurations and create exceptions for subtrees of the resource hierarchy. For example, you can constrain access to an approved set of APIs across the organization for compliance reasons, but create an exception for a Test folder, where a broader set of APIs is allowed for testing purposes.

Folders are easy to use and, as any other resource in GCP, they can be managed via API, gcloud and the Cloud Console UI. Watch this demo to learn how to incorporate folders into your GCP hierarchy.

To learn more about folders, read the beta launch blog post or the documentation.

Turns out, security drives cloud adoption — not the other way around


Download the global report conducted on behalf of Google Cloud in association with MIT SMR Custom Studio.

The elastic, on-demand nature of the cloud gives developers and IT teams flexible ways to consume computing resources. For enterprises well into their cloud journey, it should be no surprise that a MIT Sloan Management Review survey of more than 500 IT and business executives cited the “increased need for agility and speed” as the primary driver of increased cloud usage.

What may be unexpected however is that this same pool of respondents cited their “increased confidence in cloud security” as a nearly equal driver of increased cloud usage. In fact, agility and security together were cited as the top dual reasons for expanding their cloud usage. Because security concerns have traditionally topped the list of inhibitors to cloud adoption, these survey results are noteworthy to the extent that they signal a broader shift in trust. IT leaders polled in this survey recognize that aspects of public cloud can actually enhance security — a theme that our teams at Google Cloud see with increasing frequency as we consult with business and IT leaders.

Three out of four business and IT leaders polled in the MIT survey indicated that they’ve become more confident in cloud security over the past two years. This coincides with a boost in the proportion of enterprise workloads they’re running in the public cloud: 24% of workloads in the two years prior to the survey, with an anticipated 65% of workloads running in the cloud two years from now. As indicated, agility (45%) and security (44%) were cited as the top reasons behind this expansion — with cost savings (34%) a trailing third.

This report looks at security implications encountered by enterprises as they move more of their workloads to the cloud. You can download the report to learn more about:

  1. What are the top enterprise workloads leaders indicate they currently have deployed to the cloud? What’s on the horizon to be deployed? 
  2. What data types do leaders indicate they’re most likely to host in the cloud? 
  3. Does this differ for industries where data is heavily regulated? Does firsthand experience or cloud maturity affect perceptions about whether the cloud is secure? Are the threats real or perceived? 
  4. What levels of skepticism exist around security — grouped by job function, responsibility and firm size?
  5. What is actually behind the jump in confidence around cloud security? How are these organizations actually going about assessing security? 
  6. What do leaders indicate are the top security requirements for their organizations?

Google Cloud has invested deeply in security, from purpose-built hardware in its data centers, physical security and our encryption practices, to Google’s own global network. As organizations across every industry accelerate their adoption of public cloud and treat it as a major pillar of their IT strategy, Google Cloud is an excellent choice to help IT leaders implement advanced security practices for their organizations. To talk security or to share with us the challenges you’re facing with sensitive or mission-critical workloads, reach out to us.

New ways to manage sensitive data with the Data Loss Prevention API


If your organization has sensitive and regulated data, you know how much of a challenge it can be to keep it secure and private. The Data Loss Prevention (DLP) API, which went beta in March, can help you quickly find and protect over 50 types of sensitive data such as credit card numbers, names and national ID numbers. And today, we’re announcing several new ways to help protect sensitive data with the DLP API, including redaction, masking and tokenization.

These new data de-identification capabilities help you to work with sensitive information, while reducing the risk of sensitive data being inadvertently revealed. If like many enterprises you follow the principle of least privilege or need-to-know access to data (only use or expose the minimum data required for an approved business process) the DLP API can help you enforce these principles in production applications and data workflows. And because it’s an API, the service can be pointed at any virtually any data source or storage system. DLP API offers native support and scale for scanning large datasets in Google Cloud Storage, Datastore and BigQuery.
Google Cloud DLP API enables our security solutions to scan and classify documents and images from multiple cloud data stores and email sources. This allows us to offer our customers critical security features, such as classification and redaction, which are important for managing data and mitigating risk. Google’s intelligent DLP service enables us to differentiate our offerings and grow our business by delivering high quality results to our customers.  
 Sateesh Narahari, VP of Products, Managed Methods

New de-identification tools in DLP API

De-identifying data removes identifying information from a dataset, making it more difficult to associate the remaining data with an individual and reducing the risk of exposure.
With the DLP API, you can classify and mask sensitive elements in both structured data and unstructured data.


The DLP API now supports a variety of new data transformation options:

Redaction and suppression 
Redaction and suppression remove entire values or entire records from a dataset. For example, if a support agent working in a customer support UI doesn’t need to see identifying details to troubleshoot the problem, you might decide to redact those values. Or, if you’re analyzing large population trends, you may decide to suppress records that contain unique demographics or rare attributes, since these distinguishing characteristics may pose a greater risk.
The DLP API identifies and redacts a name, social security number, telephone number and email address
Partial masking 
Partial masking obscures part of a sensitive attribute  for example, the last 7 digits of a US telephone number. In this example, a 10-digit phone number retains only the area code.
Tokenization or secure hashing
Tokenization, also called secure hashing, is an algorithmic transformation that replaces a direct identifier with a pseudonym or token. This can be very useful in cases where you need to retain a record identifier or join data but don’t want to reveal the sensitive underlying elements. Tokens are key-based and can be configured to be reversible (using the same key) or non-reversible (by not retaining the key).

The DLP API supports the following token types:
  • Format-Preserving Encryption - a token of the same length and character set.


  • Secure, key-based hashes - a token that's a 32-byte hexadecimal string generated using a data encryption key.


  • Dynamic data masking 
    The DLP API can apply various de-identification and masking techniques in real time, which is sometimes referred to as “Dynamic Data Masking” (DDM). This can be useful if you don’t want to alter your underlying data, but want to mask it when viewed by certain employees or users. For example, you could mask data when it’s presented in a UI, but require special privileges or generate additional audit logs if someone needs to view the underlying personally identifiable information (PII). This way, users aren’t exposed to the identifying data by default, but only when business needs dictate.
    With the DLP API, you can prevent users from seeing sensitive data in real-time

    Bucketing, K-anonymity and L-Diversity 
    The DLP API offers even more methods that can help you transform and better understand your data. To learn more about bucketing, K-anonymity, and L-Diversity techniques, check out the docs and how-to guides.


    Get started with the DLP API

    With these new transformation capabilities, the DLP API can help you classify and protect sensitive data no matter where it’s stored. With all tools that are designed to assist with data discovery and classification, there's no certainty that it will be 100% effective in meeting your business needs or obligations. To get started with DLP API today, take a look at the quickstart guides.

    Introducing custom roles, a powerful way to make Cloud IAM policies more precise


    As enterprises move their applications, services and data to the cloud, it’s critical that they put appropriate access controls in place to help ensure that the right people can access the right data at the right time. That’s why we’re excited to announce the beta release of custom roles for Cloud IAM.

    Custom roles offer customers full control of 1,287 public permissions across Google Cloud Platform services. This helps administrators grant users the permissions they need to do their jobs — and only those permissions. Fine-grained access controls help enforce the principle of least privilege for resources and data on GCP.

    “Verily is using custom roles to uphold the highest standards of patient trust by carefully managing the granularity of data access granted to people and programs based on their ‘need-to-know’.” — Harriet Brown, Product Manager for Trust, Compliance, and Data Security at Verily Life Sciences 

    Understanding IAM roles 

    IAM offers three primitive roles for Owner, Editor, and Viewer that make it easy to get started, and over one hundred service-specific predefined roles that combine a curated set of permissions necessary to complete different tasks across GCP. In many cases, predefined roles are sufficient for controlling access to GCP services. For example, the Cloud SQL Viewer predefined role combines 14 permissions necessary to allow users to browse and export databases.

    Custom roles complement the primitive and predefined roles when you need to be even more precise. For example, an auditor may only need to access a database to gather audit findings so they know what data is being collected, but not to read the actual data or perform any other operations. You can build your own “Cloud SQL Inventory” custom role to grant auditors browse access to databases without giving them permission to export their contents.

    How to create custom roles 

    To begin crafting custom roles, we recommend starting from the available predefined roles. These predefined roles are appropriate for most use cases and often only need small changes to the permissions list to meet an organization's requirements. Here’s how you could implement a custom role for the above use case:

    Step 1: Select the predefined role that you’d like to customize, in this case Cloud SQL Viewer:
    Step 2: Clone the predefined role and give it a custom name and ID.  Add or remove the desired permissions for your new custom role. In this case, that’s removing cloudsql.instances.export.

    How to use custom roles 

    Custom roles are available now in the Cloud Console, on the Roles tab under the ‘IAM & admin’ menu; as a REST API; and on the command line as gcloud beta iam. As you create a custom role, you can also assign it a lifecycle stage to inform your users about the readiness of the role for production usage.

    IAM supports custom roles for projects and across entire organizations to centralize development, testing, maintenance, and sharing of roles.


    Maintaining custom roles 

    When using custom roles, it’s important to track what permissions are associated with the roles you create, since available permissions for GCP services evolve and change over time. Unlike GCP predefined roles, you control if and when permissions are added or removed. Returning to our example, if new features are added to the Cloud SQL service — with corresponding new permissions — then you decide whether to add the new permissions to your customized “SQL Inventory” role as you see fit. During your testing, the Cloud Console’s appearance may vary for users who are granted custom roles, since UI elements may be enabled or disabled by specific permissions. To help maintain your custom roles, you can refer to the new IAM permissions change log to find all changes to beta and GA services’ permissions.

    Get started! 

    Interested in customizing Cloud IAM roles in your GCP project? Check out the detailed step-by-step instructions on how to get started here. We hope Cloud IAM custom roles make it easier for organizations to align access controls to their business processes. In conjunction with resource-level IAM policies, which can control access down to specific resources such as Pub/Sub topics or Machine Learning models, security administrators now have the power to publish policies as precise as granting a single user just one permission on a resource — or on whole folders full of projects. We welcome your feedback.

    Introducing managed SSL for Google App Engine


    We’re excited to announce the beta release of managed SSL certificates at no charge for applications built on Google App Engine. This service automatically encrypts server-to-client communication   an essential part of safeguarding sensitive information over the web. Manually managing SSL certificates to ensure a secure connection is a time consuming process, and GCP makes it easy for customers by providing SSL systematically at no additional charge. Managed SSL certificates are offered in addition to HTTPS connections provided on appspot.com.

    Here at Google, we believe encrypted communications should be used everywhere. For example, in 2014, the Search team announced that the use of HTTPS would positively impact page rankings. Fast forward to 2017 and Google is a Certificate Authority, establishing HTTPS as the default behavior for App Engine, even across custom domains.

    Now, when you build apps on App Engine, SSL is on by default   you no longer need to worry about it or spend time managing it. We’ve made using HTTPS simple: map a domain to your app, prove ownership, and App Engine automatically provisions an SSL certificate and renews it whenever necessary, at no additional cost. Purchasing and generating certificates, dealing with and securing keys, managing your SSL cipher suites and worrying about renewal dates   those are all a thing of the past.
     "Anyone who has ever had to replace an expiring SSL certificate for a production resource knows how stressful and error-prone it can be. That's why we're so excited about managed SSL certificates in App Engine. Not only is it simple to add encryption to our custom domains programmatically, the renewal process is fully automated as well. For our engineers that means less operational risk." 
     James Baldassari, Engineer, mabl

    Get started with managed SSL/TLS certificates 


    To get started with App Engine managed SSL certificates, simply head to the Cloud Console and add a new domain. Once the domain is mapped and your DNS records are up to date, you’ll see the SSL certificate appear in the domains list. And that’s it. Managed certificates is now the default behavior   no further steps are required!
    To switch from using your own SSL certificate on an existing domain, select the desired domain, then click on the "Enable managed security" button. In just minutes, a certificate will be in place and serving client requests.

    You can also use the gcloud CLI to make this change:

    $ gcloud beta app domain-mappings update DOMAIN --certificate-management 'AUTOMATIC'

    Rest assured that your existing certificate will remain in place and communication will continue as securely as before until the new certificate is ready and swapped in.

    For more details on the full set of commands, head to the full documentation here.

    Domains and SSL Certificates Admin API GA 

    We’re also excited to announce the general availability of the App Engine Admin API to manage your custom domains and SSL certificates. The addition of this API enables more automation so that you can easily scale and configure your app according to the needs of your business. Check out the full documentation and API definition.

    If you have any questions or concerns, or if something is not working as you’d expect, you can post in the Google App Engine forum, log a public issue, or get in touch on the App Engine slack channel (#app-engine).

    4 steps for hardening your Cloud Storage buckets: taking charge of your security


    This post is the second in a new “taking charge of your security” series, providing advice and best practices for ensuring security in the cloud. Check out the first post in the series, “Help keep your Google Cloud service account keys safe.” 

    Cloud storage is well-suited to many use cases, from serving data, to data analytics, to data archiving. Here at Google Cloud, we work hard to make Google Cloud Storage the best and safest repository for your sensitive data: For example, we run on a hardened backend infrastructure, monitor our infrastructure for threats and automatically encrypt customer data at rest.

    Nevertheless, as more organizations use various public cloud storage platforms, we hear increasingly frequent reports of sensitive data being inadvertently exposed. It’s important to note that these “breaches” are often the result of misconfigurations that inadvertently grant access to more users than was intended. The good news is that with the right tools and processes in place, you can help protect your data from unintended exposure.

    Security in the cloud is a shared responsibility, and as a Cloud Storage user, we’re here to help you with some tips on how to set up appropriate access controls, locate sensitive data and do your part to help keep data more secure with tools included in Google Cloud Platform (GCP).

    1. Check for appropriate permissions

      The first step to securing a Cloud Storage bucket is to make sure that only the right individuals or groups have access. By default, access to Cloud Storage buckets is restricted, but owners and admins often make the buckets or objects public. While there are legitimate reasons to do this, making buckets public can open avenues for unintended exposure of data, and should be approached with caution.

      The preferred method for controlling access to buckets and objects is to use Identity and Access Management (IAM) permissions. IAM allows you to implement fine-grained access control to your storage buckets right out of the gate. Learn how to manage access to Cloud Storage buckets with this how-to guide. Just be sure that you understand what permissions you are granting to which users or groups. For example, granting access to a group that contains a large number of users can create significant unintended exposure. You can also use Cloud Resource Manager to centrally manage and control your projects and resources.


    2. Check for sensitive data

      Even if you’ve set the appropriate permissions, it’s important to know if there’s sensitive data stored in a Cloud Storage bucket. Enter Cloud Data Loss Prevention (DLP) API. The DLP API uses more than 40 predefined detectors to quickly and scalably classify sensitive data elements such as payment card numbers, names, personal identification numbers, telephone numbers and more. Here’s a how-to guide that teaches you how to inspect your GCS buckets using DLP API.


    3. Take Action

      If you find sensitive data in buckets that are shared too broadly, you should take appropriate steps to resolve this quickly. You can:
      • Make the public buckets or objects private again
      • Restrict access to the bucket (see Using IAM)
      • Remove the sensitive file or object from the bucket
      • Use the Cloud DLP API to redact sensitive content

      You should also avoid naming storage buckets which may contain sensitive data in a way that reveals their contents.


    4. Stay vigilant!

      Protecting sensitive data is not a one-time exercise. Permissions change, new data is added and new buckets can crop up without the right permissions in place. As a best practice, set up a regular schedule to check for inappropriate permissions, scan for sensitive data and take the appropriate follow-up actions.
    Tools like IAM and DLP help make it easy to secure your data in the cloud. Watch this space for more ways to prevent unintended access, automate data protection and protect other GCP datastores and assets.