Tag Archives: Image Processing

Experimental Nighttime Photography with Nexus and Pixel


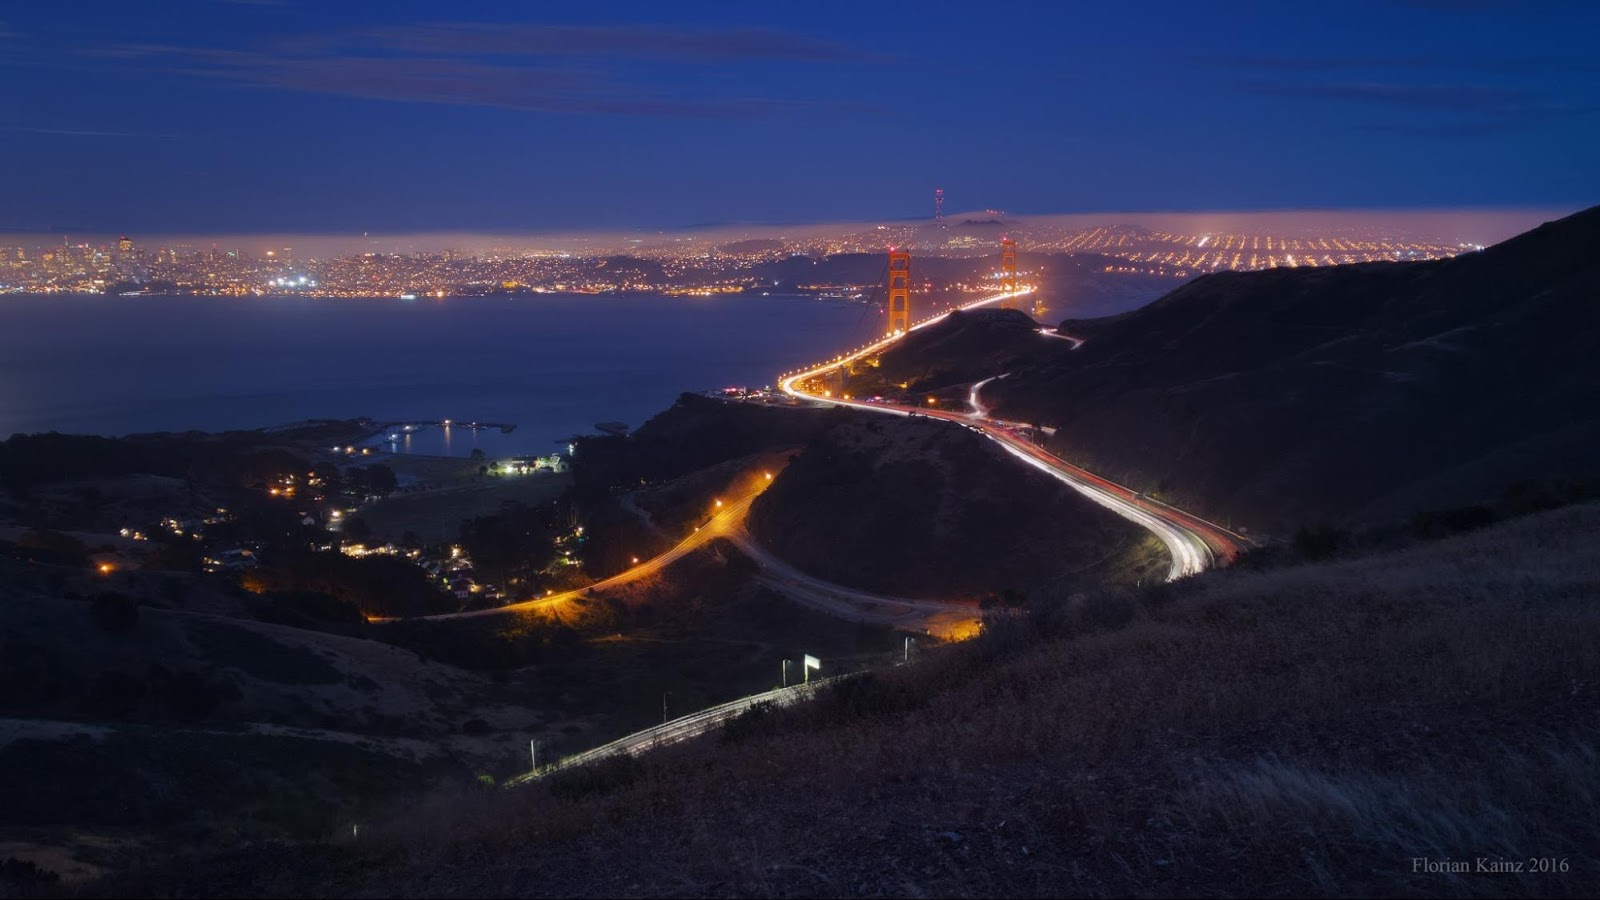
On a full moon night last year I carried a professional DSLR camera, a heavy lens and a tripod up to a hilltop in the Marin Headlands just north of San Francisco to take a picture of the Golden Gate Bridge and the lights of the city behind it.
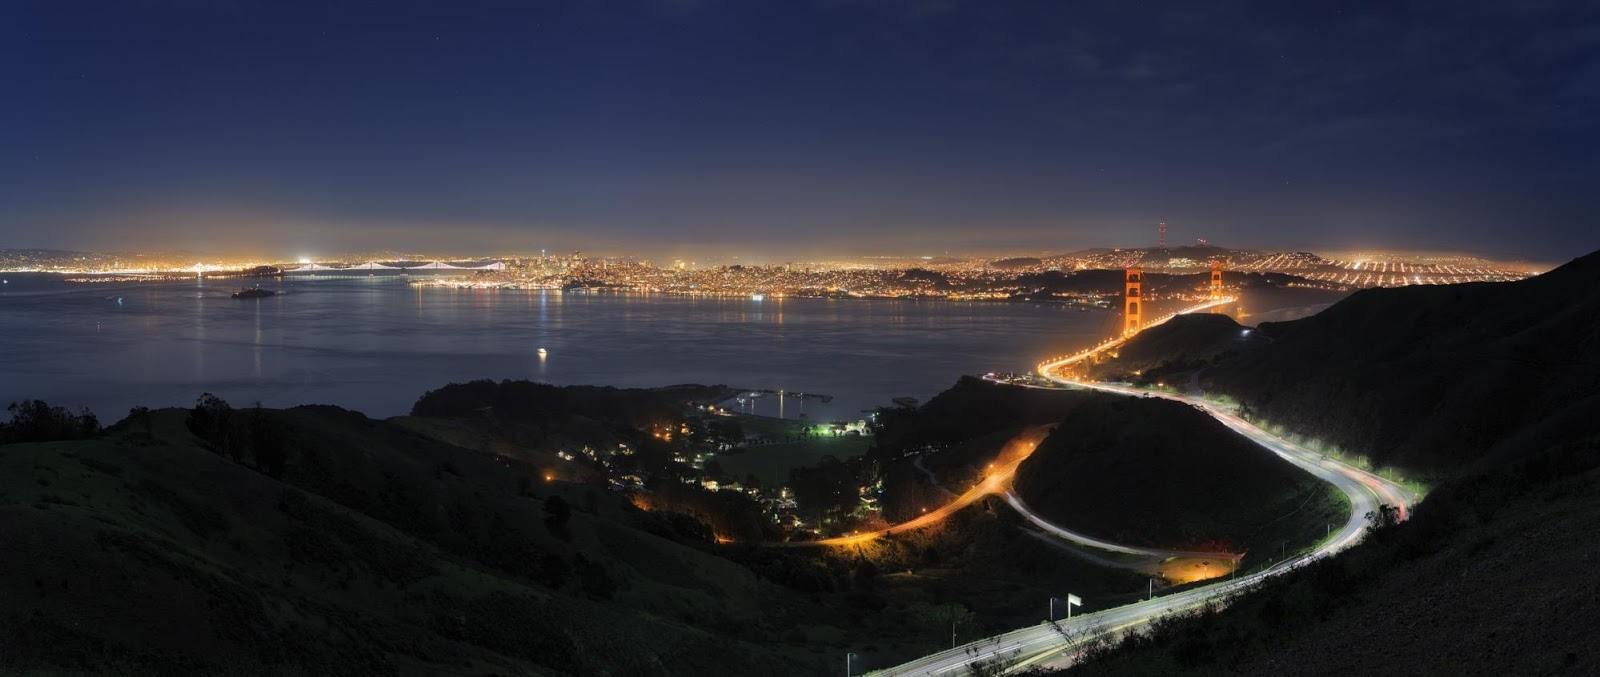
A view of the Golden Gate Bridge from the Marin Headlands, taken with a DSLR camera (Canon 1DX, Zeiss Otus 28mm f/1.4 ZE). Click here for the full resolution image.
I thought the photo of the moonlit landscape came out well so I showed it to my (then) teammates in Gcam, a Google Research team that focuses on computational photography - developing algorithms that assist in taking pictures, usually with smartphones and similar small cameras. Seeing my nighttime photo, one of the Gcam team members challenged me to re-take it, but with a phone camera instead of a DSLR. Even though cameras on cellphones have come a long way, I wasn’t sure whether it would be possible to come close to the DSLR shot.

Probably the most successful Gcam project to date is the image processing pipeline that enables the HDR+ mode in the camera app on Nexus and Pixel phones. HDR+ allows you to take photos at low-light levels by rapidly shooting a burst of up to ten short exposures and averaging them them into a single image, reducing blur due to camera shake while collecting enough total light to yield surprisingly good pictures. Of course there are limits to what HDR+ can do. Once it gets dark enough the camera just cannot gather enough light and challenging shots like nighttime landscapes are still beyond reach.

The Challenges
To learn what was possible with a cellphone camera in extremely low-light conditions, I looked to the experimental SeeInTheDark app, written by Marc Levoy and presented at the ICCV 2015 Extreme Imaging Workshop, which can produce pictures with even less light than HDR+. It does this by accumulating more exposures, and merging them under the assumption that the scene is static and any differences between successive exposures must be due to camera motion or sensor noise. The app reduces noise further by dropping image resolution to about 1 MPixel. With SeeInTheDark it is just possible to take pictures, albeit fairly grainy ones, by the light of the full moon.

However, in order to keep motion blur due to camera shake and moving objects in the scene at acceptable levels, both HDR+ and SeeInTheDark must keep the exposure times for individual frames below roughly one tenth of a second. Since the user can’t hold the camera perfectly still for extended periods, it doesn’t make sense to attempt to merge a large number of frames into a single picture. Therefore, HDR+ merges at most ten frames, while SeeInTheDark progressively discounts older frames as new ones are captured. This limits how much light the camera can gather and thus affects the quality of the final pictures at very low light levels.

Of course, if we want to take high-quality pictures of low-light scenes (such as a landscape illuminated only by the moon), increasing the exposure time to more than one second and mounting the phone on a tripod or placing it on some other solid support makes the task a lot easier. Google’s Nexus 6P and Pixel phones support exposure times of 4 and 2 seconds respectively. As long as the scene is static, we should be able to record and merge dozens of frames to produce a single final image, even if shooting those frames takes several minutes.

Even with the use of a tripod, a sharp picture requires the camera’s lens to be focused on the subject, and this can be tricky in scenes with very low light levels. The two autofocus mechanisms employed by cellphone cameras — contrast detection and phase detection — fail when it’s dark enough that the camera's image sensor returns mostly noise. Fortunately, the interesting parts of outdoor scenes tend to be far enough away that simply setting the focus distance to infinity produces sharp images.

Experiments & Results
Taking all this into account, I wrote a simple Android camera app with manual control over exposure time, ISO and focus distance. When the shutter button is pressed the app waits a few seconds and then records up to 64 frames with the selected settings. The app saves the raw frames captured from the sensor as DNG files, which can later be downloaded onto a PC for processing.

To test my app, I visited the Point Reyes lighthouse on the California coast some thirty miles northwest of San Francisco on a full moon night. I pointed a Nexus 6P phone at the building and shot a burst of 32 four-second frames at ISO 1600. After covering the camera lens with opaque adhesive tape I shot an additional 32 black frames. Back at the office I loaded the raw files into Photoshop. The individual frames were very grainy, as one would expect given the tiny sensor in a cellphone camera, but computing the mean of all 32 frames cleaned up most of the grain, and subtracting the mean of the 32 black frames removed faint grid-like patterns caused by local variations in the sensor's black level. The resulting image, shown below, looks surprisingly good.
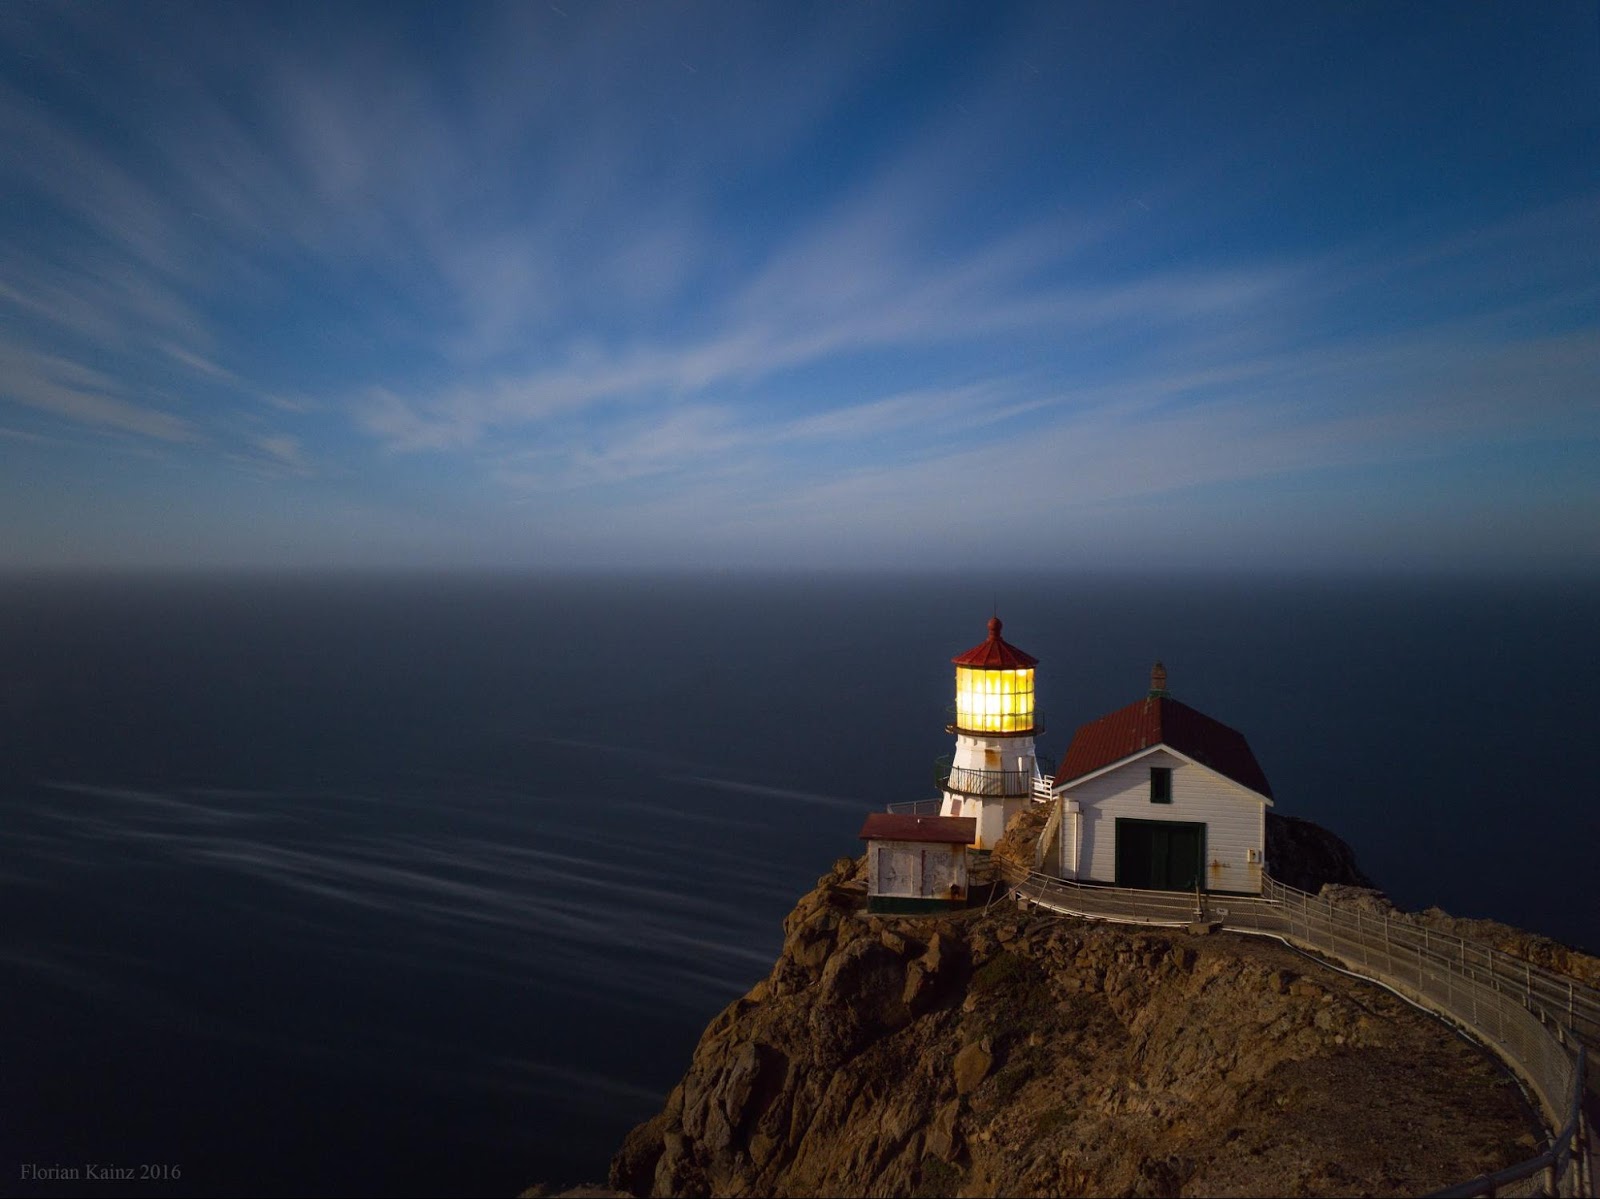
Point Reyes lighthouse at night, photographed with Google Nexus 6P (full resolution image here).
The lantern in the lighthouse is overexposed, but the rest of the scene is sharp, not too grainy, and has pleasing, natural looking colors. For comparison, a hand-held HDR+ shot of the same scene looks like this:
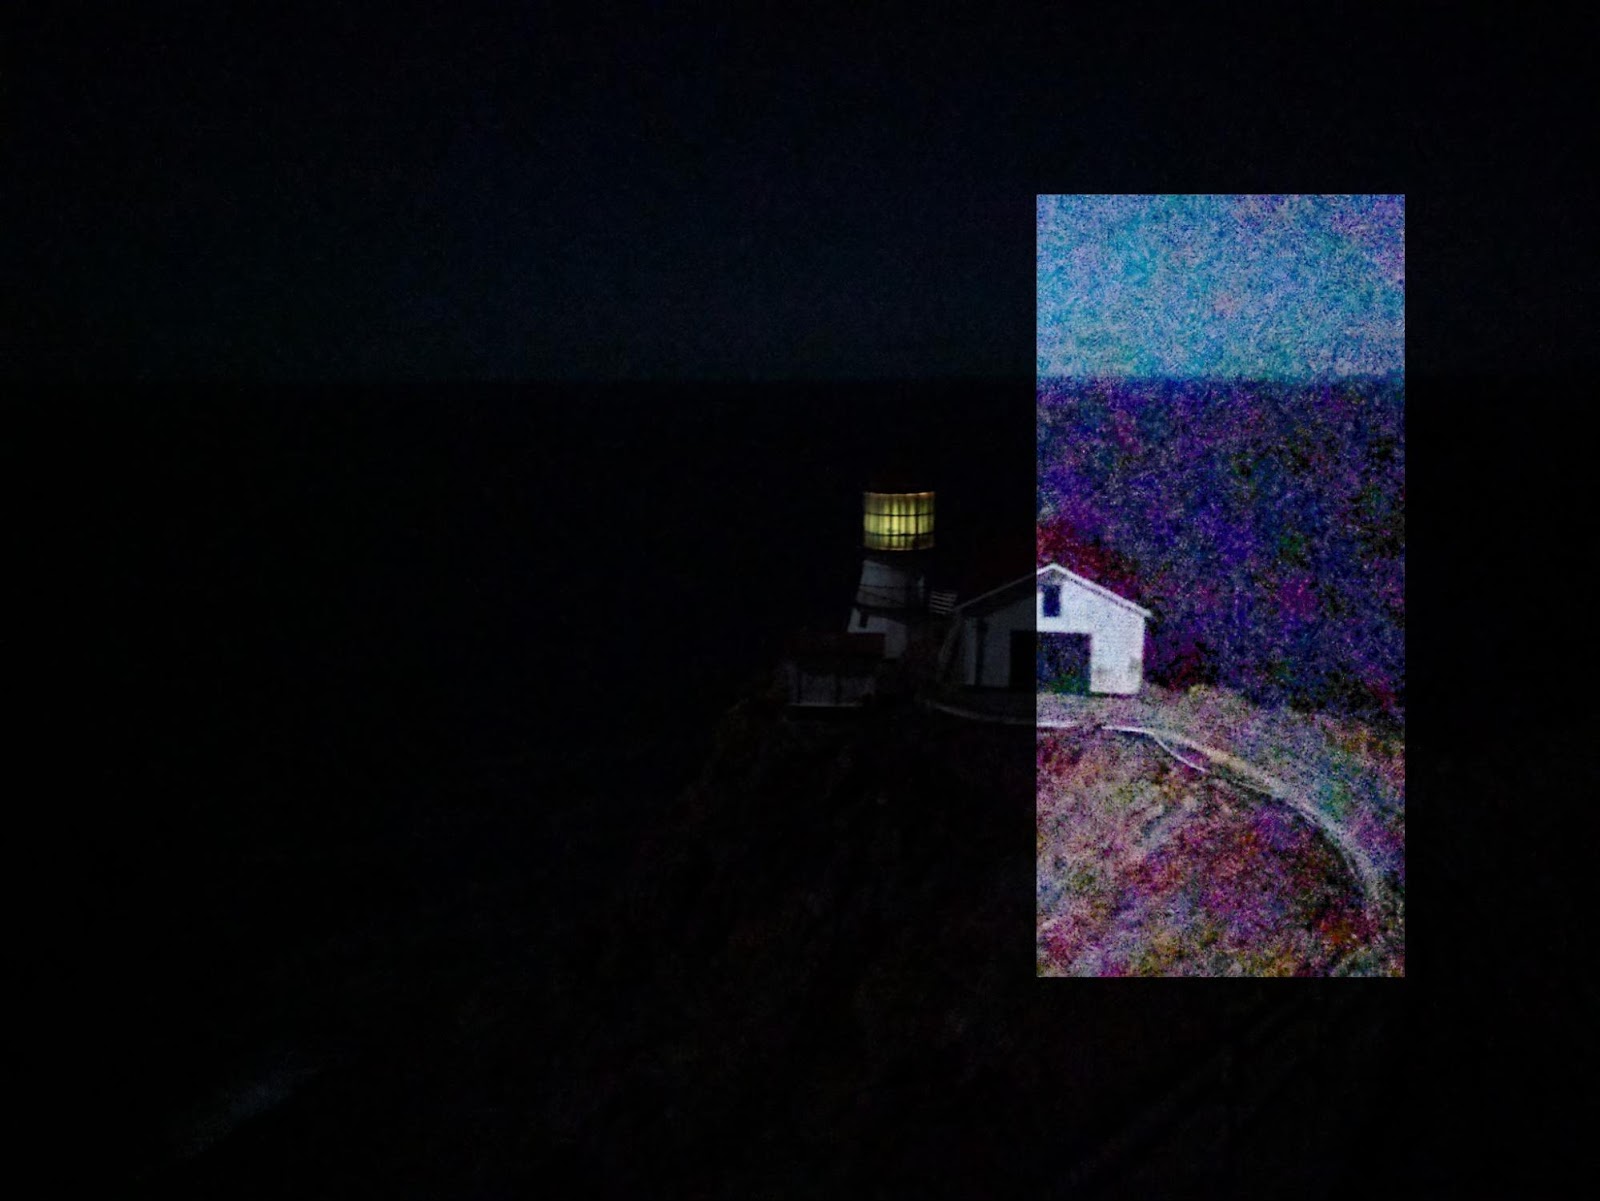
Point Reyes Lighthouse at night, hand-held HDR+ shot (full resolution image here). The inset rectangle has been brightened in Photoshop to roughly match the previous picture.
Satisfied with these results, I wanted to see if I could capture a nighttime landscape as well as the stars in the clear sky above it, all in one picture. When I took the photo of the lighthouse a thin layer of clouds conspired with the bright moonlight to make the stars nearly invisible, but on a clear night a two or four second exposure can easily capture the brighter stars. The stars are not stationary, though; they appear to rotate around the celestial poles, completing a full turn every 24 hours. The motion is slow enough to be invisible in exposures of only a few seconds, but over the minutes it takes to record a few dozen frames the stars move enough to turn into streaks when the frames are merged. Here is an example:
The North Star above Mount Burdell, single 2-second exposure. (full resolution image here).
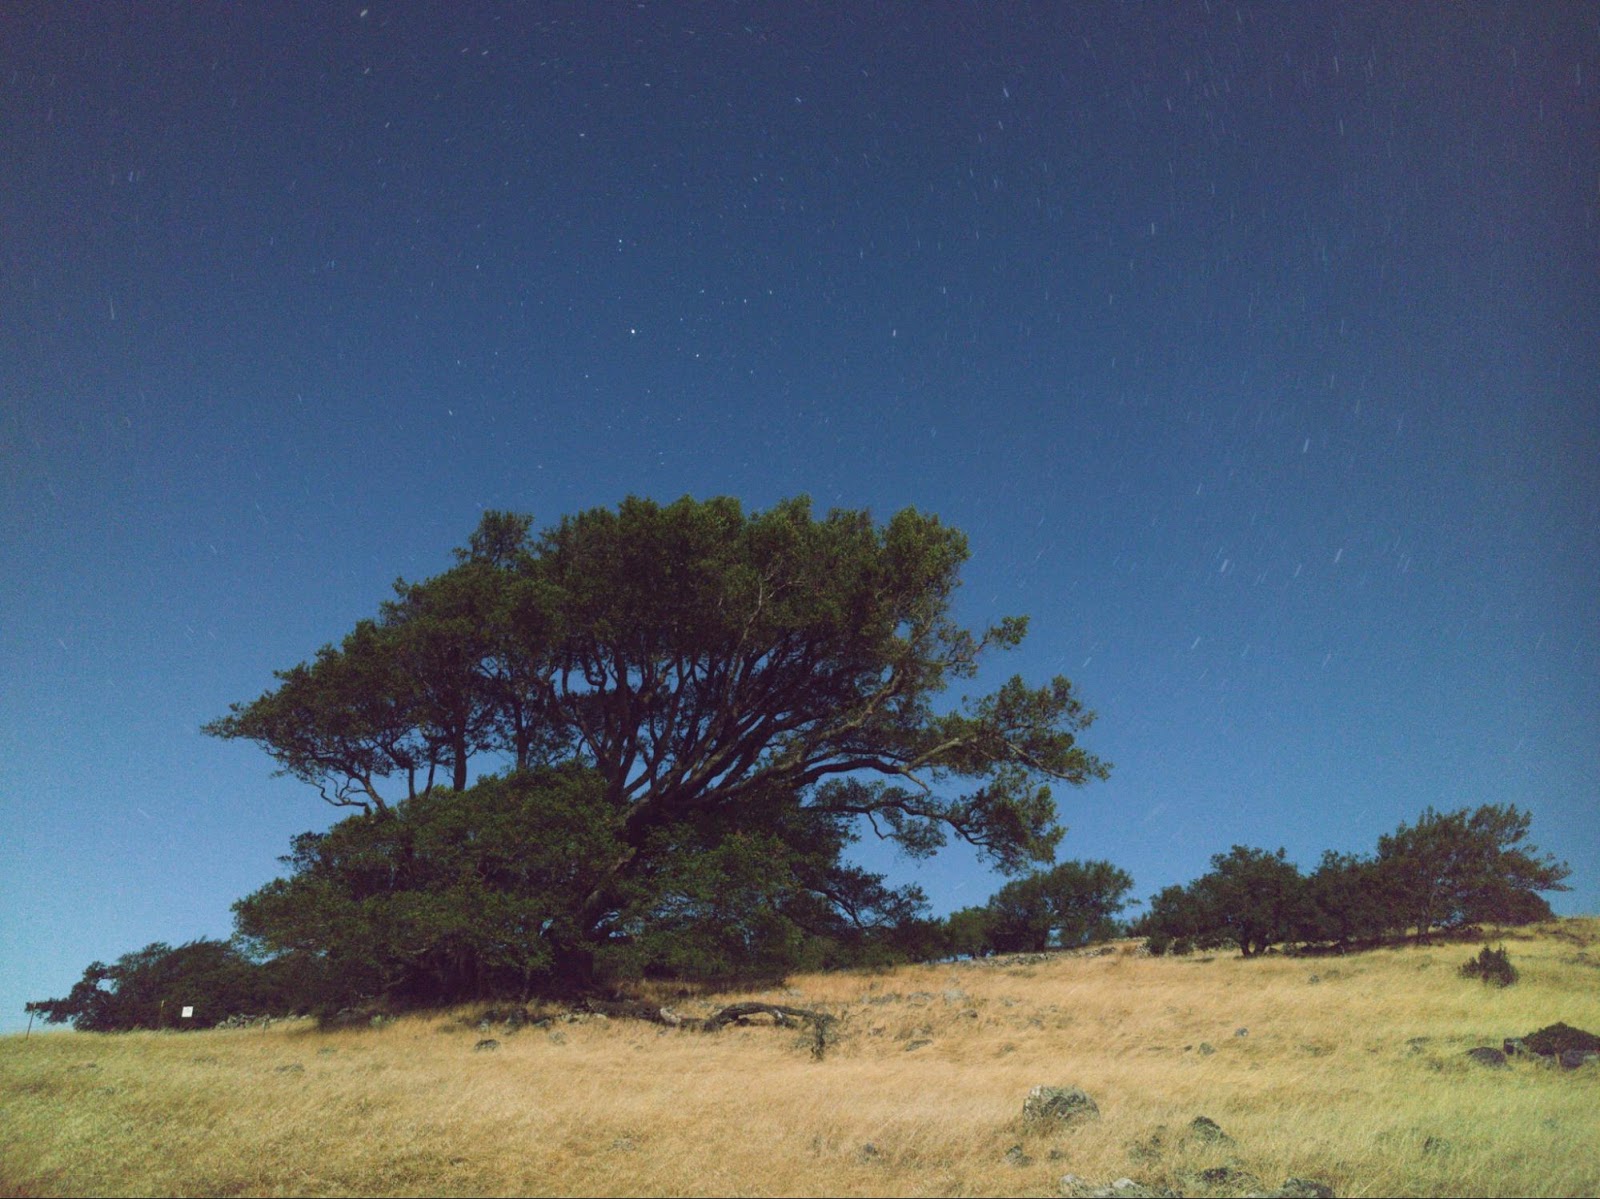
Mean of 32 2-second exposures (full resolution image here).
Seeing streaks instead of pinpoint stars in the sky can be avoided by shifting and rotating the original frames such that the stars align. Merging the aligned frames produces an image with a clean-looking sky, and many faint stars that were hidden by noise in the individual frames become visible. Of course, the ground is now motion-blurred as if the camera had followed the rotation of the sky.
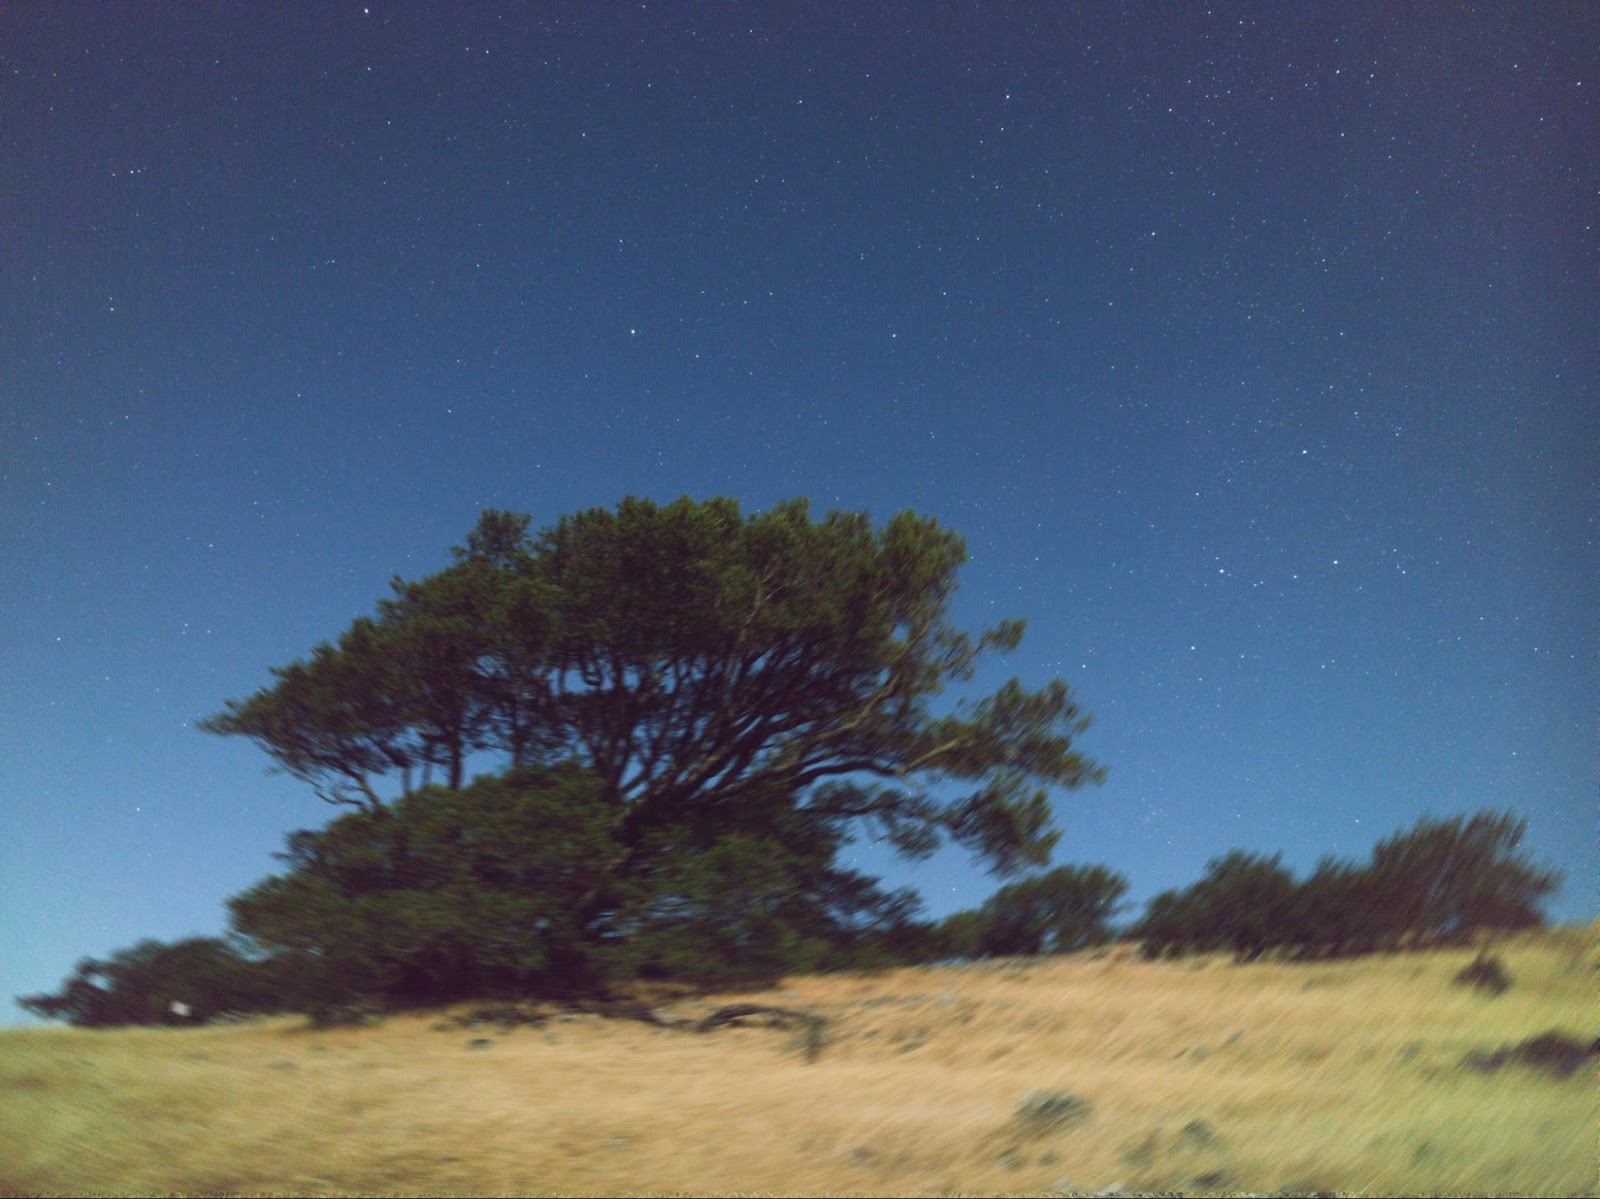
Mean of 32 2-second exposures, stars aligned (full resolution image here).
We now have two images; one where the ground is sharp, and one where the sky is sharp, and we can combine them into a single picture that is sharp everywhere. In Photoshop the easiest way to do that is with a hand-painted layer mask. After adjusting brightness and colors to taste, slight cropping, and removing an ugly "No Trespassing" sign we get a presentable picture:
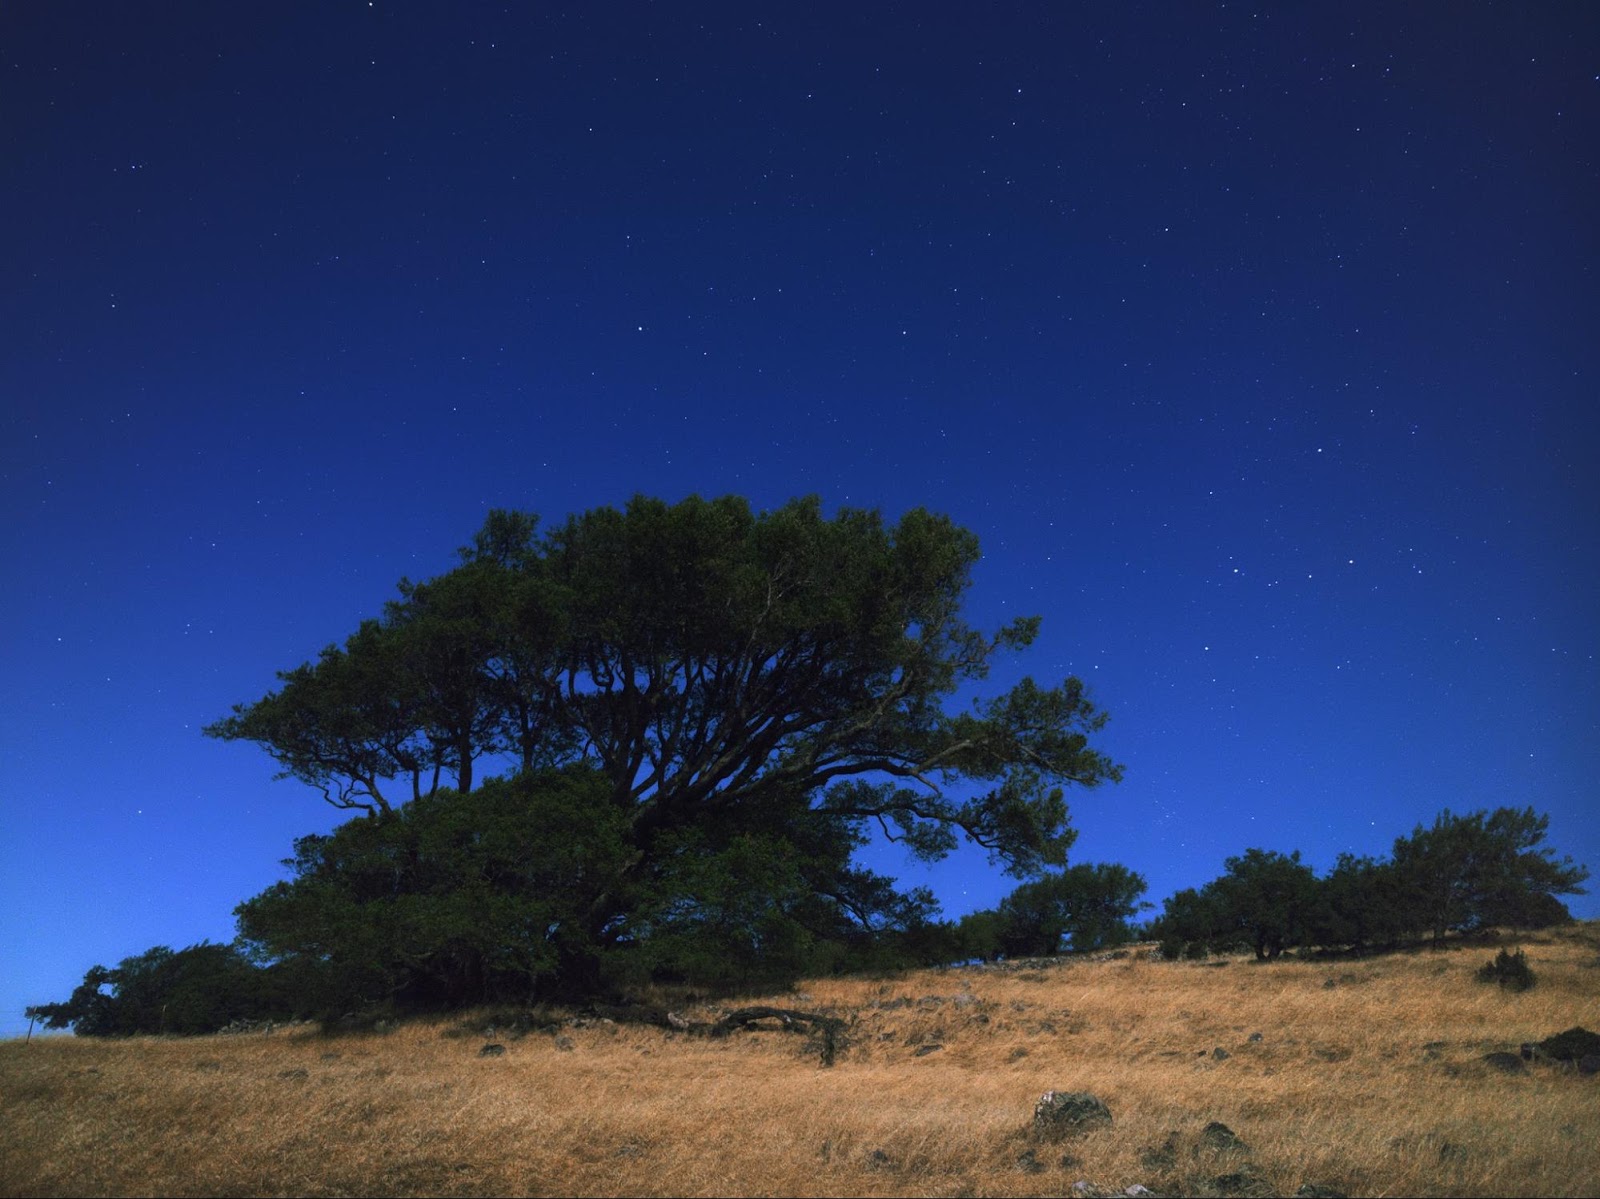
The North Star above Mount Burdell, shot with Google Pixel, final image (full resolution image here).
Using Even Less Light
The pictures I've shown so far were shot on nights with a full moon, when it was bright enough that one could easily walk outside without a lantern or a flashlight. I wanted to find out if it was possible to take cellphone photos in even less light. Using a Pixel phone, I tried a scene illuminated by a three-quarter moon low in the sky, and another one with no moon at all. Anticipating more noise in the individual exposures, I shot 64-frame bursts. The processed final images still look fine:
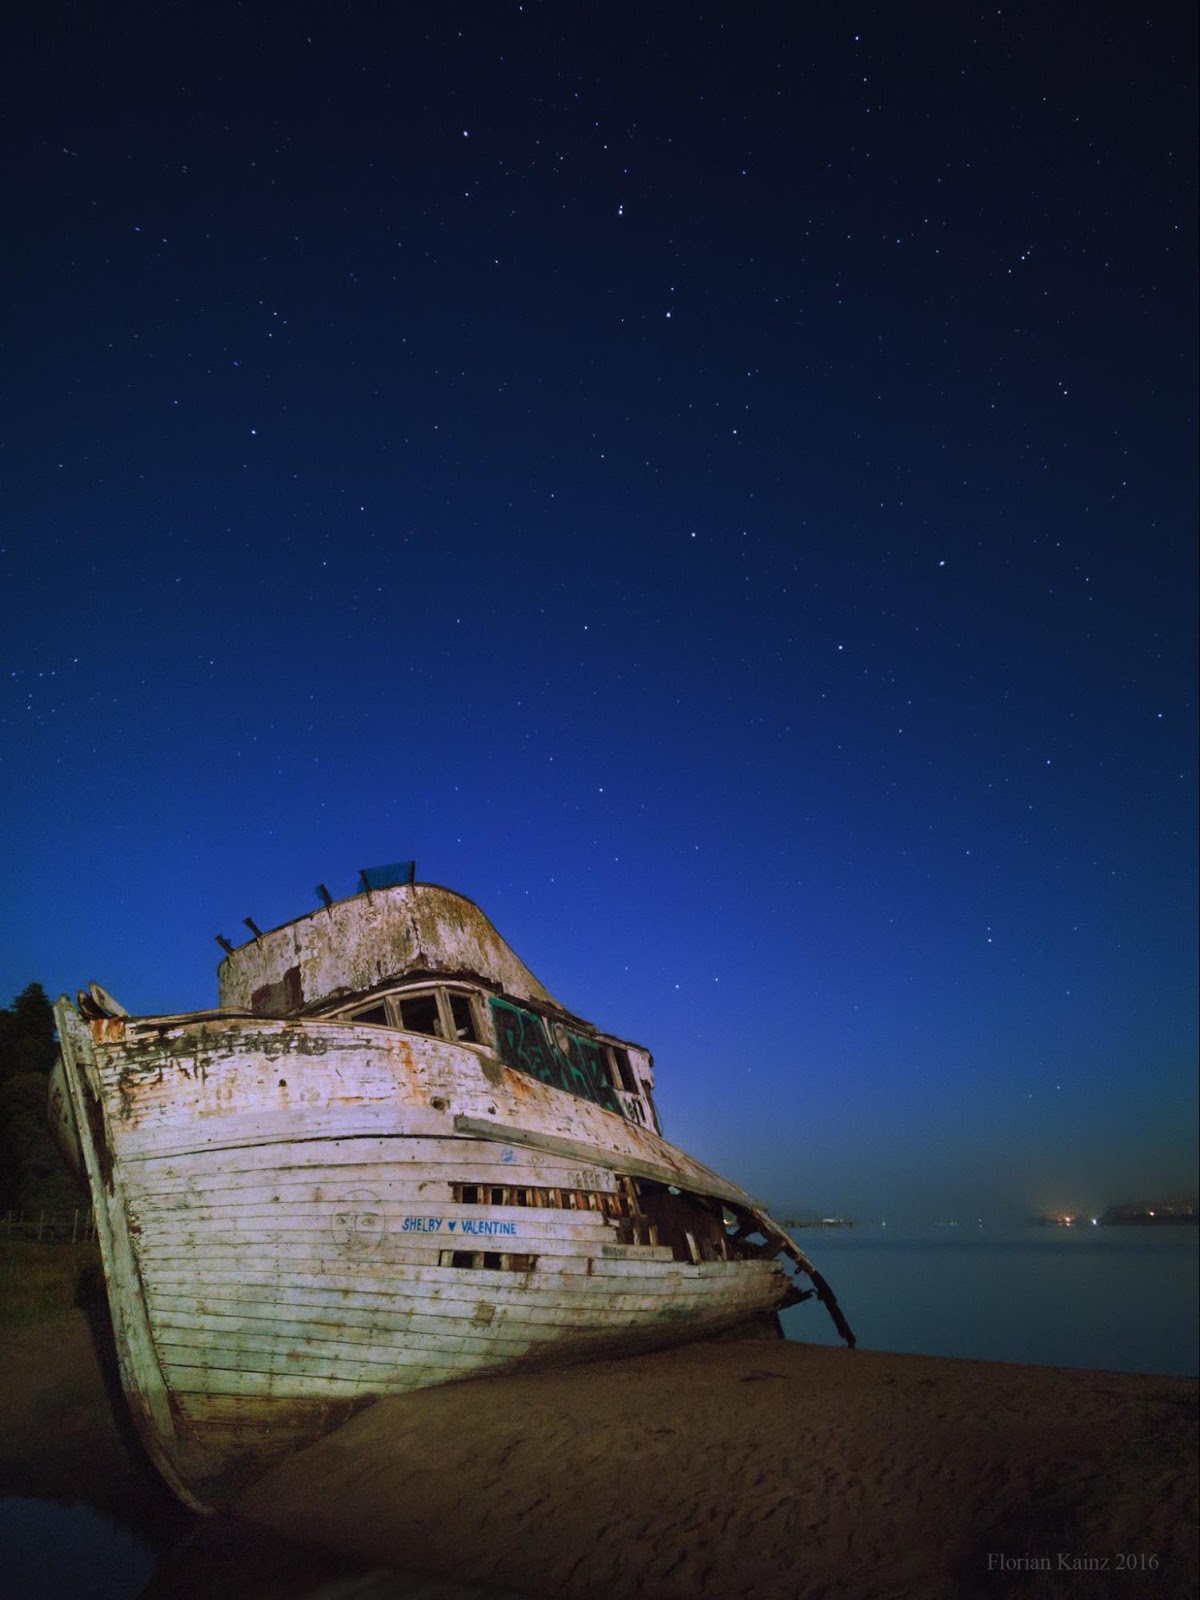
Wrecked fishing boat in Inverness and the Big Dipper, 64 2-second exposures, shot with Google Pixel (full resolution image here).
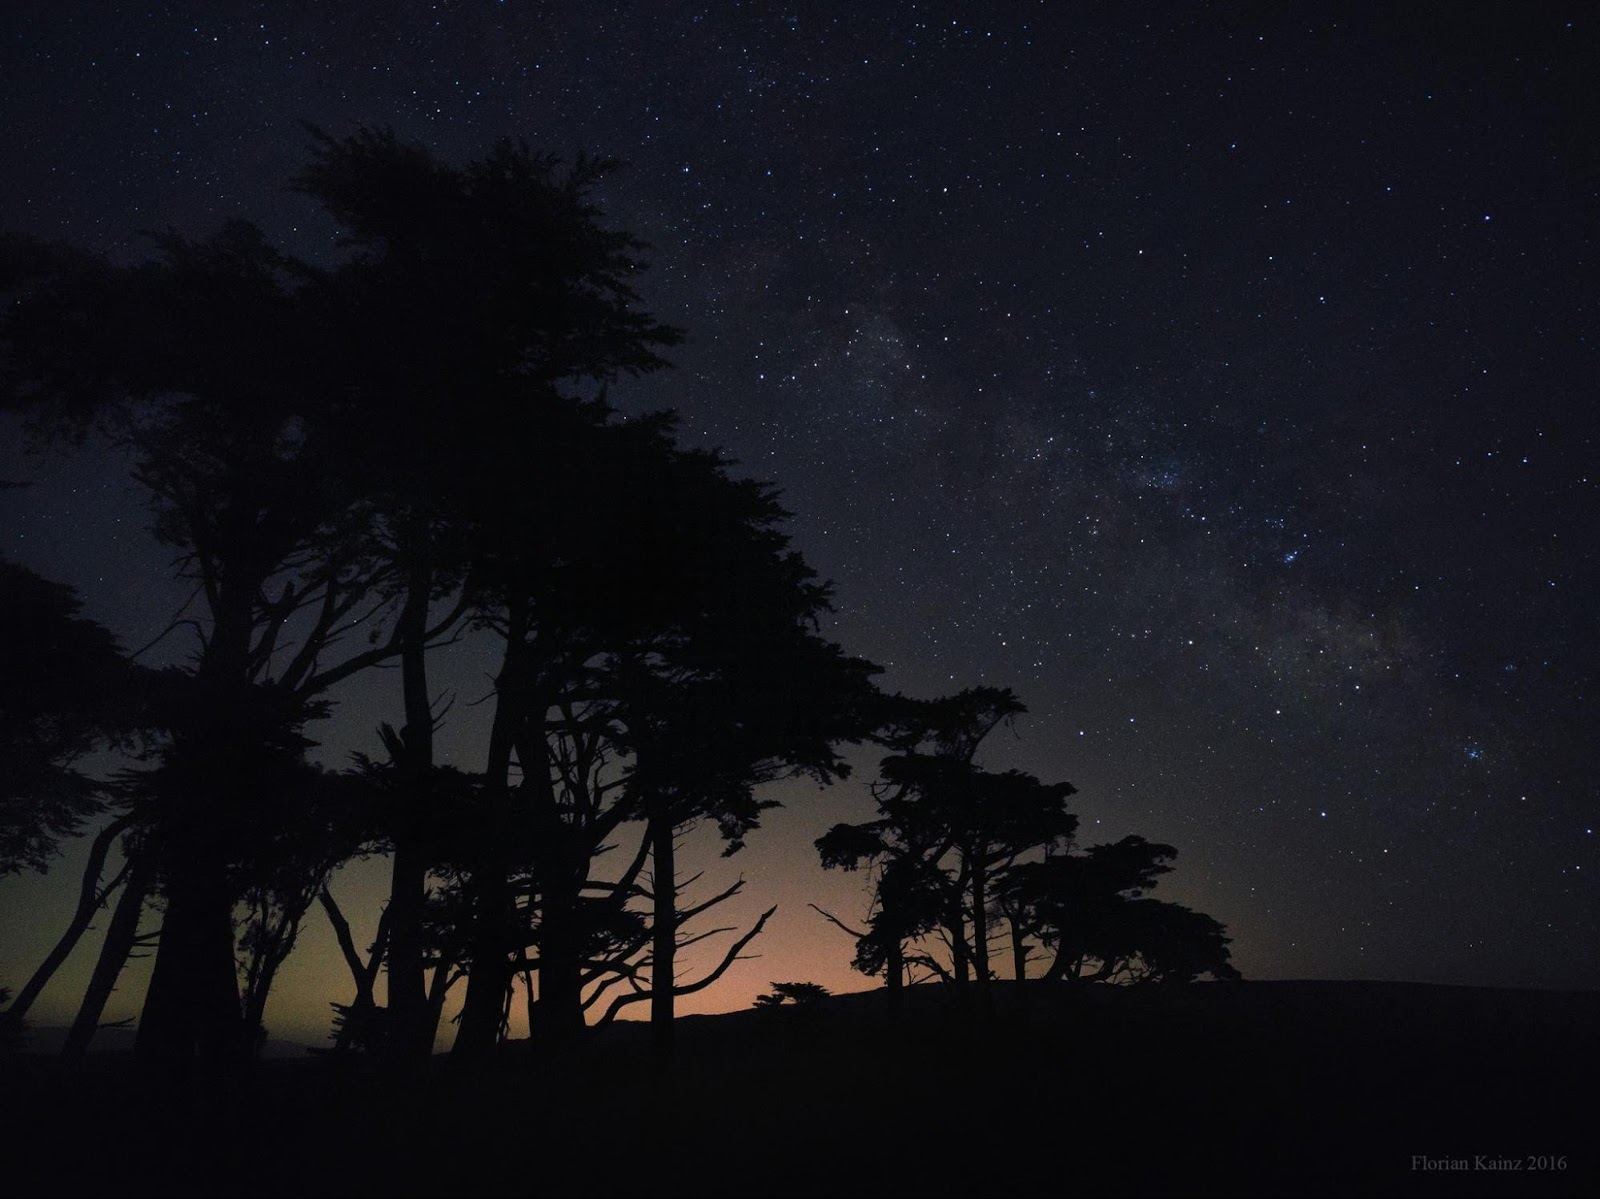
Stars above Pierce Point Ranch, 64 2-second exposures, shot with Google Pixel (full resolution image here).
In the second image the distant lights of the cities around the San Francisco Bay caused the sky near the horizon to glow, but without moonlight the night was still dark enough to make the Milky Way visible. The picture looks noticeably grainier than my earlier moonlight shots, but it's not too bad.

Pushing the Limits
How far can we go? Can we take a cellphone photo with only starlight - no moon, no artificial light sources nearby, and no background glow from a distant city?

To test this I drove to a point on the California coast a little north of the mouth of the Russian River, where nights can get really dark, and pointed my Pixel phone at the summer sky above the ocean. Combining 64 two-second exposures taken at ISO 12800, and 64 corresponding black black frames did produce a recognizable image of the Milky Way. The constellations Scorpius and Sagittarius are clearly visible, and squinting hard enough one can just barely make out the horizon and one or two rocks in the ocean, but overall, this is not a picture you'd want to print out and frame. Still, this may be the lowest-light cellphone photo ever taken.
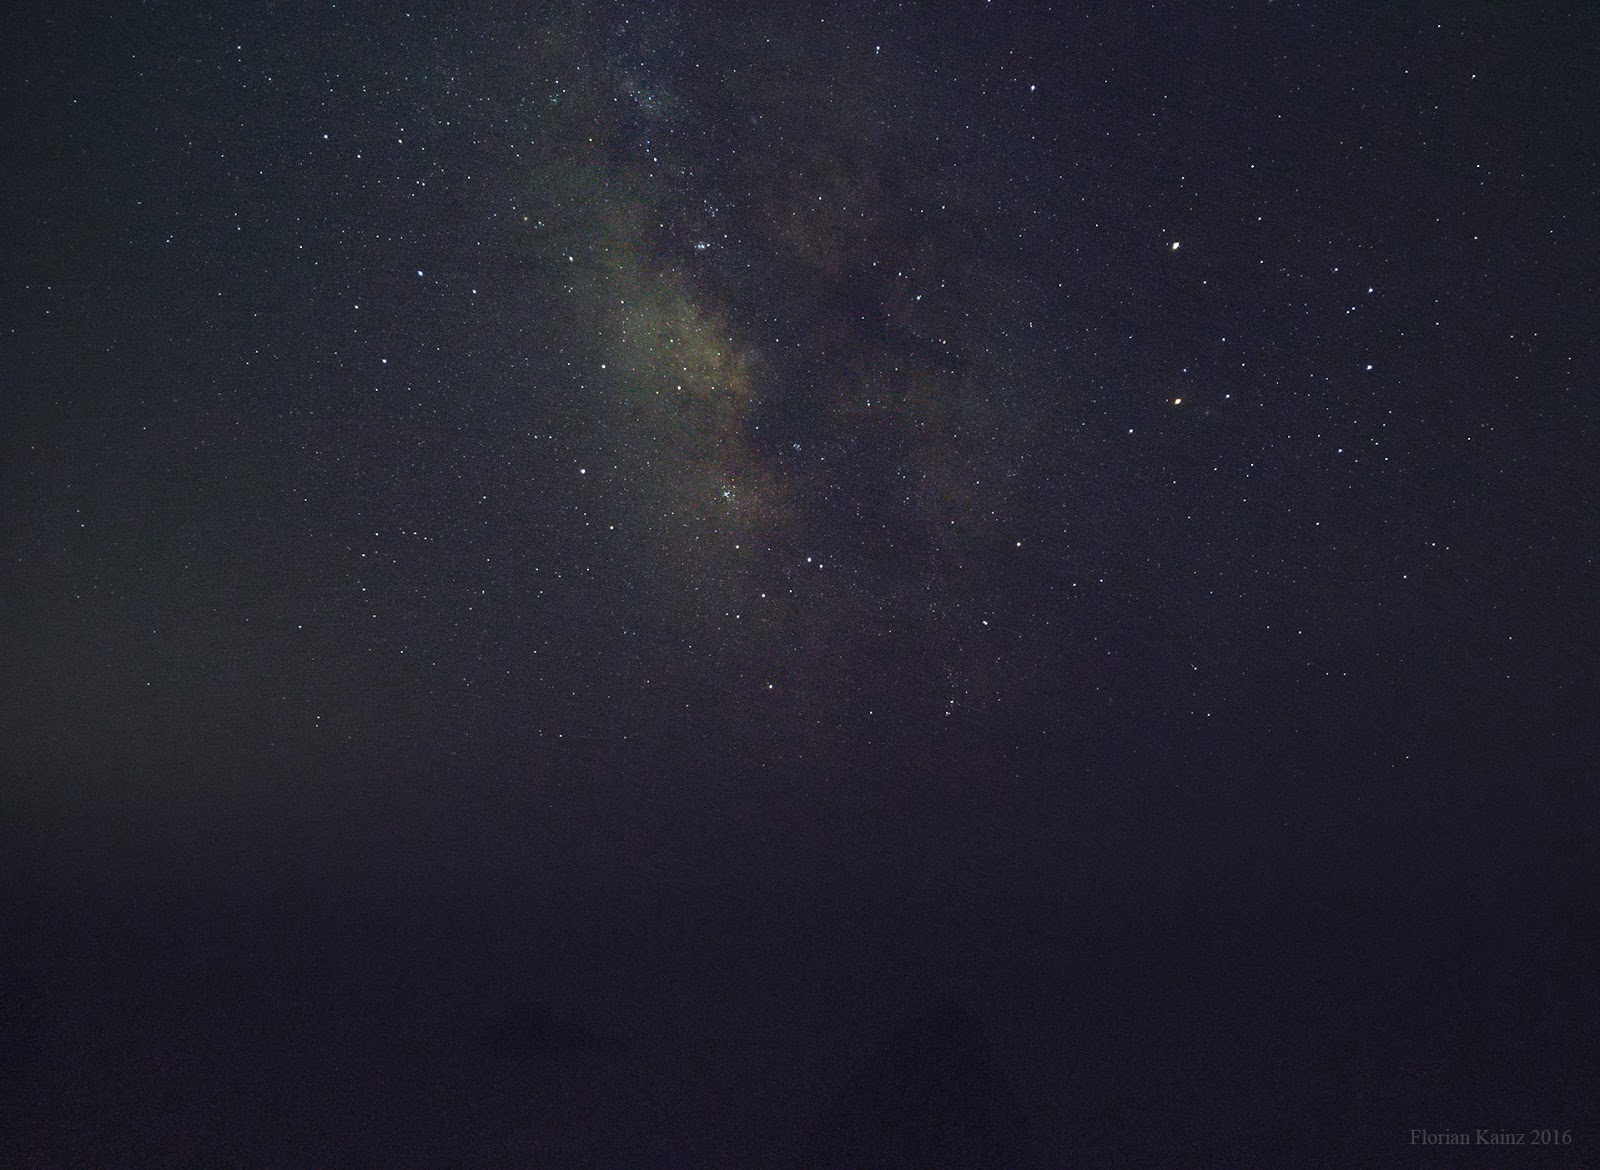
Only starlight, shot with Google Pixel (full resolution image here).
Here we are approaching the limits of what the Pixel camera can do. The camera cannot handle exposure times longer than two seconds. If this restriction was removed we could expose individual frames for eight to ten seconds, and the stars still would not show noticeable motion blur. With longer exposures we could lower the ISO setting, which would significantly reduce noise in the individual frames, and we would get a correspondingly cleaner and more detailed final picture.

Getting back to the original challenge - using a cellphone to reproduce a night-time DSLR shot of the Golden Gate - I did that. Here is what I got:
Golden Gate Bridge at night, shot with Google Nexus 6P (full resolution image here).
The Moon above San Francisco, shot with Google Nexus 6P (full resolution image here).
At 9 to 10 MPixels the resolution of these pictures is not as high as what a DSLR camera might produce, but otherwise image quality is surprisingly good: the photos are sharp all the way into the corners, there is not much visible noise, the captured dynamic range is sufficient to avoid saturating all but the brightest highlights, and the colors are pleasing.

Trying to find out if phone cameras might be suitable for outdoor nighttime photography was a fun experiment, and clearly the result is yes, they are. However, arriving at the final images required a lot of careful post-processing on a desktop computer, and the procedure is too cumbersome for all but the most dedicated cellphone photographers. However, with the right software a phone should be able to process the images internally, and if steps such as painting layer masks by hand can be eliminated, it might be possible to do point-and-shoot photography in very low light conditions. Almost - the cellphone would still have to rest on the ground or be mounted on a tripod.

Here’s a Google Photos album with more examples of photos that were created with the technique described above.

Announcing Guetzli: A New Open Source JPEG Encoder


(Cross-posted on the Google Open Source Blog)

At Google, we care about giving users the best possible online experience, both through our own services and products and by contributing new tools and industry standards for use by the online community. That’s why we’re excited to announce Guetzli, a new open source algorithm that creates high quality JPEG images with file sizes 35% smaller than currently available methods, enabling webmasters to create webpages that can load faster and use even less data.

Guetzli [guɛtsli] — cookie in Swiss German — is a JPEG encoder for digital images and web graphics that can enable faster online experiences by producing smaller JPEG files while still maintaining compatibility with existing browsers, image processing applications and the JPEG standard. From the practical viewpoint this is very similar to our Zopfli algorithm, which produces smaller PNG and gzip files without needing to introduce a new format, and different than the techniques used in RNN-based image compression, RAISR, and WebP, which all need client and ecosystem changes for compression gains at internet scale.

The visual quality of JPEG images is directly correlated to its multi-stage compression process: color space transform, discrete cosine transform, and quantization. Guetzli specifically targets the quantization stage in which the more visual quality loss is introduced, the smaller the resulting file. Guetzli strikes a balance between minimal loss and file size by employing a search algorithm that tries to overcome the difference between the psychovisual modeling of JPEG's format, and Guetzli’s psychovisual model, which approximates color perception and visual masking in a more thorough and detailed way than what is achievable by simpler color transforms and the discrete cosine transform. However, while Guetzli creates smaller image file sizes, the tradeoff is that these search algorithms take significantly longer to create compressed images than currently available methods.
Figure 1. 16x16 pixel synthetic example of a phone line hanging against a blue sky — traditionally a case where JPEG compression algorithms suffer from artifacts. Uncompressed original is on the left. Guetzli (on the right) shows less ringing artefacts than libjpeg (middle) and has a smaller file size.
And while Guetzli produces smaller image file sizes without sacrificing quality, we additionally found that in experiments where compressed image file sizes are kept constant that human raters consistently preferred the images Guetzli produced over libjpeg images, even when the libjpeg files were the same size or even slightly larger. We think this makes the slower compression a worthy tradeoff.
Figure 2. 20x24 pixel zoomed areas from a picture of a cat’s eye. Uncompressed original on the left. Guetzli (on the right)
shows less ringing artefacts than libjpeg (middle) without requiring a larger file size.
It is our hope that webmasters and graphic designers will find Guetzli useful and apply it to their photographic content, making users’ experience smoother on image-heavy websites in addition to reducing load times and bandwidth costs for mobile users. Last, we hope that the new explicitly psychovisual approach in Guetzli will inspire further image and video compression research.

Image Compression with Neural Networks


Data compression is used nearly everywhere on the internet - the videos you watch online, the images you share, the music you listen to, even the blog you're reading right now. Compression techniques make sharing the content you want quick and efficient. Without data compression, the time and bandwidth costs for getting the information you need, when you need it, would be exorbitant!

In "Full Resolution Image Compression with Recurrent Neural Networks", we expand on our previous research on data compression using neural networks, exploring whether machine learning can provide better results for image compression like it has for image recognition and text summarization. Furthermore, we are releasing our compression model via TensorFlow so you can experiment with compressing your own images with our network.

We introduce an architecture that uses a new variant of the Gated Recurrent Unit (a type of RNN that allows units to save activations and process sequences) called Residual Gated Recurrent Unit (Residual GRU). Our Residual GRU combines existing GRUs with the residual connections introduced in "Deep Residual Learning for Image Recognition" to achieve significant image quality gains for a given compression rate. Instead of using a DCT to generate a new bit representation like many compression schemes in use today, we train two sets of neural networks - one to create the codes from the image (encoder) and another to create the image from the codes (decoder).

Our system works by iteratively refining a reconstruction of the original image, with both the encoder and decoder using Residual GRU layers so that additional information can pass from one iteration to the next. Each iteration adds more bits to the encoding, which allows for a higher quality reconstruction. Conceptually, the network operates as follows:
  1. The initial residual, R[0], corresponds to the original image I: R[0] = I.
  2. Set i=1 for to the first iteration.
  3. Iteration[i] takes R[i-1] as input and runs the encoder and binarizer to compress the image into B[i].
  4. Iteration[i] runs the decoder on B[i] to generate a reconstructed image P[i].
  5. The residual for Iteration[i] is calculated: R[i] = I - P[i].
  6. Set i=i+1 and go to Step 3 (up to the desired number of iterations).
The residual image represents how different the current version of the compressed image is from the original. This image is then given as input to the network with the goal of removing the compression errors from the next version of the compressed image. The compressed image is now represented by the concatenation of B[1] through B[N]. For larger values of N, the decoder gets more information on how to reduce the errors and generate a higher quality reconstruction of the original image.

To understand how this works, consider the following example of the first two iterations of the image compression network, shown in the figures below. We start with an image of a lighthouse. On the first pass through the network, the original image is given as an input (R[0] = I). P[1] is the reconstructed image. The difference between the original image and encoded image is the residual, R[1], which represents the error in the compression.
Left: Original image, I = R[0]. Center: Reconstructed image, P[1]. Right: the residual, R[1], which represents the error introduced by compression.
On the second pass through the network, R[1] is given as the network’s input (see figure below). A higher quality image P[2] is then created. So how does the system recreate such a good image (P[2], center panel below) from the residual R[1]? Because the model uses recurrent nodes with memory, the network saves information from each iteration that it can use in the next one. It learned something about the original image in Iteration[1] that is used along with R[1] to generate a better P[2] from B[2]. Lastly, a new residual, R[2] (right), is generated by subtracting P[2] from the original image. This time the residual is smaller since there are fewer differences between the reconstructed image, and what we started with.
The second pass through the network. Left: R[1] is given as input. Center: A higher quality reconstruction, P[2]. Right: A smaller residual R[2] is generated by subtracting P[2] from the original image.
At each further iteration, the network gains more information about the errors introduced by compression (which is captured by the residual image). If it can use that information to predict the residuals even a little bit, the result is a better reconstruction. Our models are able to make use of the extra bits up to a point. We see diminishing returns, and at some point the representational power of the network is exhausted.

To demonstrate file size and quality differences, we can take a photo of Vash, a Japanese Chin, and generate two compressed images, one JPEG and one Residual GRU. Both images target a perceptual similarity of 0.9 MS-SSIM, a perceptual quality metric that reaches 1.0 for identical images. The image generated by our learned model results in an file 25% smaller than JPEG.
Left: Original image (1419 KB PNG) at ~1.0 MS-SSIM. Center: JPEG (33 KB) at ~0.9 MS-SSIM. Right: Residual GRU (24 KB) at ~0.9 MS-SSIM. This is 25% smaller for a comparable image quality
Taking a look around his nose and mouth, we see that our method doesn’t have the magenta blocks and noise in the middle of the image as seen in JPEG. This is due to the blocking artifacts produced by JPEG, whereas our compression network works on the entire image at once. However, there's a tradeoff -- in our model the details of the whiskers and texture are lost, but the system shows great promise in reducing artifacts.
Left: Original. Center: JPEG. Right: Residual GRU.
While today’s commonly used codecs perform well, our work shows that using neural networks to compress images results in a compression scheme with higher quality and smaller file sizes. To learn more about the details of our research and a comparison of other recurrent architectures, check out our paper. Our future work will focus on even better compression quality and faster models, so stay tuned!

RenderScript Intrinsics

Posted by R. Jason Sams, Android RenderScript Tech Lead

RenderScript has a very powerful ability called Intrinsics. Intrinsics are built-in functions that perform well-defined operations often seen in image processing. Intrinsics can be very helpful to you because they provide extremely high-performance implementations of standard functions with a minimal amount of code.

RenderScript intrinsics will usually be the fastest possible way for a developer to perform these operations. We’ve worked closely with our partners to ensure that the intrinsics perform as fast as possible on their architectures — often far beyond anything that can be achieved in a general-purpose language.

Table 1. RenderScript intrinsics and the operations they provide.

Name Operation
ScriptIntrinsicConvolve3x3, ScriptIntrinsicConvolve5x5 Performs a 3x3 or 5x5 convolution.
ScriptIntrinsicBlur Performs a Gaussian blur. Supports grayscale and RGBA buffers and is used by the system framework for drop shadows.
ScriptIntrinsicYuvToRGB Converts a YUV buffer to RGB. Often used to process camera data.
ScriptIntrinsicColorMatrix Applies a 4x4 color matrix to a buffer.
ScriptIntrinsicBlend Blends two allocations in a variety of ways.
ScriptIntrinsicLUT Applies a per-channel lookup table to a buffer.
ScriptIntrinsic3DLUT Applies a color cube with interpolation to a buffer.

Your application can use one of these intrinsics with very little code. For example, to perform a Gaussian blur, the application can do the following:

RenderScript rs = RenderScript.create(theActivity);
ScriptIntrinsicBlur theIntrinsic = ScriptIntrinsicBlur.create(mRS, Element.U8_4(rs));;
Allocation tmpIn = Allocation.createFromBitmap(rs, inputBitmap);
Allocation tmpOut = Allocation.createFromBitmap(rs, outputBitmap);
theIntrinsic.setRadius(25.f);
theIntrinsic.setInput(tmpIn);
theIntrinsic.forEach(tmpOut);
tmpOut.copyTo(outputBitmap);

This example creates a RenderScript context and a Blur intrinsic. It then uses the intrinsic to perform a Gaussian blur with a 25-pixel radius on the allocation. The default implementation of blur uses carefully hand-tuned assembly code, but on some hardware it will instead use hand-tuned GPU code.

What do developers get from the tuning that we’ve done? On the new Nexus 7, running that same 25-pixel radius Gaussian blur on a 1.6 megapixel image takes about 176ms. A simpler intrinsic like the color matrix operation takes under 4ms. The intrinsics are typically 2-3x faster than a multithreaded C implementation and often 10x+ faster than a Java implementation. Pretty good for eight lines of code.

Renderscript optimizations chart

Figure 1. Performance gains with RenderScript intrinsics, relative to equivalent multithreaded C implementations.

Applications that need additional functionality can mix these intrinsics with their own RenderScript kernels. An example of this would be an application that is taking camera preview data, converting it from YUV to RGB, adding a vignette effect, and uploading the final image to a SurfaceView for display.

In this example, we’ve got a stream of data flowing between a source device (the camera) and an output device (the display) with a number of possible processors along the way. Today, these operations can all run on the CPU, but as architectures become more advanced, using other processors becomes possible.

For example, the vignette operation can happen on a compute-capable GPU (like the ARM Mali T604 in the Nexus 10), while the YUV to RGB conversion could happen directly on the camera’s image signal processor (ISP). Using these different processors could significantly improve power consumption and performance. As more these processors become available, future Android updates will enable RenderScript to run on these processors, and applications written for RenderScript today will begin to make use of those processors transparently, without any additional work for developers.

Intrinsics provide developers a powerful tool they can leverage with minimal effort to achieve great performance across a wide variety of hardware. They can be mixed and matched with general purpose developer code allowing great flexibility in application design. So next time you have performance issues with image manipulation, I hope you give them a look to see if they can help.