Tag Archives: Firebase Cloud Messaging

Notifications from the Twitter app are easier on your battery

This blogpost is a collaboration between Google and Twitter. Authored by Jingwei Hao with support from César Puerta, Fred Lohner from Twitter, and developed with Jingyu Shi from Google.

Push notifications are an important way to keep Twitter users informed about what's happening. However, they can be a significant and often overlooked source of battery drain. For example: high priority notifications can wake a phone from Doze, and fetching data upon push notification delivery via the network can drain the battery quickly.
As app developers at Twitter, we know that battery life is an important aspect of the mobile experience for our users. Over time we've taken several steps to optimize our app to work with the power saving features, particularly around push notifications. In this article, we'll share what we did to save battery life on our users' devices in the hope this will help other developers optimize their apps as well.

Firebase Cloud Messaging migration

Earlier this year, we upgraded our notifications messaging library to the next evolution of GCM: Firebase Cloud Messaging (FCM). This gave us the ability to use the latest APIs and get access to the additional features Firebase has to offer.
This was a very unique migration for us for multiple reasons:
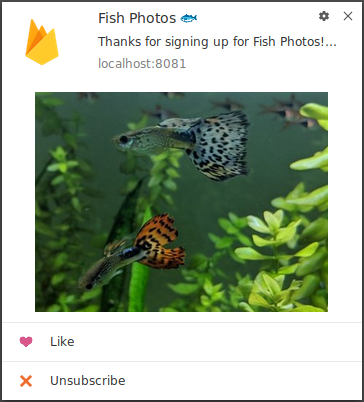
  • Push notifications are an important part of Twitter's mobile engagement strategy. Notifications help our users stay informed and connected with the world, and helped a man get his nuggs. Therefore, we couldn't afford having unreliable delivery of notifications during and after the migration, which would negatively impact the platform.
  • Since it's not possible to support both GCM and FCM in the application, we were not able to use typical A/B testing techniques during the migration.
We mitigated the risks by thoroughly testing across dogfood, alpha, and beta users for both migration and rollback paths, with real time metrics monitoring, and a staged app roll out. During the migration, we were pleased to find that replacing GCM with FCM worked smoothly in all our use cases.
Migrating to FCM proved valuable to us when testing against the power saving features on Android. With APIs like: getPriority() and getOriginalPriority(), FCM gave us insight into if the priority of FCM messages are downgraded.

Set the right FCM message priority

On the backend at Twitter, we always try to make sure that notifications are assigned with the appropriate priority, making sure that high priority FCM messages are only used to generate a user visible notification. In fact, a very small fraction of notifications we send are classified as high priority.
App Standby Buckets was introduced in Android 9 Pie, this feature impose restrictions on the number of high priority messages the app will receive based on which bucket the app belongs to. As a result, high priority messages should be reserved for the notifications users are more likely to interact with. Using high priority FCM messages for actions which do not involve user interactions can lead to negative consequences, for example: once an app exhausts its app standby bucket quota, the following genuinely urgent FCM messages will be downgraded to normal priority and delayed when device is in Doze.
To understand how our app performs with App Standby Buckets, we gathered statistics on the notification priorities at both send and delivery time for the Twitter App:
  • During our test, we observed that none of the high priority FCM messages were downgraded, especially for the 2% of devices which are bucketed in the frequent or lower bucket when the notifications are delivered. This is particularly worth noting since the system could potentially impose restrictions on high priority FCM messages for devices in low active buckets.
  • 86% of the devices were bucketed in the active bucket when high priority FCM messages are delivered. This is another positive signal that our priority assignment of the messages is consistent with the use pattern from the users.
This was very encouraging to see, as it means all users would receive the important notifications without any delay, and this is true no matter the app is considered active or not by the Android system. This also confirms that we are correctly categorizing high priority FCM messages based on our users usage engagement patterns.

Avoid follow-up data prefetch for notifications

Prefetching data is a popular practice to enrich the user experience around notifications. This entails including a piece of metadata within the payload of a notification. When the notification is delivered, the app leverages the payload data to start one or multiple network calls to download more data before the rendering of the notification. FCM payload has a 4KB max limit, and when more data is needed to create rich notifications, this prefetch practice is used. But doing this has a trade-off, and will increase both device power consumption and notification latency. At Twitter, among all the types of notifications we push to our users, there's only one type which does prefetching which makes up to less than 1% of the volume. In addition, in the cases where data prefetching for notification is unavoidable, it should be scheduled with JobScheduler or WorkManager tasks in order to avoid issues with the background execution limits in Oreo+.

Create notification channels

In addition, Notification Channels were introduced in the Android 8 Oreo release. We designed the importance level of the channels with multiple factors in mind, user experience being the most important and power-saving being another. Currently, Twitter for Android has nine notification channels, among which only direct messaging, emergency, and security are designed as high importance, leaving most of the channels with a lower importance level, making it less intrusive.

Summary

We set out to improve our user experience by migrating to FCM, prioritizing notifications cautiously, limiting prefetching, and carefully designing notification channels. We were glad to find that these changes had a positive impact on battery performance and enabled our app to take advantage of the power-saving features introduced in recent versions of Android.
Designing for power optimization in a large evolving application is a complex and ongoing process, particularly as the Android platform grows and provides more granular controls. At Twitter we strongly believe in continuous refinement to improve application performance and resource consumption. We hope this discussion is useful in your own quest to optimize your app's performance and use of resources ?

Getting screen brightness right for every user

Posted by Ben Murdoch, Software Engineer and Michael Wright, Android Framework Engineer

The screen on a mobile device is critical to the user experience. The improved Adaptive Brightness feature in Android P automatically manages the display to match your preferences for brightness level so you get the best experience, whatever the current lighting environment.

Screen brightness in Android is managed via Quick Settings or via the settings app

(Settings → Display → Brightness Level).

In Android Pie, Adaptive Brightness is enabled by default (Settings → Display → Adaptive Brightness).

While enabled, Android automatically selects a screen brightness that's suitable for the user's current ambient light conditions. Prior to Android Pie, the brightness slider didn't represent an absolute screen brightness level, but a global adjustment factor for boosting or reducing the device manufacturer's preset screen brightness curve across all ambient light levels:

* Setting the slider to center resulted in the device using the preset.

* Setting the slider to the left of center applied a negative scale factor, making the screen dimmer than the preset.

* Setting the slider to the right of center applied a positive scale factor, making the screen brighter than the preset.

So, under low ambient light conditions, you might prefer a brighter screen than the preset level and move the brightness slider up accordingly. But, because that adjustment would boost the brightness at all ambient light levels, you might find yourself needing to move the brightness slider back down in brighter ambient light. And so on, back and forth.

To improve this experience, we've introduced two important changes to screen brightness in Android Pie:

  1. Better slider control
  2. Personalization of the brightness level

Better slider control

The slider control now represents absolute screen brightness rather than the global adjustment factor. That means that you may see it move on its own while Adaptive Brightness is on. This is expected behavior!

Humans perceive brightness on a logarithmic rather than linear scale1. That means changes in screen brightness are much more noticeable when the screen is dark versus bright. To match this difference in perception, we updated the brightness slider UI in the notification shade and System Settings app to work on a more human-like scale. This means you may need to move the slider farther to the right than you did on previous versions of Android for the same absolute screen brightness, and that when setting a dark screen brightness you have more precise control over exactly which brightness to set.

Personalization of screen brightness

Prior to Android P, when developing a new Android device the device manufacturer would determine a baseline mapping from ambient brightness to screen brightness based on the display manufacturer's recommendation and a bit of experimentation. All users of that device would receive the same baseline mapping and, while using the device, move the brightness slider around to set their global adjustment factor. To determine the final screen brightness, the system would first look at the room brightness and the baseline mapping to find the default screen brightness for that situation, and then apply the global adjustment factor.

What we found is that in many cases this global adjustment factor didn't adequately capture personal preferences - that is, users tended to change the slider often for new lighting environments.

For Android Pie we worked with researchers from DeepMind to build a machine learning model that will observe the interactions that a user makes with the screen brightness slider, and train on-device to personalise the mapping of ambient light level to screen brightness.

This means that Android will learn what screen brightness is comfortable for a user in a given lighting environment. The user teaches it by manually adjusting the slider, and, as the software trains over time, the user should need to make fewer manual adjustments. In testing the feature, we've observed that after a week almost half our test users are making fewer manual adjustments while the total number of slider interactions across all internal test users was reduced by over 10%. The model that we've developed is updatable and will be tuned based on real world usage now that Android Pie has been released. This means that the model will continue to get better over time.

We believe that screen brightness is one of those things that should just work, and these changes in Android Pie are a step towards realizing that. For the best performance no matter where you are models run directly on the device rather than the cloud, and train overnight while the device charges.

The improved Adaptive Brightness feature is now available on Pixel devices and we are working with our OEM partners now to incorporate Adaptive Brightness into Android Pie builds for their devices.

Notes

Notifying your users with FCM

Posted by Jingyu Shi, Developer Advocate, Partner Devrel

This is the second in a series of blog posts in which outline strategies and guidance in Android with regard to power.

Notifications are a powerful channel you can use to keep your app's users connected and updated. Android provides Notification APIs to create and post notifications on the device, but quite often these notifications are triggered by external events and sent to your app from your app server.

In this blog post, we'll explain when and how to generate these remote notifications to provide timely updates to users and minimize battery drain.

Use FCM for remote notifications

We recommend using Firebase Cloud Messaging (FCM) to send remote notifications to Android devices. FCM is a free, cross-platform messaging solution that reliably delivers hundreds of billions of messages per day. It is primarily used to send remote notifications and to notify client applications that data is available to sync. If you still use Google Cloud Messaging (GCM) or the C2DM library , both of which are deprecated, it's time to upgrade to FCM!

There are two types of FCM messages you can choose from:

  • Notification Messages, which simplify notification handling and are high priority by default.
  • Data Messages, for when you want to handle the FCM messages within the client app.

You can set the priority to either high or normal on the data messages. You can find out more about FCM messages and message handling in this blog post on Firebase Blog.

FCM is optimized to work with Android power management features. Using the appropriate message priority and type helps you reach your users in a timely manner, and also helps save their battery. Learn more about power management features in this blog post: "Moar Power in P and the future".

To notify or not?

All of the notifications that you send should be well-structured and actionable, as well as provide timely and relevant information to your users. We recommend that you follow these notification guidelines, and avoid spamming your users. No one wants to be distracted by irrelevant or poorly-structured notifications. If your app behaves like this, your users may block the notifications or even uninstall your app.

The When not to use a notification section of the Material Design documentation for notifications highlights cases where you should not send your user a notification. For example, a common use case for a normal priority FCM Data Message is to tell the app when there's content ready for sync, which requires no user interaction. The sync should happen quietly in the background, with no need for a notification, and you can use the WorkManager1 or JobScheduler API to schedule the sync.

Post a notification first

If you are sending remote notifications, you should always post the notification as soon as possible upon receiving the FCM message. Adding any additional network requests before posting a notification will lead to delayed notifications for some of your users. When not handled properly, the notifications might not be seen at all, see the "avoid background service" section below.


⚠️ Avoid adding any additional network requests before posting a notification

Also keep in mind that, depending on the state of the device, user actions, and app behavior, one or many power saving features could be restricting your app's background work. As a result, your app's jobs and alarms might be delayed, and its ability to access the network might be restricted.

For all of these reasons, to ensure timely delivery of the notification, you should always show the notification promptly when the FCM message is received, before any other work like network fetch or scheduling jobs.

FCM message payload is your friend

To post a notification upon the receipt of an FCM message, you should include all the data needed for the notification in the FCM message payload.

The same applies to data sync--we recommend that your app send as much data as possible in the FCM payload and, if needed, load the remainder of the data when the app opens. On a well-performing network, there's a good chance that the data will be synced by the time the user opens the app so the spinner won't be shown to the user. If network connectivity is not good, a notification will be sent to the user with the content in the FCM payload to inform the user in a timely manner. The user can then open the app to load all the data.

You can also encrypt FCM messages end-to-end using libraries like Capillary. The image below shows a general flow of how to handle FCM messages.

Need more data?

As convenient as FCM message payload is, it comes with a 4KB maximum limit. If you need to send a rich notification with an image attachment, or you want to improve your user experience by keeping your app in sync with media content, you may need more than the 4KB payload limit. For this, we recommend using FCM messages in combination with the WorkManager 1 or JobScheduler API.

If you need to post a rich notification, we recommend posting the notification first, with some of the content in the FCM message. Then schedule a job to fetch the remainder of the content. Once the job is finished, update the notification if it is still active. For example, you can include a thumbnail or preview of the content in the FCM payload and post it in the notification first. Then schedule a job to fetch the rest of the media files. Be aware that if you've scheduled jobs from the FCM message handler, it is possible that when the user launches the app, the scheduled job won't have finished yet. You should handle this case gracefully.

In short, use the data in the FCM message payload to post a notification and keep your app content updated first. If you still need more data, then schedule jobs with APIs like WorkManager 1 or JobScheduler API.

Avoid background services

One common pitfall is using a background service to fetch data in the FCM message handler, since background service will be stopped by the system per recent changes to Google Play Policy (Starting late 2018, Google Play will require a minimum target API level ).

Android 9 Pie will also impose background execution limits when battery saver is on. Starting a background service will lead to IllegalStateException from a normal priority FCM message. High priority messages do grant you a short whitelist window that allows you to start a background service. However, starting a background service with a network call will put the service at risk of getting terminated by the system, because the short execution window is only intended to be used for posting a notification.

You should avoid using background services but use WorkManager 1 or JobScheduler API instead to perform operations in the background.

Power & message priority

Android 6 Marshmallow introduced Doze. FCM is optimized to work with Doze, and you can use high priority FCM messages to notify your users immediately. In Doze mode, normal priority messages are deferred to a maintenance window. This enables the system to save battery when a device is idle, but still ensure users receive time-critical notifications. Consider an instant messaging app that sends users messages from friends or incoming phone calls or a home monitoring app sends users alarm notifications. These are some of the acceptable examples where you can use high priority FCM messages.

In addition, Android 9 Pie introduced App Standby Buckets and App Restrictions.

The table below shows how various power-management features affect message delivery behaviors.

High priority message delivery Normal priority message delivery
App in Foreground Immediate, unless app is restricted (see below) Immediate, unless app is restricted (see below)
App in Background
Device in Doze (M+) and Doze "on the go" (N+) Immediate Deferred until maintenance window
App Standby Buckets (P+) May be restricted No restriction
App Restrictions (P+) All messages dropped (see below) All messages dropped (see below)
Battery Saver No restriction No restriction


★ Note: Starting January 2019, App Restrictions (in Battery Setting) will include restrictions on FCM messages. You can find out if your app is in the restricted state with the isBackgroundRestricted API. Once your app is in the restricted state, no FCM messages will be delivered to the app at all. This will apply to both high and normal priority FCM messages and when app is in either foreground or background.

App Standby Buckets impose different levels of restrictions based on the app's standby bucket. Based on which bucket your app belongs to, there might be a cap for the number of high priority messages you are allowed to send per day. Once you reach the cap, any subsequent high priority messages will be downgraded to normal priority. See more details in the power management restrictions.

High priority FCM messages are designed to send remote notifications or trigger actions that involve user interactions. As long as you always use high priority messages for these purposes, your high priority messages will be delivered immediately and remote notifications will be displayed without delay. In addition, when a notification from a high priority message causes a user to open your app, the app gets promoted to the active bucket, which exempts it from FCM caps. The example below shows an instant messaging app moving to the active bucket after the user taps on a notification triggered by a high priority FCM message.

However, if you use high priority messages to send notifications to the blocked notification channels or tasks which do not involve user interactions, you will run the risk of wasting the high priority messages allocated in your app's bucket. Once reaching the cap, you won't be able to send urgent notifications anymore.

In summary, you should only use high priority FCM messages to deliver immediate, time-critical notifications to users. Doing so will ensure these messages and subsequent high priority messages reach your users without getting downgraded. You should use normal priority messages to trigger events that do not require immediate execution, such as a notification that is not time-sensitive or a data sync in the background.

Test with Android 9!

We highly recommend that you test your apps under all of the power management features mentioned above. To learn more about handling FCM messages on Android in your code, visit the Firebase blog.

Thank you for helping move the ecosystem forward, making better Android apps, and saving users' batteries!

Acknowledgements: This blog posts is in joint collaboration with FCM and Android teams.

1 WorkManager is the recommended solution for background processing once it's stable.

Web Notifications API Support Now Available in FCM Send v1 API

Posted by Mertcan Mermerkaya, Software Engineer

We have great news for web developers that use Firebase Cloud Messaging to send notifications to clients! The FCM v1 REST API has integrated fully with the Web Notifications API. This integration allows you to set icons, images, actions and more for your Web notifications from your server! Better yet, as the Web Notifications API continues to grow and change, these options will be immediately available to you. You won't have to wait for an update to FCM to support them!

Below is a sample payload you can send to your web clients on Push API supported browsers. This notification would be useful for a web app that supports image posting. It can encourage users to engage with the app.

{
"message": {
"webpush": {
"notification": {
"title": "Fish Photos ?",
"body":
"Thanks for signing up for Fish Photos! You now will receive fun daily photos of fish!",
"icon": "firebase-logo.png",
"image": "guppies.jpg",
"data": {
"notificationType": "fishPhoto",
"photoId": "123456"
},
"click_action": "https://example.com/fish_photos",
"actions": [
{
"title": "Like",
"action": "like",
"icon": "icons/heart.png"
},
{
"title": "Unsubscribe",
"action": "unsubscribe",
"icon": "icons/cross.png"
}
]
}
},
"token": "<APP_INSTANCE_REGISTRATION_TOKEN>"
}
}

Notice that you are able to set new parameters, such as actions, which gives the user different ways to interact with the notification. In the example below, users have the option to choose from actions to like the photo or to unsubscribe.

To handle action clicks in your app, you need to add an event listener in the default firebase-messaging-sw.js file (or your custom service worker). If an action button was clicked, event.action will contain the string that identifies the clicked action. Here's how to handle the "like" and "unsubscribe" events on the client:

// Retrieve an instance of Firebase Messaging so that it can handle background messages.
const messaging = firebase.messaging();

// Add an event listener to handle notification clicks
self.addEventListener('notificationclick', function(event) {
if (event.action === 'like') {
// Like button was clicked

const photoId = event.notification.data.photoId;
like(photoId);
}
else if (event.action === 'unsubscribe') {
// Unsubscribe button was clicked

const notificationType = event.notification.data.notificationType;
unsubscribe(notificationType);
}

event.notification.close();
});

The SDK will still handle regular notification clicks and redirect the user to your click_action link if provided. To see more on how to handle click actions on the client, check out the guide.

Since different browsers support different parameters in different platforms, it's important to check out the browser compatibility documentation to ensure your notifications work as intended. Want to learn more about what the Send API can do? Check out the FCM Send API documentation and the Web Notifications API documentation. If you're using the FCM Send API and you incorporate the Web Notifications API in a cool way, then let us know! Find Firebase on Twitter at @Firebase, and Facebook and Google+ by searching "Firebase".

Google Cloud Messaging and Firebase

Posted by Laurence Moroney, Developer Advocate

With the announced expansion of Firebase at Google I/O recently, we also introduced Firebase Cloud Messaging (FCM) and Firebase Notifications (FN). As a developer, there are lots of updates that you might be able to take advantage of.

Despite the switch to FCM, we’ll continue to support Google Cloud Messaging on Android, iOS and the Web because we know that you have applications using the previous SDKs to handle notifications. However, all new client side features will be added to FCM SDKs moving forward. As such, we strongly recommend that you upgrade to the FCM SDKs. You can learn more about them here.

FCM supports everything that you’ve come to know with Google Cloud Messaging including addressing single devices, groups of devices or topics.

The FCM SDK simplifies client development. For example, you no longer need to write your own registration or subscription retry logic. When it comes to your server (if you still want to use one), updates to the endpoints and protocol don’t incur breaking changes, so as to maintain backwards compatibility. The updated details are available in the FCM Server documentation.

We’re investing heavily in making Firebase our unified mobile platform. We’re also continuing to expand our messaging platform beyond Android, including iOS and the Web. Firebase is well known for it’s cross-platform capabilities, so FCM is a natural fit for the ongoing Firebase releases. If you want to learn how to migrate your current app from Google Cloud Messaging to FCM, we’ve provided guides here for Android and iOS.

We think that Google Cloud Messaging will be even more useful to you when integrated into Firebase, including the new Firebase Notifications console. With that you’ll be able to send messages to apps directly from the console -- without you needing to build a messaging server.

To upgrade from Google Cloud Messaging to FCM or to learn more, see our guides for Android and iOS apps.