Editor’s Note: We are (literally) coding a mobile app on the road as part of our cross-country road trip, Code the Road. If you haven’t read our previous posts in the series, be sure to check out Hitting the Road with the Google Maps Android API and Store Your Locations in the Cloud with Firebase to get started. Follow along as we build our app on the road and read more from David McClusky, Maps Solutions Architect at Google.
We’re now in the third week of our Code the Road journey and we’ve had a great time meeting with developers and customers across the country. In this third post in our app blog series we will extend the capabilities of our mobile application by adding the ability to ‘check-in’ to places we visit along the way using the Google Places API for Android. If you haven’t read our earlier posts, checkout our posts on building a mobile map with the Google Maps Android API and connecting it to the cloud.
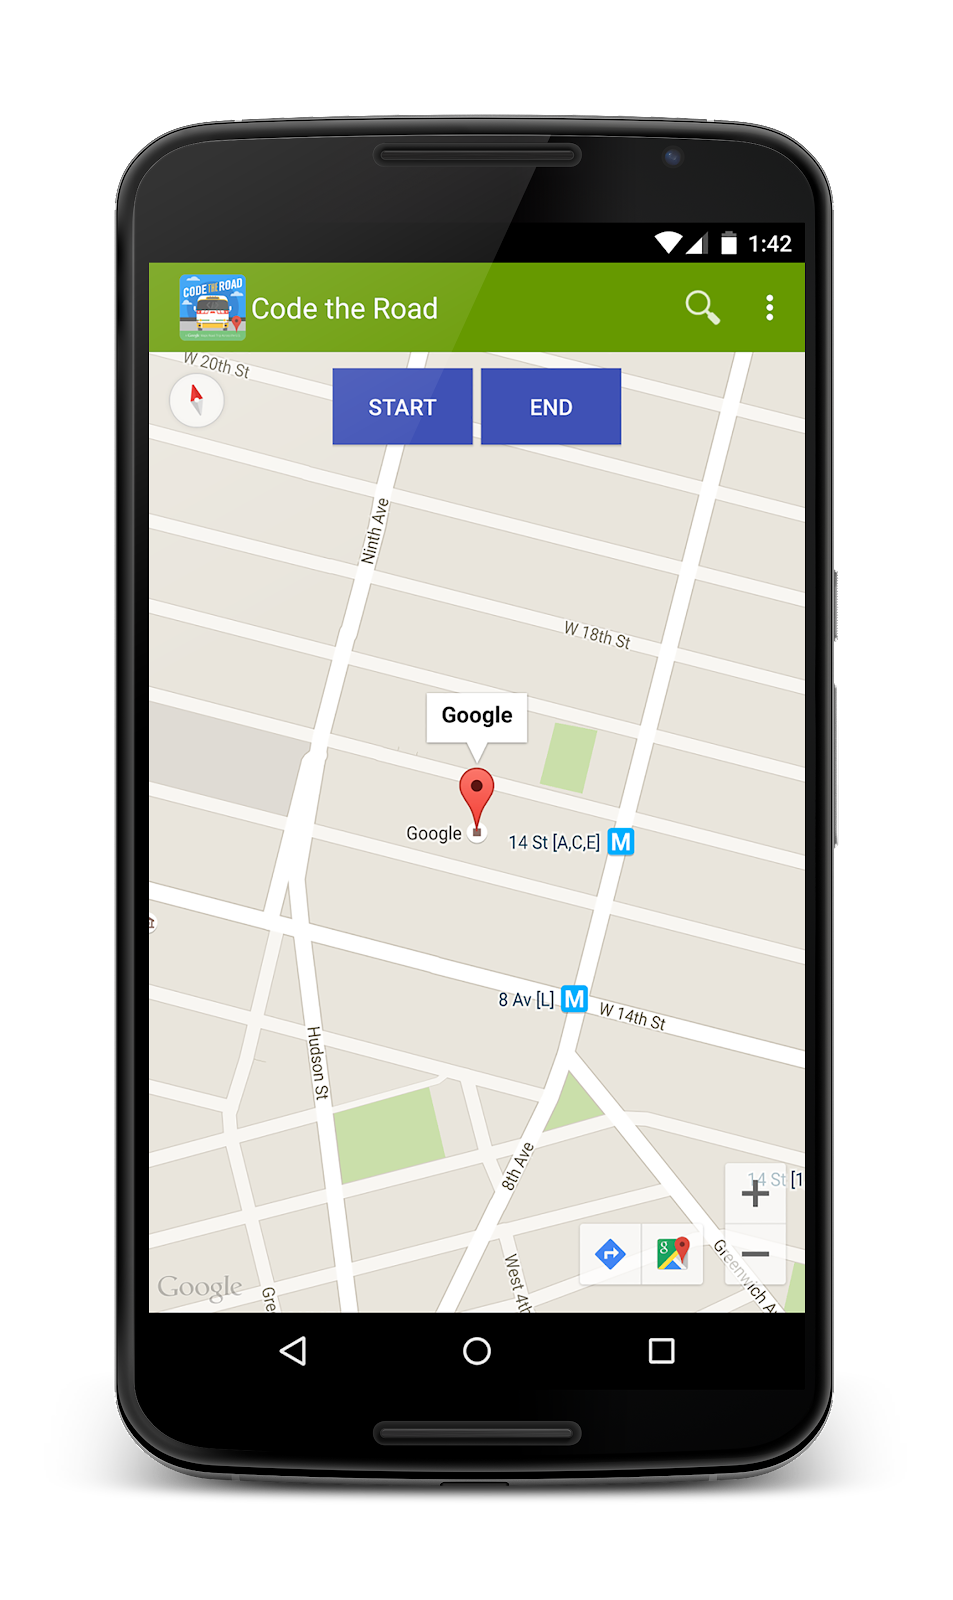
Our Code the Road bus is now visiting New York City, so we thought it would be useful to update our app and add the capability to view nearby places, select places and check-in, and then store those locations in the cloud for future reference. To do this we’ll integrate the Google Places API for Android.
We’ll start by utilizing the Place Picker—an out-of-the-box user interface that allows your app to quickly connect to Google’s database of hundreds of millions points of interest.
Prerequisites
Before you get started, make sure you have the latest version of Android Studio installed and your project includes the Google Play services component. In addition, you must have an API Key for Google Places configured with your app’s digital certificate. For more information on creating a Places API key read the documentation. You should have also completed the first two steps in our blog series, as we’ll be utilizing our existing connection to Firebase to store our check-ins in the cloud.Adding the Place Picker to Your Application
The Place Picker provides a UI dialog that displays an interactive map and a list of nearby places. When you activate the Place Picker, it attempts to identify the your current location, and will also provide a list of alternative suggestions. We’ll add some code to our app so when we select a place, we’ll add a marker to the map and store the location in the cloud.
The first thing we’ll do is add a button to our app on the action bar to launch the place picker. View the documentation for adding an action button.
To launch the Place Picker from our action button, we will construct an intent in the onOptionsItemSelected() function:

@Override
public boolean onOptionsItemSelected(MenuItem item) {
 // Handle presses on the action bar items
 switch (item.getItemId()) {
   case R.id.action_search:
     try {
        PlacePicker.IntentBuilder intentBuilder = new PlacePicker.IntentBuilder();
        Intent intent = intentBuilder.build(this);

        // Start the Intent by requesting a result, identified by a request code.
        startActivityForResult(intent, REQUEST_PLACE_PICKER);

     } catch (GooglePlayServicesRepairableException e) {
       GooglePlayServicesUtil.getErrorDialog(e.getConnectionStatusCode(),
       this, 0);
     } catch (GooglePlayServicesNotAvailableException e) {
       Toast.makeText(this, "Google Play Services is not available.",
Toast.LENGTH_LONG).show();
     }
     return true;

  default:
    return super.onOptionsItemSelected(item);
  }
}
After we select a place, we’ll need to identify which location was selected and display a marker on the map. First we will capture the result by creating the onActivityResult() function. We first obtain a reference to the place selected:final Place place = PlacePicker.getPlace(data, this);And then extract the various details about the place:
final CharSequence name = place.getName();
final CharSequence address = place.getAddress();
final CharSequence phone = place.getPhoneNumber();
Finally we can add a marker to the map:
mMap.addMarker(new MarkerOptions()
                   .position(place.getLatLng())
                   .title(name.toString())
Here is what the complete function in our app looks like:@Override
public void onActivityResult(int requestCode, int resultCode, Intent data) {
if (requestCode == REQUEST_PLACE_PICKER) {
// This result is from the PlacePicker dialog.
if (resultCode == Activity.RESULT_OK) {
/* User has picked a place, extract data.
Data is extracted from the returned intent by retrieving a Place
object from the PlacePicker.
*/
final Place place = PlacePicker.getPlace(data, this);
/* A Place object contains details about that place, such as its name,
address and phone number. Extract the name, address, phone number,
place ID and place types.
*/
final CharSequence name = place.getName();
final CharSequence address = place.getAddress();
final CharSequence phone = place.getPhoneNumber();
final String placeId = place.getId();
String attribution = PlacePicker.getAttributions(data);
if(attribution == null){
attribution = "";
}
// Update data on map
mMap.addMarker(new MarkerOptions()
.position(place.getLatLng())
.title(name.toString())
);
// Print data to debug log
Log.d(TAG, "Place selected: " + placeId + " (" + name.toString() + ")");
}
} else {
super.onActivityResult(requestCode, resultCode, data);
}
// END_INCLUDE(activity_result)
}
After the marker is added to the map, we can easily trigger turn-by-turn navigation by selecting the navigation icon in the bottom-right of the map to launch directions in Google Maps mobile.
Save the Location to the Cloud
Checking in to the places we’ve visited becomes even more useful if we are able to store those check-ins for future reference. Since we’ve already connected our app to the cloud using Firebase, it will be very easy to use that same connection to store our check-ins. After adding the marker to the map, we simply add the following lines of code to our function above to also save the location and id of the place to Firebase.MapmLocation = new HashMap (); mLocation.put("timestamp", mLastUpdateTime); Map mCoordinate = new HashMap (); mCoordinate.put(“latitude”, place.getLatLng().latitude); mCoordinate.put(“longitude”, place.getLatLng().longitude); mLocation.put("location", mCoordinate); mLocation.put("place_id", place.getId()); myFirebaseRef.push().setValue(mLocation);
That’s all there is to it! We now have an app that, in addition to storing our location history in the cloud, also lets us record a list of all the places we’ve visited while on the road. Stay tuned for future blog posts where we will continue to extend our app’s functionality with features such as directions and support for wearable devices.