In part 1 and part 2 of this series, we showed you how to build a conversational tour guide app with API.AI and Google Cloud Machine Learning APIs. In this final part, you’ll learn how to extend this app to the Google Assistant-supported devices (Google Home, eligible Android phones and iPhones, and Android Wear). And we’ll build this on top of the existing API.AI agent created in parts 1 and 2.

New Intents for Actions on Google
In part 1, we discussed the app’s input and output context relationships.
The where context requires the user to upload an image, which is not supported by the Google Assistant. We can modify the context relationship as below.

We will add three new intents, hours-no-context, ticket-no-context and map-no-context. Each intent will set location as the output context so that other intents can use the location as an input parameter.

Enable Actions on Google Integration
Now we’ll enable Actions on Google to support the Google Assistant.
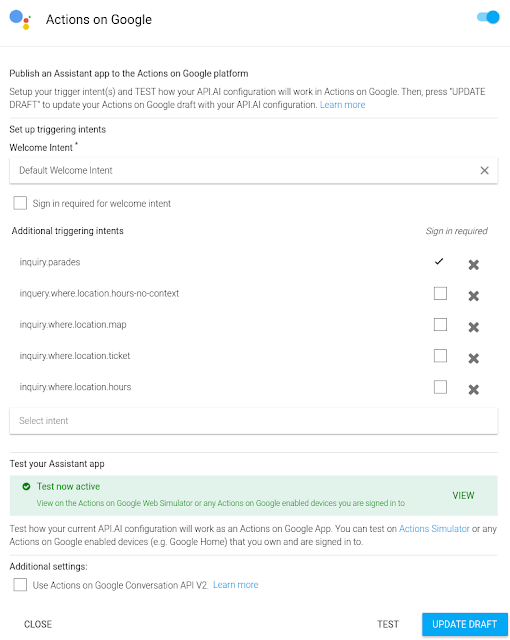
- Open your API.AI console. Under the Integrations Tab, turn on the Actions on Google integration.

- In the popup dialog under Additional triggering intents, add all intents you want to support on the Google Assistant. The system will automatically set the Welcome Intent to Default Welcome Intent. You can also click SETTINGS under Actions on Google to bring up this settings dialog in the future. Note that the inquiry.where intent requires uploading an image and won’t work on the Google Assistant, so you should not add that intent to the triggering intents list. We discussed how to add a new intent to support that in New Intent for Actions on Google section.
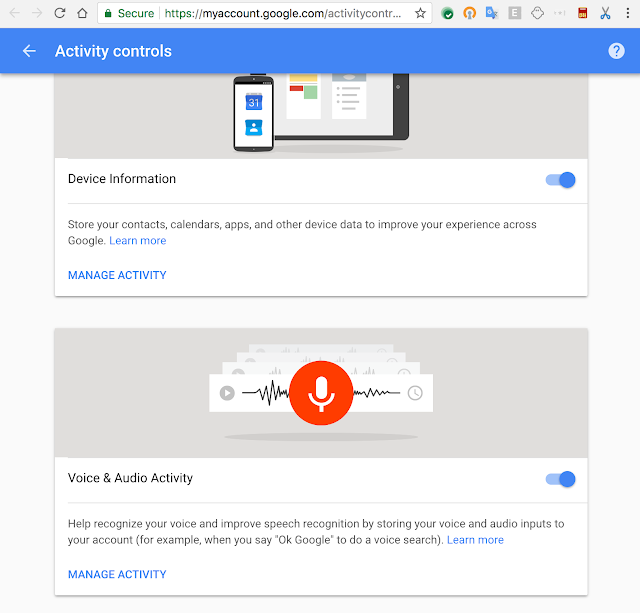
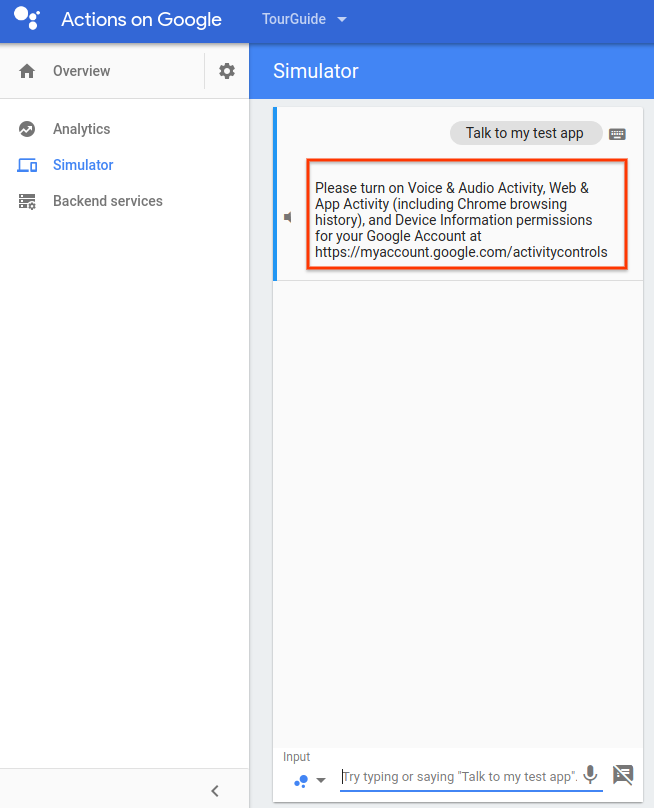
- After you’re done adding all the intents that we want to support on Google on Actions (e.g., hours-no-context intent) to the additional triggering intents list, hit UPDATE and TEST button on the bottom. It will generate a green box. Tap the VIEW button to go to the Actions on Google Web Simulator. If this is your first time on Actions on Google console, it will prompt you to turn on Device Information and Voice & Audio Activity on your Activity controls center.
 By default these settings are off. If you already turn them on, you won’t see the prompt.
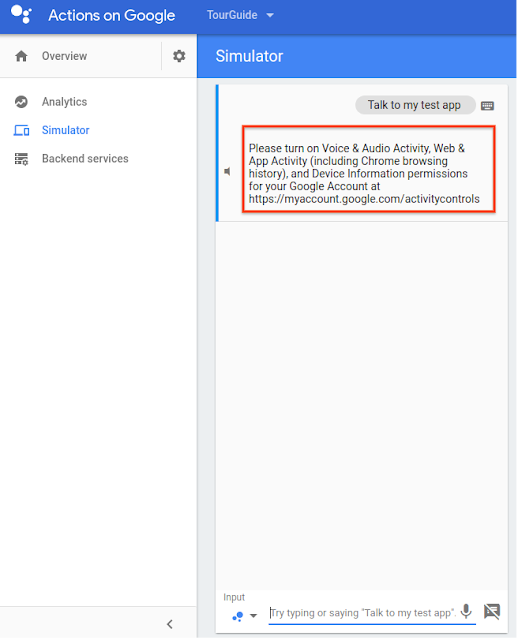
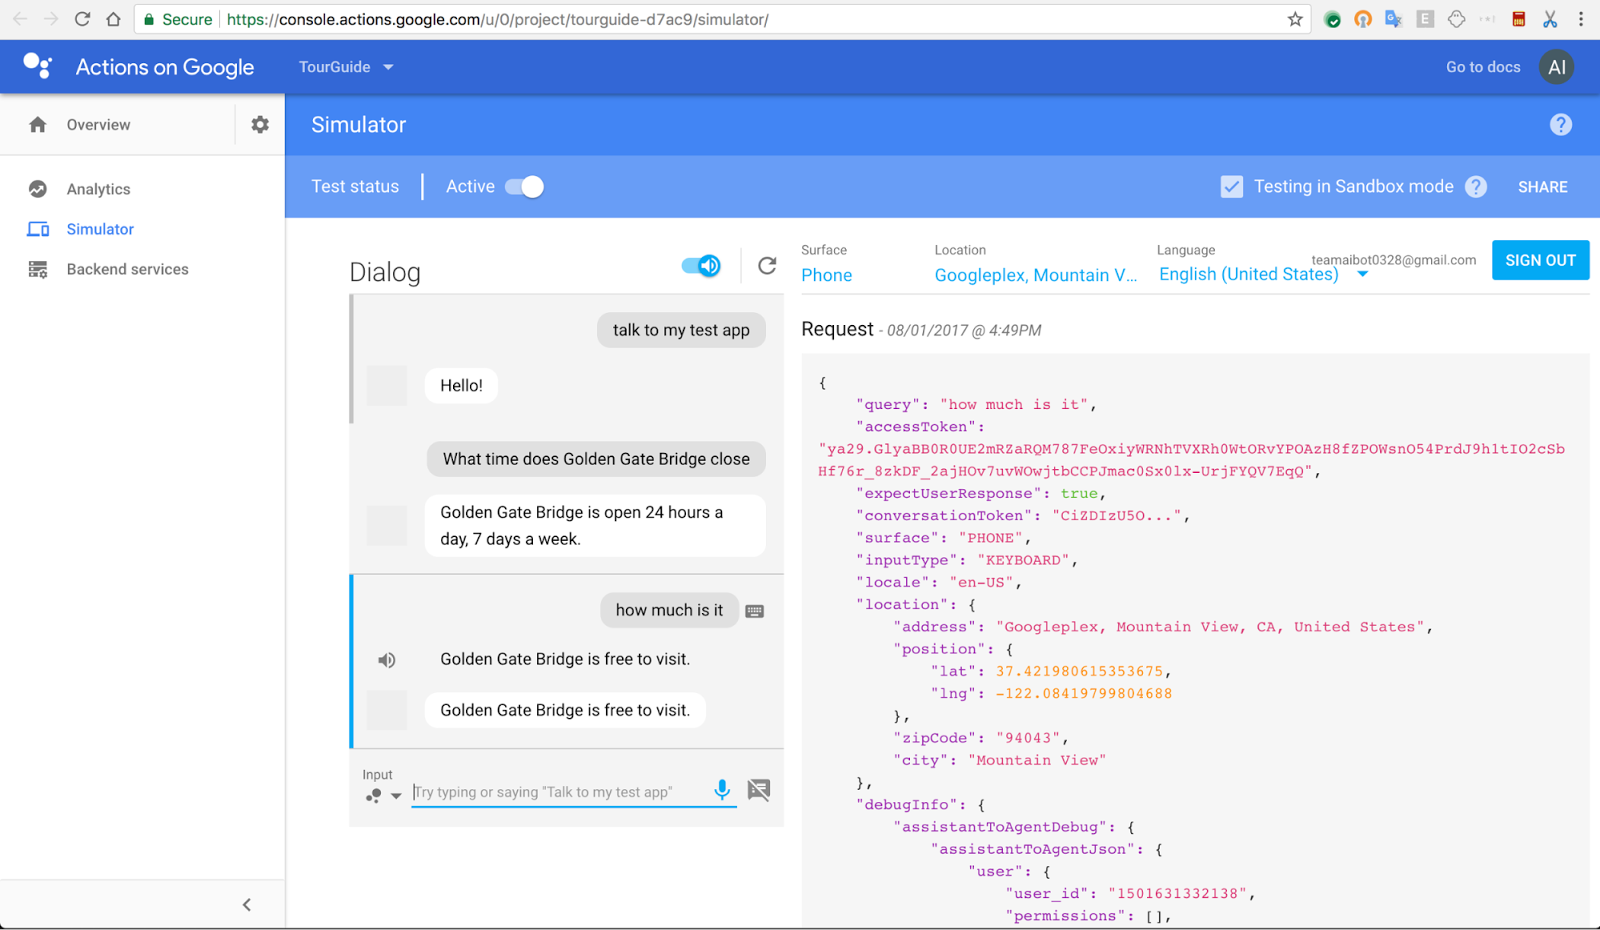
- Go back to the simulator after turning on these two settings. Now we're ready to test the integration on the simulator! Start by typing or saying “Talk to my test app”. The simulator will respond with the texts from the Default Welcome Intent. Afterward, you can test the app as if you were in the API.AI test console.


Difference between tell() and ask() APIs
As we mentioned in part 2, there is a subtle difference between tell() and ask() APIs when we implement the Cloud Function with the Actions on Google SDK. This doesn’t make much of a difference in part 1 and part 2, but it does in part 3 when we integrate Actions on Google. tell() will end the conversation and close the mic, while ask() will keep the conversation open and wait for the next user input.You can test out the difference in the simulator. If you use tell() in the Cloud Functions, you’ll need to say “talk to my test app” again once you’ve triggered the intents with the Cloud Functions webhook such as the inquiry.parades intent “Are there any parades today?”. If you use ask(), you will still be in the test app conversation and won’t need to say “talk to my test app” again.
Next steps
We hope this example demonstrates how to build a simple app powered by machine learning. For more getting started info, you might also want to try:- Cloud Speech API Quickstart
- Cloud Vision API Quickstart
- Cloud Translation API Quickstart
- API.AI Quickstart
