Editor’s note: We will be (literally) coding a mobile app on the road as part of our cross-country road trip, Code the Road. Follow along as we build our app on the road and read more from David McClusky, Solutions Architect at Google.
Welcome to our first post in our Code the Road mobile app development series. If you have not heard, we are celebrating 10 years of the Google Maps API with a road trip across the United States, starting at Google I/O, at the Moscone Center in San Francisco, and ending at Walt Disney World Resort. Along the way, we’ll be making a number of stops and hosting Google Maps API Developer Meetups in Boulder, Chicago and New York.

While on the road, we’re building a mobile application to show how easy it is to get started with the Google Maps and Places APIs on Android. Over the next several weeks, we will be building a road trip app which will help our team stay connected while on the road. We'll be demonstrating how to:
- Store your location data in the cloud with Firebase
- Check in along the road using Places API
- Plan a hike or bike ride using the Directions and Elevation APIs
- Send notifications to your Android Wear watch
Setup your environment. If you haven’t already, download and install the latest version of Android Studio. In addition, be sure use the SDK Manager to download the SDKs for your target version of Android, and the latest version of the the Google Play services SDK.
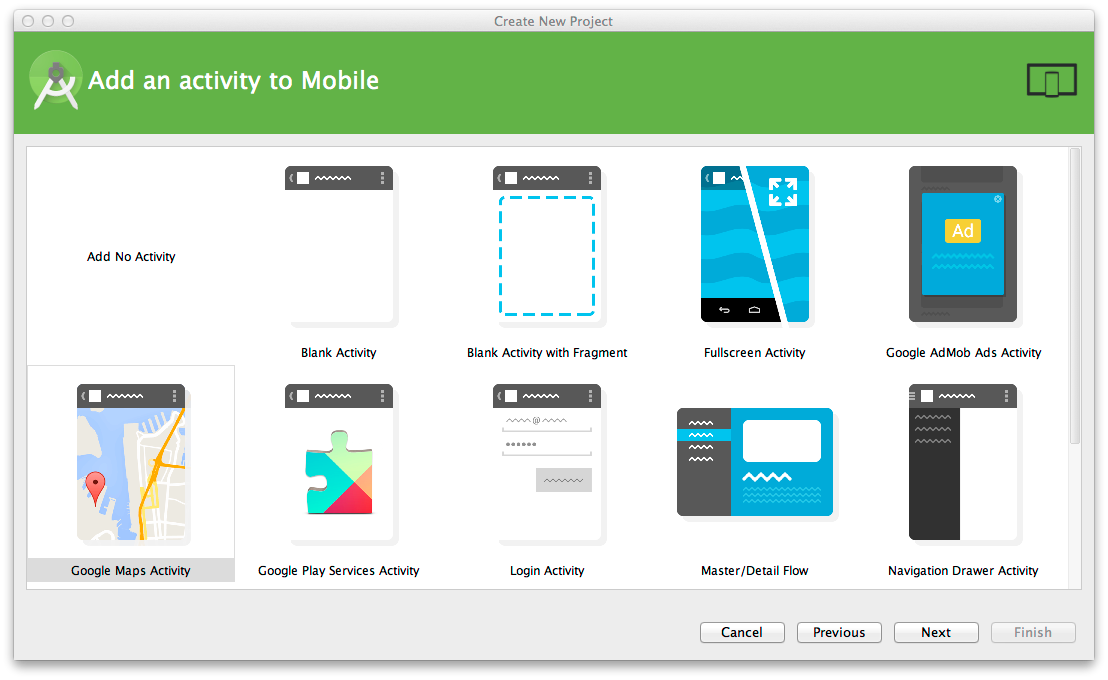
Create a new project. Create a new project in Android Studio and give it a name. We are calling ours “Code the Road.” Select a minimum SDK version to target, and then add a Google Maps Activity.


Create your Google Maps API keys. Before you can run your Google Maps application, you must create a free API key in the Developers Console. Please see the detailed instructions here on creating a key.
In the google_maps_api.xml file, you want to insert your key here:
<string name="google_maps_key" templateMergeStrategy="preserve" translate="false">
YOUR_KEY_HERE
</string>
Now you can run your Google Maps application, either in an emulator or on your device.
Display a marker on the map. For our Code the Road application, we want to start out simple. Let’s put a marker on map showing the kick-off location of our Code the Road road trip, at the Moscone Center in San Francisco. We’ll also change the icon to an image of our Code the Road bus.

To import your own custom marker image into your Android application, you need to copy the image file file into the app / res / drawable folder of your Android project. In this example, we are using this image of our bus, but you can use any image you like.
Finally, we need a bit of code to set up our map and draw our marker. In the MapsActivity.java file, we’ll modify the setUpMap() function as follows:

Our application does not do too much right now, so be sure to read our follow-on posts where we’ll be adding a lot more capability to our app, such as finding nearby places, storing our road trip location history to the cloud, and integrating with wearable devices. Stay tuned for more!
Finally, we need a bit of code to set up our map and draw our marker. In the MapsActivity.java file, we’ll modify the setUpMap() function as follows:
private void setUpMap() {
  LatLng busLocation = new LatLng(37.783879,-122.401254);

  mMap.moveCamera(CameraUpdateFactory.newLatLngZoom(busLocation, 12));
  mMap.addMarker(new MarkerOptions()
           .position(busLocation)
           .title("Code the Road Bus")
           .icon(BitmapDescriptorFactory.fromResource(R.drawable.bus)));
}
You may also need to add the following import statements at the top of MapsActivity.java:import com.google.android.gms.maps.CameraUpdateFactory; import com.google.android.gms.maps.model.BitmapDescriptorFactory;Click the Run button to run in an emulator or an attached Android device. You now have a fully working Android application with Google Maps!
Our application does not do too much right now, so be sure to read our follow-on posts where we’ll be adding a lot more capability to our app, such as finding nearby places, storing our road trip location history to the cloud, and integrating with wearable devices. Stay tuned for more!