Author Archives: Chris Bailey

Create your own journaling app without writing code

Studies show that regularly writing down your thoughts and feelings can improve your mental, emotional and physical health. Despite all of journaling’s benefits, it can feel like an insurmountable challenge. 

While writing by hand is therapeutic for some, many may find it uncomfortable and tiring. Others may find an inventive way to leverage Google Doc, Keep, or Sheets to log their thoughts, but these tools are not optimized for the struggling journaler. In reality, the challenge may not be journaling itself but creating and customizing a routine that helps you get into a rhythm and document your day in the ways most useful to you.

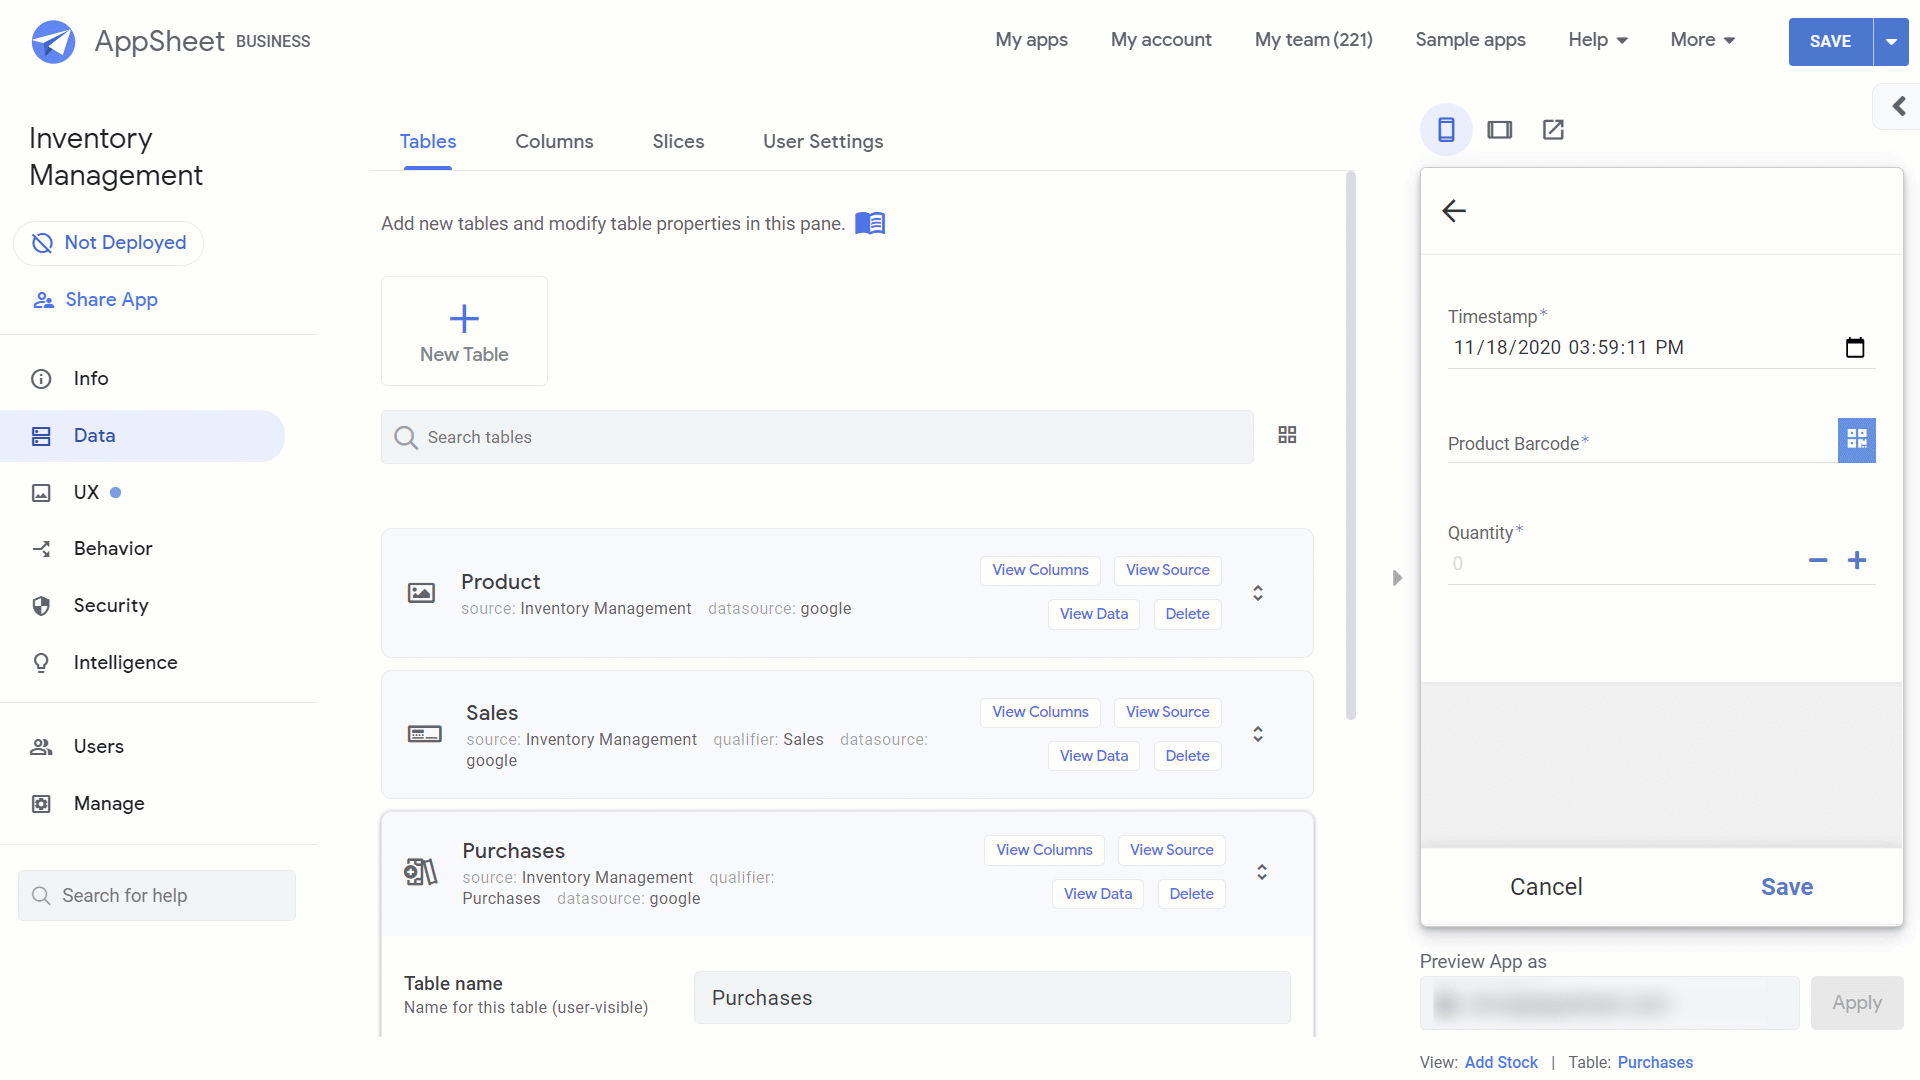
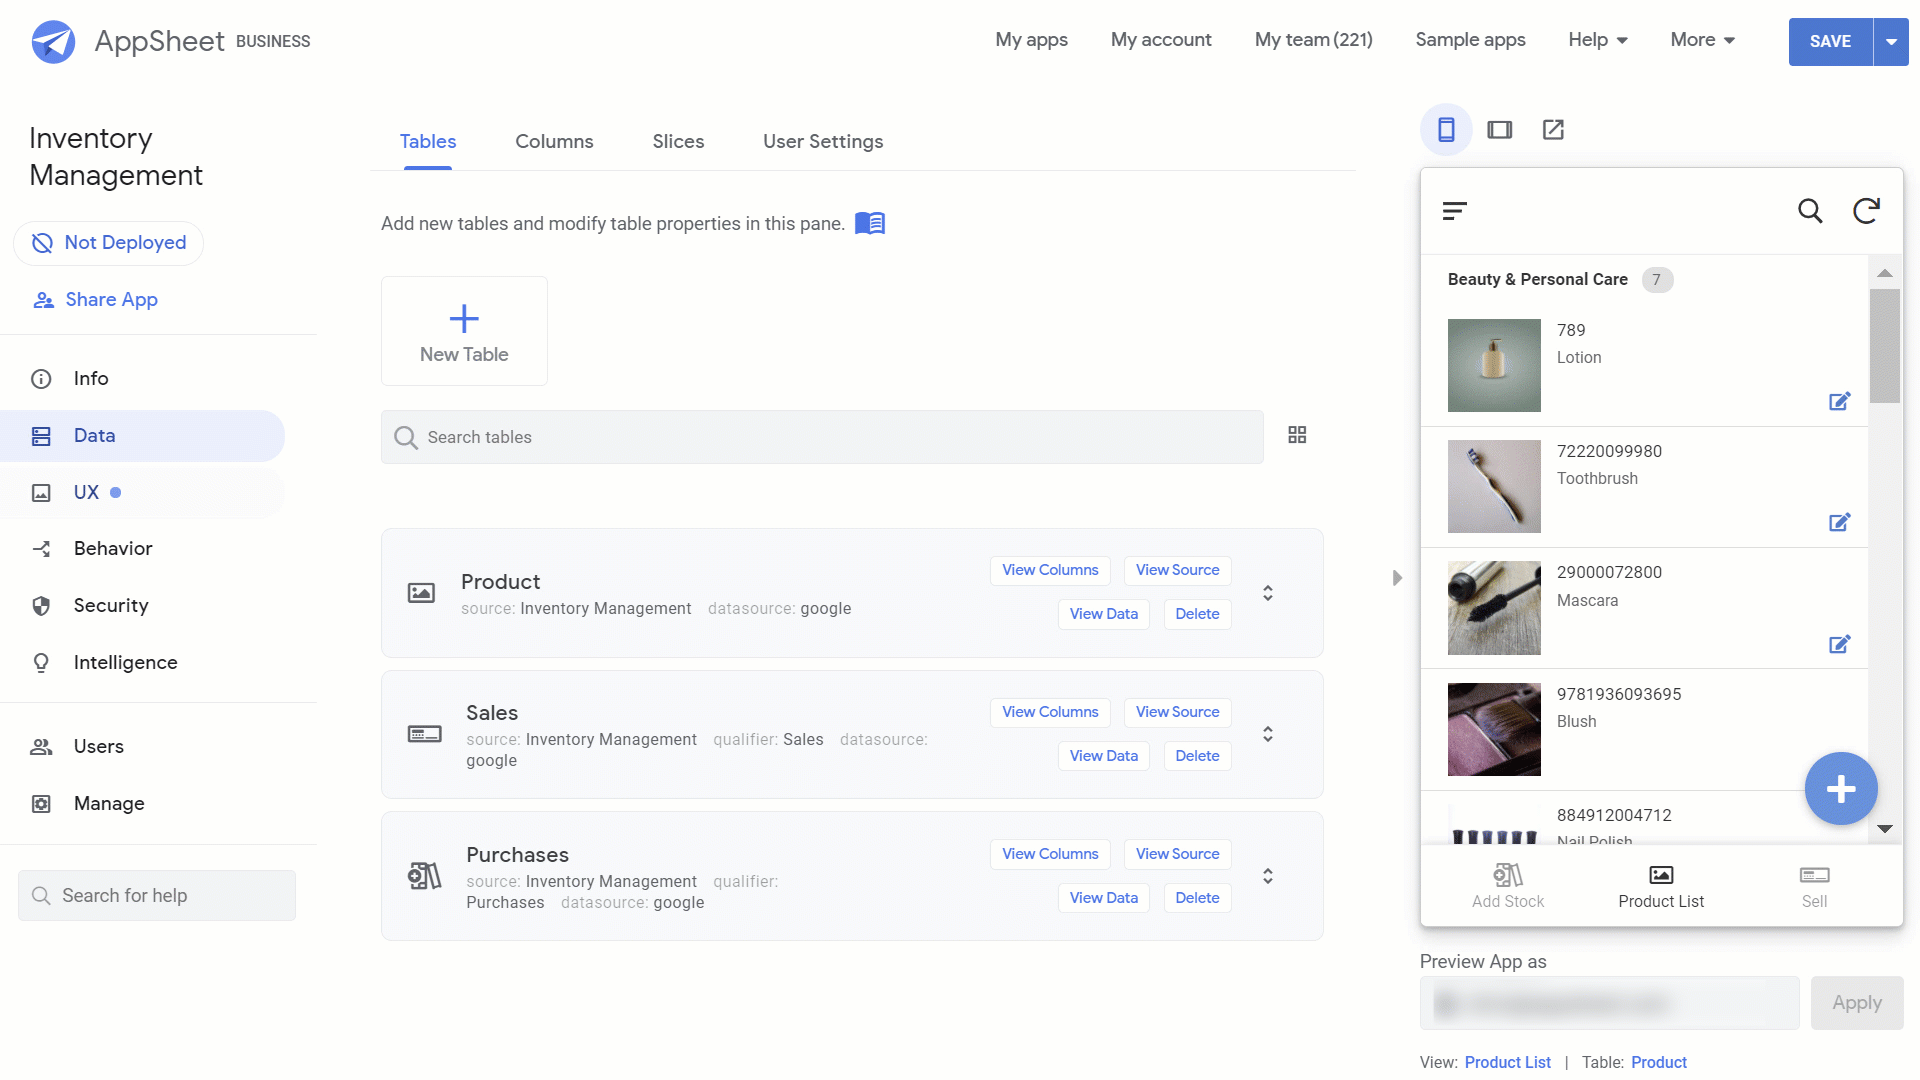
A few months ago, I decided to put this theory to the test by building my own journaling app in AppSheet, Google Cloud’s no-code application development platform. It lets me customize my journaling experience the way I want, I was able to build the app without writing any code, and it’s been extremely useful.

Phone screenshots showing a custom journaling app created in AppSheet.

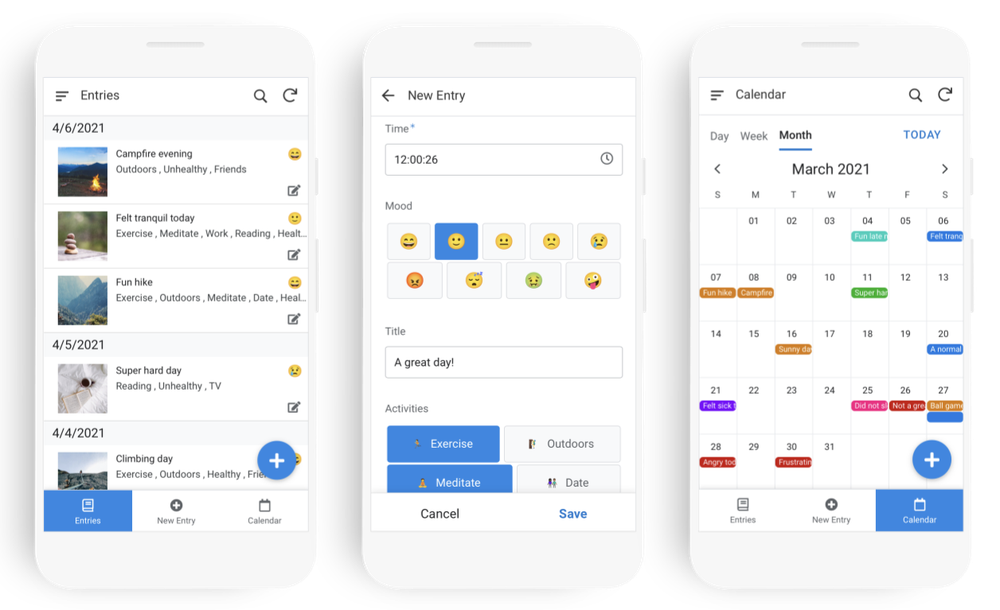
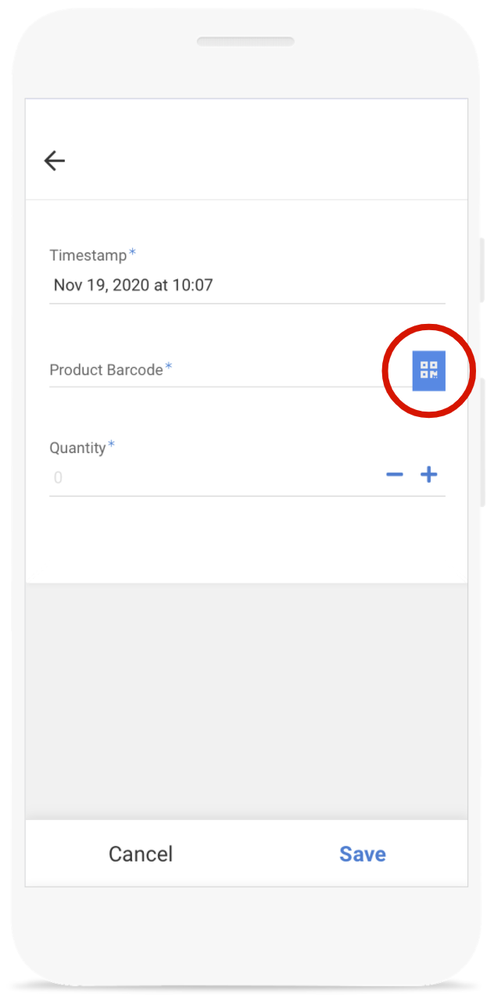
The journaling app, built with AppSheet, has a form that makes it easy for me to log my moods and activities, write a few notes, and add photos. I’ve also added a list and a calendar view so I can read through previous entries.

With AppSheet, anyone can create their own custom apps, connected directly to their data in Sheets — no technical background needed. To help you create your own journaling app, without writing a single line of code,  I’ve made a tutorial video.

And that’s just a starting point. From there, try adding your own customizations, like your own activities, notification and text message reminders and charts to show trends over time. 

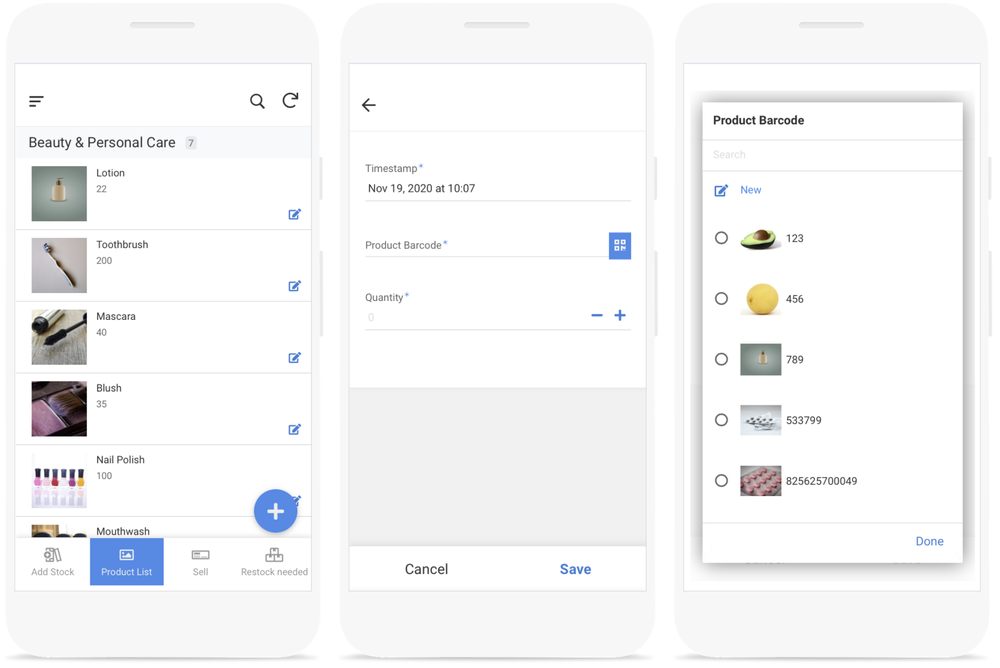
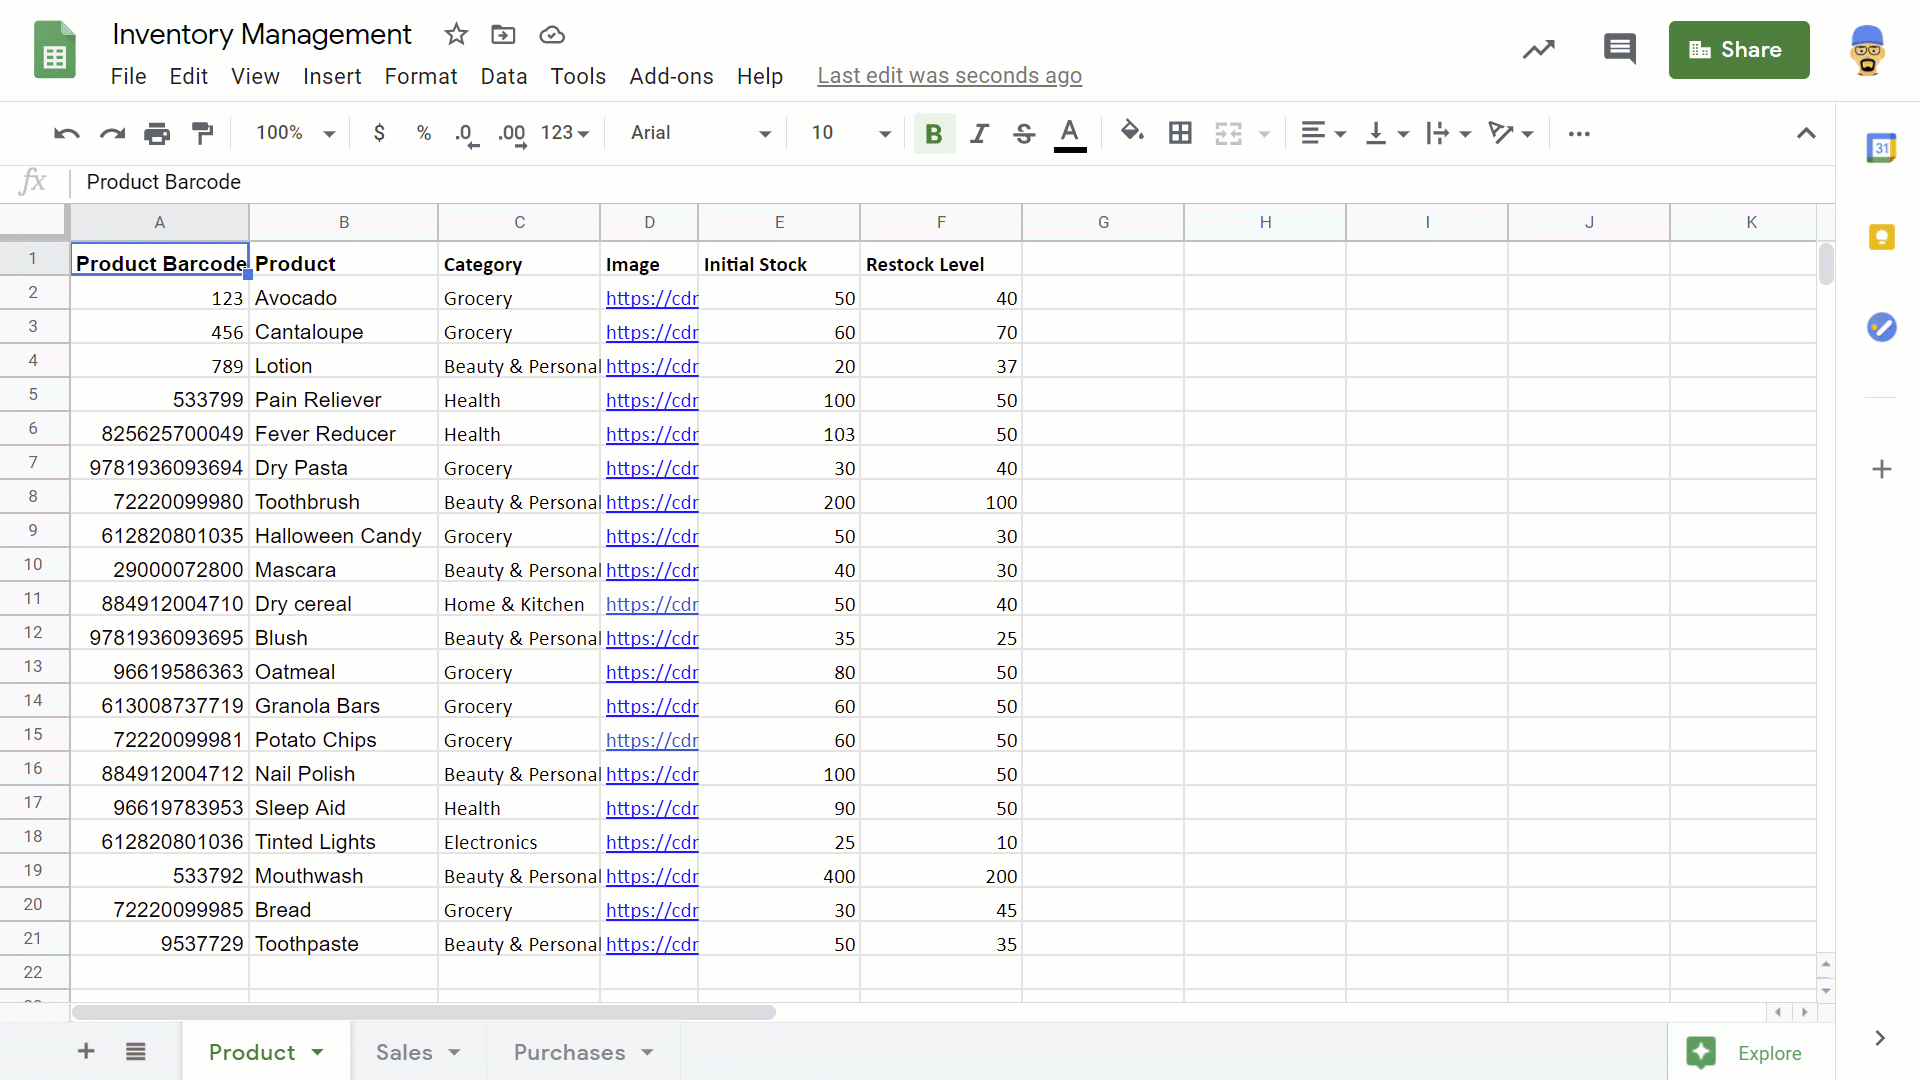
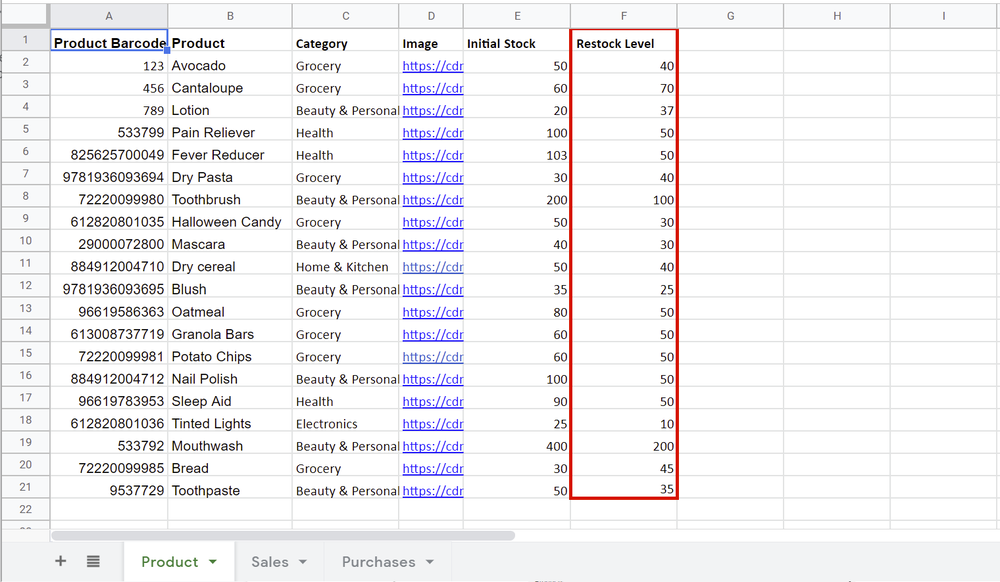
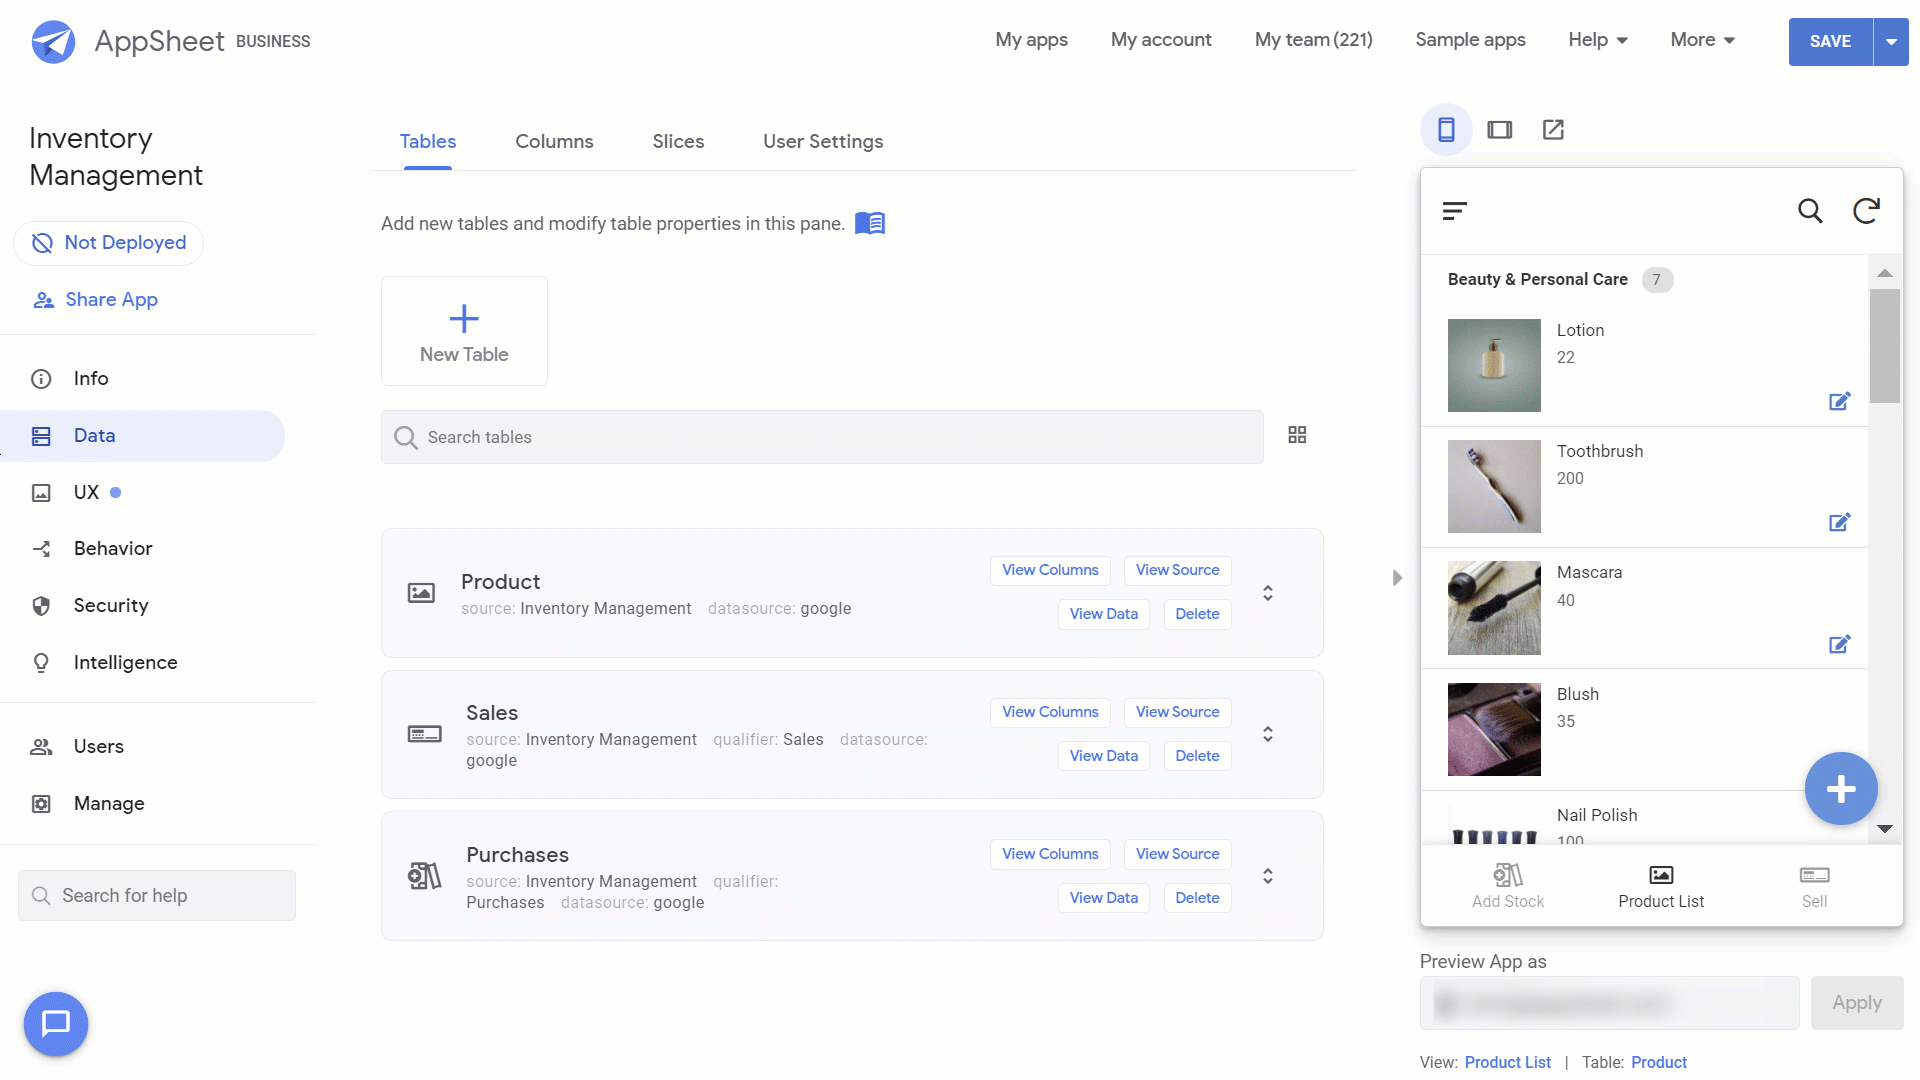
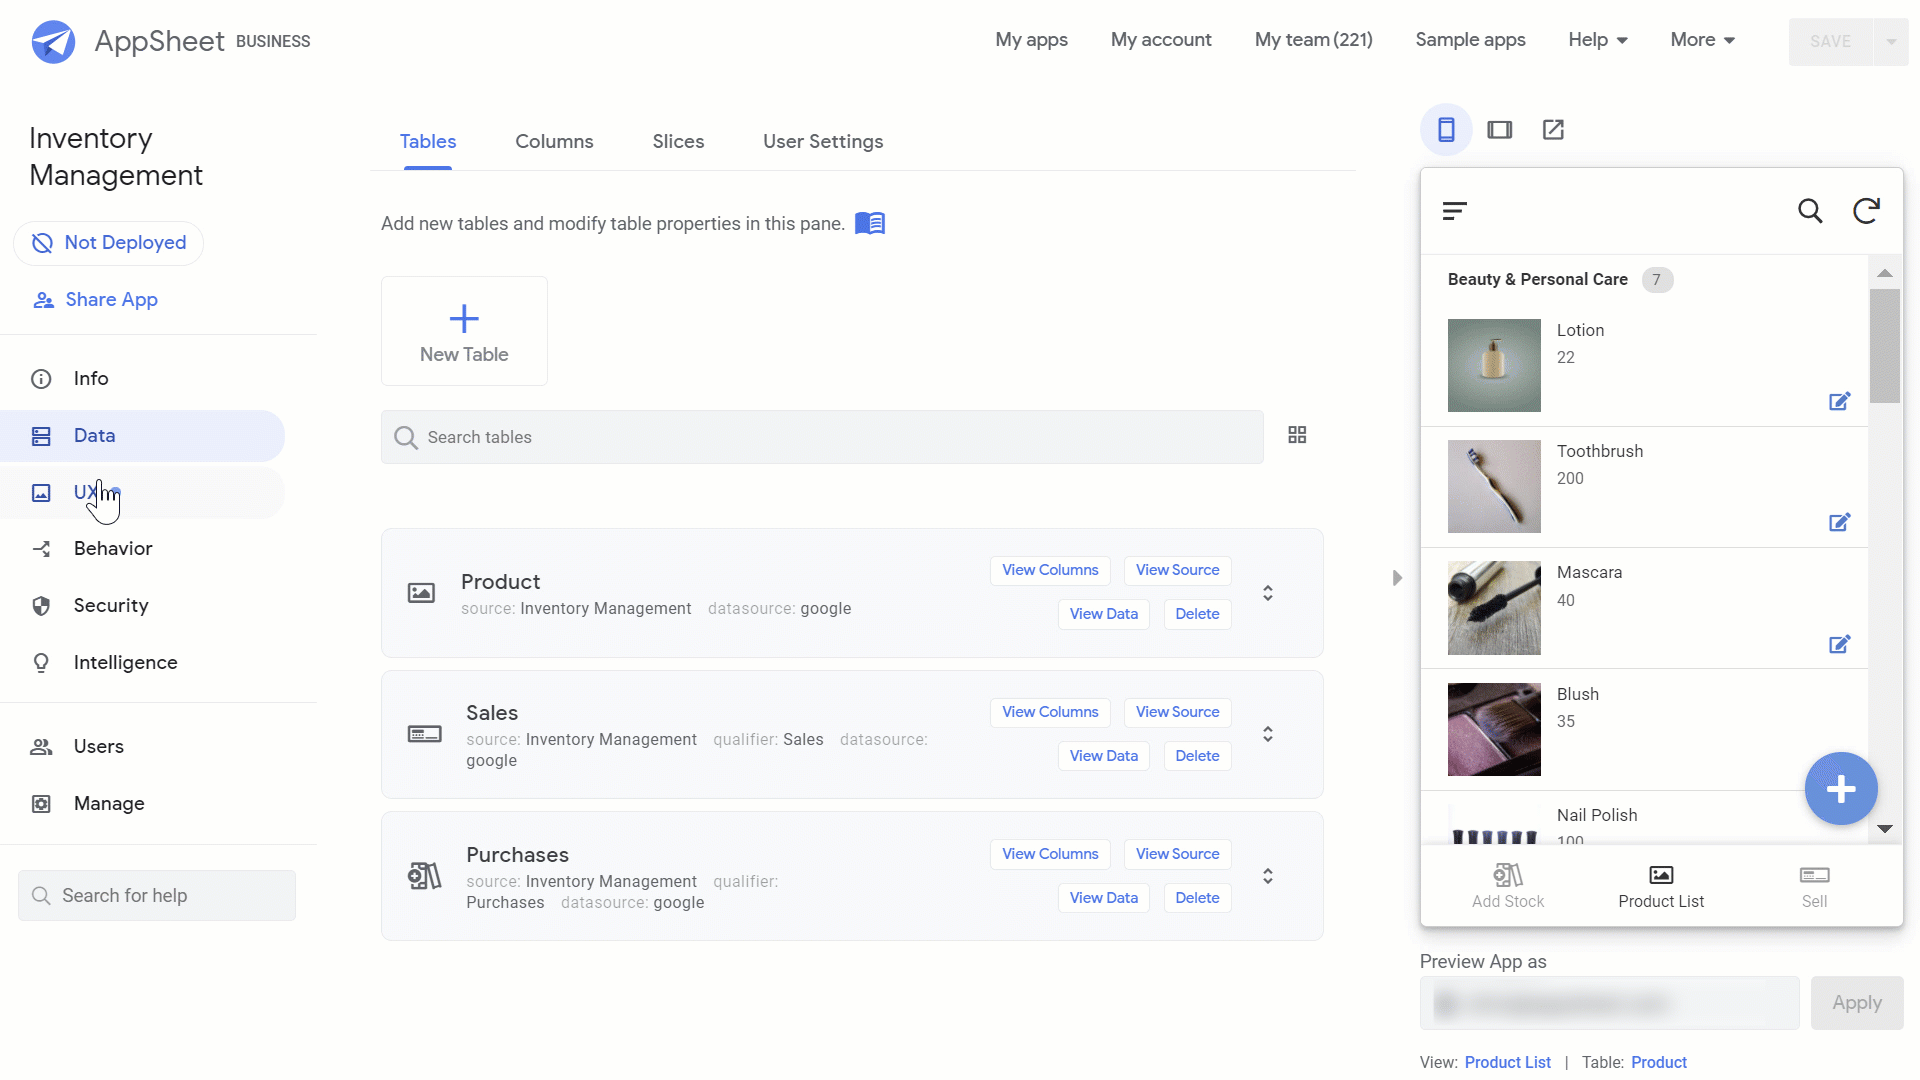
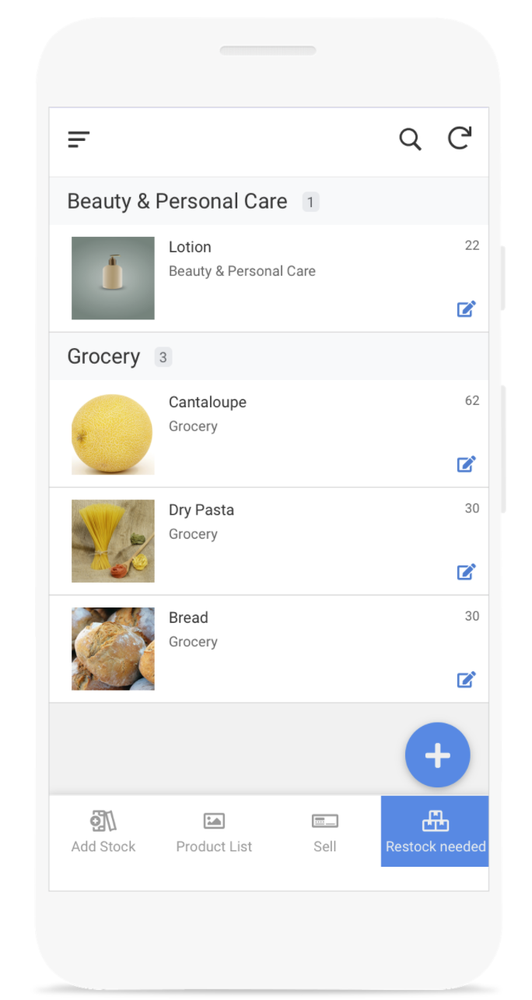
AppSheet lets you build and use your own personal apps for free. For example, you can build a custom workout app to help track your progress at the gym or you can build an inventory management app to keep track of inventory at your local community events. These are just a few ideas, but feel free to explore our app templates library or start with your own ideas.

Hopefully creating a custom journaling app inspires you to start writing — and dive into no-code app building at the same time.

Ready to use AppSheet? Get started now.

Create an inventory management app from Google Sheets with AppSheet

Google Cloud’s AppSheet lets you create apps without writing a line of code. From managing to-do lists to tracking your dog’s habits, you can now create apps to simplify your life. 

We often see people building inventory management apps, whether it’s to run a large retail business or just to sell products as a side job. Normally, tracking inventory can be difficult, especially if you’re doing it in a spreadsheet or database. With AppSheet, however, you can make inventory tracking much simpler by building your own tailored inventory management app.

In this post, we’ll show you how you can build an inventory management application with AppSheet in a few steps. The app we’ll create will include the following features:

  •  Use barcode scanners to record stock in and stock out

  • Automatically calculate current stock level

  • Display what items need to be restocked

We’ve already built this app, so if you want to use it to follow along or start using it now, you can access it here. Here’s a look at the app:

appsheet

Let’s build your inventory management app.

Step 1: Organize your data and generate your app

AppSheet apps connect to data sources, such as Google Sheets. But before connecting your data to AppSheet, you’ll want to make sure it’s set up appropriately. Set up your data with column headers in the first row, and rows of data underneath. 

To set up the data for this app, we created three tables in a Google Sheet (that you can copy here):

  • “Product” for all product information

  • “Sales” for items sold or removed out from stock;

  • “Purchases” for products added to stock.

Now, let’s turn this data into an app. If you’re in Google Sheets, you can go to Tools>AppSheet>Create an App, and AppSheet will convert your data into an AppSheet app.

Tools>AppSheet>Create an App

AppSheet will automatically add one of your data tables to your app. You can add the other tables by going to Data>Tables>Add a table.

AppSheet will automatically add one of your data tables to your app. You can add the other tables by going to Data>Tables>Add a table.

It’s also created a view for you, showing the Products. You can create additional views for the other tables by going to UX>Views, select New View, name your view, and set the view type to form. We’ll call our views Product List, Sell, and Add Stock.

It’s also created a view for you, showing the Products. You can create additional views for the other tables by going to UX>Views, select New View, name your view, and set the view type to form. We’ll call our views Product List, Sell, and Add Stock.

Step 2: Set up the barcode scanner

AppSheet can use the camera on your mobile device to capture barcoded data. To do this: Go to Data>Columns in the AppSheet Editor and mark the “Product Barcode” column in both the “Purchases” and “Sales” tables as searchable and scannable.

Set up the barcode scanner

Your app is now ready to record any inventory movement, whether it is stock in or stock out. All you have to do is to tap on the barcode scanner button (under “Add Stock” or “Sell” view) and scan the item.

barcodesettings

Step 3: Calculate the real-time inventory level

We want to see the current inventory level of each item in our app. The calculation formula is pretty simple: 

Current stock level = initial stock + stock in – stock out

To set it up, the first step is to configure our app to automatically record real-time inventory levels. You can do this by linking the data in the tables together. Since every table includes a column for the product barcode numbers, use that data to link the apps.

We’ll connect our Product Barcode columns in the “Sales” and “Purchases” sheets with the Product Barcode column in the Product sheet. To do this: Go to Data>Columns> Sales, and click on Product Barcode and edit the column definition by following the three steps below:

  1. Name the Column “Product Barcode”

  2. Select Ref on the Type drop-down list

  3. Select Products as ReferencedTableName

Calculate the real-time inventory level

Then repeat these same steps for the Purchases table.

Now let’s tell our app how to calculate the inventory level! Go to Data>Columns and in the “Products” table select Add virtual column. Add this app formula in the popup box:

COUNT([Related Purchases]) - COUNT([Related Sales]) + [Initial Stock].

how to calculate the inventory level

And that’s it. If you go to UX>View>Product List view, you can select either the Deck view or Table view, then select Current Stock as one of your headers. You will see every product’s Current Stock level.

And that’s it. If you go to UX>View>Product List view, you can select either the Deck view or Table view, then select Current Stock as one of your headers. You will see every product’s Current Stock level.

Step 4: Display “Restock Needed” for low inventory products

Inventory managers need to make sure there is enough inventory to sell and that shelves are full. This final step will set up a view that shows which items need to be restocked.

1. Set a restock level for every product. This will likely be different for each product. To determine the right number, you can review historical data and check out your demand forecast.

Display “Restock Needed” for low inventory products

2. Create a slice. Go to Data>Slices, select Create a slice and name it “Restock Needed.” Set the Source Table as Product and the Row Filter Condition to be: [Current Stock] <= [Restock Level]. This formula says, “Give me the data if a product’s Current Stock level is lower than or equal to Restock Level.”

Row Filter Condition

3. Create a view for the slice. Go to UX>Views and select New View. Choose Restock Needed (slice) as your data source, and choose the view type you want (we went with the deck view type).

Create a view for the slice

Now we can see all the products that need to be restocked.

Now we can see all the products that need to be restocked.

Congratulations, you now have a working inventory management app! From here you can customize it and add additional functionality, such as email notifications, themes, and new views. If you ran into any issues building your app, check out our help articles or ask a question on the AppSheet Community

Ready to use AppSheet? Get started now.

Create time-saving apps using AppSheet, no coding required

We recently announced Google Workspace, an integrated platform that brings Google’s communication and collaboration tools together. Your documents, tasks, messages, meetings and emails are now all available in one place. In addition, you’ll see another new option in your Google Workspace interface—AppSheet. AppSheet is Google Cloud’s no-code development platform, designed to let anyone create a powerful app without having to write a single line of code. Instead of learning code or finding someone to create the app you need, you can use AppSheet to create the app, so you can focus on using it instead of developing or fixing it.

You can create your own application using AppSheet directly from Google Sheets. Open up a Sheet, and you’ll see an option under “Tools” to “Open in AppSheet.” Once you create an AppSheet account (if you didn’t have one already), AppSheet will take care of the coding part, analyzing the data structure and creating a prototype app from it. 

Here’s what you’ll see:

See how you can build a new app about national parks from within Google Sheets.

See how you can build a new app about national parks from within Google Sheets.

Exploring data with no-code applications

This easy connection between Sheets and AppSheet means it’s easier than ever to build the apps you need. It could be a curbside pickup app to manage customer orders, a safety app linked to Google Docs, a work order app integrated with Google Meet or a ticketing app to manage work orders. There are plenty of possibilities to explore, especially since AppSheet integrates with other handy tools like Google Calendar, Maps and more. 

To learn more, check out AppSheet in Google Workspace, and to explore more of the amazing apps built by the AppSheet community, check out this article on the momentum of no-code programming.