Author Archives: Christopher Chamberlain

Maximizing art assets for VR

In line with previous tips we shared about creating art assets for VR, we’ve put together a few specific techniques for VR artists to get the most out of polygons and UV space.


Tiling textures: Instead of making one giant texture that covers lots of space, create a smaller tileable texture that can be used in more spaces. The example below uses UV space with a tileable texture repeated eight times to create high resolution on this ladder.  Through mirroring and flipping, the user will likely not notice the reused UV spaces, but the overall look is higher-res.
vrart2ladder

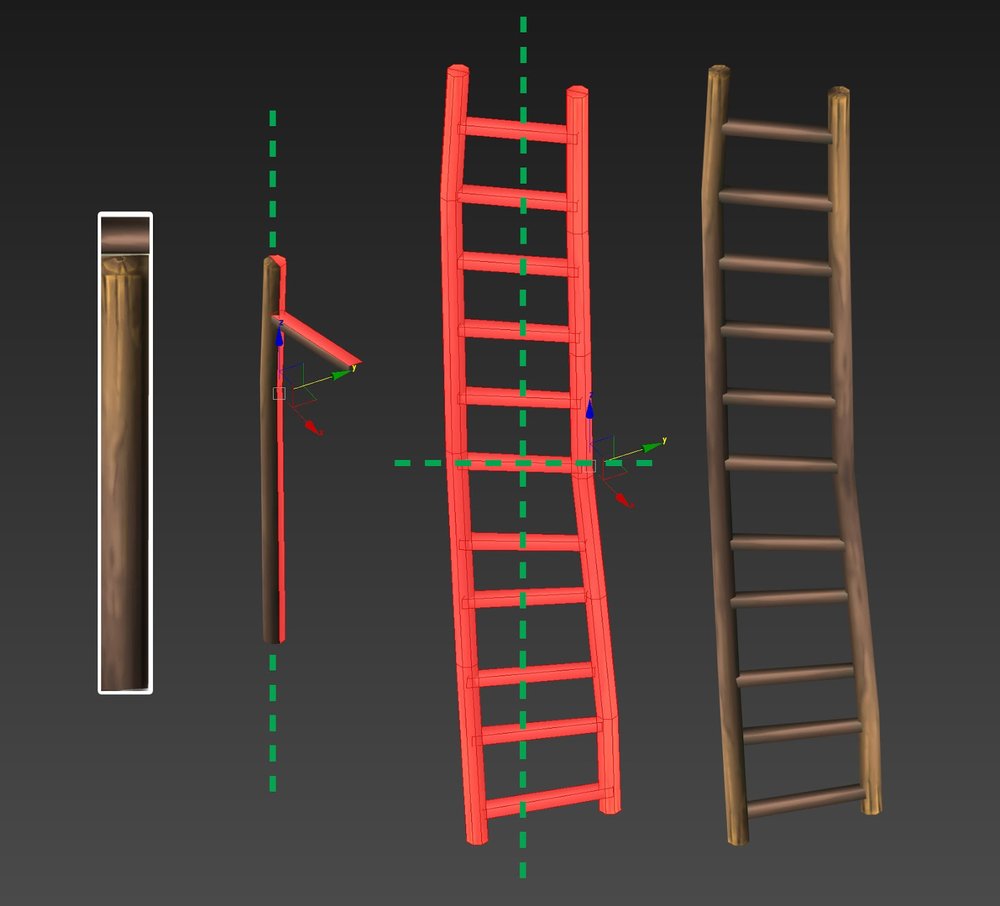
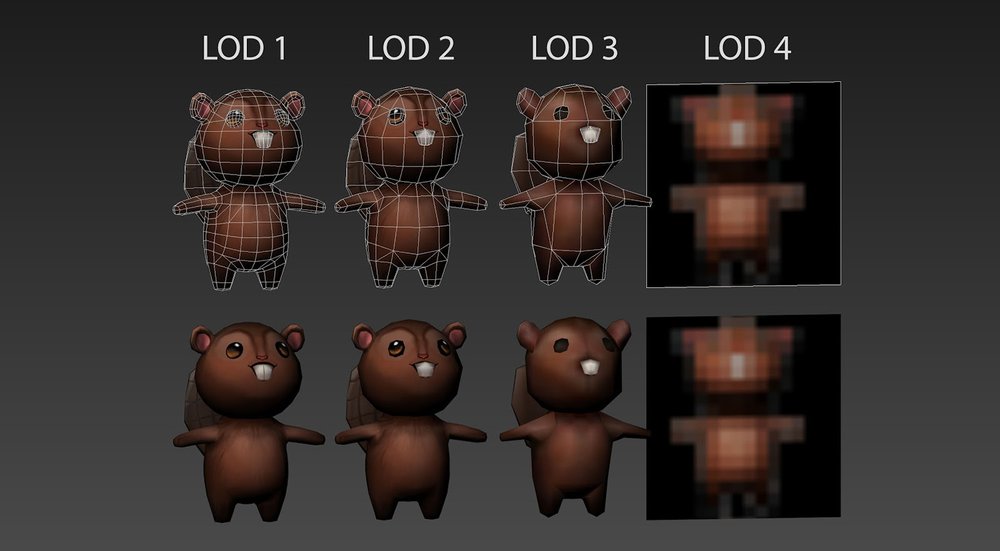
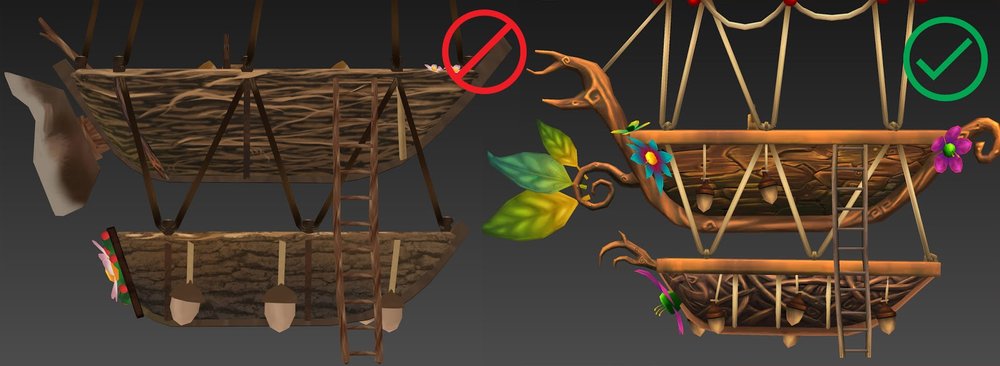
Use more polygons: While keeping the poly count low is important, texture and pixel resolution is more valuable. Plan ahead when designing an asset to account for the fact that you may need to add more polygons or model an asset in a less polygonally-optimized way, because doing so will increase resolution and result in a more detailed and overall optimized asset. On the left is a 13k poly model which was intended to be 6” tall in VR.  When the user approached the model, it became pixelated and didn’t look good. Instead of using large sheets of UV space, the model on the right was built with more careful polygon placement. It’s a 9k poly with a higher resolution of textures that holds up to close inspection in VR.

vrships

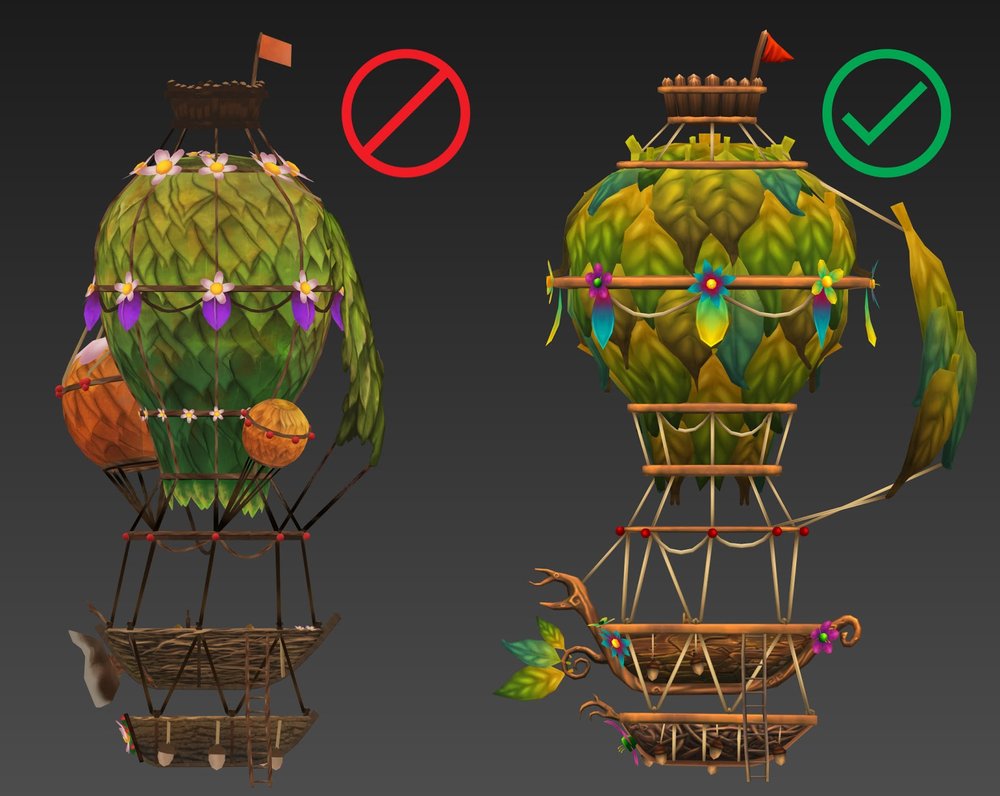
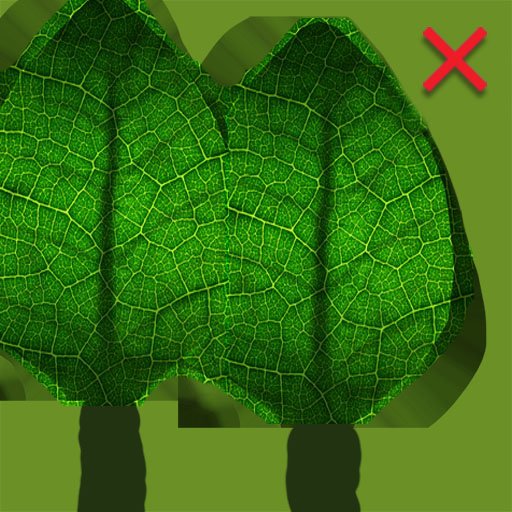
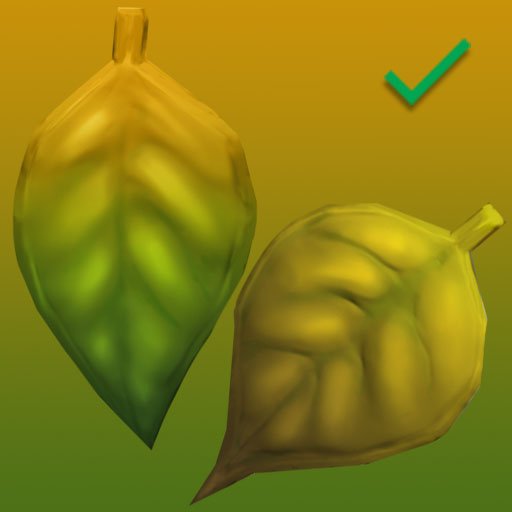
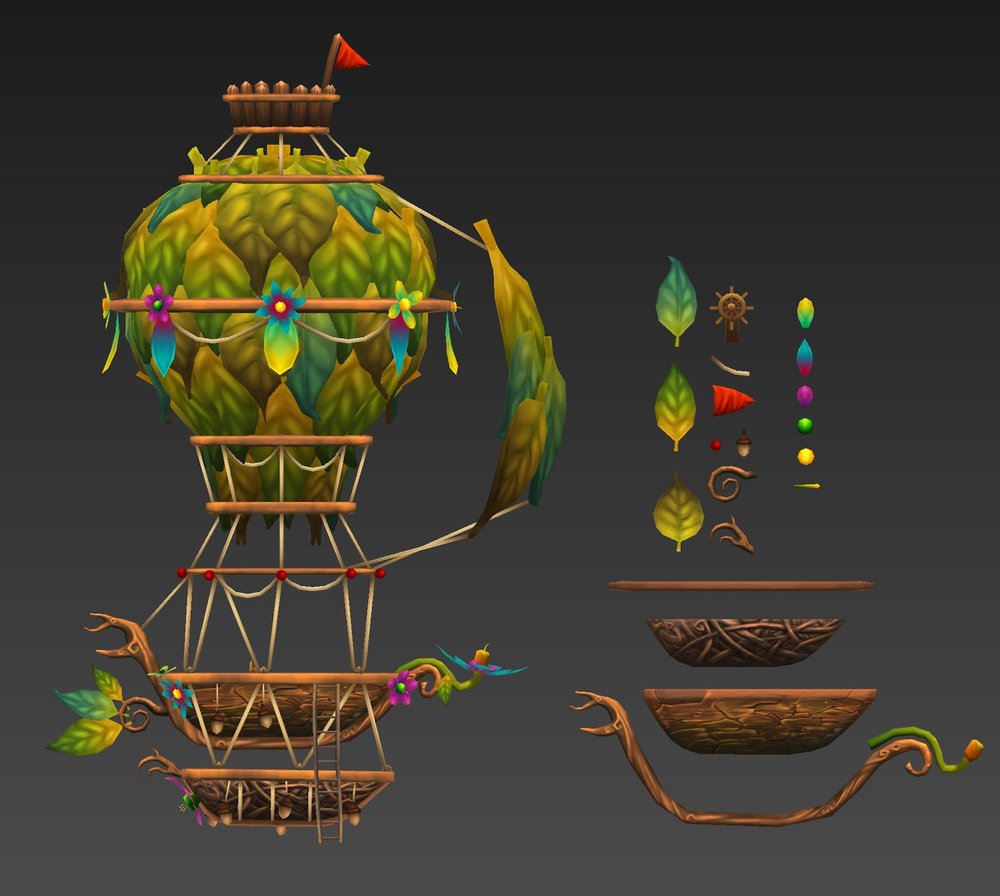
Maximize that UV space: Strive for higher resolution by making larger UV spaces to achieve a higher resolution per asset.  Because almost every asset has a unique UV space, the image on the left uses the large green leaf area for the entire balloon, which looks pixelated at close distances in VR. By making larger and higher resolution UV spaces and duplicating the geometry instead of relying on unique UV sections, the final asset on the right looks sharper when viewed up close.

shiptexture

Use geometry to make something unique, not textures: One drawback with reusing UV space is that things can look repetitive. To make areas of your asset look more unique, use geometry to add a new color splash or add a few edge loops to bend or scale a duplicated asset into a different silhouette.

geocompare

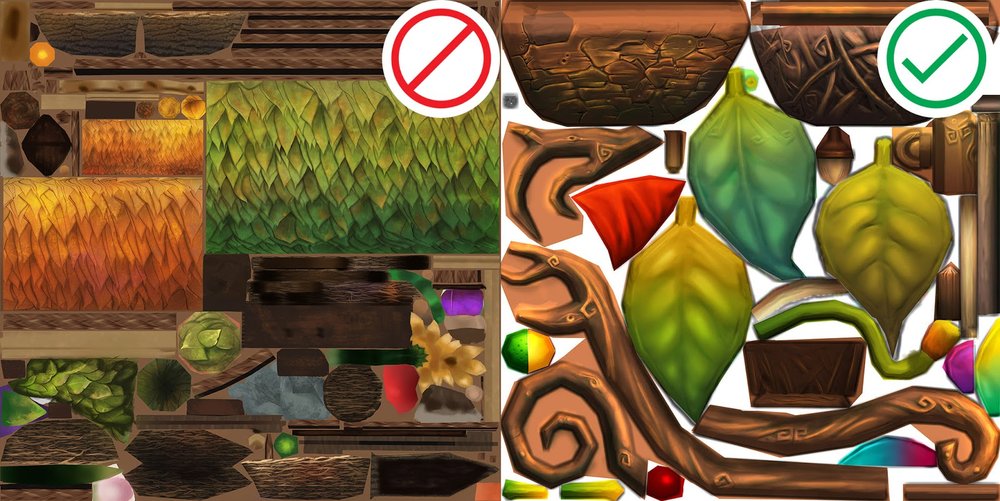
Plan ahead when creating assets, so they can be reused and combined with other assets: A good workflow in the tight constraints of VR is to build the individual parts of a final asset and then assemble them. Always be considering whether or not that next unique part is needed at the cost of an overall smaller UV layout, thus less lower resolution per asset.  The entire final asset on the left was built with the parts on the right.

shipparts

Hopefully, these tips will be useful as you create and optimize your assets for VR. What are some of your favorite tips and tricks? Let’s get a conversation going; use #VRArtTips to share.

Best Practices: Creating Art Assets for VR

Editor's Note: This is a design-focused post for anyone interested in creating art assets for virtual reality.

As a VR and AR artist, I’ve noticed two trends. First, new tools and practices that can make us better artists are appearing all the time. But also, techniques and skills from the late 90’s and early 00’s are making a comeback, and they apply to virtual reality because computing resources in VR are limited. If you’re just starting out, there’s a lot to consider. So if you’re an artist and you’re new to VR, here are some of my favorite tips for creating great assets.

vrart1copy

  • Never drop a frame. You need to keep your frame rate as high as possible, because the lower it goes, the greater the chance of discomfort and motion sickness due to conflicts between your inner ear and your visual inputs. One technique to keep your frame rate high is to create levels of detail (LODs). A character with 10,000 polygons only needs such a high resolution really close up. At further distances, you could swap in a 5,000 poly version, and then even lower poly models as the distance increases, all the way to a single polygon (LOD 4 in the diagram below). This will help with performance, and it works especially well for large groups of background characters that are always seen at a distance.

vrart2

  • Be aware of the textures you’re using. Busy, noisy and contrasting textures can be nauseating in VR, as they tend to cause a jittering look. However, flat textures with no detail can pose problems as well, because without texture it’s hard to measure motion or depth. Although extremes can work in non-VR experiences, avoid them in VR. 

leafwrong
LeafRight

  • How it looks in VR is what matters. When designing assets in 2D, be sure to constantly check and see what it looks like in VR.  It can be cumbersome to jump back and forth, but your perspective will be different: volume and size are extremely present in VR. Putting that tree on a hill may look like a fine distance to cover when you’re designing in 2D, but once you’re in VR and comparing distances, it might not work at all.

Cave

  • Make exploration fun, not hard. Exploration should be fun and available, but in VR you really want to clearly point out where to go. Create a visual language, like having orange torches near the proper dungeon exit, or street lights in a zombie apocalypse. These are subtle yet important indicators, because it’s very easy to become lost in VR.

Hopefully, these tips will be useful as you get started creating art in VR. We’re all on the edge of a new frontier, and because of that, we’re learning all the time. It’s great. What are some of your favorite tips and tricks? Let’s get a conversation going; use #VRArtTips to share.