Validating 4 Million TPS using AerospikeDB with only 20 GCE nodes
In this post I’ll summarize what I learned from running benchmark tests with the Aerospike team using Google Cloud Platform (GCP) virtual machines. In doing this work, I independently validated their latest benchmark test results of up to 4 Million Transactions Per Second (TPS) on a single Aerospike cluster. These results are significantly faster than the previous December 2014 benchmark, which showed 1 million write transactions per second with 50 servers and 1 million reads per second with 10 servers.
Aerospike is a powerful open source NoSQL database. It’s known for both speed and scale, and is often used for session storage, advertising profiles, recent financial transactions, caching and other fast key value uses. Aerospike is built to be extremely fast by leveraging SSDs for persistence and includes automatic scalability. It’s also multi-threaded and written in C.
In the December 2014 benchmark, a 1 million read per second configuration was quoted as $11.40 per hour (about $8300/month). With the configurations used in this updated performance test, 4 million reads per second required 20 n1-standard-8 instances at $0.304 per hour each ($4499.20/month). An improvement of four times the performance at half the price was measured.
I reached out to Google and learned they profile their products and optimize their software regularly. The changes impacting Aerospike were a drastic reduction in network latency, achieved through a new interrupt handler, and huge pages support on the host OS. Changes to the host OS are not possible for customers, so having Google doing this regularly is a good thing.
For the benchmark tests, I tested the most common use case – using Aerospike as a simple key-value store, using in-memory (DRAM) data storage with synchronous replication. Individual key-value requests are individual network transactions, and neither batching nor pipelining are used. I used Compute Engine VM’s for this test run and the steps to reproduce these results are included.
New Benchmark Validated – TL; DR – 6 Simple Steps to Speed
In validating results, I found ease of implementation to be a key differentiator between Aerospike and other NoSQL databases for large-scale loads. This matched nicely with the speed, ease and scale of Compute Engine. For example, I was able to use default settings on Compute Engine instances – no manual tuning or special setup in GCP was required. Combine a blazingly fast cloud with a blindingly fast NoSQL database for powerful results.
About Aerospike Scaling:

- Aerospike handles the equivalent of sharding automatically.
- There’s no downtime. You can add new capacity (data volume and throughput) dynamically. Simply add additional nodes and Aerospike will automatically rebalance the data and traffic.
- You set the replication factor to 2 or more and configure Aerospike to operate with synchronous replication for immediate consistency and durability.
- If a server goes down, Aerospike handles failover transparently; the Aerospike client makes sure that your application can read or write replicated data automatically.
- You can run purely in RAM, or take advantage of Flash/SSDs for storage. Using Flash/SSDs results in a slight penalty on latency (~0.1ms longer on average), but allows you to scale with significantly smaller clusters and at a fraction of the cost.
Benchmark Testing on GCE – TL; DR – look ma’ it’s fast
One of the reasons I’ve been doing more and more Big Data project work on Compute Engine is due to its raw performance. As mentioned, I was pleasantly surprised at the lack of manual configuration I had to do to validate this benchmark. It was basically, ‘plug it in, turn it on…and go.’ I’ll cover details about the instance types and sizes in subsequent sections, but this lack of need to twist and turn obscure (cloud) knobs, is significant. This is because simplicity results not only in reproducibility, but also more importantly, general productivity. Your team can get started quickly and can then move on to other work, such as adding features to your solution, without having to spend time tweaking Compute Engine instance settings.
That being said, I find that reproducing vendor benchmarks on any public cloud requires some attention to detail. The environment is obviously different than on premises. Also beyond basic setup, performance-tuning techniques vary from those I’ve used for on-premise and also from cloud-to-cloud solutions. In addition to covering the steps to do this, I’ve also included a list of technical links at the end of this blog post. These links include the Github repository with the complete script and config files that I used to run this series of tests.
Setup to Test Aerospike on Compute Engine
Step One
SETUP Compute Engine Environment. Best practice when testing is to properly setup a dedicated test environment. To do this on Compute Engine, sign in or create a user account (https://cloud.google.com/). Next access the GCP console and create a new GCP project. Note the project name. Then download and install the GCP SDK (https://cloud.google.com/sdk/); this will give you access to the gcloud command-line tool.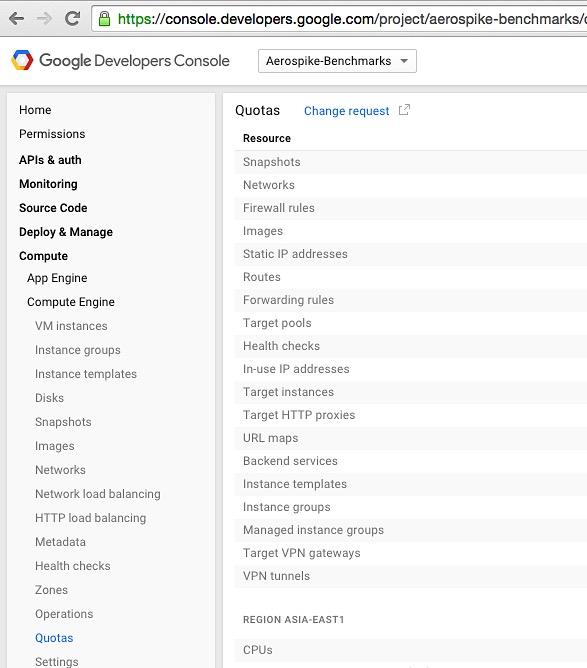
Note: To replicate the 4 million TPS benchmark, you’ll need to enable project billing and then request an increase in the default quota limits for a GCP project, as you’ll need to increase the default CPUs/project limit from 24 to 160.
To do this, from within your new project in the GCP console > Compute > Compute Engine > Quotas and then click on the "Change Request" link at the top of the page. Fill out the form and click send. It generally takes around 24 hours for this type of request to be processed.
Step Two

SETUP Compute Engine instances for the Aerospike server cluster. We’ll start by setting up an Aerospike cluster that can handle 4 million TPS. You can, of course, reproduce this testing with the level of benchmark that is appropriate to your projected workload value.
To reproduce the Aerospike team’s results, I used 20 GCE Linux instances for the server cluster. I used n1-standard-8 instances types. Each instance has 8 CPUs and 30 GB of memory.
For each instance I used Google’s standard GCE Debian GNU/Linux boot disk version 7.8 (shown left). I selected this number of this type of instances because this configuration uses common instance types.
Additionally, I used the GCE image that the Aerospike team prepared as the base image for each node in my cluster, which is based on Google’s Debian image. This image contained a default installation of Aerospike server, Aerospike AMC (Aerospike Management Console) and the Aerospike Java client.
The Aerospike Java client includes the Aerospike benchmark-testing tool. I’ve included instructions on how to create this base image in the text box below.

LOGIN to your Google Cloud account. Open a terminal window; create a working directory and cd into that directory. Set your account value and then use the gcloud auth login command to connect.
SETUP variable values as for your test. Be sure to replace the (your-project-name) value with the name of your particular project instance. I set the value of "USE_PERSISTANT_DISK" to 0 to perform an in-memory only test. You could set it to "1" if you wished to test using persistent disks.
CREATE 20 GCE instances for your Aerospike server cluster using the gcloud compute instances create command. I used a custom Aerospike image as a basis for creating each node. The full script can also create persistent disks if you choose to run your benchmark test with persistence. Note the use of the "tag" flag to identify these instances as the Aerospike server nodes.
Step Three
UPDATE the Aerospike config files. To create the cluster, update the Aerospike config files to use the correct IP address for the mesh address. (See the references section at the end of this post for a link to Aerospike configuration file that I used). You can use the default configuration file settings so long as your cluster uses 32 or fewer nodes.
Step Four
Step Five

Step Six
To connect to the AMC console, you’ll need to find the public IP of "as-server-1" and then open a browser using
Run Tests using the Benchmark Tools
Shown below is the first result in the AMC – it’s actually considerably MORE than previous 1 Million TPS – it’s 4 Million! Of note is that only 50 GB (of the total available 350 GB) of RAM available to the cluster is being used for this workload. This first test uses 100% reads for the workload.

For this next test, I ran the benchmark tool with the configuration set to 100% WRITES. This test resulted in a 1 Million TPS as shown in the AMC console image below. Again, of interest, is that only 50 GB (of the total 350 GB) or RAM is being used to run this workload.

Benchmark Tool Script Details
The host in the “-h” option of the benchmark tool must be used to test against the Aerospike host node. Benchmark options used in the current tests were:
- 10 million keys (
-k 10000000) - 50 byte string values for each key (
-o S: 50) – 150 byte into 3 bins + key -> 200 byte objects - 3 bins or columns each of size 50 and insert key size of 20 bytes (
-b 3 -l 20) - Two different loads:
- 100% write (
-w I) - 100% read (
-w RU, 100) - Before every test run, data was populated using the insert workload option (
-w I) - For each client instance, 256 threads give the maximum throughput in the in-memory database case (
-z 256). - For more about benchmark flags, use benchmarks -help
Clean Up
Conclusions and Next Steps
I found the combination of Aerospike and GCP to be a winner for these reasons:
- Powerful, scalable NoSQL Database – I was able to set up and test with ease
- Quick setup and low cost to test – for this configuration the cost looks to be around 4k/month – this is for up to 4 million reads per SECOND, many customers won’t need this much power, so running fewer servers would reduce costs
- Flexibility of cloud platform – scaling up or down is trivial given the sharding of Aerospike and the speed of working with Compute Engine VMs
In further work, I can see myself testing with different quantities of Compute Engine instances of different sizes. The key is to understand requirement and then test to validate, for example “can I run a workload of (n)
Note: On Compute Engine Machine Types. I chose the n1-standard-8 series of instances, as these are “middle-of-the-road” instance types and provide a good instance-to-value ratio. Of course, Compute Engine offers a variety of instance sizes and types – a grid summarizing choices is shown below.

References
Use my scripts and config files to run your test Select GCP machine types Use Compute Engine instances - Create a Compute Engine image – https://cloud.google.com/compute/docs/images?hl=en#create_an_image_from_a_root_persistent_disk
Export Compute Engine image Import your Compute Engine image Understand Compute Engine Instance Pricing Information Get Started with Aerospike Install Aerospike Java client Understand Aerospike Java benchmark tool Previous Aerospike Benchmark on GCP