Upcoming changes to reboot, alert, and log settings for Google Meet hardware devices


What’s changing 

In the coming weeks, we will introduce changes to multiple settings in Google Meet hardware admin console that will offer new capabilities and a better experience for admins. These changes will impact the following settings: 
  • Alert configuration 
  • Time zone 
  • Log upload settings & Device state reporting 
  • Scheduled reboot 
While rolling out the new changes, there will be a 2-3 week period where both the new setting and old setting will be displayed. During this time, admins will see a banner in the admin console indicating this, as well as a banner indicating your previous configuration is being migrated. 

Alert configuration: 
Alerts will be more streamlined with a separate setting for Email alerts and SMS alerts. There will be one checkbox per SMS and per email alert. Options to select alerts for missing microphone, missing default camera, and other device and peripheral issues will be displayed for both email and text message alerts. 


The existing Alerts experience 


The updated, streamlined Alerts experience 


Time zone: 
We have simplified the time zone setting so it’s more customizable. The new time zone options allow admins to use the time zone configured during setup for their devices, manually select the time zone, use the device IP address, or location to detect the time zone. Note: Devices not running on ChromeOS are not supported by this feature.


The existing Time zone experience 


The updated, streamlined Time zone experience 


Log Upload Settings & Device State Reporting: 
Currently, there are three separate settings in the Admin console which control whether error reports, metrics, and logs are uploaded for troubleshooting purposes: 
  • Report diagnostics > Send Google usage metrics and logs to improve meeting room hardware 
  • Logs and feedback > Send Google usage metrics and logs periodically and after each meeting for troubleshooting purposes 
  • Error reporting > Send error reports to Google 
Going forward, this will be controlled by one unified setting found under Google Meet Hardware > Settings > Data Sharing. This update provides a more straightforward, easy to understand experience for Admins. 


The existing Log Upload Settings & Device State Reporting 


The updated Log Upload Settings & Device State Reporting 


Since we’re consolidating three separate settings into one, your previous selections will determine the default ON/OFF state for the new setting: 
  • If you have ANY of the three original settings disabled, the new unified setting will be OFF by default. 
  • If you have ALL three of the original settings enabled, the new unified setting will be ON by default. 
Additionally, the device state reporting will now be enabled for all Google Meet Hardware customers. Device state reporting provides essential insights for Google Meet hardware admins to actively manage GMH deployments, including device health, network connectivity to facilitate troubleshooting, proactive maintenance, and informed decision-making. 

Scheduled Reboot: 
Currently, you can set reboots to occur at a frequency (between 1-7 days). Soon, you'll be able to select specific days of the week for reboots. This change will make scheduled reboots happen more predictably. 


The existing Scheduled Reboot 


The Updated Scheduled Reboot 


We recommend that you review your settings to make sure you know when your devices will reboot. If you take no action on your reboot settings, they will be migrated as follows: 


Reboot Frequency
(Old Setting)
      Day
      (New Setting)
1     Daily
2, 3, 4, 5, 6     Monday, Thursday
7     Monday

Additional details 

Audit logs for all of the new simplified settings outlined in this post can be found under “Change application setting”. Legacy settings will continue to generate audit logs under the “Chromebox for meetings Device Setting Change” event until they are removed from the user interface. 

Getting started 


Rollout pace 

  • Rapid and Scheduled Release domains: Gradual rollout (up to 15 days for feature visibility) starting August 5, 2025 

Availability 

  • Available to all Google Workspace customers with Google Meet hardware devices

Resources 
Automatic Room Check-in in Google Meet with Proximity Detection

What’s changing

To simplify the process of joining meetings for those using companion mode on laptops within a conference room, we’re introducing automatic room check-in via ultrasound proximity detection. To automatically check you in, the green room uses your laptop’s microphone to detect an ultrasound signal from the conference room hardware, streamlining the process and eliminating unnecessary steps.

The “Use Companion mode” button is highlighted, prompting the user to click it to join the call.

Who’s impacted

  • Admins and end users

Why it’s important

To simplify joining meetings from a conference room and prevent disruptive audio feedback, Google Meet now intelligently guides you to the best joining option.
Meet intelligently knows when you are in a room using an ultrasonic signal, and highlights the “Use Companion mode” button before you even join the call. This wayfinding feature helps ensure a seamless, echo-free start to your meeting. When you join using the highlighted Companion mode button, you will also be automatically checked into the correct room. 

Additional Details

  • Improving Room Check-in from Greenroom: Today, when at least one Google Meet hardware device is on the call and the user clicks on “Use companion mode,” Meet will present an option to check-in to the room. Room Check-in by proximity will replace this experience.
  • Platform & Browser: Only supported on Meet web (meet.google.com) for Chrome. 
  • Supported pages: Proximity detection is limited to a call’s greenroom and a brief period after joining companion mode
  • Unsupported pages: Proximity detection will not function on g.co/present or g.co/companion. However, it will detect once the user joins companion mode for a brief period after joining.
  • Google Meet hardware peripherals: We have tested and verified functionality only with certified peripheral devices. While other devices might work, they are not officially supported and we cannot guarantee their performance. 

Getting started

  • Admins: 
    • A “Proximity Detection” device setting will be available in the Admin console to better support needs of each organization. Admins have granular controls to enable or disable proximity detection on specific Google Meet hardware devices.
    • Proximity Detection is on by default. This feature will be automatically enabled on all Google Meet hardware devices. If you need to change this setting:

  • End users: 
    • The Companion mode entry point will be highlighted in the greenroom when the proximity detection signal is detected. 
    • After joining a meeting in Companion mode, the user will be automatically checked into the room. If you have dynamic tiles enabled you will also be prompted to use Face Match to identify your face so your Dynamic tile shows your name instead of the room name.
    • Proximity check-in not working? See the help documentation for troubleshooting tips. You can still check in manually after joining the call.

The companion mode entry point is highlighted to inform the user that the meeting room for this call has been detected.

Rollout pace

Availability

  • Available to all Google Workspace customers with Google Meet hardware devices

Resources

Unlocking enhanced Performance Max targeting in the Google Ads API

We're excited to announce the launch of three powerful new features for Performance Max campaigns within the Google Ads API. These updates will give you greater control and flexibility over your Performance Max campaigns, allowing for even more precise targeting and optimization. Available today across all supported versions of the Google Ads API, these features empower developers and advertisers to refine their Performance Max strategies.

Introducing new targeting capabilities

1. Device targeting

With the introduction of device targeting, you now have the ability to specify at the campaign level where your Performance Max ads will appear. This feature provides a new layer of control, enabling you to optimize your campaign reach across various platforms. To set up device targeting, add a DeviceInfo criterion to your Performance Max campaign.

2. Negative keyword lists

To help prevent your ads from showing for irrelevant searches, we're introducing support for negative keyword lists at the campaign level on Performance Max campaigns. This highly requested feature allows you to upload and apply lists of keywords that you want to exclude, ensuring your ads are displayed to the most relevant audience. Attach a NegativeKeywordListInfo criterion to your PMax campaign to enable this targeting feature.

3. Age range exclusions

We're also adding the capability to exclude specific age ranges from your Performance Max campaigns. This allows for more granular audience targeting, which helps you comply with age-related advertising regulations and focus your spend on the most appropriate demographics for your products or services. To set up an age range exclusion, add an AgeRangeInfo as a negative criterion on your PMax campaign.

How to get started

These new features are available starting today on all supported versions of the Google Ads API. For detailed documentation on how to implement these new targeting options in your Performance Max campaigns, refer to our developer guides.

We're committed to continually enhancing the Google Ads API to provide you with the tools you need to succeed. We encourage you to explore these new features and incorporate them into your Performance Max strategies to achieve even better results.

NotebookLM is now available to all education users

What’s changing 

We are expanding support for the NotebookLM for Google Workspace for Education users of all ages.

NotebookLM is covered under the Google Workspace for Education Terms of Service for all Workspace for Education users. Those terms include enterprise-grade data protections, so your data is not reviewed by anyone or otherwise used to train AI models. 

Who’s impacted 

Admins and end users 

Why you’d use it 

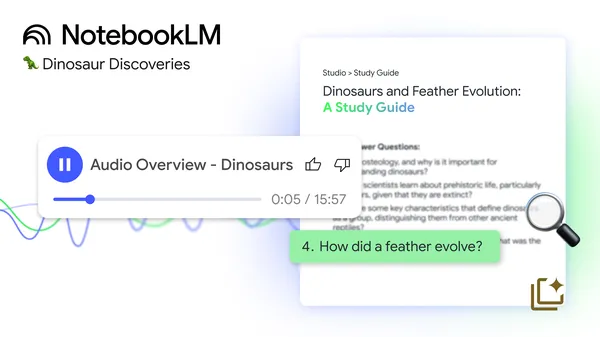
NotebookLM is an AI-powered thinking partner that helps you understand anything. It accelerates learning and knowledge sharing, with AI grounded on the documents that matters most to you. Educators and students can add their lesson plans, education standards, lecture notes and/or course readings to get real-time summaries, guided lesson plans, discussion questions, quizzes and more. They can also generate audio overviews to take learning on the go and make content more accessible, digestible and engaging.   

Additional details 

NotebookLM is available in 180+ regions where Gemini API is available and currently supports 35+ languages. Users can only upload sources from Workspace that they have permission to access. Furthermore, they can control who has access to their notebooks and set more granular permissions within each. Notebooks can only be shared within your organization. 

NotebookLM also supports compliance with industry regulations like FERPA and COPPA.

Getting started 

  • Admins: As a Core Workspace Service, NotebookLM is enabled by default for Workspace for Education institutions. Visit the Help Center to learn more about turning NotebookLM on or off for users.
  • End users: Visit the Help Center to learn more about NotebookLM. 

Rollout pace 

Availability 

  • Available for Google Workspace:
    • Education Fundamentals, Standard, and Plus

Resources