Gone are the days when users were impressed with a marker on a map. This is the first in a series of Maps Zen blog posts covering integrations of Google Maps APIs to help your apps provide great maps user experiences. What’s a zen pattern? Simply put, a design pattern that results in harmonious user experiences.
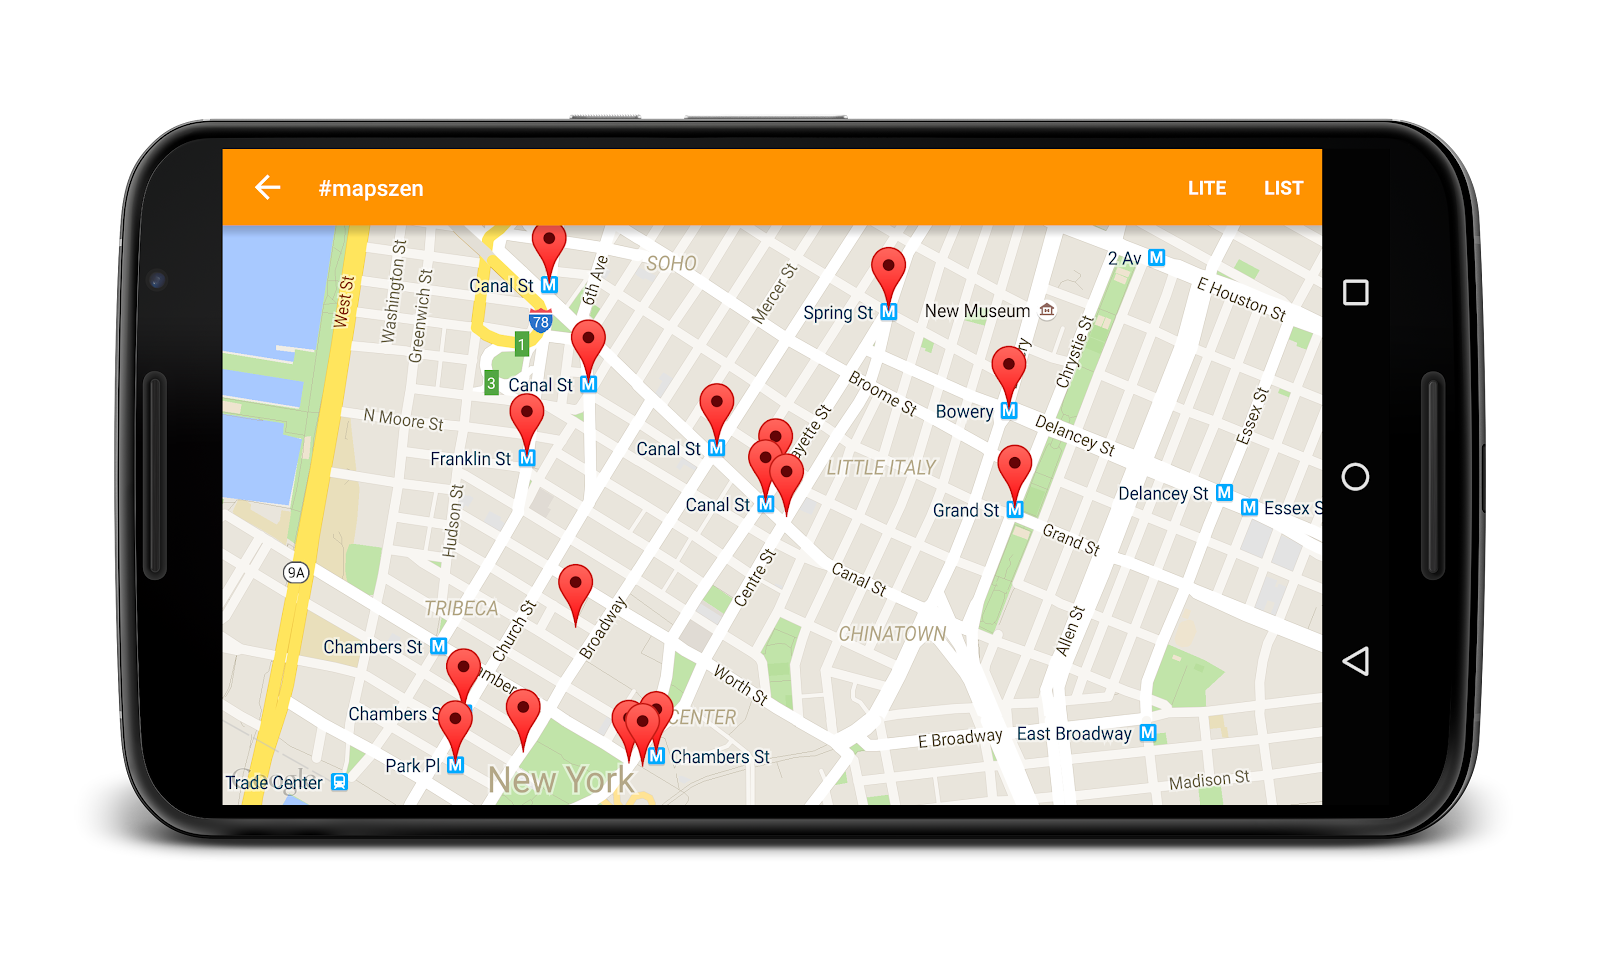
First is on the map itself. Here, we remove the UI and let the map markers be the primary point of interaction. This makes for a very immersive experience, however it's only effective if the markers fit comfortably on one screen. If the user has to zoom or scroll, the emphasis of your collection is lost. For example, “Train stations near me” works well since the results are co-located.
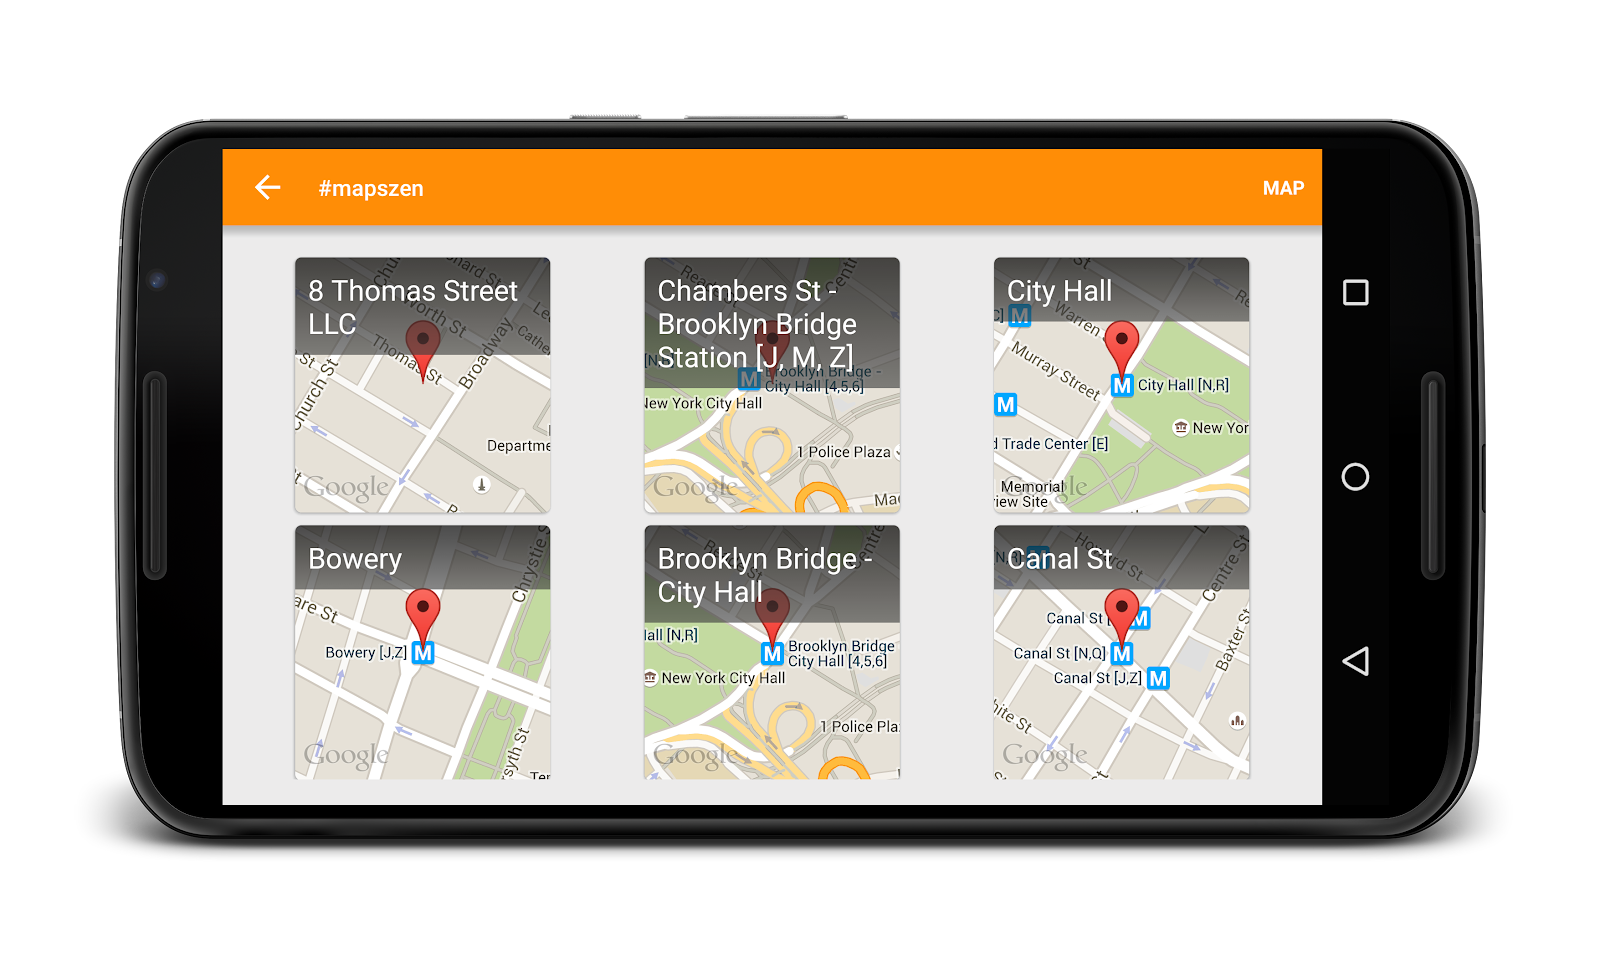
The second method of displaying a list of places that are spread out —it uses map thumbnails. The Maps Android API offers Lite mode — an ideal mode for such scenarios.
Lite mode provides a static map; effectively just the image of a map without the ability for the user to pan, or tilt the camera. This limited functionality, however, comes with some big benefits — it’s super fast and uses less memory. Additionally, you still get click listeners, markers and polylines. Lite mode makes it possible to show lists of maps — they are just images so you can instantiate many of these.
Enabling Lite mode is simple. If you’re creating your maps in Java, on creation, simply specify litemode in the GoogleMapOptions object as shown below.
GoogleMapOptions options = new GoogleMapOptions().liteMode(true);If your map is declared via layouts, add the xml property in your layouts as shown below. Be sure to include the map namespace since it makes the litemode attribute available.
<fragment xmlns:android="http://schemas.android.com/apk/res/android"
    xmlns:map="http://schemas.android.com/apk/res-auto"
    android:name="com.google.android.gms.maps.MapFragment"
    android:id="@+id/map"
    android:layout_width="match_parent"
    android:layout_height="match_parent"
    map:liteMode="true"/>
At some point, you may need to replace the lite mode map with the fully-interactive one. In that situation, you can gracefully transition into a regular map triggered by a touch event. In the image below, Android Lollipop transitions are being used across screens. You can see the big map dissolve and the grid implode in place. For users on older versions of Android, a reasonable fallback is to instantiate a MapFragment and animate it into place.
With this technique, we’re able to mix and match Lite mode and regular maps seamlessly. I hope you’ve now seen the lite — Lite mode that is. It enables you to show multiple maps simultaneously whilst keeping your app performant.