Tag Archives: Low-Light Photography

Astrophotography with Night Sight on Pixel Phones


Taking pictures of outdoor scenes at night has so far been the domain of large cameras, such as DSLRs, which are able to achieve excellent image quality, provided photographers are willing to put up with bulky equipment and sometimes tricky postprocessing. A few years ago experiments with phone camera nighttime photography produced pleasing results, but the methods employed were impractical for all but the most dedicated users.

Night Sight, introduced last year as part of the Google Camera App for the Pixel 3, allows phone photographers to take good-looking handheld shots in environments so dark that the normal camera mode would produce grainy, severely underexposed images. In a previous blog post our team described how Night Sight is able to do this, with a technical discussion presented at SIGGRAPH Asia 2019.

This year’s version of Night Sight pushes the boundaries of low-light photography with phone cameras. By allowing exposures up to 4 minutes on Pixel 4, and 1 minute on Pixel 3 and 3a, the latest version makes it possible to take sharp and clear pictures of the stars in the night sky or of nighttime landscapes without any artificial light.
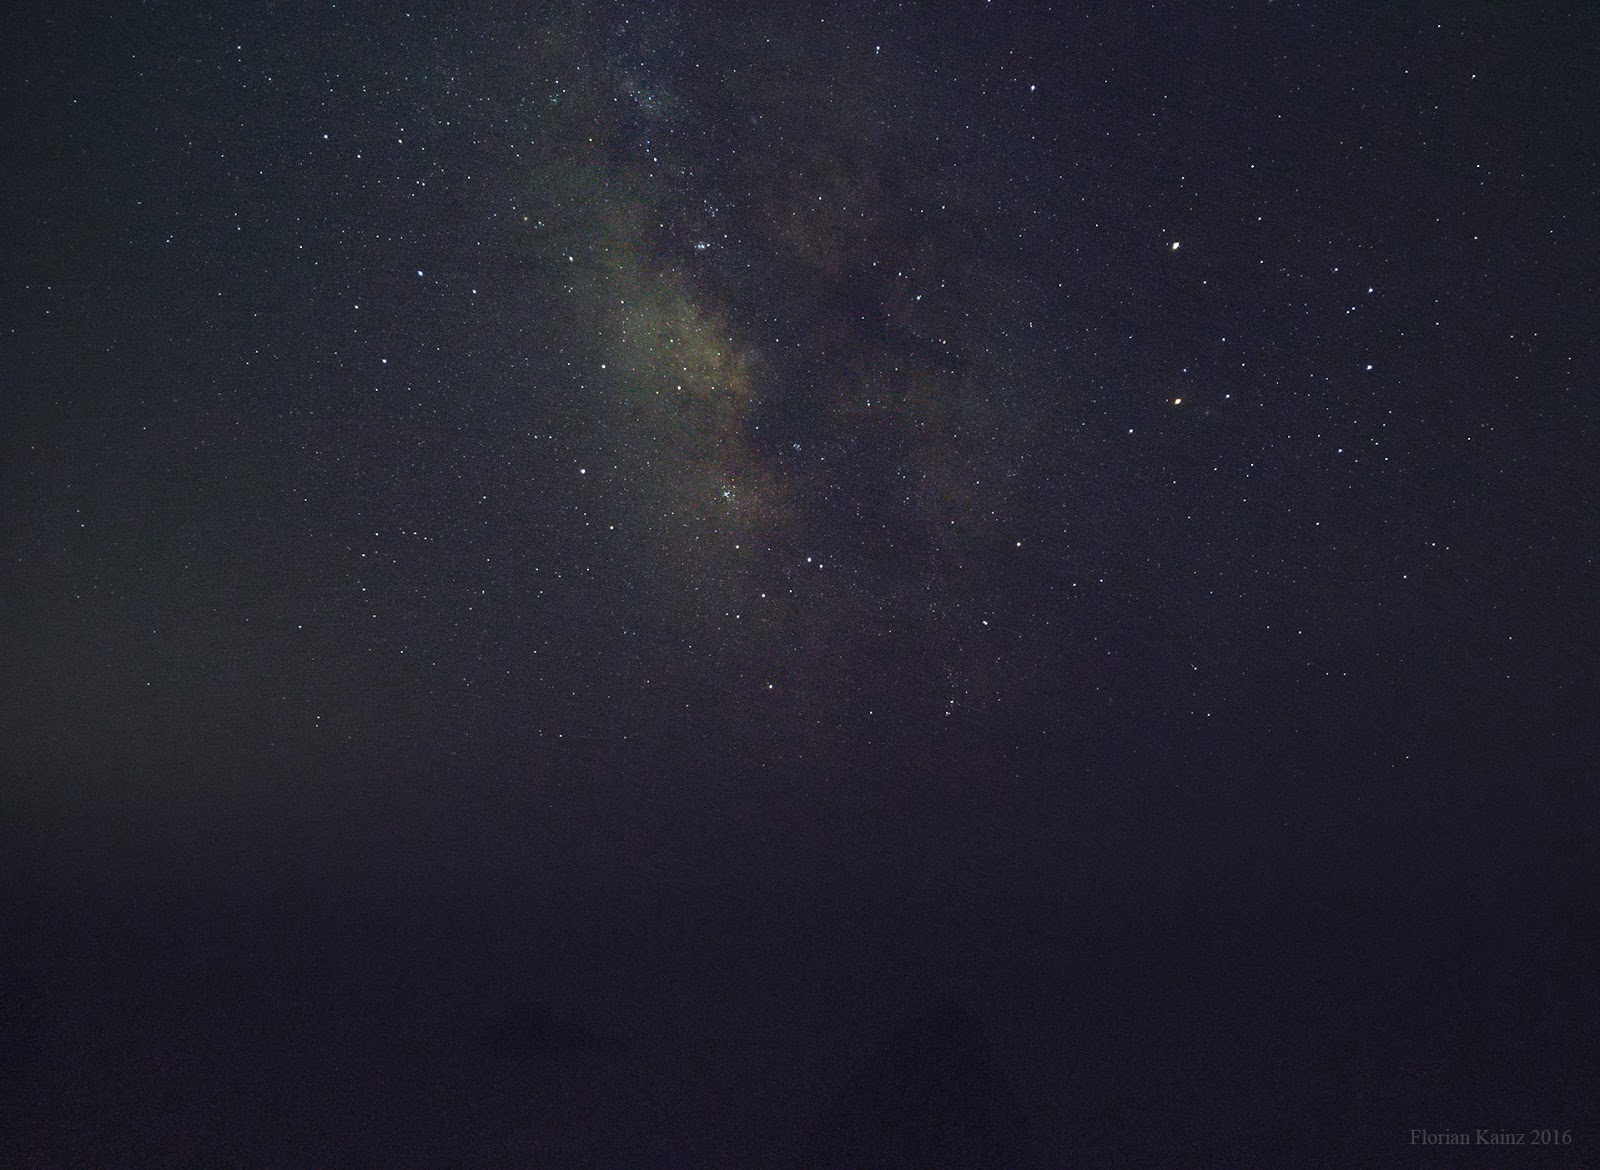
The Milky Way as seen from the summit of Haleakala volcano on a cloudless and moonless September night, captured using the Google Camera App running on a Pixel 4 XL phone. The image has not been retouched or post-processed in any way. It shows significantly more detail than a person can see with the unaided eye on a night this dark. The dust clouds along the Milky Way are clearly visible, the sky is covered with thousands of stars, and unlike human night vision, the picture is colorful.
A Brief Overview of Night Sight
The amount of light detected by the camera’s image sensor inherently has some uncertainty, called “shot noise,” which causes images to look grainy. The visibility of shot noise decreases as the amount of light increases; therefore, it is best for the camera to gather as much light as possible to produce a high-quality image.

How much light reaches the image sensor in a given amount of time is limited by the aperture of the camera lens. Extending the exposure time for a photo increases the total amount of light captured, but if the exposure is long, motion in the scene being photographed and unsteadiness of the handheld camera can cause blur. To overcome this, Night Sight splits the exposure into a sequence of multiple frames with shorter exposure times and correspondingly less motion blur. The frames are first aligned, compensating for both camera shake and in-scene motion, and then averaged, with careful treatment of cases where perfect alignment is not possible. While individual frames may be fairly grainy, the combined, averaged image looks much cleaner.

Experimenting with Exposure Time
Soon after the original Night Sight was released, we started to investigate taking photos in very dark outdoor environments with the goal of capturing the stars. We realized that, just as with our previous experiments, high quality pictures would require exposure times of several minutes. Clearly, this cannot work with a handheld camera; the phone would have to be placed on a tripod, a rock, or whatever else might be available to hold the camera steady.

Just as with handheld Night Sight photos, nighttime landscape shots must take motion in the scene into account — trees sway in the wind, clouds drift across the sky, and the moon and the stars rise in the east and set in the west. Viewers will tolerate motion-blurred clouds and tree branches in a photo that is otherwise sharp, but motion-blurred stars that look like short line segments look wrong. To mitigate this, we split the exposure into frames with exposure times short enough to make the stars look like points of light. Taking pictures of real night skies we found that the per-frame exposure time should not exceed 16 seconds.
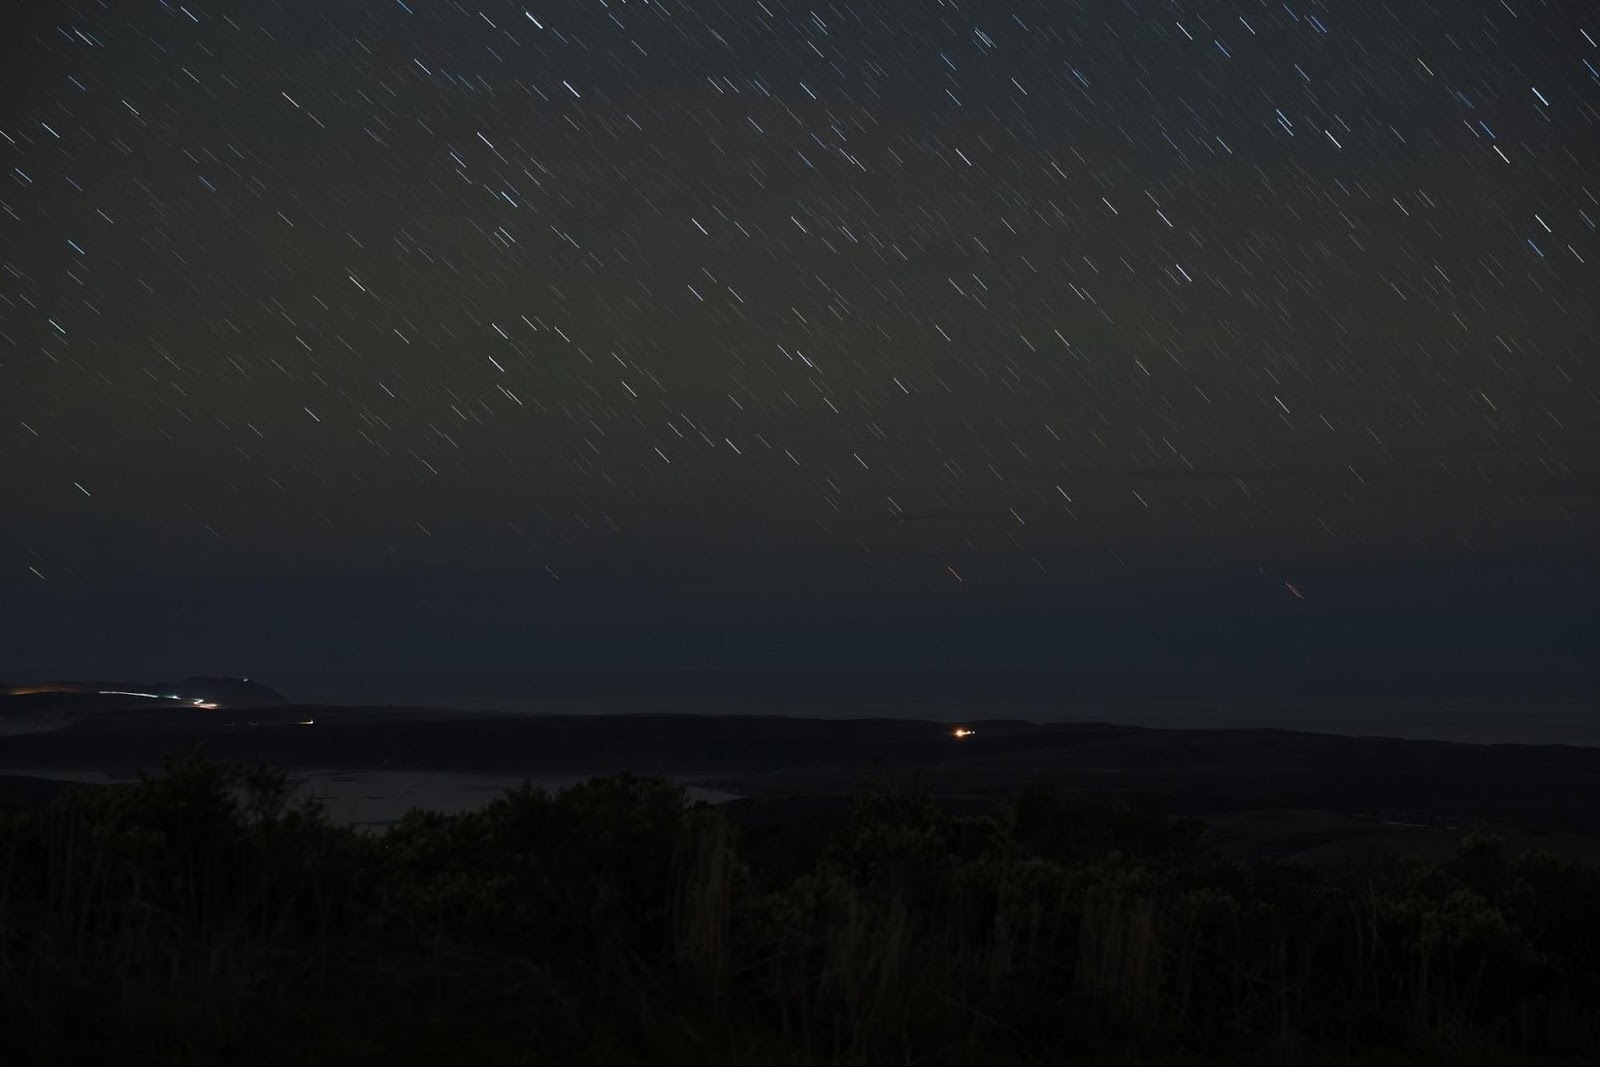
Motion-blurred stars in a single-frame two-minute exposure.
While the number of frames we can capture for a single photo, and therefore the total exposure time, is limited by technical considerations, we found that it is more tightly constrained by the photographer’s patience. Few are willing to wait more than four minutes for a picture, so we limited a single Night Sight image to at most 15 frames with up to 16 seconds per frame.

Sixteen-second exposures allow us to capture enough light to produce recognizable images but a useable camera app capable of taking pictures that look great must deal with additional issues that are unique to low-light photography.

Dark Current and Hot Pixels
Dark current causes CMOS image sensors to record a spurious signal, as if the pixels were exposed to a small amount of light, even when no actual light is present. The effect is negligible when exposure times are short, but it becomes significant with multi-second captures. Due to unavoidable imperfections in the sensor’s silicon substrate, some pixels exhibit higher dark current than their neighbors. In a recorded frame these “warm pixels,” as well as defective “hot pixels,” are visible as tiny bright dots.

Warm and hot pixels can be identified by comparing the values of neighboring pixels within the same frame and across the sequence of frames recorded for a photo, and looking for outliers. Once an outlier has been detected, it is concealed by replacing its value with the average of its neighbors. Since the original pixel value is discarded, there is a loss of image information, but in practice this does not noticeably affect image quality.
Left: A small region of a long-exposure image with hot pixels, and warm pixels caused by dark current nonuniformity. Right: The same image after outliers have been removed. Fine details in the landscape, including small points of light, are preserved.
Scene Composition
Mobile phones use their screens as electronic viewfinders — the camera captures a continuous stream of frames that is displayed as a live video in order to aid with shot composition. The frames are simultaneously used by the camera’s autofocus, auto exposure, and auto white balance systems.

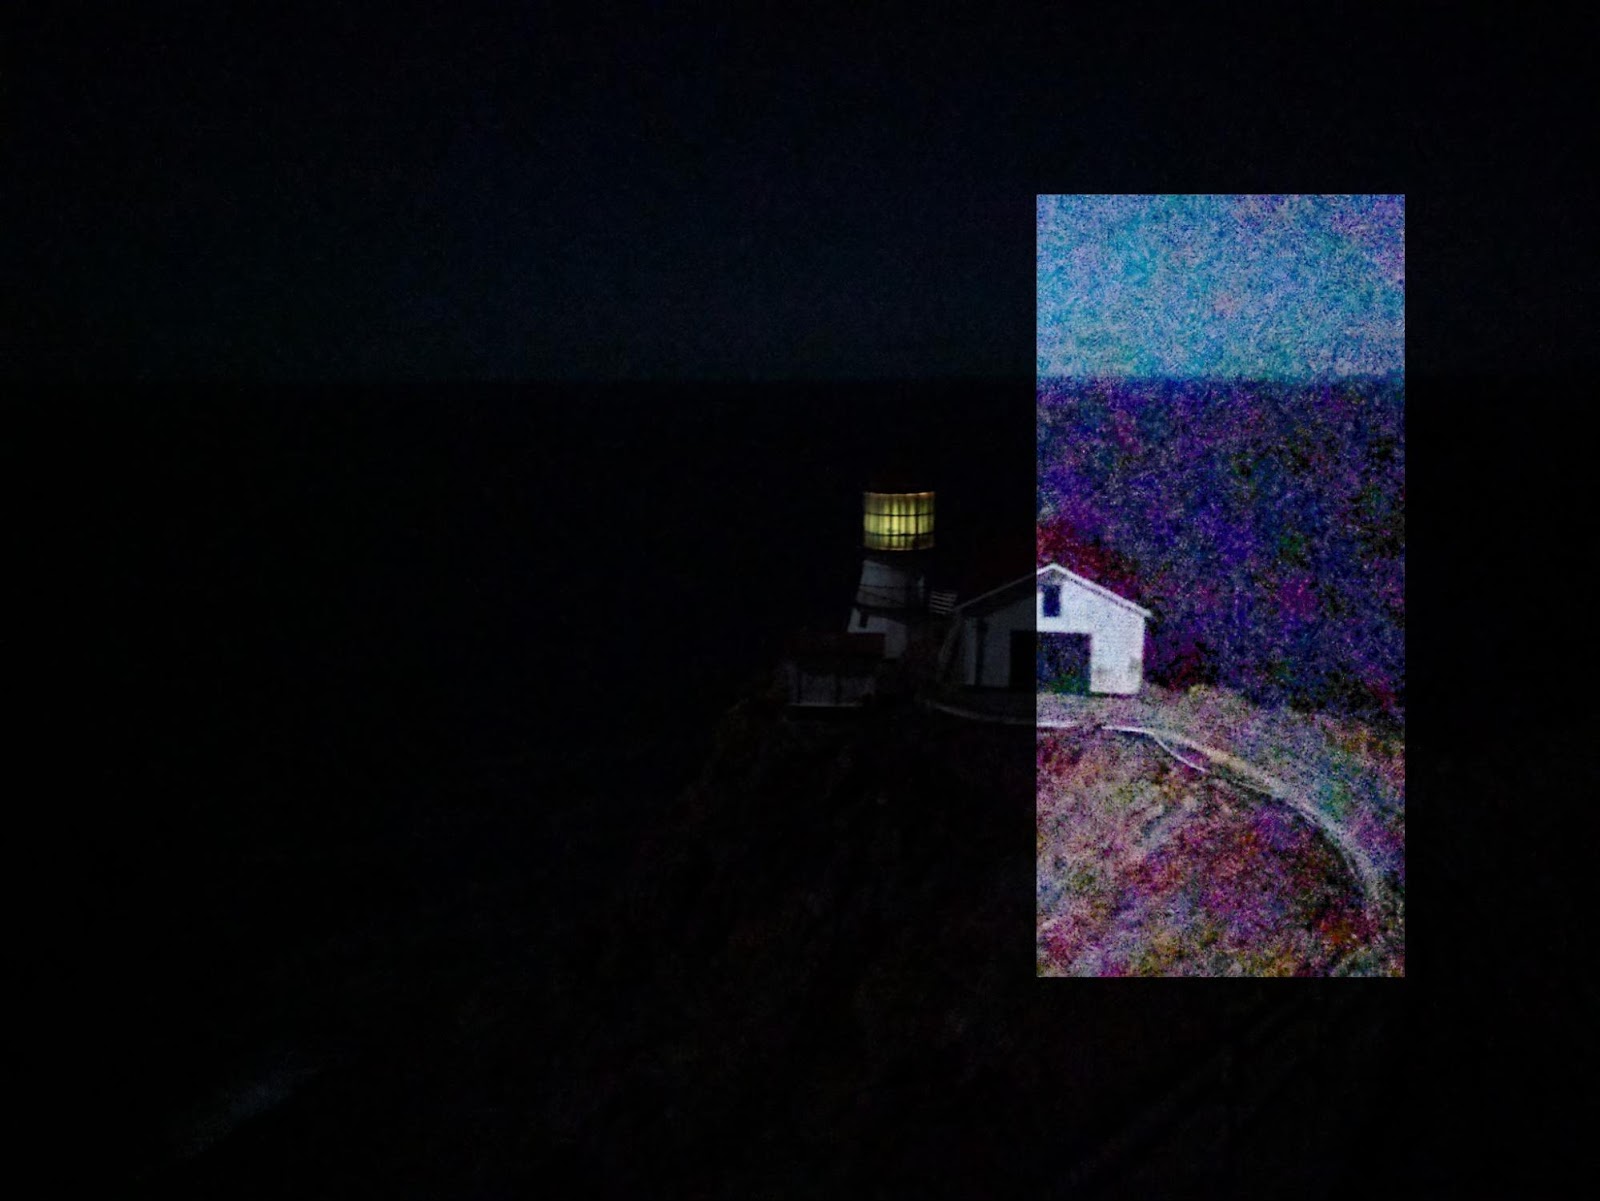
To feel responsive to the photographer, the viewfinder is updated at least 15 times per second, which limits the viewfinder frame exposure time to 66 milliseconds. This makes it challenging to display a detailed image in low-light environments. At light levels below the rough equivalent of a full moon or so, the viewfinder becomes mostly gray — maybe showing a few bright stars, but none of the landscape — and composing a shot becomes difficult.

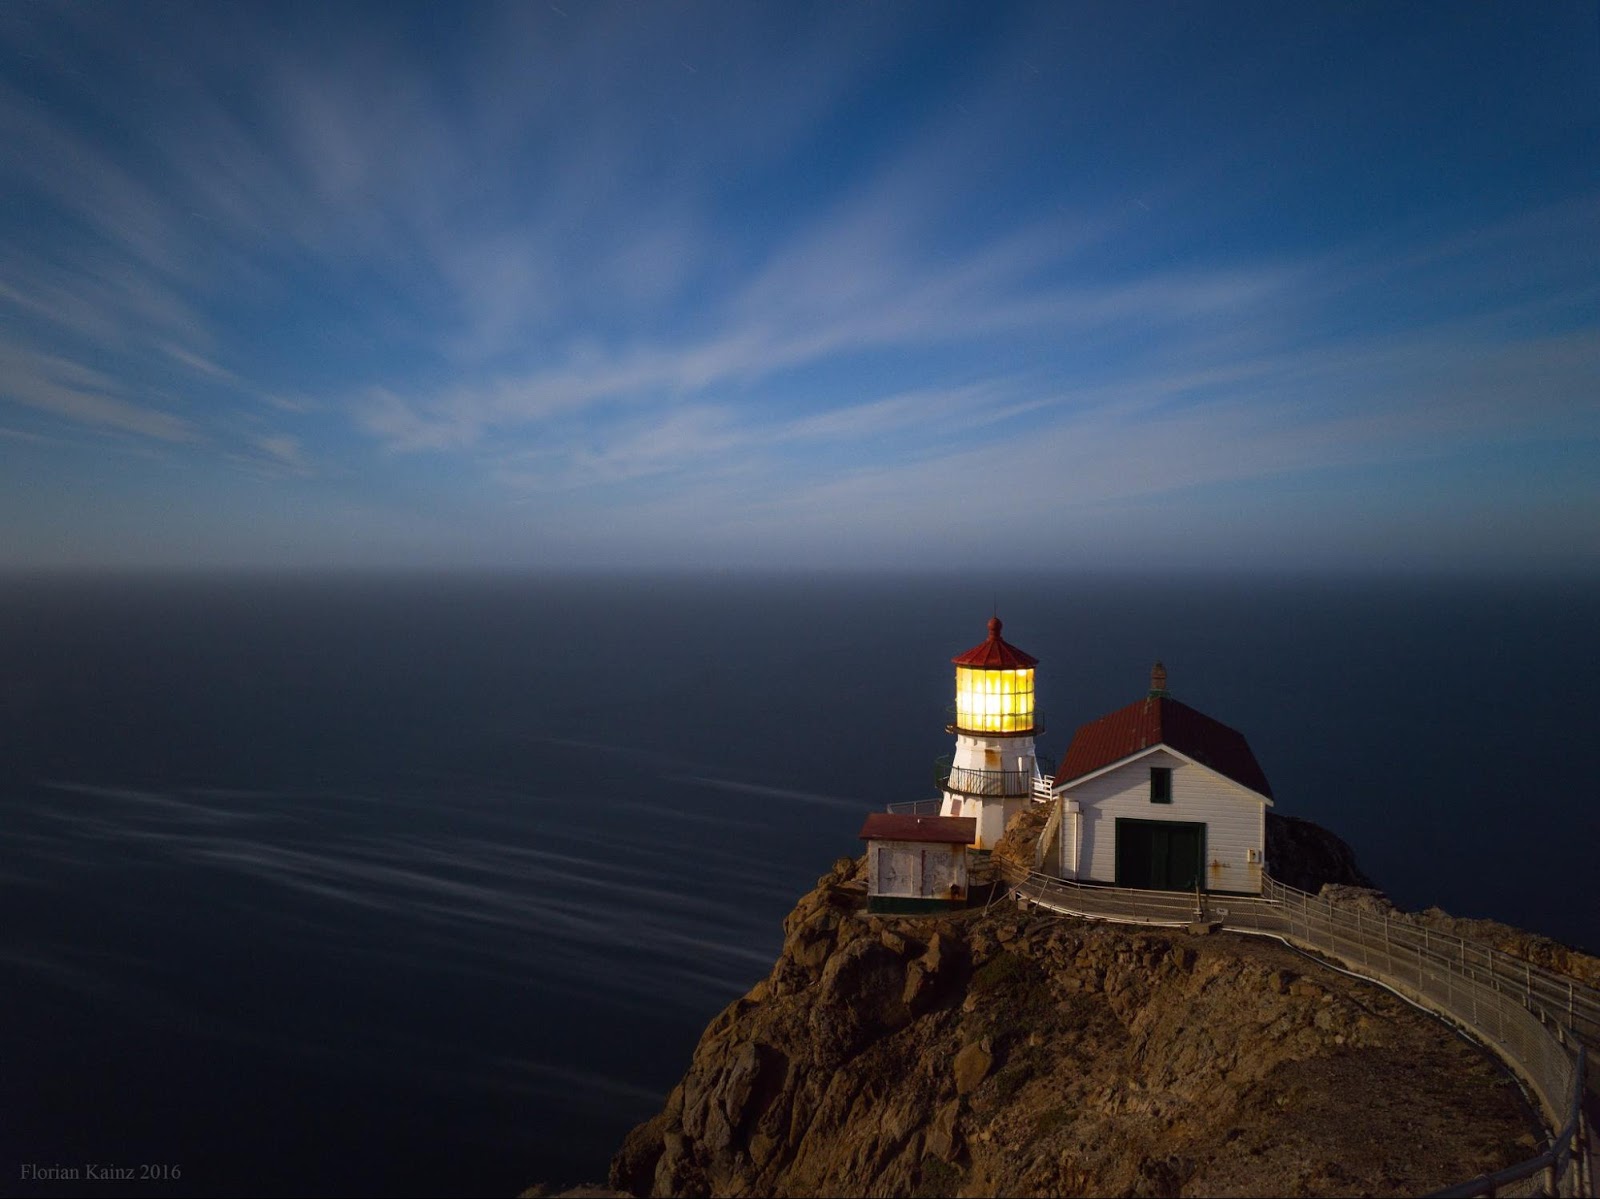
To assist in framing the scene in extremely low light, Night Sight displays a “post-shutter viewfinder”. After the shutter button has been pressed, each long-exposure frame is displayed on the screen as soon as it has been captured. With exposure times up to 16 seconds, these frames have collected almost 250 times more light than the regular viewfinder frames, allowing the photographer to easily see image details as soon as the first frame has been captured. The composition can then be adjusted by moving the phone while the exposure continues. Once the composition is correct, the initial shot can be stopped, and a second shot can be captured where all frames have the desired composition.
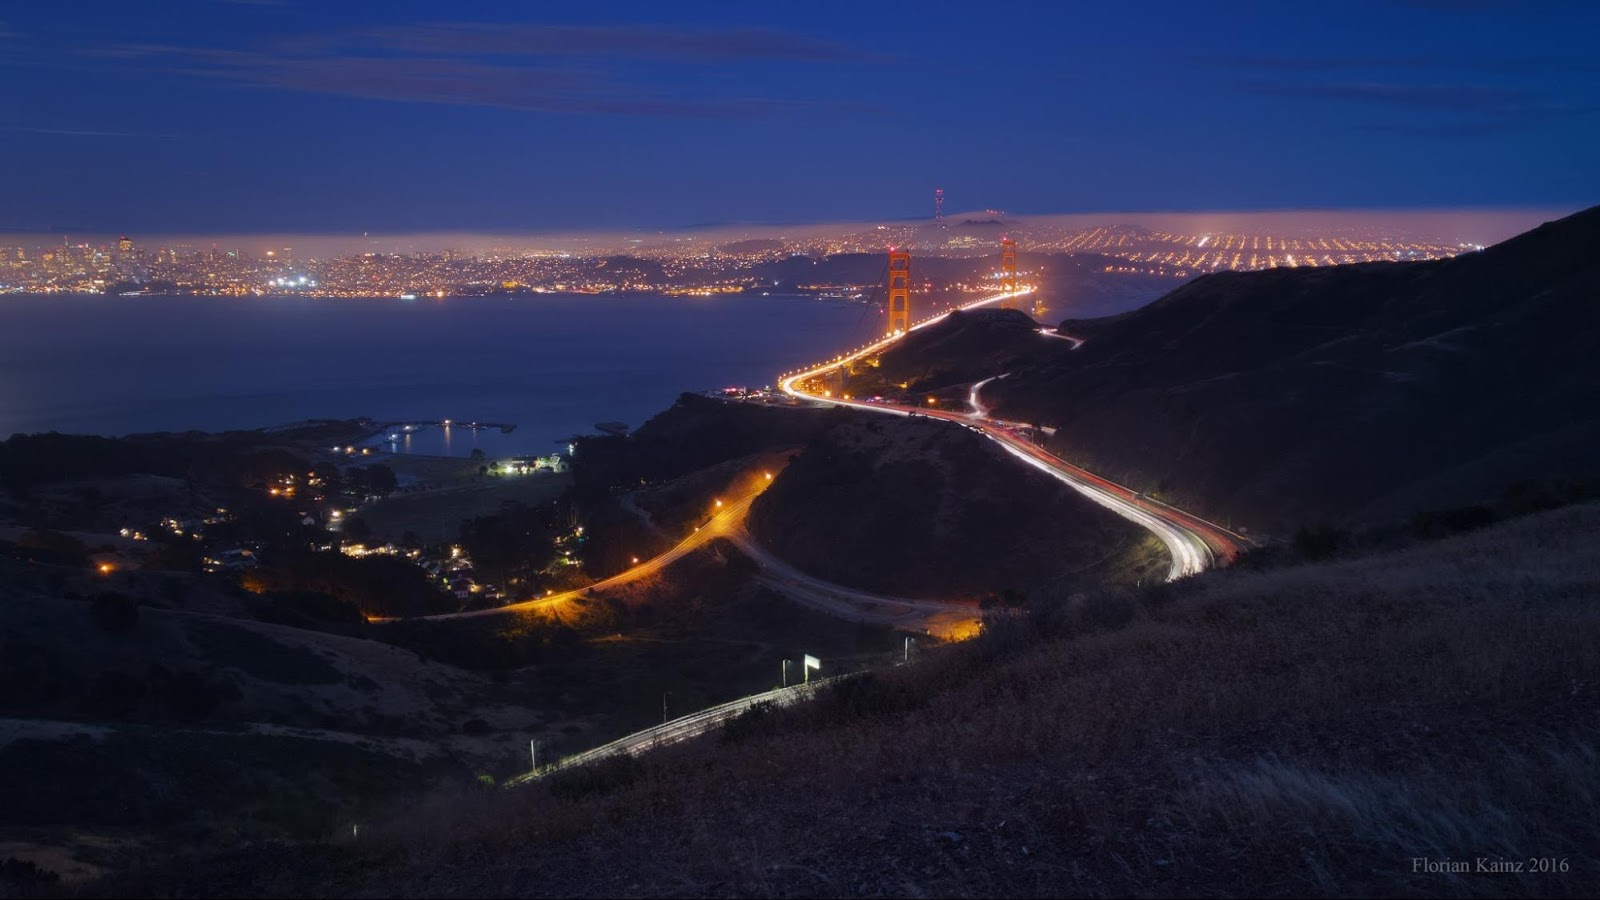
Left: The live Night Sight viewfinder in a very dark outdoor environment. Except for a few points of light from distant buildings, the landscape and the sky are largely invisible. Right: The post-shutter viewfinder during a long exposure shot. The image is much clearer; it updates after every long-exposure frame.
Autofocus
Autofocus ensures that the image captured by the camera is sharp. In normal operation, the incoming viewfinder frames are analyzed to determine how far the lens must be from the sensor to produce an in-focus image, but in very low light the viewfinder frames can be so dark and grainy that autofocus fails due to lack of detectable image detail. When this happens, Night Sight on Pixel 4 switches to “post-shutter autofocus.” After the user presses the shutter button, the camera captures two autofocus frames with exposure times up to one second, long enough to detect image details even in low light. These frames are used only to focus the lens and do not contribute directly to the final image.

Even though using long-exposure frames for autofocus leads to consistently sharp images at light levels low enough that the human visual system cannot clearly distinguish objects, sometimes it gets too dark even for post-shutter autofocus. In this case the camera instead focuses at infinity. In addition, Night Sight includes manual focus buttons, allowing the user to focus on nearby objects in very dark conditions.

Sky Processing
When images of very dark environments are viewed on a screen, they are displayed much brighter than the original scenes. This can change the viewer’s perception of the time of day when the photos were captured. At night we expect the sky to be dark. If a picture taken at night shows a bright sky, then we see it as a daytime scene, perhaps with slightly unusual lighting.

This effect is countered in Night Sight by selectively darkening the sky in photos of low-light scenes. To do this, we use machine learning to detect which regions of an image represent sky. An on-device convolutional neural network, trained on over 100,000 images that were manually labeled by tracing the outlines of sky regions, identifies each pixel in a photograph as “sky” or “not sky.”
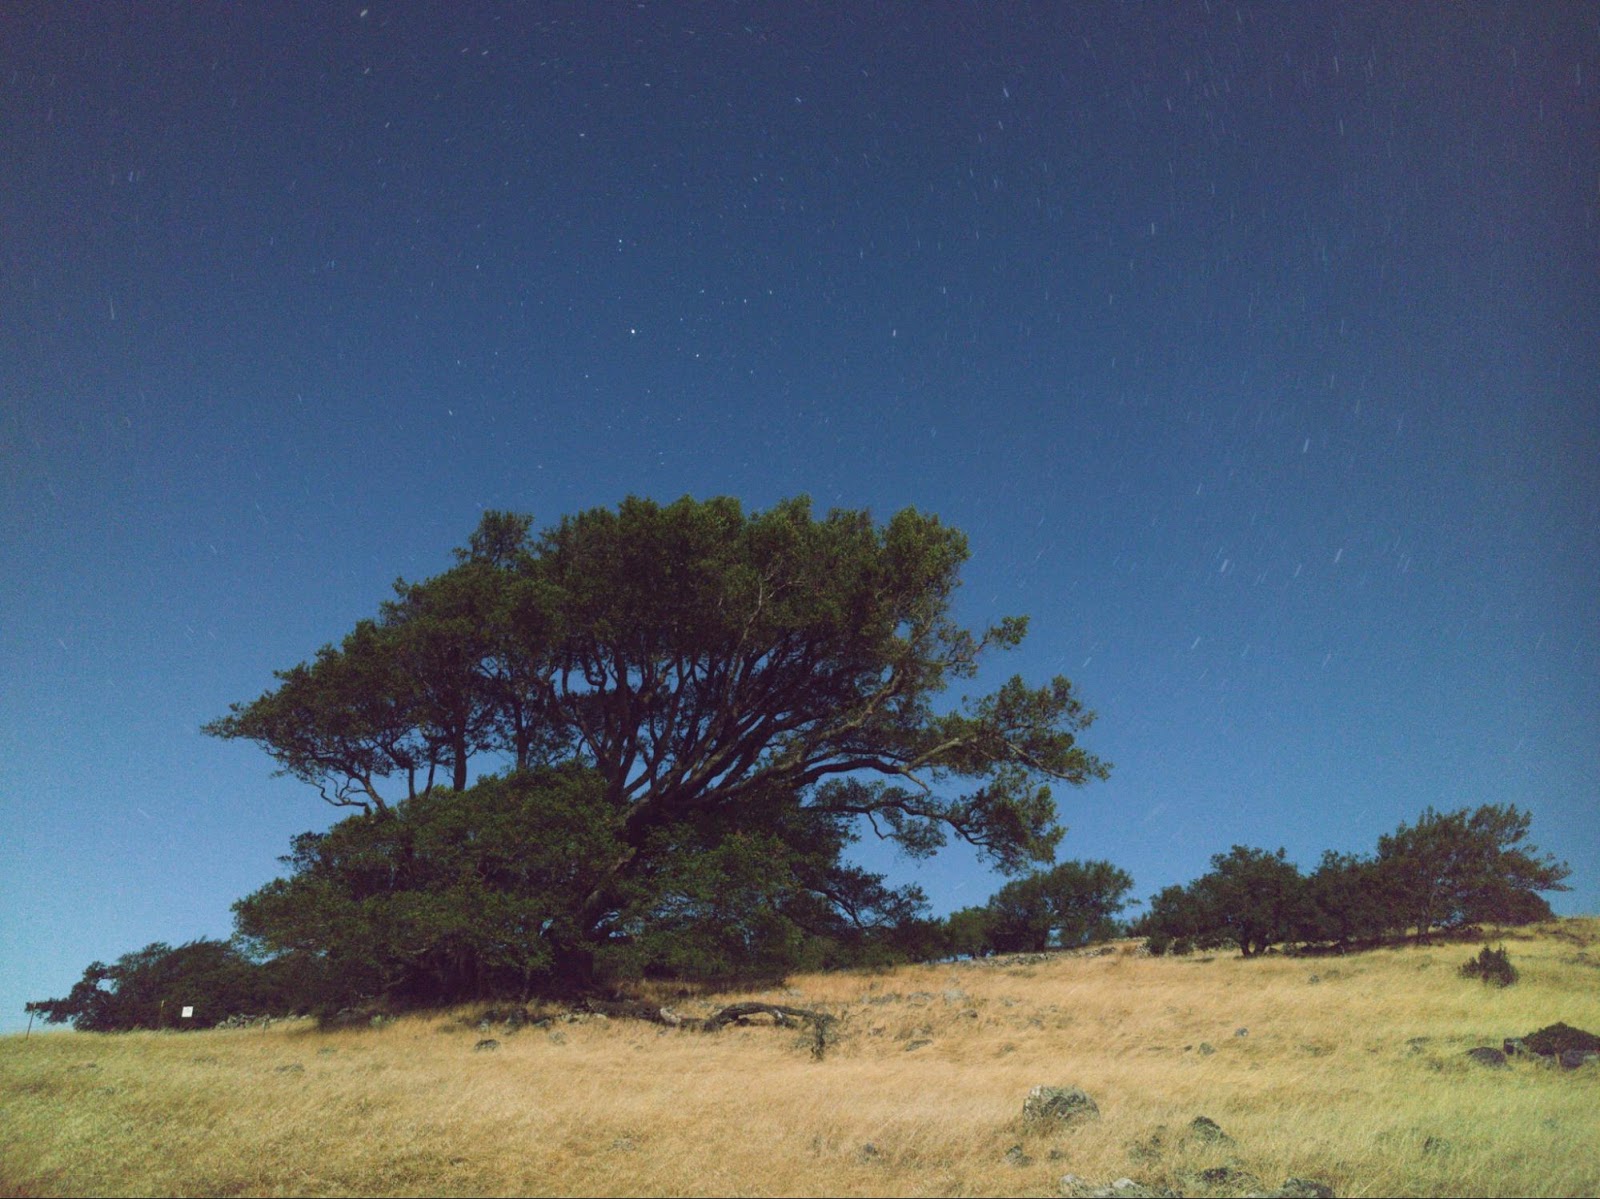
A landscape picture taken on a bright full-moon night, without sky processing (left half), and with sky darkening (right half). Note that the landscape is not darkened.
Sky detection also makes it possible to perform sky-specific noise reduction, and to selectively increase contrast to make features like clouds, color gradients, or the Milky Way more prominent.

Results
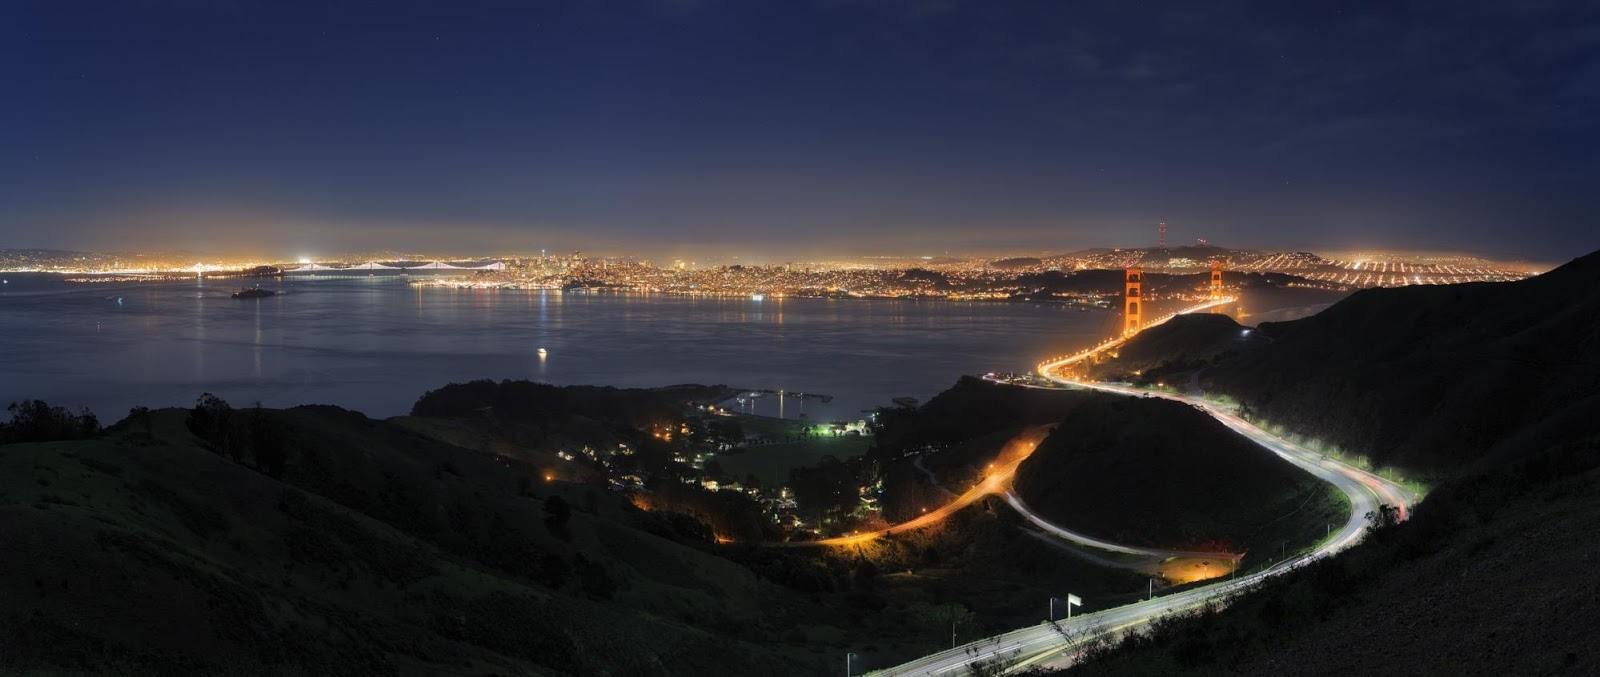
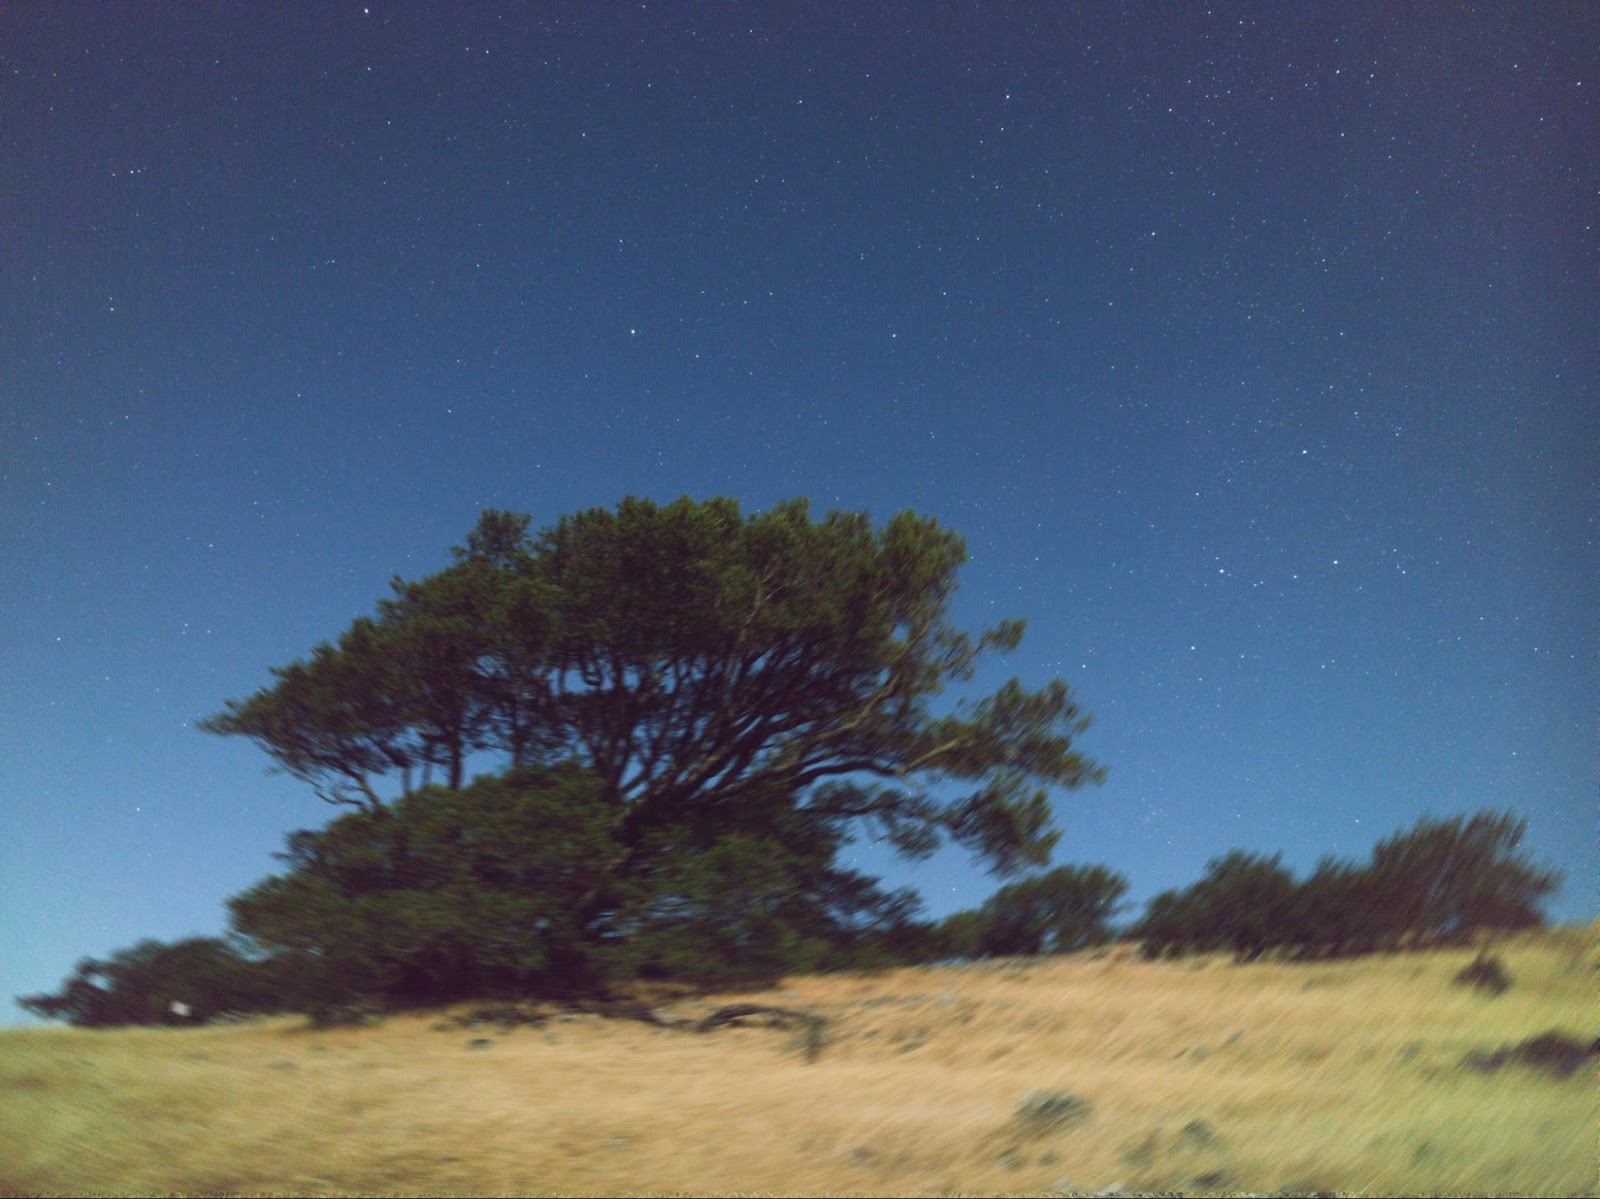
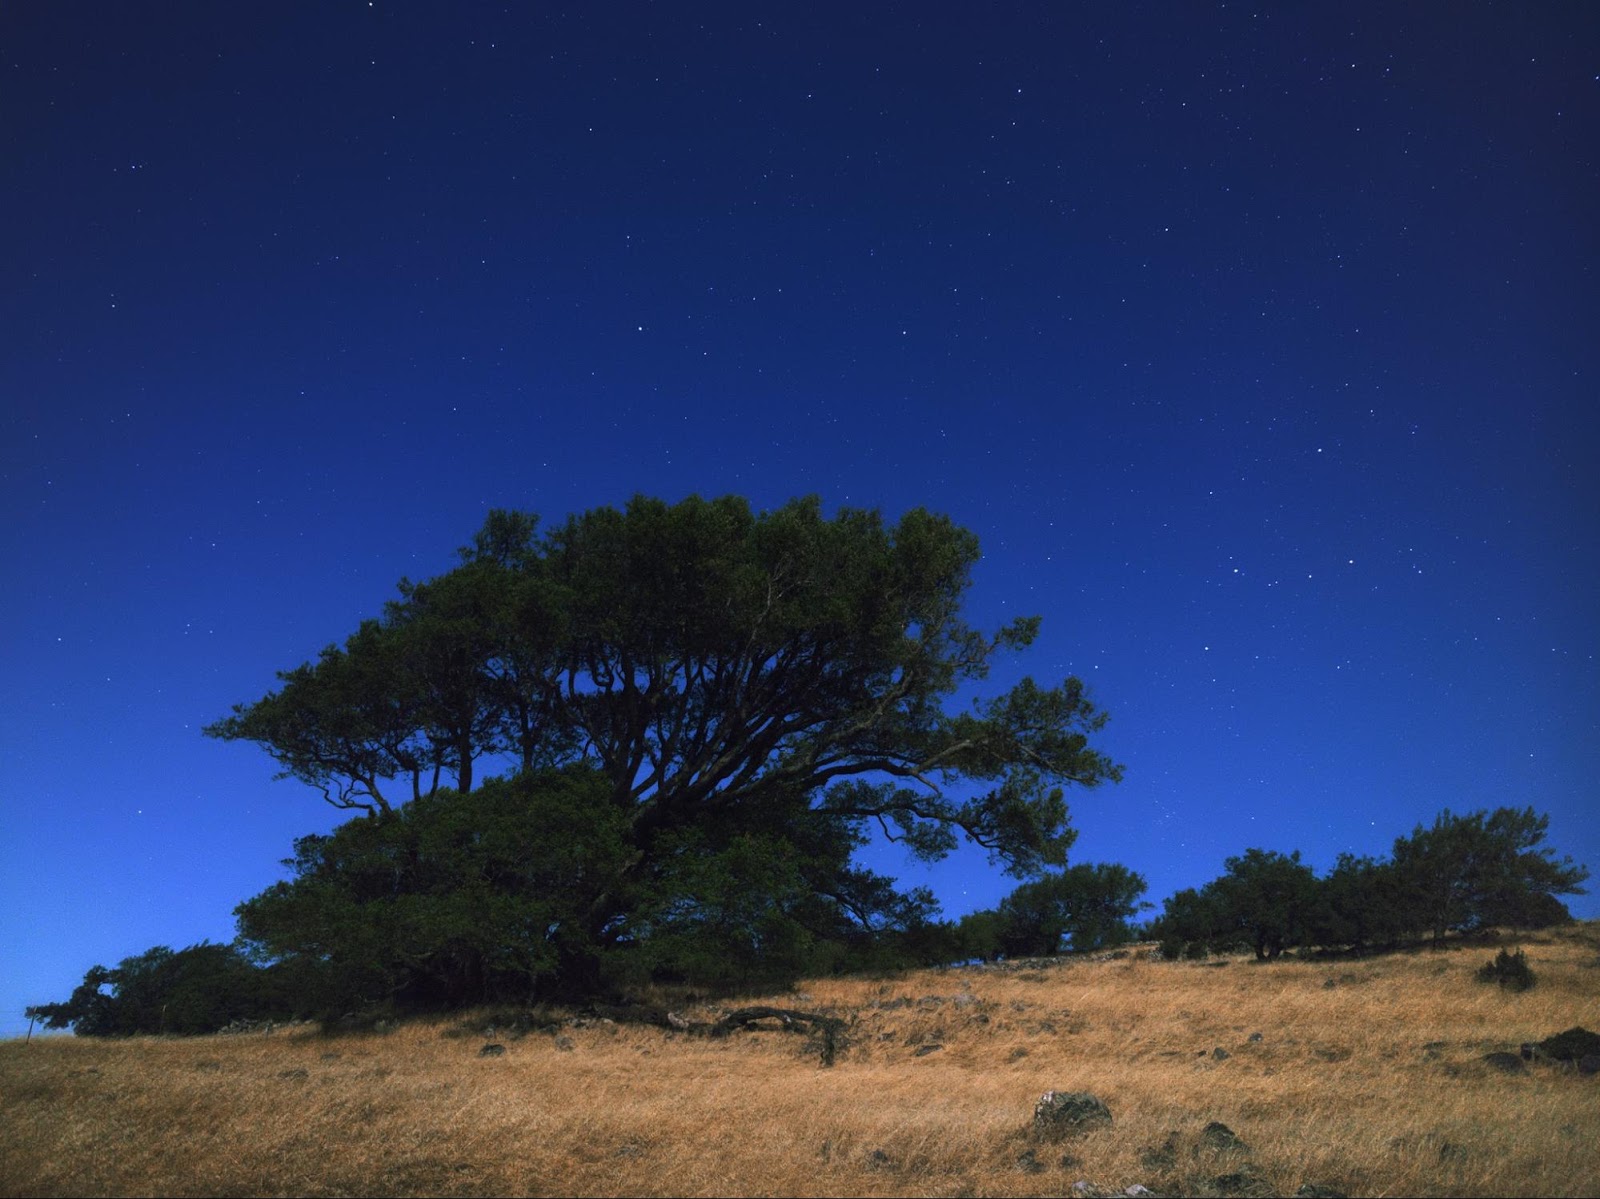
With the phone on a tripod, Night Sight produces sharp pictures of star-filled skies, and as long as there is at least a small amount of moonlight, landscapes will be clear and colorful.

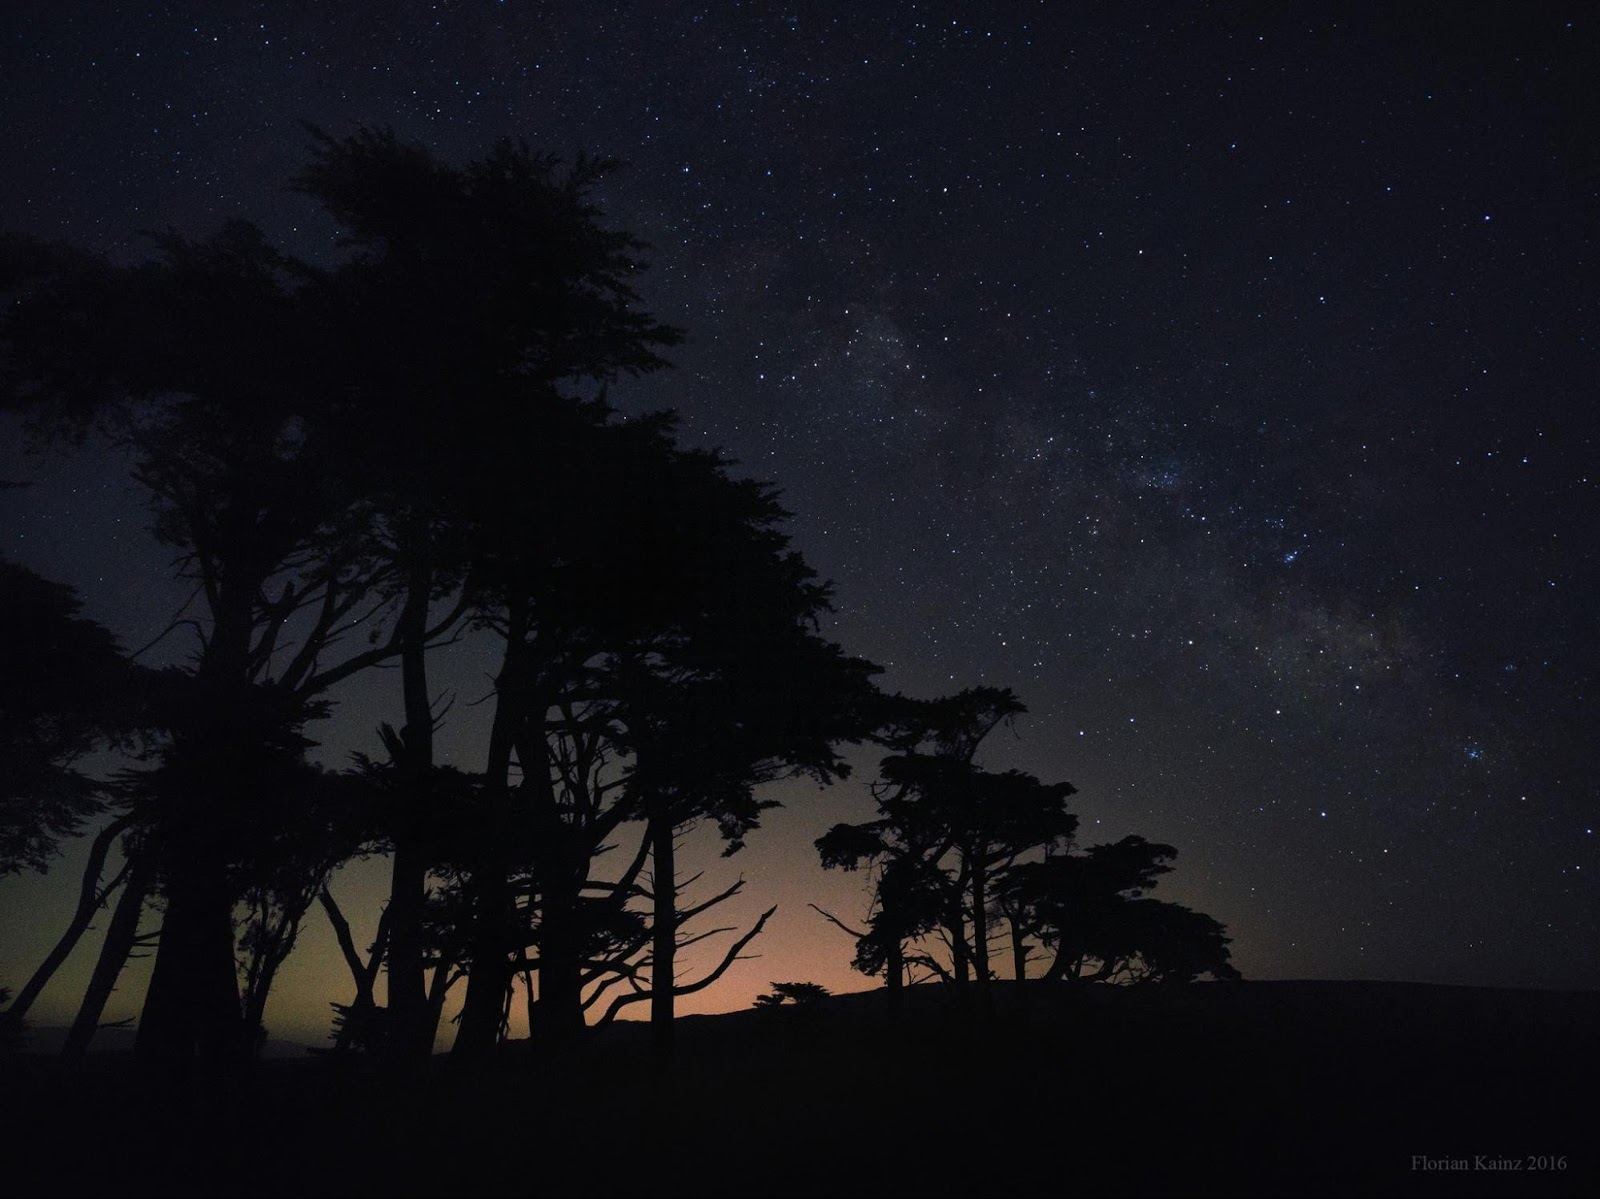
Of course, the phone’s capabilities are not limitless, and there is always room for improvement. Although nighttime scenes are dark overall, they often contain bright light sources such as the moon, distant street lamps, or prominent stars. While we can capture a moonlit landscape, or details on the surface of the moon, the extremely large brightness range, which can exceed 500,000:1, so far prevents us from capturing both in the same image. Also, when the stars are the only source of illumination, we can take clear pictures of the sky, but the landscape is only visible as a silhouette.

For Pixel 4 we have been using the brightest part of the Milky Way, near the constellation Sagittarius, as a benchmark for the quality of images of a moonless sky. By that standard Night Sight is doing very well. Although Milky Way photos exhibit some residual noise, they are pleasing to look at, showing more stars and more detail than a person can see looking at the real night sky.
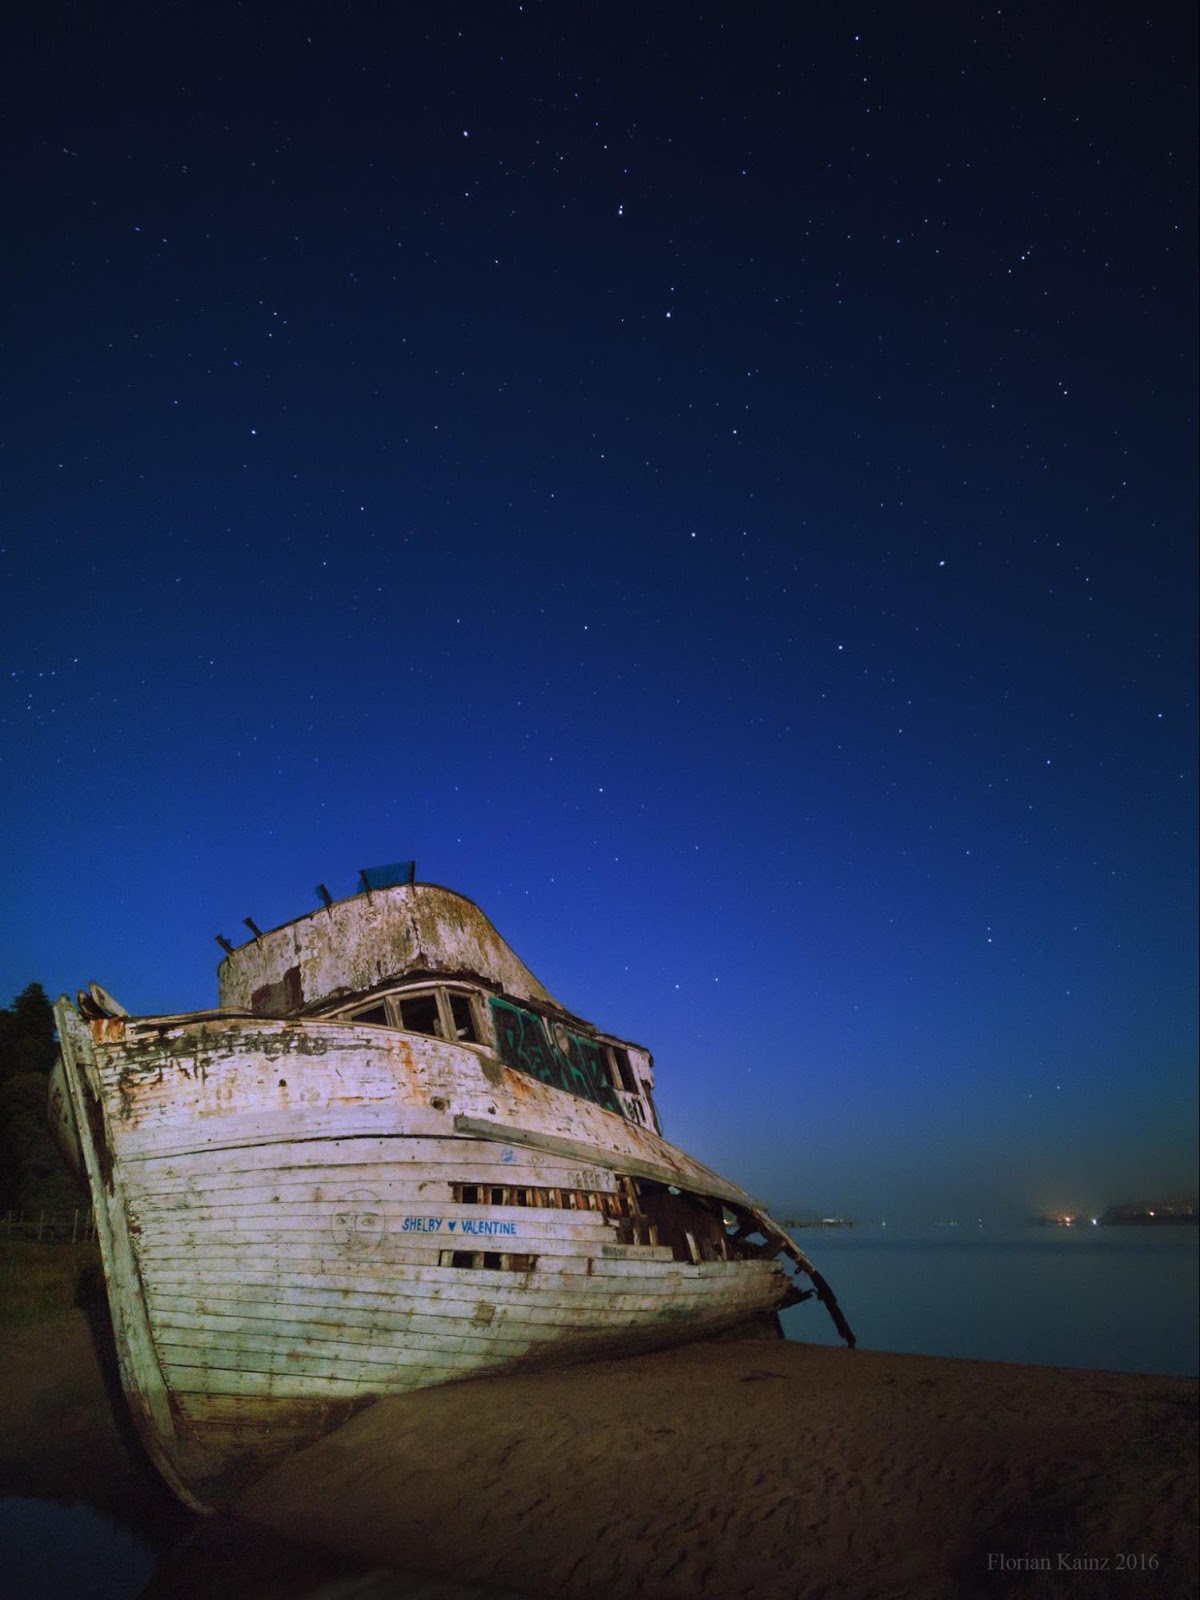
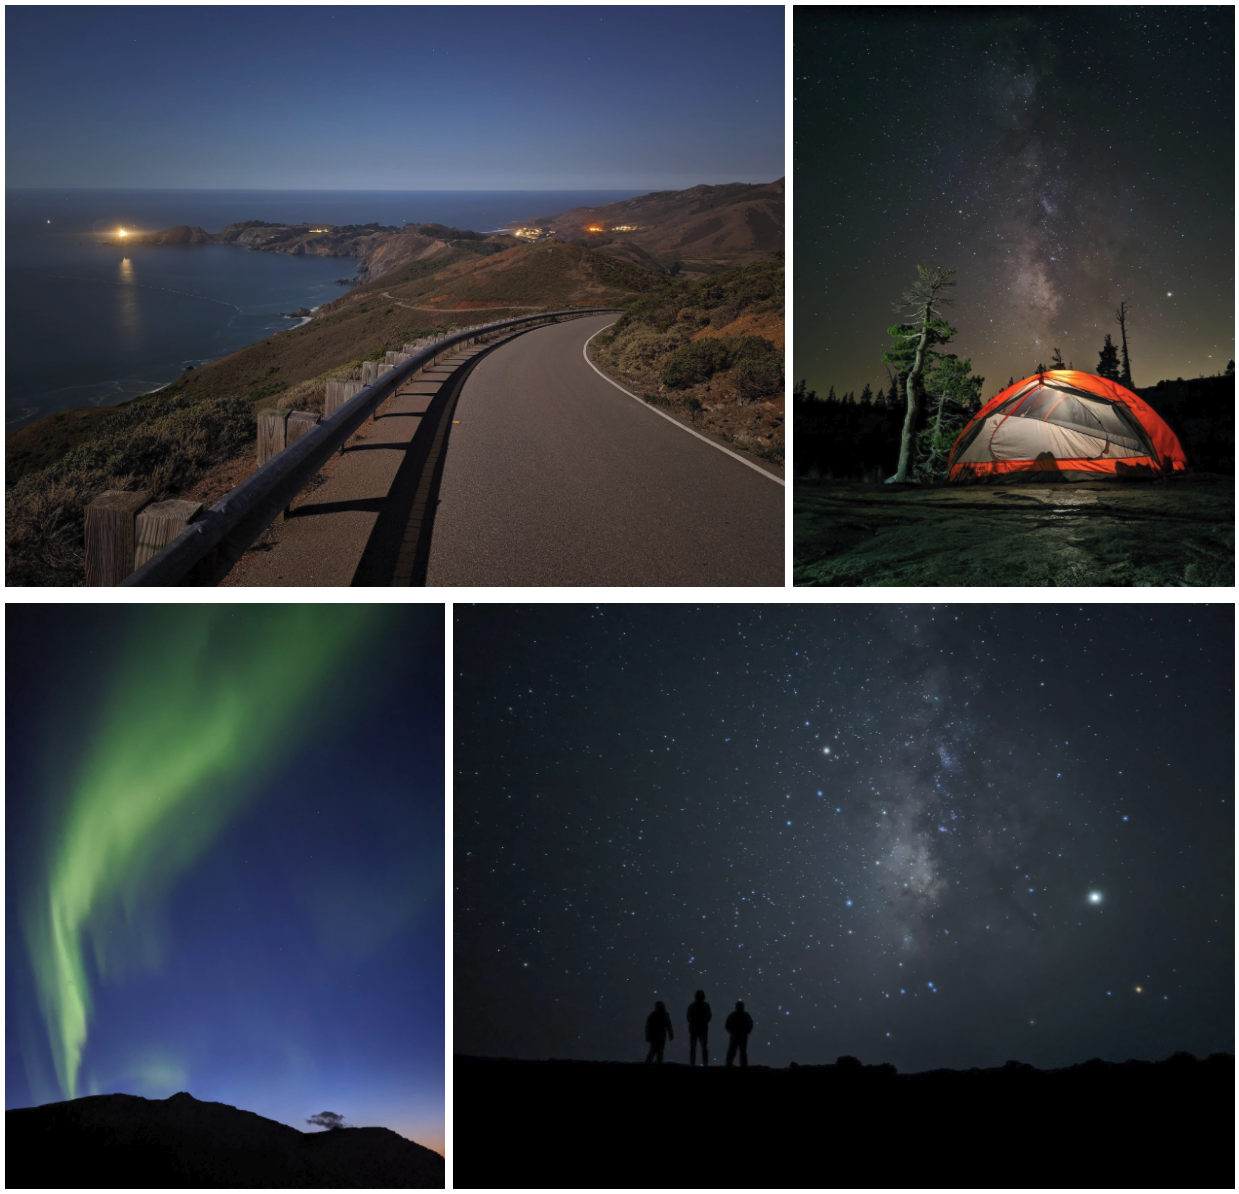
Examples of photos taken with the Google Camera App on Pixel 4. An album with more pictures can be found here.
Tips and Tricks
In the course of developing and testing Night Sight astrophotography we gained some experience taking outdoor nighttime pictures with Pixel phones, and we’d like to share a list of tips and tricks that have worked for us. You can find it here.

Acknowledgements
Night Sight is an ongoing collaboration between several teams at Google. Key contributors to the project include from the Gcam team, Orly Liba, Nikhil Karnad, Charles He, Manfred Ernst, Michael Milne, Andrew Radin, Navin Sarma, Jon Barron, Yun-Ta Tsai, Tianfan Xue, Jiawen Chen, Dillon Sharlet, Ryan Geiss, Sam Hasinoff, Alex Schiffhauer, Yael Pritch Knaan and Marc Levoy; from the Super Res Zoom team, Bart Wronski, Peyman Milanfar, and Ignacio Garcia Dorado; from the Google camera app team, Emily To, Gabriel Nava, Sushil Nath, Isaac Reynolds, and Michelle Chen; from the Android platform team, Ryan Chan, Ying Chen Lou, and Bob Hung; from the Mobile Vision team, Longqi (Rocky) Cai, Huizhong Chen, Emily Manoogian, Nicole Maffeo, and Tomer Meron; from Machine Perception, Elad Eban and Yair Movshovitz-Attias.

Source: Google AI Blog


Experimental Nighttime Photography with Nexus and Pixel


On a full moon night last year I carried a professional DSLR camera, a heavy lens and a tripod up to a hilltop in the Marin Headlands just north of San Francisco to take a picture of the Golden Gate Bridge and the lights of the city behind it.
A view of the Golden Gate Bridge from the Marin Headlands, taken with a DSLR camera (Canon 1DX, Zeiss Otus 28mm f/1.4 ZE). Click here for the full resolution image.
I thought the photo of the moonlit landscape came out well so I showed it to my (then) teammates in Gcam, a Google Research team that focuses on computational photography - developing algorithms that assist in taking pictures, usually with smartphones and similar small cameras. Seeing my nighttime photo, one of the Gcam team members challenged me to re-take it, but with a phone camera instead of a DSLR. Even though cameras on cellphones have come a long way, I wasn’t sure whether it would be possible to come close to the DSLR shot.

Probably the most successful Gcam project to date is the image processing pipeline that enables the HDR+ mode in the camera app on Nexus and Pixel phones. HDR+ allows you to take photos at low-light levels by rapidly shooting a burst of up to ten short exposures and averaging them them into a single image, reducing blur due to camera shake while collecting enough total light to yield surprisingly good pictures. Of course there are limits to what HDR+ can do. Once it gets dark enough the camera just cannot gather enough light and challenging shots like nighttime landscapes are still beyond reach.

The Challenges
To learn what was possible with a cellphone camera in extremely low-light conditions, I looked to the experimental SeeInTheDark app, written by Marc Levoy and presented at the ICCV 2015 Extreme Imaging Workshop, which can produce pictures with even less light than HDR+. It does this by accumulating more exposures, and merging them under the assumption that the scene is static and any differences between successive exposures must be due to camera motion or sensor noise. The app reduces noise further by dropping image resolution to about 1 MPixel. With SeeInTheDark it is just possible to take pictures, albeit fairly grainy ones, by the light of the full moon.

However, in order to keep motion blur due to camera shake and moving objects in the scene at acceptable levels, both HDR+ and SeeInTheDark must keep the exposure times for individual frames below roughly one tenth of a second. Since the user can’t hold the camera perfectly still for extended periods, it doesn’t make sense to attempt to merge a large number of frames into a single picture. Therefore, HDR+ merges at most ten frames, while SeeInTheDark progressively discounts older frames as new ones are captured. This limits how much light the camera can gather and thus affects the quality of the final pictures at very low light levels.

Of course, if we want to take high-quality pictures of low-light scenes (such as a landscape illuminated only by the moon), increasing the exposure time to more than one second and mounting the phone on a tripod or placing it on some other solid support makes the task a lot easier. Google’s Nexus 6P and Pixel phones support exposure times of 4 and 2 seconds respectively. As long as the scene is static, we should be able to record and merge dozens of frames to produce a single final image, even if shooting those frames takes several minutes.

Even with the use of a tripod, a sharp picture requires the camera’s lens to be focused on the subject, and this can be tricky in scenes with very low light levels. The two autofocus mechanisms employed by cellphone cameras — contrast detection and phase detection — fail when it’s dark enough that the camera's image sensor returns mostly noise. Fortunately, the interesting parts of outdoor scenes tend to be far enough away that simply setting the focus distance to infinity produces sharp images.

Experiments & Results
Taking all this into account, I wrote a simple Android camera app with manual control over exposure time, ISO and focus distance. When the shutter button is pressed the app waits a few seconds and then records up to 64 frames with the selected settings. The app saves the raw frames captured from the sensor as DNG files, which can later be downloaded onto a PC for processing.

To test my app, I visited the Point Reyes lighthouse on the California coast some thirty miles northwest of San Francisco on a full moon night. I pointed a Nexus 6P phone at the building and shot a burst of 32 four-second frames at ISO 1600. After covering the camera lens with opaque adhesive tape I shot an additional 32 black frames. Back at the office I loaded the raw files into Photoshop. The individual frames were very grainy, as one would expect given the tiny sensor in a cellphone camera, but computing the mean of all 32 frames cleaned up most of the grain, and subtracting the mean of the 32 black frames removed faint grid-like patterns caused by local variations in the sensor's black level. The resulting image, shown below, looks surprisingly good.
Point Reyes lighthouse at night, photographed with Google Nexus 6P (full resolution image here).
The lantern in the lighthouse is overexposed, but the rest of the scene is sharp, not too grainy, and has pleasing, natural looking colors. For comparison, a hand-held HDR+ shot of the same scene looks like this:
Point Reyes Lighthouse at night, hand-held HDR+ shot (full resolution image here). The inset rectangle has been brightened in Photoshop to roughly match the previous picture.
Satisfied with these results, I wanted to see if I could capture a nighttime landscape as well as the stars in the clear sky above it, all in one picture. When I took the photo of the lighthouse a thin layer of clouds conspired with the bright moonlight to make the stars nearly invisible, but on a clear night a two or four second exposure can easily capture the brighter stars. The stars are not stationary, though; they appear to rotate around the celestial poles, completing a full turn every 24 hours. The motion is slow enough to be invisible in exposures of only a few seconds, but over the minutes it takes to record a few dozen frames the stars move enough to turn into streaks when the frames are merged. Here is an example:
The North Star above Mount Burdell, single 2-second exposure. (full resolution image here).
Mean of 32 2-second exposures (full resolution image here).
Seeing streaks instead of pinpoint stars in the sky can be avoided by shifting and rotating the original frames such that the stars align. Merging the aligned frames produces an image with a clean-looking sky, and many faint stars that were hidden by noise in the individual frames become visible. Of course, the ground is now motion-blurred as if the camera had followed the rotation of the sky.
Mean of 32 2-second exposures, stars aligned (full resolution image here).
We now have two images; one where the ground is sharp, and one where the sky is sharp, and we can combine them into a single picture that is sharp everywhere. In Photoshop the easiest way to do that is with a hand-painted layer mask. After adjusting brightness and colors to taste, slight cropping, and removing an ugly "No Trespassing" sign we get a presentable picture:
The North Star above Mount Burdell, shot with Google Pixel, final image (full resolution image here).
Using Even Less Light
The pictures I've shown so far were shot on nights with a full moon, when it was bright enough that one could easily walk outside without a lantern or a flashlight. I wanted to find out if it was possible to take cellphone photos in even less light. Using a Pixel phone, I tried a scene illuminated by a three-quarter moon low in the sky, and another one with no moon at all. Anticipating more noise in the individual exposures, I shot 64-frame bursts. The processed final images still look fine:
Wrecked fishing boat in Inverness and the Big Dipper, 64 2-second exposures, shot with Google Pixel (full resolution image here).
Stars above Pierce Point Ranch, 64 2-second exposures, shot with Google Pixel (full resolution image here).
In the second image the distant lights of the cities around the San Francisco Bay caused the sky near the horizon to glow, but without moonlight the night was still dark enough to make the Milky Way visible. The picture looks noticeably grainier than my earlier moonlight shots, but it's not too bad.

Pushing the Limits
How far can we go? Can we take a cellphone photo with only starlight - no moon, no artificial light sources nearby, and no background glow from a distant city?

To test this I drove to a point on the California coast a little north of the mouth of the Russian River, where nights can get really dark, and pointed my Pixel phone at the summer sky above the ocean. Combining 64 two-second exposures taken at ISO 12800, and 64 corresponding black black frames did produce a recognizable image of the Milky Way. The constellations Scorpius and Sagittarius are clearly visible, and squinting hard enough one can just barely make out the horizon and one or two rocks in the ocean, but overall, this is not a picture you'd want to print out and frame. Still, this may be the lowest-light cellphone photo ever taken.
Only starlight, shot with Google Pixel (full resolution image here).
Here we are approaching the limits of what the Pixel camera can do. The camera cannot handle exposure times longer than two seconds. If this restriction was removed we could expose individual frames for eight to ten seconds, and the stars still would not show noticeable motion blur. With longer exposures we could lower the ISO setting, which would significantly reduce noise in the individual frames, and we would get a correspondingly cleaner and more detailed final picture.

Getting back to the original challenge - using a cellphone to reproduce a night-time DSLR shot of the Golden Gate - I did that. Here is what I got:
Golden Gate Bridge at night, shot with Google Nexus 6P (full resolution image here).
The Moon above San Francisco, shot with Google Nexus 6P (full resolution image here).
At 9 to 10 MPixels the resolution of these pictures is not as high as what a DSLR camera might produce, but otherwise image quality is surprisingly good: the photos are sharp all the way into the corners, there is not much visible noise, the captured dynamic range is sufficient to avoid saturating all but the brightest highlights, and the colors are pleasing.

Trying to find out if phone cameras might be suitable for outdoor nighttime photography was a fun experiment, and clearly the result is yes, they are. However, arriving at the final images required a lot of careful post-processing on a desktop computer, and the procedure is too cumbersome for all but the most dedicated cellphone photographers. However, with the right software a phone should be able to process the images internally, and if steps such as painting layer masks by hand can be eliminated, it might be possible to do point-and-shoot photography in very low light conditions. Almost - the cellphone would still have to rest on the ground or be mounted on a tripod.

Here’s a Google Photos album with more examples of photos that were created with the technique described above.