 Tips for teachers to create an A+ learning experience using Google Classroom
8 Google Classroom tips every teacher should know
Tips for teachers to create an A+ learning experience using Google Classroom
Tips for teachers to create an A+ learning experience using Google Classroom
Grace is a 5th grader at Village Elementary School near San Diego, CA. As a student who is blind, she’s used to using multiple pieces of equipment or having an aide support her. But when she started using Google Classroom with a screen reader, “it opened up a whole world for her,” according to Grace’s mom. She is now able to participate confidently alongside her sighted peers.
Many tools in G Suite have accessibility features built in, including screen readers, voice typing, and braille displays—and Classroom is no different. It helps teachers create and organize assignments quickly, provide feedback efficiently, and easily communicate with students and guardians. Classroom is now used by 40 million students and educators globally, each of whom learns and teaches in a unique way.
Grace is one story of a student excelling in her class with the support of technology, and we’d love to hear from you about the tools you’re using to support all learners. To learn more about the accessibility features built into G Suite and Chromebooks, head to edu.google.com/accessibility.
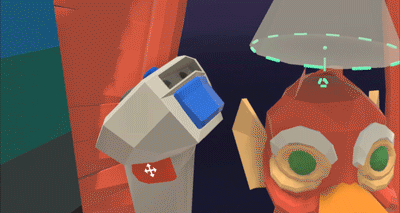
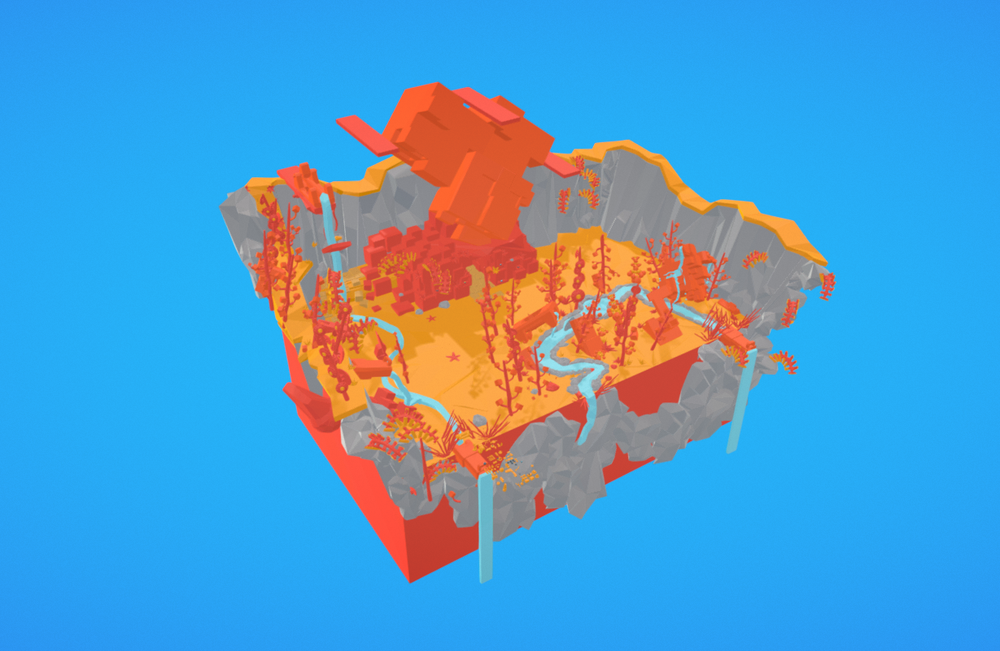
Since Blocks launched six months ago, it's been amazing to see all the incredible creations built by novices and professional modelers alike. We’ve witnessed everything from a retro roller skate, to an old timey photograph, to our very own JUMP camera. We've also gotten tons of feedback about ways we could improve the experience. The latest release, available today on Steam and the Oculus Store, has lots of new features that make Blocks more powerful and even easier to use. Let's take a look.
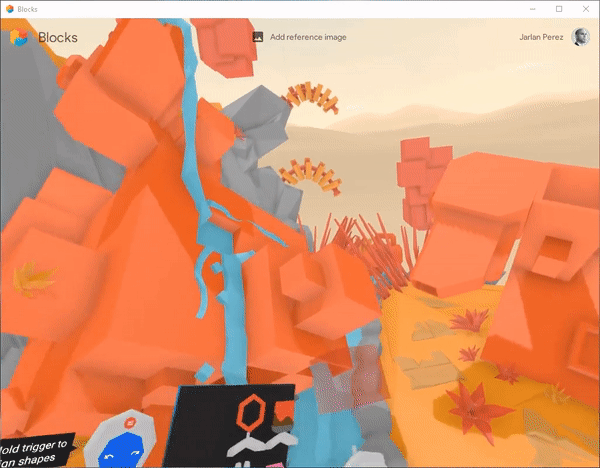
Modeling in the desert got you seeing 3D mirages? Don’t fret, you’ll now have the option to pick from four modeling environments. We’ve added a night version of the current environment for those who found the desert a bit too bright after long creation sessions. You’ll also find plain white and black options. Make sure to look up while creating in the black environment for a night sky surprise. Plus, we’ll remember which environment you used in your last session and automatically default to that selection your next time around.

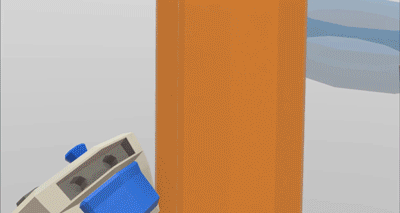
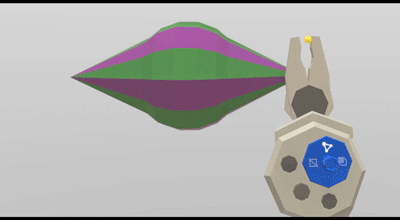
The ability to snap objects, edges and vertices together helps make your creations precise. However, we heard that the existing snapping behavior was often unpredictable or difficult to control. To ensure every snap you make does what you expect it to do, we’ve vastly improved our snapping algorithm and introduced a brand new user experience to guide you.
When trying to snap two objects together, make sure to half-press the alternate trigger to see a helpful guide line. The line will preview the spot to which your object will snap if the trigger is fully pressed. Use this guide to locate your snapping gesture to the exact face you intend before pressing the trigger all the way down.
You can also more easily snap meshes together. Let’s say, for example, that you’d like to snap a torus around a cylinder. Half-press the alternate trigger while placing the torus to get helpful guidelines for placing one mesh around the other. Fully press the trigger to snap the torus in place.
At the very bottom of your Blocks menu you'll now see a beaker icon which lets you access prototype versions of your most-asked-for features. Here’s a breakdown:
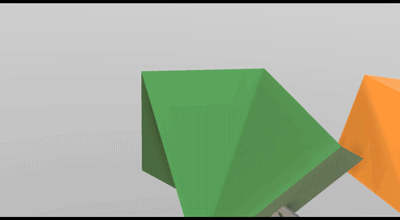
Non-coplanar face mode: Many of you have noticed that Blocks will create coplanar faces when reshaping meshes. This is helpful in many cases, but in others it creates extraneous triangles that make further operations like perfect subdivision difficult. Now you can enable non-coplanar faces to avoid creation of extra triangles.
Loop subdivide: Subdivision can be a really powerful tool. It’s even more powerful if you can cut a loop around an entire mesh. With loop subdivide enabled, simply long press on the trigger while subdividing to see a perfect subdivision loop form around your object.
Edge, Face and Vertex Deletion: Many have asked for the ability to delete a single edge, face or vertex. With this feature enabled, use the eraser tool to do just that. We'll “collapse” the mesh based on the edge, face or vertex you delete.
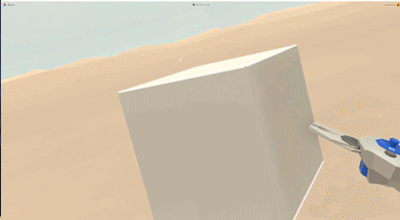
Worldspace grids: Another option that helps with precision is enabling worldspace grids. This feature will show grids along every side of your worldspace. The grid units are equivalent to the actual worldspace grid units, so you can precisely measure and place objects along the grids.
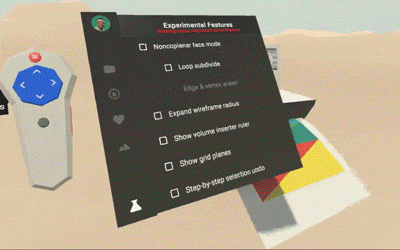
Volume insertion ruler: Modeling very precisely in Blocks can be difficult without a sense of relative scale. This experimental feature allows you to enable a ruler when you are inserting a mesh. As you insert the object, you'll see relative measurements in meters appear on each axis so you can precisely and accurately measure every object relative to the others.
Expanded mesh wireframe:When reshaping a mesh you see a helpful wireframe around the section of the mesh you are reshaping. Many have asked for the ability to turn that wireframe on for the entire mesh, and this feature does exactly that.
Stepwise selection undo: Multi-selecting a lot of objects can be frustrating if you select the wrong object in the middle of your selection process. We wanted to make this easier, so we’ve experimented with allowing you to undo and redo steps in your multi-selection. You can use the undo and redo buttons on your non-dominant controller to undo or redo the selection of objects in order. Make sure to keep your trigger held down while undoing or redoing to ensure you can keep multi-selecting after correcting your mistake!
It’s important to note that since these features are experimental, there may be minor bugs or issues when using them.
We can’t wait to see what you build with the latest version of Blocks. You can download the update from Steam and the Oculus Store for free today.
Header image: Blocks models by Damon Pidhajecki, Jacques Fourie, Jerad Bitner, and Michael Fuchs
Since Blocks launched six months ago, it's been amazing to see all the incredible creations built by novices and professional modelers alike. We’ve witnessed everything from a retro roller skate, to an old timey photograph, to our very own JUMP camera. We've also gotten tons of feedback about ways we could improve the experience. The latest release, available today on Steam and the Oculus Store, has lots of new features that make Blocks more powerful and even easier to use. Let's take a look.
Modeling in the desert got you seeing 3D mirages? Don’t fret, you’ll now have the option to pick from four modeling environments. We’ve added a night version of the current environment for those who found the desert a bit too bright after long creation sessions. You’ll also find plain white and black options. Make sure to look up while creating in the black environment for a night sky surprise. Plus, we’ll remember which environment you used in your last session and automatically default to that selection your next time around.
The ability to snap objects, edges and vertices together helps make your creations precise. However, we heard that the existing snapping behavior was often unpredictable or difficult to control. To ensure every snap you make does what you expect it to do, we’ve vastly improved our snapping algorithm and introduced a brand new user experience to guide you.
When trying to snap two objects together, make sure to half-press the alternate trigger to see a helpful guide line. The line will preview the spot to which your object will snap if the trigger is fully pressed. Use this guide to locate your snapping gesture to the exact face you intend before pressing the trigger all the way down.
You can also more easily snap meshes together. Let’s say, for example, that you’d like to snap a torus around a cylinder. Half-press the alternate trigger while placing the torus to get helpful guidelines for placing one mesh around the other. Fully press the trigger to snap the torus in place.
At the very bottom of your Blocks menu you'll now see a beaker icon which lets you access prototype versions of your most-asked-for features. Here’s a breakdown:
Non-coplanar face mode: Many of you have noticed that Blocks will create coplanar faces when reshaping meshes. This is helpful in many cases, but in others it creates extraneous triangles that make further operations like perfect subdivision difficult. Now you can enable non-coplanar faces to avoid creation of extra triangles.
Loop subdivide: Subdivision can be a really powerful tool. It’s even more powerful if you can cut a loop around an entire mesh. With loop subdivide enabled, simply long press on the trigger while subdividing to see a perfect subdivision loop form around your object.
Edge, Face and Vertex Deletion: Many have asked for the ability to delete a single edge, face or vertex. With this feature enabled, use the eraser tool to do just that. We'll “collapse” the mesh based on the edge, face or vertex you delete.
Worldspace grids: Another option that helps with precision is enabling worldspace grids. This feature will show grids along every side of your worldspace. The grid units are equivalent to the actual worldspace grid units, so you can precisely measure and place objects along the grids.
Volume insertion ruler: Modeling very precisely in Blocks can be difficult without a sense of relative scale. This experimental feature allows you to enable a ruler when you are inserting a mesh. As you insert the object, you'll see relative measurements in meters appear on each axis so you can precisely and accurately measure every object relative to the others.
Expanded mesh wireframe:When reshaping a mesh you see a helpful wireframe around the section of the mesh you are reshaping. Many have asked for the ability to turn that wireframe on for the entire mesh, and this feature does exactly that.
Stepwise selection undo: Multi-selecting a lot of objects can be frustrating if you select the wrong object in the middle of your selection process. We wanted to make this easier, so we’ve experimented with allowing you to undo and redo steps in your multi-selection. You can use the undo and redo buttons on your non-dominant controller to undo or redo the selection of objects in order. Make sure to keep your trigger held down while undoing or redoing to ensure you can keep multi-selecting after correcting your mistake!
It’s important to note that since these features are experimental, there may be minor bugs or issues when using them.
We can’t wait to see what you build with the latest version of Blocks. You can download the update from Steam and the Oculus Store for free today.
Header image: Blocks models by Damon Pidhajecki, Jacques Fourie, Jerad Bitner, and Michael Fuchs
Editor's note:This week our Google for Education team will be joining thousands of educators at Bett in London. At our booth, C230, you can learn more about Google Expeditions in person. Follow along on The Keyword and Twitter for the latest news and updates.
Since 2015, educators have been using Expeditions to bring lessons to life with the power of virtual reality. As part of our wider Grow with Google efforts, we’re bringing even more immersive learning experiences to classrooms through the Google Expeditions AR Pioneer Program. With augmented reality, students can explore the eye of a tornado or step foot in historic landmarks by interacting with digital objects right in front of them.

Through our travels with the Google Expeditions Pioneer Program, we’ve worked alongside teachers and students to improve the overall Expeditions experience. One of the top requests we’ve heard from teachers and students is the ability to create their own Expeditions. Today, we are excited to announce a beta program that allows schools and educators to do just that. Classrooms will be able to create immersive tours of the world around them -- their classrooms, their schools, their communities. We'll provide participating schools with all the tools and hardware required to capture 360 images and curate unique Expeditions. For more information about the program, sign up here.
This feature transforms the classroom from a content consumption space to an immersive content creation space with the student taking the lead.
We are eager to hear feedback from teachers and students about how they use these new tools. In the past year, we’ve used feedback directly from our users to make Expeditions even more engaging and effective. We’ve added personalization features like annotations to allow a teacher to highlight their own observations in a panorama. We’ve also enabled students and all lifelong learners (we’re looking at you, parents and guardians) to visit and discover new places through self-guided mode.
We can’t wait to see what you create and remember to keep the feedback and suggestions coming through the app or here. Thank you for helping us make Google Expeditions even better.
Today we're making it even easier for developers to find and use 3D objects and scenes for their VR and AR apps with the Poly API.
Poly lets creators and developers browse, find, and download 3D objects and scenes for use in their apps. It’s fully integrated with Blocks and Tilt Brush, and even allows you to upload your own models, so there are plenty of options to choose from.
We want to make the process of finding the right 3D assets for your projects faster and more flexible. With the new Poly API, you can access our growing collection of Creative Commons 3D assets and interact directly with Poly to search, download, and import objects dynamically across desktop, mobile, virtual reality, and augmented reality.
If you’re using Unity or Unreal Engine to develop your apps, we also created the Poly Toolkit, an evolution of Tilt Brush Toolkit. With it, you can import 3D objects and scenes from Poly directly into a project, thanks to the API.
And with samples for both ARCore and ARKit, our developer site provides you with everything you need to use Poly assets in your AR experiences.
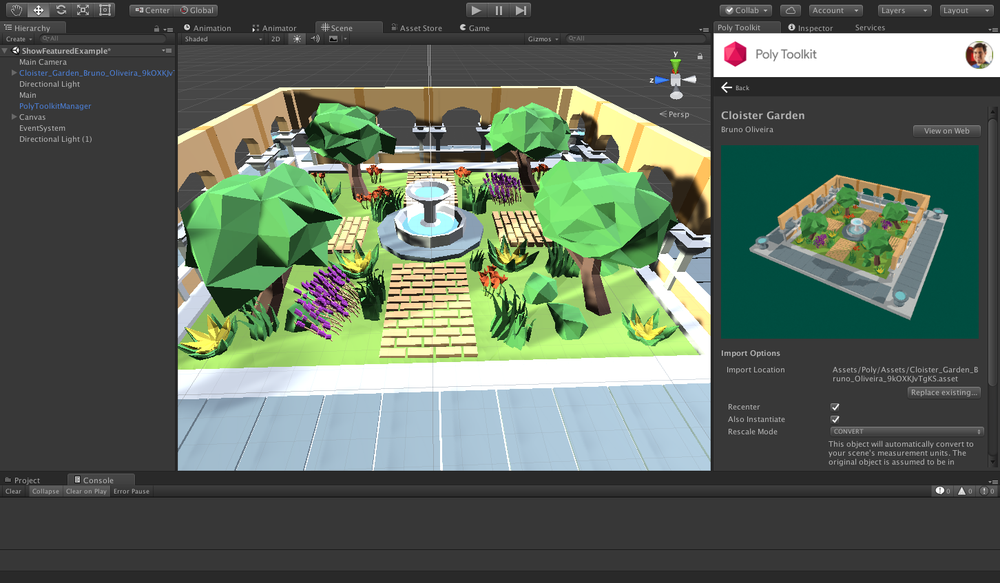
Credit: Cloister Gardens by Bruno Oliveira
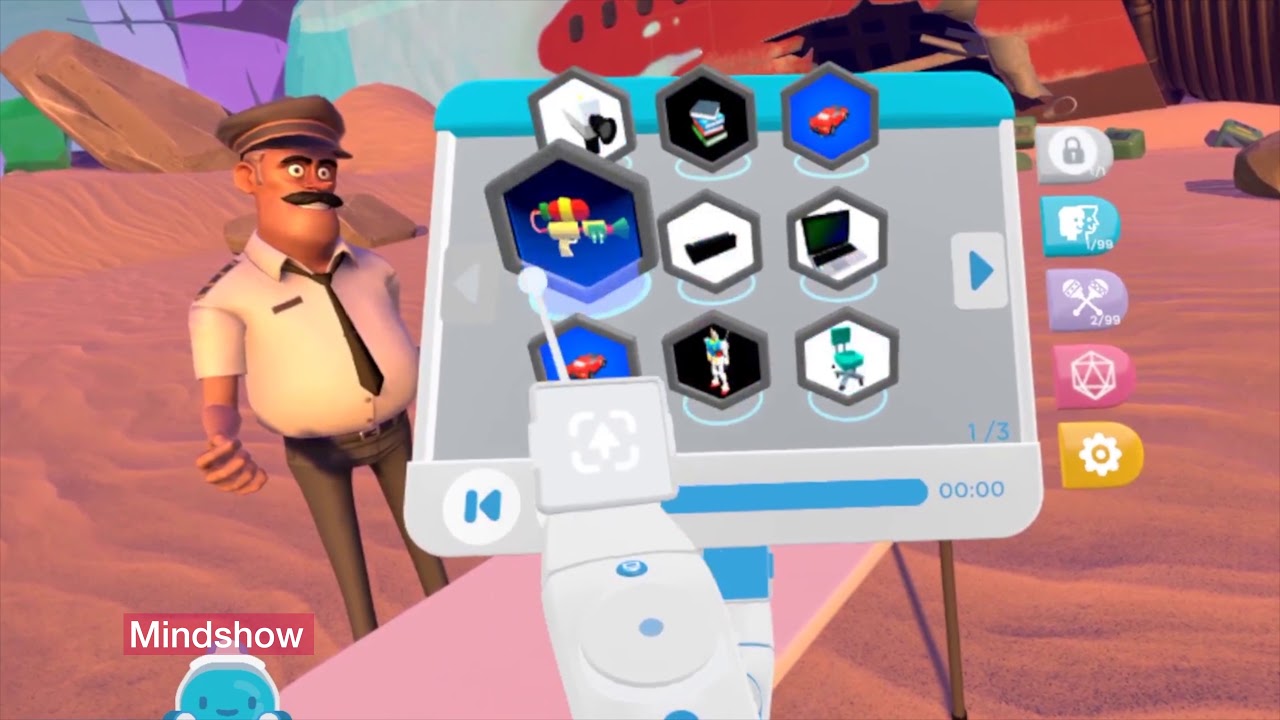
To put the Poly API and Toolkit to the test, we partnered with a few talented developers to show just how compelling their apps can become with a Poly API integration. Check out how Mindshow, TheWaveVR, Unity EditorXR, and many others have already integrated with the API:
Starting today, you can find all types of assets for your applications, and easily search for remixable, free assets licensed under a Creative Commons license by keyword, category, format, popularity or date uploaded. You can even filter by model complexity, or give people a personalized experience by letting them sign into your app with their Google account to access any assets they’ve uploaded or liked on Poly.
Ready to get started? Visit our developer page to see instructions on how to use the API and download our sample apps and toolkits.
Earlier this year, 3D modeler Jarlan Perez joined the Blocks team for a two-week sprint. The goal of his time with the team was to create a fully immersive virtual reality game in just two weeks using Blocks and Unreal Engine, two tools that have significantly influenced his process as a modeler and game enthusiast.
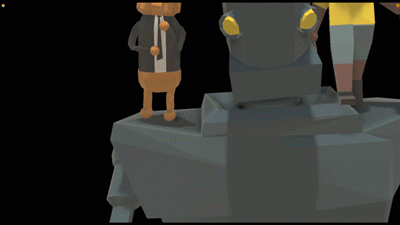
The result was “Blocks Isle,” the first level of a game that takes you on a journey to find your long lost friend in a sci-fi land of wonder. To win, you must solve a puzzle using hidden clues and interactions throughout the experience.
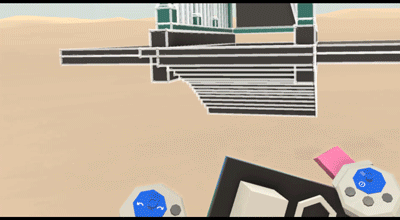
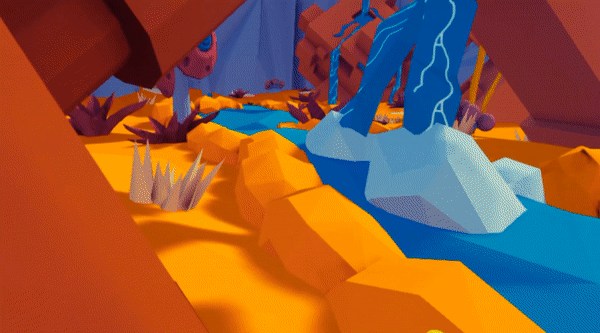
You start out on a strange desert island. After uncovering some clues and pulling a handy lever, a rocky pathway opens for exploration. Up ahead, hidden radios and books reveal clues to solve the puzzle.

Initial steps to get onto Blocks Isle. Levers and teleportation immerse the user in a new world.
We caught up with Jarlan to hear more about his process and advice for other developers building immersive experiences using Blocks and Unreal Engine 4.
Brittany: Tell us about using Blocks and Unreal to develop a game in such a short amount of time.
Jarlan: Tag teaming both pieces of software worked very well! Blocks allowed me to visualize and be in the space during the modeling and conceptual phase. Unreal is like giving an artist magical powers: I’m able to fully build a proof of concept and implement functionality without having to be a professional programmer.
I found myself spending part of the day in Blocks experimenting with concepts and the rest in Unreal creating basic functionality for those ideas. This method allowed for rapid prototyping and was later beneficial when populating the space with art assets.
What tips and tricks did you uncover that made it easy to build your game?
Being able to build large parts of the environment while standing smack dab in the middle of it is wonderful.
Another general tip, the snap trigger is your friend! I’ve used it for most of my modeling in Blocks to snap and place assets.
How did you experiment with different ideas and concepts?
Without Blocks, how might this process have been different?
After all is said and done, I still had to take the geometry from Blocks and bring it into a 3D program for unwrapping and lightmap baking.
That said, even though I am proficient in traditional 3D modeling, I think the project would have taken longer to put together without Blocks. Blocks helped me take out some steps in the process. Traditionally I’d model out the scene and export pieces as I went, bringing them into the engine, placing them, and moving around to get a sense of how the space feels. All that got combined inside Blocks. Oh, and not to mention color exploration. If I wanted to try out colors I’d also have to create materials and place them on each asset during the in-engine test which takes more time. I can easily preview all of that in Blocks.
What advice would you give to other game developers about using these tools?
Keep exploring and always stay hungry. Be on the lookout for new tools that can improve your process and don’t be afraid of trying something new. If it doesn’t work out, it’s ok. We learn so much more from the challenges we take on than from the ones we don’t face by walking the easy path.
There are some amazing low poly games and artists out there. I think many artists would benefit from making models in VR using Blocks. If I was able to finish this project in two weeks, I can only imagine what a small team could do. Give it a try, and post your creations or questions using #MadeWithBlocks.
If you’d like to experience Blocks Isle on the HTC Vive, you can download the game.